TL;DR
- Armor provides percentage-based health boosts ranging from +3.75% to +35% across 15+ different pieces
- The forging process involves three challenging mini-games that directly impact armor quality
- Higher-tier armors like Wolf and Dark Knight sets have significantly lower drop rates (1/4 and 1/2 respectively)
- Strategic ore combinations and mini-game performance determine your crafting success rate
- Post-crafting decisions include selling for profit or upgrading with runes and essences
Armor represents one of the most vital defensive systems in The Forge, functioning as your primary protection layer against enemy attacks. Unlike weapons that focus on offense, quality armor provides percentage-based health increases that scale with your character’s progression, enabling you to withstand significantly more damage during combat encounters. With over 15 distinct armor pieces available, understanding which sets complement your playstyle becomes essential for maximizing survival potential.
While you can utilize race changes through spins acquired from The Forge codes, armor acquisition remains exclusively dependent on your forging skills. The right armor selection, when paired with optimal racial traits, creates powerful synergies that can dramatically alter your combat effectiveness. Further enhancement through potions and totem buffs elevates your defensive capabilities to elite levels, creating near-invulnerable builds when combined with superior weaponry.
Strategic armor selection goes beyond simple stat comparisons—it involves understanding how each piece integrates with your overall build strategy, resource availability, and long-term progression goals.
The Forge features a tiered armor system with progressively better stats and correspondingly lower acquisition chances. Beginning players typically start with basic light armor, while experienced crafters aim for elite sets like Wolf and Dark Knight armor with substantially higher health bonuses.
| Armor Name | Health | Base Price | Chance |
|---|---|---|---|
| Light Helmet | +3.75% | $65 | 1/1 |
| Light Chestplate | +5% | $225 | 1/1 |
| Light Leggings | +4.375% | $112.5 | 1/1 |
| Armor Name | Health | Base Price | Chance |
|---|---|---|---|
| Medium Helmet | +6.25% | $335 | 1/1 |
| Medium Chestplate | +8.75% | $850 | 1/1 |
| Medium Leggings | +7.5% | $485 | 1/1 |
| Samurai Helmet | +8% | $335 | 1/2 |
| Samurai Chestplate | +12.75% | $850 | 1/2 |
| Samurai Leggings | +9% | $485 | 1/2 |
| Viking Helmet | +10.5% | $335 | 1/4 |
| Viking Chestplate | +14.75% | $850 | 1/4 |
| Viking Leggings | +11% | $485 | 1/4 |
| Armor Name | Health | Base Price | Chance |
|---|---|---|---|
| Knight Helmet | +12.5% | $1020 | 1/1 |
| Knight Chestplate | +16.25% | $1355 | 1/1 |
| Knight Leggings | +13.75% | $1200 | 1/1 |
| Dark Knight Helmet | +18.75% | $1020 | 1/2 |
| Dark Knight Chestplate | +25% | $1355 | 1/2 |
| Dark Knight Leggings | +21.875% | $1200 | 1/2 |
| Wolf Helmet | +25% | $1020 | 1/4 |
| Wolf Chestplate | +35.00% | $1355 | 1/4 |
| Wolf Leggings | +28% |
$1200 | 1/4 |
Notice the progression pattern: basic sets guarantee acquisition (1/1 chance) while premium armors like Viking and Wolf pieces feature significantly reduced drop rates (1/4), making them valuable commodities for both personal use and economic gain.
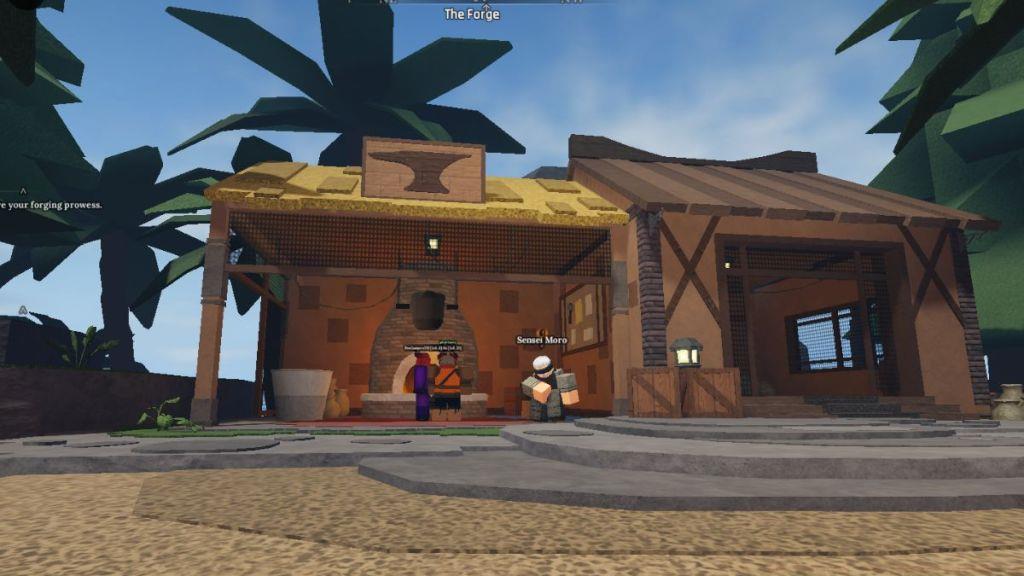
Armor forging mechanics closely mirror weapon crafting processes in The Forge, utilizing identical ore types and material requirements. The journey begins with resource gathering—ores must be extracted from cave deposits using an appropriate Pickaxe tool. Once you’ve accumulated sufficient materials, return to the Forging station where you completed the initial game tutorial quest.
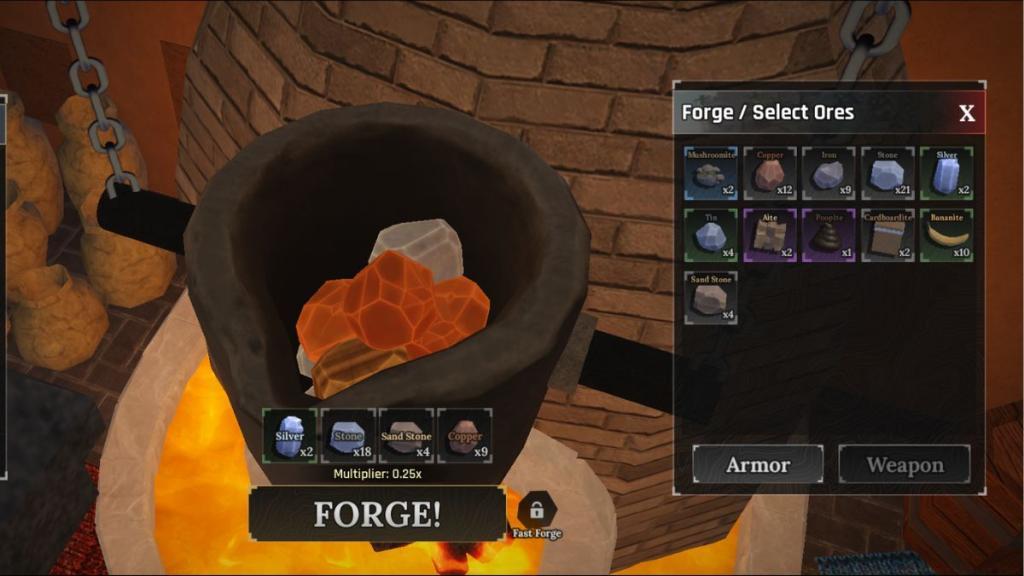
At the Forging station, locate the Crucible interface—interacting with this station opens the comprehensive forging menu. Select the armor crafting option and choose a combination of three or four different ores from your inventory to add to the crucible mixture. Strategic material selection significantly impacts your outcomes: utilizing more ore varieties increases your probability of obtaining superior armor types, while higher-quality materials directly enhance the statistical attributes of your final product.
The forging sequence comprises three distinct mini-games that test different aspects of your crafting proficiency. Mastering each phase is crucial for producing high-quality armor with optimal stats.
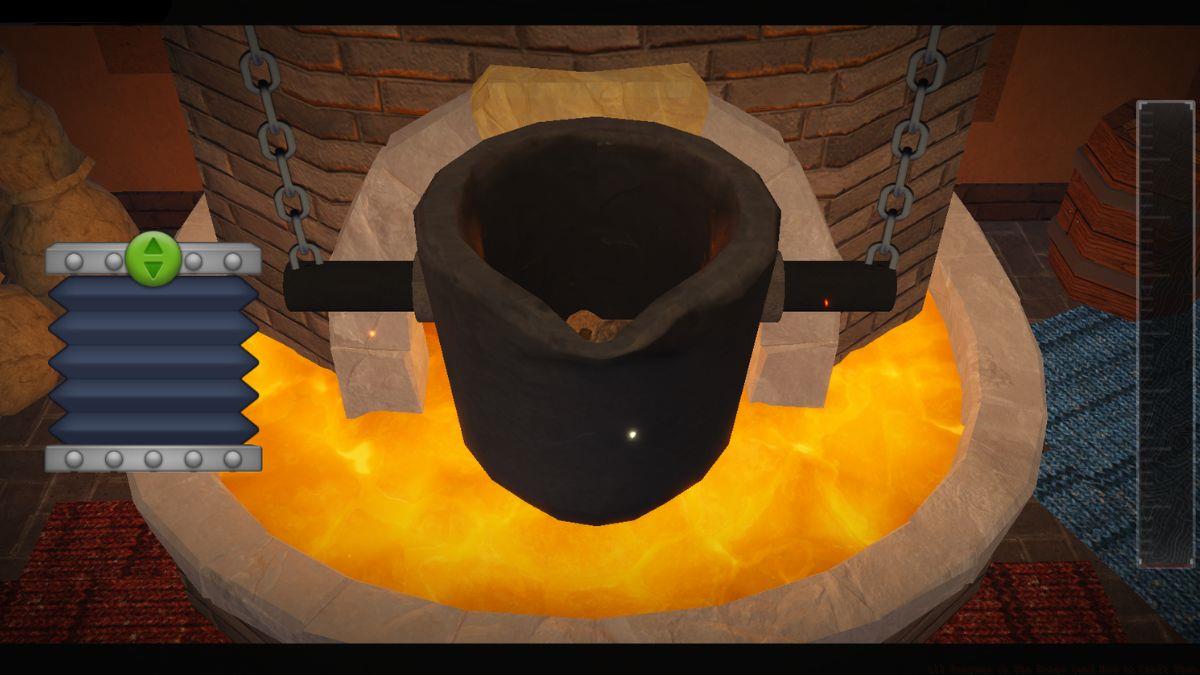
- Smelting Phase: During this initial mini-game, manipulate the green directional arrows on the left interface panel to properly heat the ore mixture. Monitor the progress indicator bar on the right side to ensure optimal temperature levels throughout the heating process.
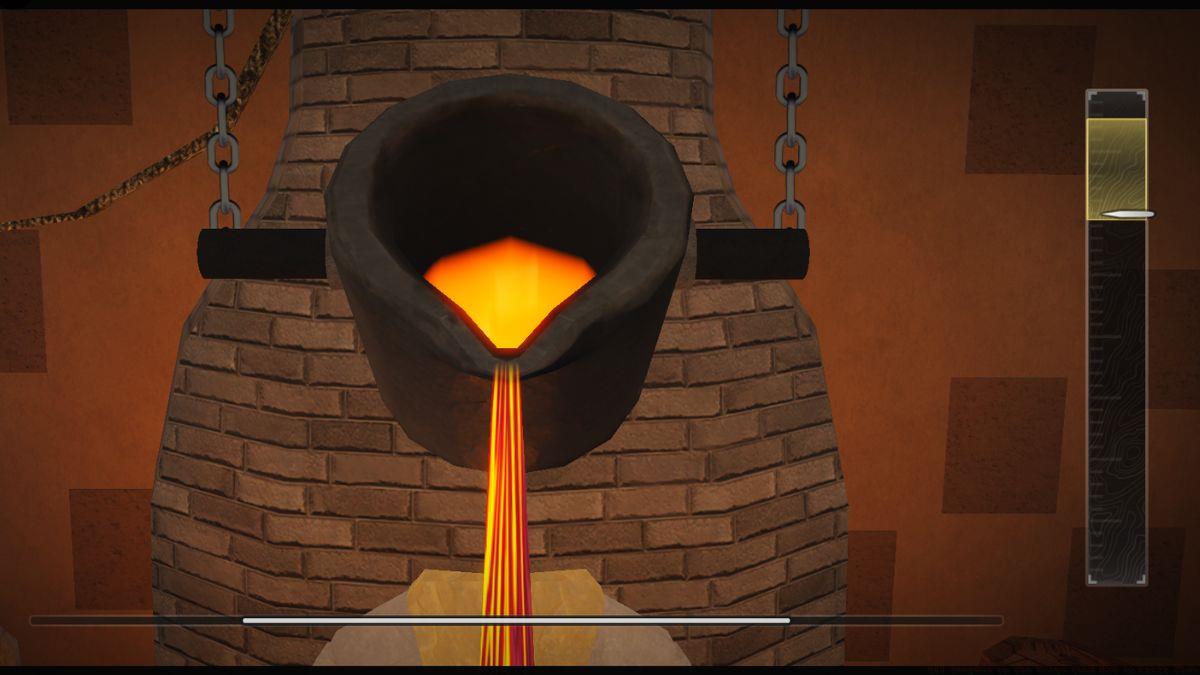
- Pouring Stage: This phase introduces a black measurement bar on the right display with a moving needle indicator. Your objective involves maintaining the needle within the designated yellow zone throughout the pouring operation. Control the needle’s position by holding the left mouse button to elevate it and releasing to allow descent.
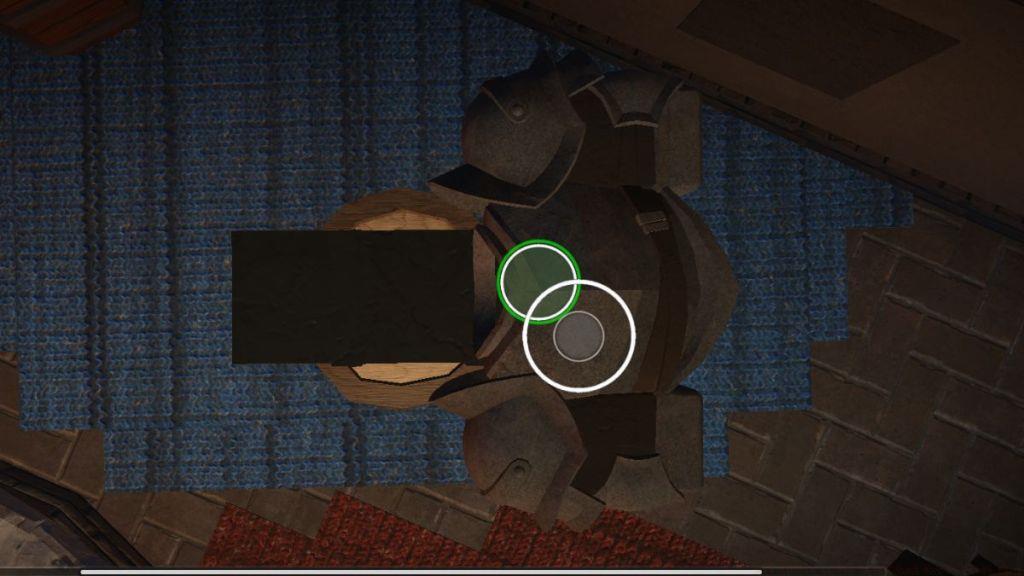
- Hammering and Shaping Process: The hammering mechanic requires simple tapping actions, but the shaping component presents considerable difficulty. You’ll observe two concentric circles forming on the molten armor piece—one stationary outer ring and one contracting inner circle. Precise timing is essential: click when the circles achieve maximum proximity. Successful execution generates a green ‘Perfect’ notification, while mistimed attempts produce red ‘Bad’ indicators. Maintain intense focus throughout this phase, as your performance directly determines the final quality grade of your crafted armor.
Upon successful completion of all three mini-games, the forging procedure concludes, and your newly created armor transfers to your inventory. Following acquisition, you face strategic decisions: either sell the piece for immediate profit or invest in statistical enhancements using runes and essences for long-term value.
Advanced armor crafting transcends basic mechanics, requiring strategic planning and execution optimization. Begin with material preparation—experienced crafters recommend gathering 20-30% more ore than theoretically required to account for failed attempts and experimentation with different combinations.
The material combination strategy represents perhaps the most crucial advanced technique. While the game permits three-ore combinations, elite crafters consistently utilize four different ore types to maximize their chances of producing rare armor variants. The quality hierarchy follows: common ores yield basic armor, rare ores generate medium sets, and legendary ores create premium pieces like Wolf and Dark Knight armor.
Mini-game optimization separates novice crafters from masters. For smelting, maintain consistent medium heat rather than alternating between extremes—this prevents material degradation. During pouring, develop a rhythmic tapping pattern rather than sustained holding, as this provides superior control. The shaping mini-game demands particular attention; many players fail by clicking too early. Wait until the inner circle nearly touches the outer ring’s boundary for optimal timing.
Avoid these common crafting pitfalls: using insufficient ore varieties dramatically reduces your rare armor acquisition chances. Rushing through mini-games frequently results in ‘Bad’ ratings that diminish final stats. Additionally, neglecting to upgrade your Pickaxe severely limits access to higher-tier ores necessary for premium armor production.
Post-forging decisions carry significant strategic weight. Selling armor provides immediate currency but sacrifices long-term defensive capabilities. Upgrading with runes and essences represents a resource investment that pays dividends through enhanced survivability during challenging combat scenarios. Consider your current economic needs versus progression requirements when making these determinations.
For players seeking comprehensive gameplay guidance, our Complete Guide offers detailed strategies across all game systems. Those focusing on offensive capabilities should consult our Weapons Unlock guide, while those optimizing character builds will benefit from our Class Guide for optimal specialization.
Action Checklist
- Gather 25-35% excess ore beyond theoretical requirements to accommodate failed attempts
- Always use four different ore types in combinations rather than three to maximize rare armor chances
- Practice mini-game rhythms: medium heat for smelting, rhythmic tapping for pouring, delayed clicking for shaping
- Analyze armor stats and drop rates to identify optimal crafting targets based on your current progression stage
- Make strategic post-crafting decisions: sell for immediate profit or upgrade with runes/essences for long-term value
No reproduction without permission:Tsp Game Club » All Armors in The Forge (and How to Craft Them) Master armor crafting in The Forge with complete stats, forging techniques, and advanced optimization strategies