TL;DR
- Study enemy attack patterns and health ranges to optimize your combat approach
- Utilize environmental positioning and weapon runes for tactical advantages
- Focus on elite variants for rare loot drops and accelerated progression
- Master parrying mechanics with high-tier weapons for defensive superiority
- Prepare thoroughly before engaging Reapers and Elite Deathaxe Skeletons
Venturing into The Forge’s treacherous caverns requires more than just mining proficiency – it demands combat mastery against increasingly dangerous foes. As you progress deeper to extract premium ores, you’ll encounter aggressive creatures strategically positioned to ambush unprepared miners. Comprehensive enemy knowledge transforms these threats into manageable encounters, enabling efficient resource gathering while preserving your hard-earned health.
Before descending into more challenging subterranean layers, ensure your equipment arsenal includes superior pickaxes capable of handling tougher mineral deposits. This guide provides exhaustive enemy intelligence, including statistical ranges, loot tables, and specialized combat methodologies to ensure your survival and success.
Strategic combat execution directly influences mining efficiency within the caverns. The key lies in intelligent engagement rather than brute force, maintaining focus on mineral acquisition while neutralizing threats. Advanced positioning through circular movement and precise timing to evade attacks will significantly conserve your vitality throughout extended expeditions.
| Enemy | Stats | Loot |
|---|---|---|
 Zombie |
Health: 20-52 Damage: 6-11.2 Level: 1-5 |
Gold: 5-10 Experience: 10-20 |
 Elite Zombie |
Health: 70-295 Damage: 20 Level: 1-10 |
Gold: 5-10 Experience: 10-20 |
 Delver Zombie |
Health: 40-175 Damage: 12-30.4 Level: 1-10 |
Gold: 10-20 Experience: 20-40 |
 Brute Zombie |
Health: 220-370 Damage: 28-47.5 Level: 5-10 |
Gold: 32.5-45 Experience: 43.33-60 |
| Enemy | Stats | Loot | |
|---|---|---|---|
 Bomber |
Health: 60-120 Damage: 70 Level: 1-5 |
Gold: 5-10 Experience: 10-20 |
|
 Skeleton Rogue |
Health: 150-195 Damage: 30-76 Level: 1-10 |
Gold: 17.5-75 Experience: 37.5-75 |
|
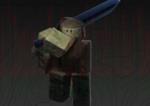
 Axe Skeleton |
Health: 125-215 Damage: 15-38 Level: 1-10 |
Gold: 25-50 Experience: 48.5-97 |
|
 Deathaxe Skeleton |
Health: 150-420 Damage: 35-76 Level: 1-10 |
Gold: 40-80 Experience: 58.5-117 |
|
 Elite Skeleton Rogue |
Health: 250-295 Damage: 45-114 Level: 1-10 |
Gold: 45-90 Experience: 67.5-135 |
|
 Elite Deathaxe Skeleton |
Health: 300-570 Damage: 50-123.5 Level: 1-10 |
Health: 300-570 Damage: 50-123.5 Level: 1-10 |
Gold: 60-120 Experience: 90-180 |
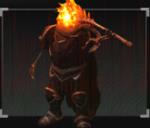
 Blight Pyromancer |
Health: 300-500 Damage: 45-70 Level: 1-5 |
Gold: 50-100 Experience: 95-190 |
|
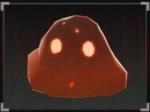
 Slime |
Health: 300-570 Damage: 30 Level: 1-10 |
Gold: 43-86 Experience: 43-86 |
|
 Blazing Slime |
Health: 600-870 Damage: 45 Level: 1-10 |
Gold: 65-130 Experience: 110-255 |
|
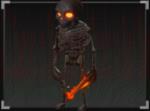
 Reaper |
Health: 340 Damage: 60 Level: 12 |
Gold: 55 Experience: 80 |
| Enemy | Stats | Loot | |
|---|---|---|---|
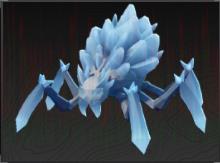
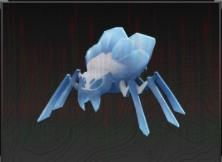 Crystal Spider |
Health: 600-720 Damage: 55 Level: 1-5 |
Gold: 80-160 Experience: 125-250 |
|
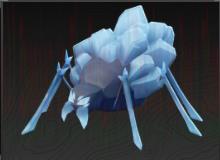 Diamond Spider |
Health: 1000-1300 Damage: 70 Level: 1-5 |
Gold: 95-190 Experience: 145-290 |
|
 Prismarine Spider |
Health: 7500-11500 Damage: 90 Level: 1-5 |
Gold: 110-220 Experience: 170-340 |
|
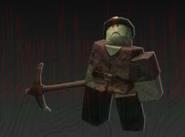
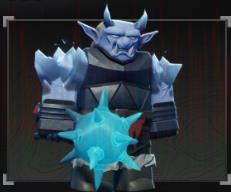 Elite Orc |
Health: 2000-2200 Damage: 100 Level: 1-5 |
Gold: 145-290 Experience: 200-400 |
|
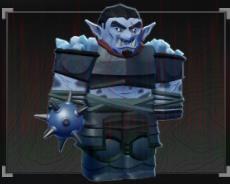 Common Orc |
Health: 800-1000 Damage: 85 Level: 1-5 |
Gold: 100-200 Experience: 150-300 |
|
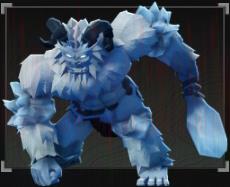 Yeti |
Health: 10000-14000 Damage: 125 Level: 1-5 |
Gold: 180-360 Experience: 250-500 |
|
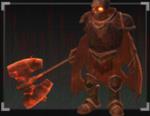
 Crystal Golem |
Health: 3000-4000 Damage: 125 Level: 1-5 |
Health: 3000-4000 Damage: 125 Level: 1-5 |
Gold: 150-300 Experience: 225-450 |
Strategic positioning represents your primary defensive advantage against The Forge’s inhabitants. Utilize natural terrain features like rock formations and mineral deposits as defensive barriers, positioning yourself atop elevated surfaces to minimize exposure to ground-based attacks. This approach proves particularly effective against melee-focused enemies such as Zombies and Skeletons.
Weapon selection significantly impacts your combat effectiveness against specific enemy types. For heavily armored opponents like Brute Zombies and Crystal Golems, prioritize weapons with high penetration capabilities. Against faster enemies such as Skeleton Rogues, opt for quicker weapons that allow rapid counter-attacks during their recovery phases.
Rune attachments provide specialized combat enhancements tailored to different encounter scenarios. The Rot Stitch inflicts damage-over-time effects ideal for high-health targets, while Ward Patch provides defensive bonuses crucial for surviving encounters with elite variants. Rage Mark enhances offensive capabilities during extended engagements.
Parrying mechanics become increasingly valuable as you acquire superior weaponry. Mastering the ‘F’ key parry timing can completely negate incoming damage while creating openings for devastating counter-strikes.
Race selection profoundly influences your combat capabilities within The Forge’s challenging environment. Angel race provides defensive and mobility advantages, while Demon race offers offensive enhancements. Consider your preferred playstyle when selecting racial attributes for maximum effectiveness.
Checkpoint utilization represents a critical survival strategy during deep cave expeditions. Identify and memorize strategic rock formations and boulder clusters that provide safe positions for recovering health and reassessing combat situations.
Elite enemy variants consistently drop the game’s most valuable and rare loot items. Prioritize encounters with these enhanced versions when adequately equipped, as the reward-to-risk ratio favors prepared combatants.
The Elite variants of every enemy can drop the rarest and most useful loot in The Forge.
High-level adversaries including Reapers and Elite Deathaxe Skeletons possess exceptional speed and damage output. Thorough preparation through weapon upgrades and armor enhancements becomes mandatory before engaging these formidable foes.
The Reapers and Elite Deathaxe Skeletons can hit you fast and harder than any other enemy in The Forge. So, make sure to upgrade your weapons and armor before taking them on.
Advanced weaponry such as Dragon Slayer and Skul Crusher significantly improve your combat effectiveness against endgame challenges. These premium weapons not only increase damage output but also enhance parrying success rates.
Have you successfully navigated to the Forgotten Kingdom utilizing The Forge Portal system? Share your expedition experiences and strategic insights within the commentary section below.
Action Checklist
- Study enemy attack patterns and health ranges for optimal engagement planning
- Practice circular positioning and environmental utilization against early-game zombies
- Experiment with different weapon types against skeleton variants to identify optimal matchups
- Apply specialized runes (Rot Stitch, Ward Patch, Rage Mark) based on enemy type encounters
- Master parrying timing with high-tier weapons against elite variants
- Systematically engage elite enemies for rare loot acquisition
No reproduction without permission:Tsp Game Club » All Enemies in The Forge and Tricks to Beat Them Complete guide to all enemies in The Forge with advanced combat strategies and loot optimization tips