TL;DR
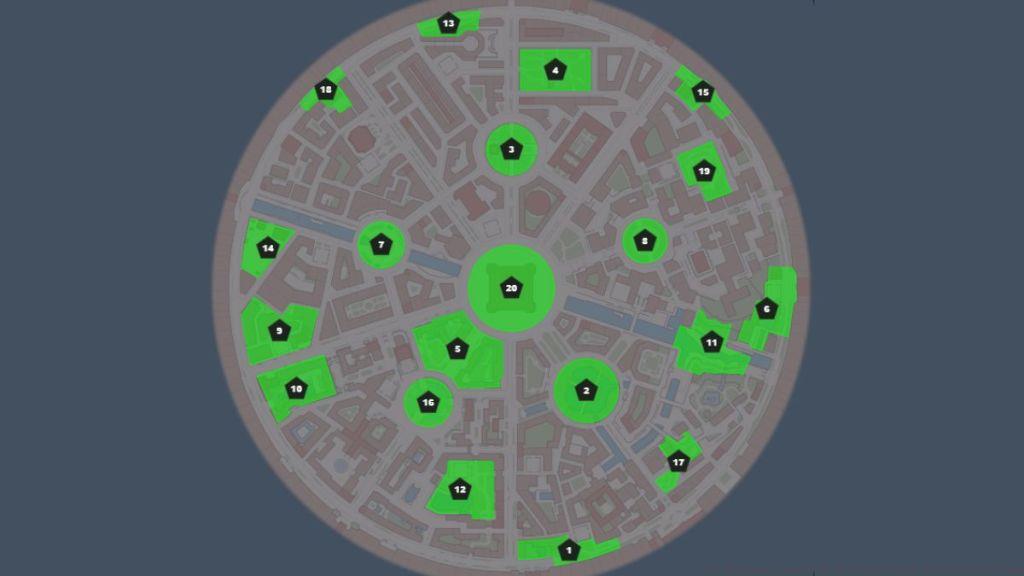
- Wild Zones unlock progressively through main missions, with 20 total zones available
- Alpha Pokemon appear more frequently in Wild Zones and some have guaranteed spawns
- Time of day and weather conditions affect which Pokemon appear in each zone
- Zone 20 contains the most diverse spawns including starter Pokemon and powerful Alphas
- Proper preparation with healing items and Poke Balls significantly improves catching success
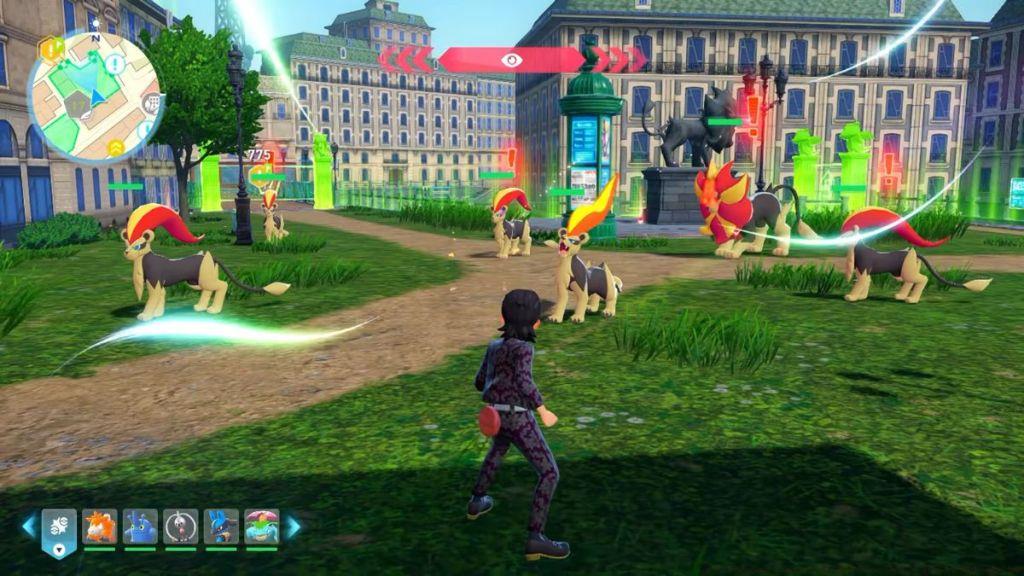
Wild Zones represent specialized hunting grounds within Pokemon Legends ZA where trainers can encounter diverse Pokemon populations, including the coveted Alpha variants. These designated areas serve as your primary resource for expanding your team roster with powerful creatures that possess enhanced stats and larger sizes compared to their regular counterparts.
While you’ll occasionally spot Pokemon in urban environments like rooftops, alleyways, and market carts, Wild Zones concentrate significantly higher spawn rates and species variety. The strategic importance of these zones cannot be overstated—they provide access to Pokemon that typically wouldn’t appear in standard Lumiose City locations.
Each of the 20 Wild Zones features unique Pokemon combinations and environmental conditions. Understanding the unlock requirements and spawn mechanics for each zone will dramatically accelerate your team-building progress throughout the game.
Your journey begins with access to six Wild Zones that contain lower-level Pokemon suitable for beginning trainers. These initial zones provide essential catching practice while introducing you to Alpha Pokemon mechanics through less threatening encounters.
As you advance through the main storyline, additional Wild Zones become accessible at specific mission milestones. The progression system ties zone unlocks directly to your advancement in the Lumiose City restoration project.
| Wild Zone | Unlock Requirement |
|---|---|
| 1 | Default |
| 2 | Default |
| 3 | Default |
| 4 | Default |
| 5 | Default |
| 6 | Default |
| 7 | Main Mission 9 (Chase that Mysterious Pokemon) |
| 8 | Main Mission 9 (Chase that Mysterious Pokemon) |
| 9 | Main Mission 9 (Chase that Mysterious Pokemon) |
| 10 | Main Mission 9 (Chase that Mysterious Pokemon) |
| 11 | Main Mission 14 (Reaching Rank E) |
| 12 | Main Mission 14 (Reaching Rank E) |
| 13 | Main Mission 14 (Reaching Rank E) |
| 14 | Main Mission 19 (Reaching Rank D) |
| 15 | Main Mission 19 (Reaching Rank D) |
| 16 | Main Mission 24 (Reaching Rank C) |
| 17 | Main Mission 24 (Reaching Rank C) |
| 18 | Main Mission 30 (Reaching Rank B) |
| 19 | Main Mission 30 (Reaching Rank B) |
| 20 | Main Mission 37 (Operation Project Lumiose) |
The final Wild Zone becomes available only after completing Operation Project Lumiose, representing the culmination of your main storyline progression. This zone contains the most diverse Pokemon selection, including multiple starter Pokemon and numerous powerful Alpha variants.
Each Wild Zone maintains specific spawn tables that determine which Pokemon appear under normal conditions. Additionally, every zone features guaranteed Alpha Pokemon spawns—these powerful variants will always appear as Alpha versions when encountered. Regular spawns also have a chance to appear as Alpha variants, though this occurs less frequently.
Environmental factors significantly influence spawn patterns. Time of day (day/night cycles) and weather conditions can alter which Pokemon are available in certain zones. For example, Zone 2 features Staryu exclusively during nighttime hours, while Zone 14 requires sunny daytime conditions for Heliolisk to appear.
| Wild Zone | Pokemon Spawns | Alpha Pokemon Spawns |
|---|---|---|
| Zone 1 | Weedle, Pichu, Scatterbug, Fletchling, Pidgey, Mareep, Bunnelby | Pichu, Mareep, Pidgey |
| Zone 2 | Kakuna, Patrat, Binacle, Staryu (night), Magikarp, Budew | Magikarp (Day), Staryu (Night), Patrat (Night) |
| Zone 3 | Skiddo, Pancham, Litleo, Espurr, Flabébé, Pikachu | Litleo, Espurr |
| Zone 4 | Patrat, Gastly, Honedge (night), Spewpa, Ekans, Spinarak | Gastly (Day), Spinarak (Night) |
| Zone 5 | Pidgeotto, Venipede, Electrike, Bellsprout, Abra, Pidgey, Bunnelby | Bellsprout, Whirlipede |
| Zone 6 | Binacle, Meditite (day), Buneary, Magikarp, Houndour, Swablu, Flaaffy | Houndour (Night), Houndoom, Pikachu (Night), Magikarp, Binacle |
| Zone 7 | Hippopotas (day), Audino, Vanillite, Kakuna, Floette, Roselia, Shuppet (night) | Fletchinder |
| Zone 8 | Krokorok, Sandile, Gible, Drilbur, Machop, Numel | Krokorok, Camerupt (Day) |
| Zone 9 | Carbink, Espurr, Fletchinder, Kadabra, Sableye, Mawile | Meowstic, Manectric |
| Zone 10 | Slowpoke, Arbok, Watchog, Bellsprout, Carvanha, Staryu, Tynamo | Arbok, Watchog, Sharpedo |
| Zone 11 | Gyarados, Clauncher, Furfrou, Inkay, Slowpoke, Stunfisk | Slowbro |
| Zone 12 | Delibird, Machop, Snover, Bergmite, Vanillite, Gogoat, Snorunt, Machoke | Clawitzer, Avalugg, Abomasnow |
| Zone 13 | Phantump (night), Vivillon (day), Heracross, Pinsir, Weepinbell (day), Scyther (night) | Weepinbell (Day), Trevenant |
| Zone 14 | Heliolisk (sunny, day), Drilbur, Onix, Aron, Excadril, Lairon, Emolga | Excadrill |
| Zone 15 | Pumpkaboo, Shuppet (night), Scolipede (day), Haunter (night), Whirlipede (day), Beedrill, Larvitar | Gourgeist, Banette (Night), Beedrill (Day) |
| Zone 16 | Falinks, Flaaffy, Starmie (night), Barbaracle (night), Medicham (day), Florges, Froakie | Ampharos |
| Zone 17 | Klefki (day), Lampent (night), Skarmory, Pyroar, Diggersby, Chespin | Pyroar, Mawile |
| Zone 18 | Noibat (night), Fennekin, Bagon, Altaria (day), Noivern (night), Swablu (day) | Salamence, Lopunny |
| Zone 19 | Eevee, Furfrou, Drampa (day), Kangaskhan, Audino, Clefairy (night), Cleffa (night) | Furfrou (Day), Clefable (Night) |
| Zone 20 | Malamar, Dragalge, Charmander, Tepig, Lucario, Hippowdon, Squirtle, Totodile, Bulbasaur, Roserade, Gardevoir, Chikorita, Aggron, Scrafty, Garbodor | Stunfisk, Vaporeon, Raichu, Simisage, Florges, Eelektross, Diggersby, Clefable, Gogoat, Malamar, Alakazam, Scolipede, Gengar, Heliolisk, Chandelure, Barbaracle, Machamp, Dragalge, Vanilluxe |
Preparation significantly impacts your Wild Zone success rate. Always visit Pokemon Centers to fully heal your team before exploration. Stock up on various Poke Ball types—standard Poke Balls for common spawns, Great Balls for mid-tier Pokemon, and Ultra Balls for Alpha encounters. Consider our Weapons Unlock guide for additional strategic approaches to game progression.
Common mistakes include entering zones with weakened Pokemon teams and insufficient Poke Ball supplies. Many trainers underestimate the challenge of catching Alpha Pokemon, which often require multiple attempts and specialized catching techniques.
Note:
There is a 1 in 4096 chance to encounter a shiny Pokemon. You can also encounter a shiny variant of the Alpha Pokemon with the same shiny rate.
For shiny hunting enthusiasts, understanding spawn mechanics becomes crucial. The standard 1/4096 shiny rate applies to all Wild Zone encounters, including Alpha variants. This makes Wild Zones ideal locations for dedicated shiny hunters seeking rare color variants.
Advanced optimization includes tracking mission progression to anticipate upcoming zone unlocks. Reference our Complete Guide for comprehensive mission walkthroughs that will streamline your Wild Zone access.
Time estimates for zone completion vary significantly. Early zones may require 15-30 minutes for comprehensive exploration, while later zones with diverse spawns could take 45-60 minutes to fully catalog.
Action Checklist
- Complete main missions systematically to unlock new Wild Zones
- Visit Pokemon Center to heal team and stock up on Poke Balls before each zone visit
- Check time of day and weather conditions before entering zones
- Focus on guaranteed Alpha spawns first, then hunt regular spawns
- Use appropriate Poke Ball types for different Pokemon rarity levels
- Track your mission progress to anticipate upcoming zone unlocks
No reproduction without permission:Tsp Game Club » All Pokemon Legends ZA Wild Zones and How to Unlock Them Complete guide to unlocking all 20 Wild Zones and discovering rare Alpha Pokemon spawns in Pokemon Legends ZA