TL;DR
- Activate power and Pack-A-Punch before engaging OSCAR enemy mechanics
- Collect three Dark Aether Crystals and randomized lamp post items systematically
- Execute OSCAR elimination using three distinct environmental traps in specific order
- Master timing and positioning to avoid common progression-blocking mistakes
- Secure LGM-1 Wonder Weapon for enhanced endgame survival and boss elimination
Embark on an extraordinary journey through Treyarch’s most ambitious Zombies experience yet – Astra Malorum. This skull-shaped celestial rock formation transports your crew to Martian terrain where complex puzzles and relentless undead await. The main Easter egg quest represents one of the franchise’s most challenging undertakings, demanding precise execution and strategic planning to conquer.
Our comprehensive walkthrough provides the essential roadmap you need to navigate this intricate challenge. Without proper guidance, most players find themselves overwhelmed by the multi-layered objectives and punishing boss encounters that define this experience.
The Astra Malorum questline guides you through the enigmatic Lumanarium, forces an uneasy alliance with a lethal robotic adversary, and culminates in an interplanetary confrontation against a formidable final boss. Success requires mastering environmental puzzles while surviving escalating undead assaults. Here’s your strategic overview of the complete mission:
Begin your Astra Malorum expedition by establishing fundamental infrastructure. The power activation sequence follows a directed path through the map’s initial sectors – locate and activate three primary power nodes in sequence to energize the facility. This foundational step unlocks critical systems including weapon upgrade stations and defensive positions.
Once power stabilizes, immediately activate the Pack-A-Punch machine. This essential upgrade station dramatically improves your weapon effectiveness against later-stage enemies. Pro tip: Complete this during early rounds (1-3) when zombie density remains manageable, allowing focused progression without excessive defensive pressure.
Common mistake: Many players delay power activation until mid-game, creating unnecessary difficulty spikes when facing specialized enemies with standard weaponry. Establish this infrastructure within the first 10 minutes for optimal progression pacing.
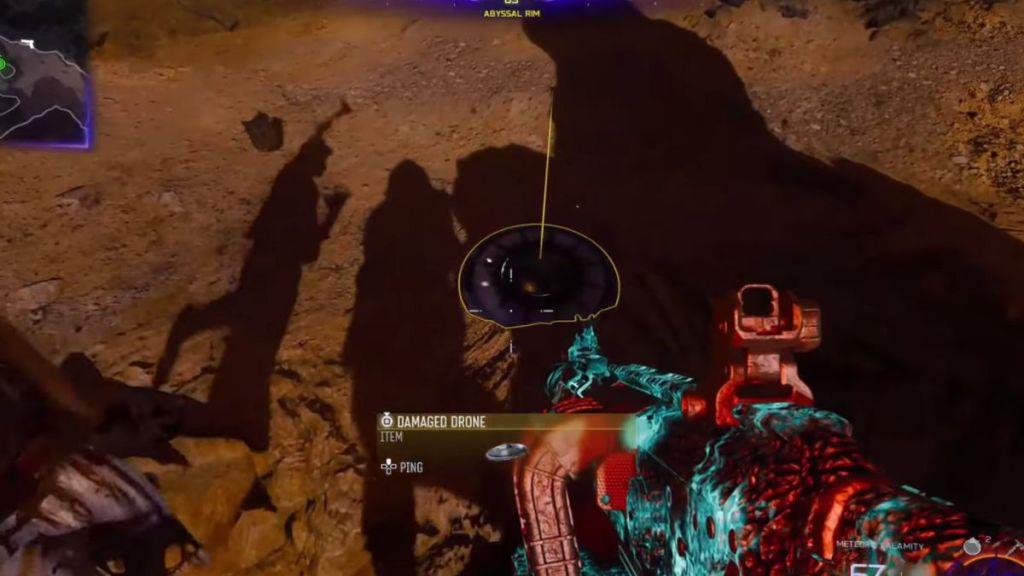
Advance through undead waves until the unmistakable OSCAR enemy spawns, typically around rounds 5-7 depending on your efficiency. This robotic adversary deploys distinctive UFO-style projectiles that present both threat and opportunity. Strategically destroy one of these projectiles to secure the crucial Damage Drone item – your key to progressing the questline.
Next, invest in the Cryo Freeze Ammo Mod from the arsenal station. This specialized ammunition proves essential for the crystal collection phase. Methodically sweep the map to locate three Dark Aether Crystals – these glowing formations emit subtle audio cues and visual distortion fields to aid identification. Engage each crystal with Cryo Freeze-equipped weapons to safely harvest their energy.
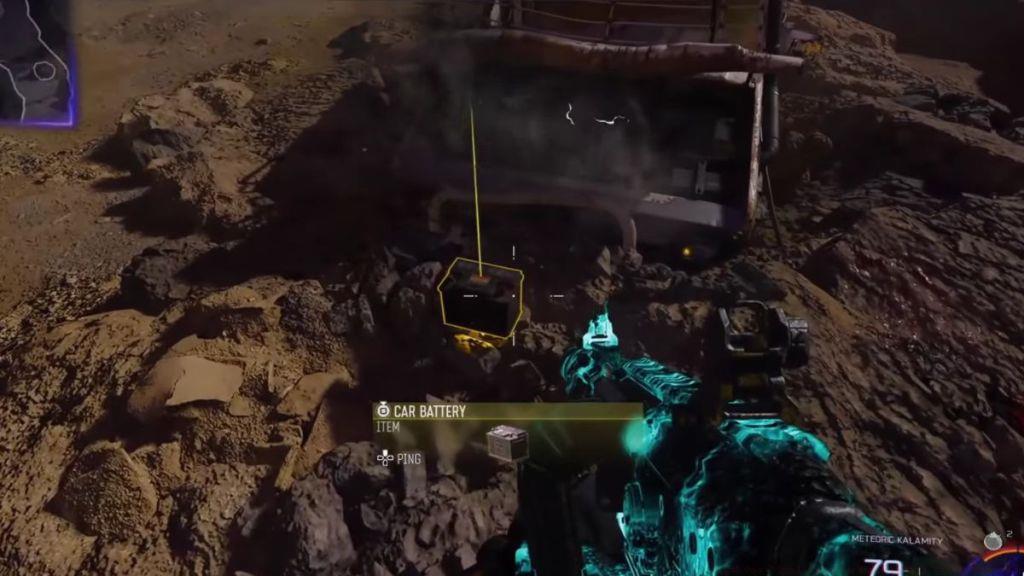
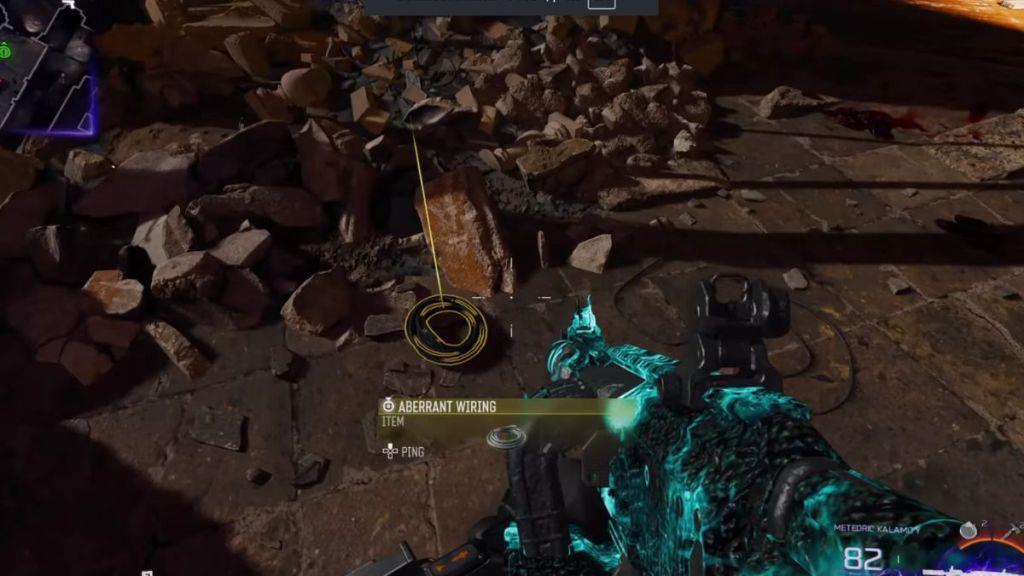
Simultaneously, scan the environment for a singular flickering lamp post. This randomized element appears in one of seven potential locations but stands out conspicuously against static lighting. Destroy it to obtain the Aberrant Wiring component. Return to the initial landing zone and target Ol’ Tessie’s bonnet to acquire the Car Battery, completing your essential item collection.
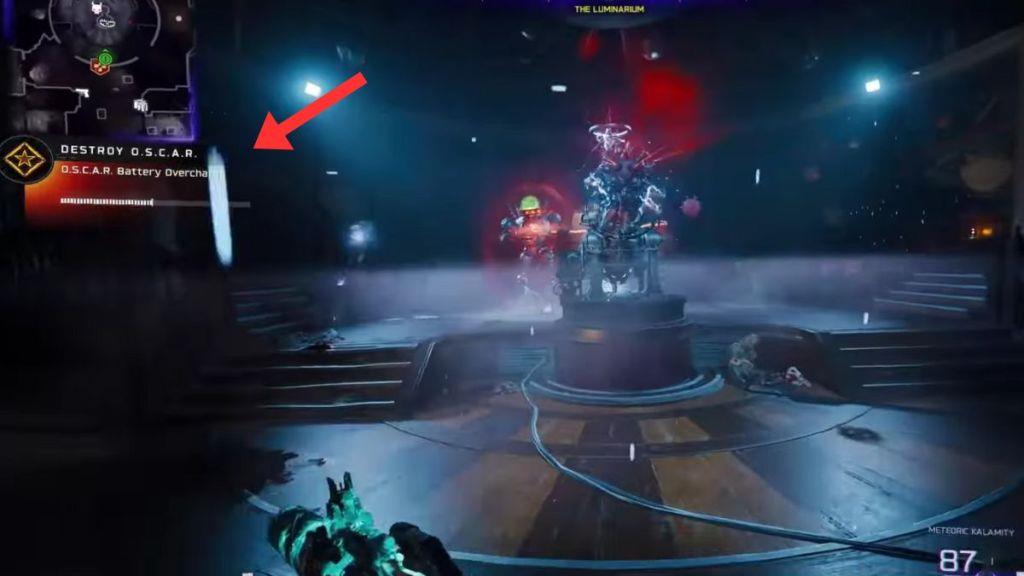
The quest’s most demanding segment requires eliminating OSCAR through three distinct environmental traps. Each execution demands precise timing and positional awareness. Begin with the Electro-Volt Projector situated within the Luminarium’s central chamber – lure OSCAR into the activation zone during its patrol cycle.
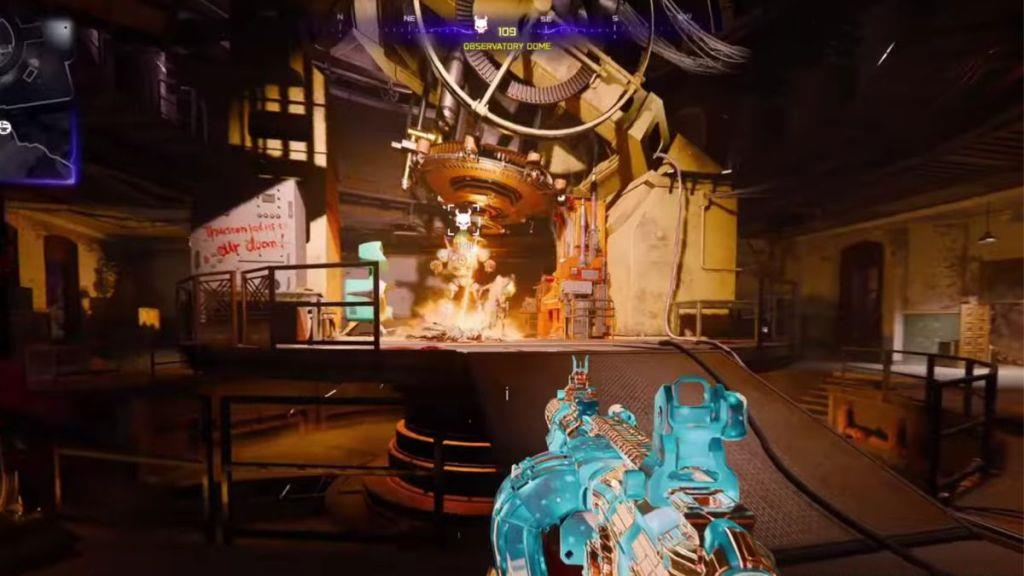
Next, navigate to the Museum Infinitum and utilize the Rocket Ignition mechanism. This trap requires coordinating OSCAR’s position with the ignition sequence, typically requiring 2-3 attempts for proper alignment. The Planetary Telescope in the Observatory Dome presents the final elimination challenge, involving celestial alignment puzzles before activation.
Advanced strategy: Execute these eliminations in the specified sequence to minimize backtracking and optimize ammo conservation. Time each attempt during round transitions when zombie pressure temporarily decreases. Failure to eliminate OSCAR through all three methods will block Wonder Weapon acquisition and quest progression.
Successfully completing the triple elimination protocol causes OSCAR to drop the legendary LGM-1 Wonder Weapon. This game-changing armament provides essential firepower for the culminating Martian boss encounter. The weapon’s area-denial capabilities prove invaluable against the boss’s minion spawns and environmental hazards.
The final confrontation demands mastery of the LGM-1’s unique firing patterns while managing multiple threat vectors. Position yourself strategically to exploit the boss’s attack animations and vulnerability windows.
Completion rewards include exclusive calling cards, achievement unlocks, and narrative revelations that expand the Black Ops Zombies storyline. For comprehensive strategies on weapon optimization and class configurations, consult our detailed BF6 Weapons Unlock Guide to enhance your loadout effectiveness.
Successfully completing the Astra Malorum Easter Egg requires gathering four critical Wonder Weapon components before engaging the formidable OSCAR entity. Each component serves a distinct purpose in constructing the specialized traps needed to contain this powerful enemy.
Mastering the dual-trap system represents the cornerstone of defeating OSCAR efficiently. The Oculus Trap creates a containment field that restricts movement, while the Electro-Volt Trap delivers devastating electrical damage.
Oculus Trap Deployment: Position this trap in areas where OSCAR frequently transitions between attack phases. The optimal placement zones include choke points between major map sections or near objective markers where the entity pauses momentarily.
Electro-Volt Trap Activation: Deploy this offensive trap when OSCAR becomes immobilized by the Oculus field. The combined effect dramatically increases damage output while minimizing your exposure to counterattacks.
Timing Coordination: Successful trapping requires precise sequencing. Activate the Oculus Trap first to establish control, then immediately deploy the Electro-Volt Trap to capitalize on the brief vulnerability window.
Avoid these frequent errors that sabotage Easter Egg attempts and implement advanced strategies used by elite players.
Component Collection Efficiency: Gather Dark Aether Crystals before other components since they require the Cryo Freeze Ammo Mod purchase. This prevents unnecessary backtracking to Arsenal machines mid-process.
OSCAR Behavior Recognition: Study the entity’s movement patterns during initial encounters. OSCAR typically follows predictable patrol routes before becoming aggressive, allowing strategic trap pre-placement.
Trap Optimization Techniques: Upgrade your Wonder Weapons through Pack-a-Punch before attempting the Easter Egg. Enhanced damage output significantly reduces the time required to destroy UFO projectiles for the Damaged Drone.
Common Timing Errors: Many players activate traps too early or deploy them in suboptimal locations. Wait until OSCAR enters the designated trap zone completely before triggering mechanisms.
Advanced Positioning: Place traps in elevated positions when possible. OSCAR’s projectiles have difficulty targeting traps placed on higher ground, increasing their survival time.
For comprehensive strategies on optimizing your entire loadout, consult our detailed BF6 Weapons Unlock Guide to ensure you’re properly equipped for this challenging encounter.
Return to the Astralist chamber and ascend the staircase positioned directly facing the Perfusion Machine. You’ll discover a coding interface device adjacent to this area that requires your attention. Input the DEC numerical sequences you previously recorded into this mechanism to conclude the initial phase of this complex challenge.
Pro Tip: Before entering codes, double-check your notes for accuracy. A single digit error will require restarting this section, costing valuable time during your mission progression.
Proceed into the Archive of Orbis, where you’ll encounter numerous shelving units organized into three distinct sections. Adjacent to each row stands a sculptural bust that can be rotated through interaction. Your objective involves examining every shelf within each section, tallying the quantity of pertinent volumes they contain, and adjusting the bust rotations based on these counts.
For instance, during my playthrough, I identified three matching book titles within the middle section, while the first and final rows each contained only one corresponding volume. This calculation dictated that I needed to rotate the initial bust one time, the central bust three times, and the concluding bust once more to successfully resolve this segment.
Common Mistake: Many players miscount by including decorative books that don’t match the target titles. Focus only on volumes that precisely correspond to your documented list to avoid unnecessary repetition.
Upon correct execution, a concealed floor entrance will become accessible in the vicinity. Ascend through this opening to acquire the Planet Neptune artifact, which can be positioned within the celestial display system back in the Astralis chamber.
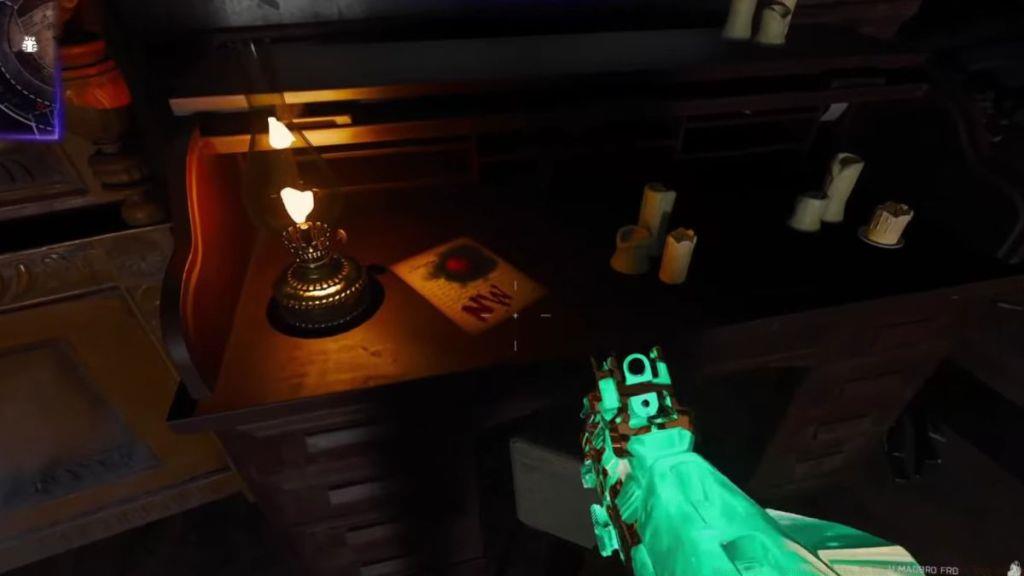
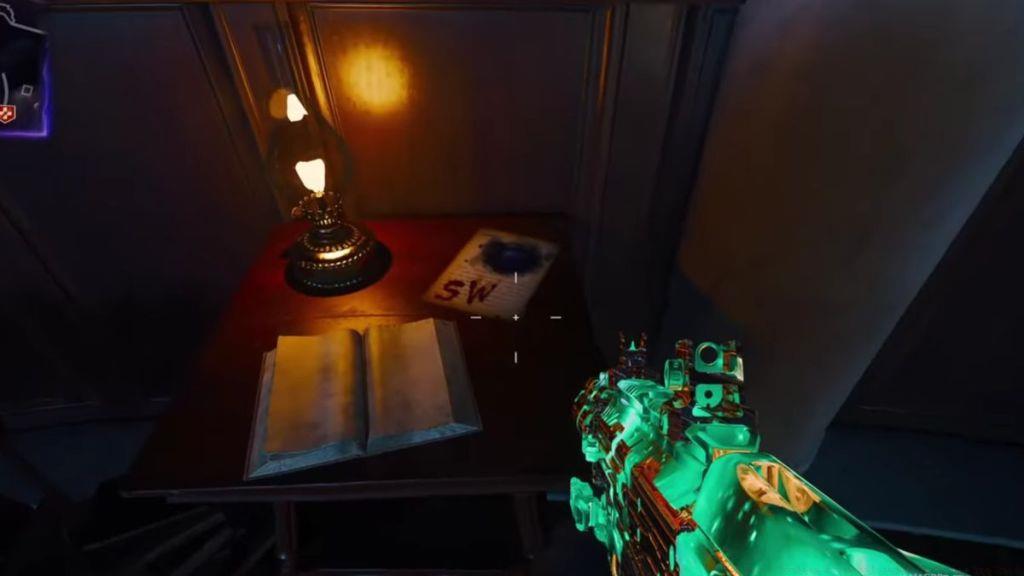
For the subsequent phase, you’ll need to locate three distinct documents and record the celestial body names and directional indicators mentioned within them. The ultimate aim involves projecting the three planetary bodies into the specific orientations detailed in these papers.
The initial document rests upon a workstation inside the Astralis chamber proper. The subsequent paper awaits collection from a central table within the Archive of Orbis. The concluding document occupies another work surface, this time located in the Luminarium room.
Optimization Strategy: Collect all three papers in a single efficient route rather than returning to the planetarium after each find. This approach can reduce completion time by approximately 3-5 minutes.
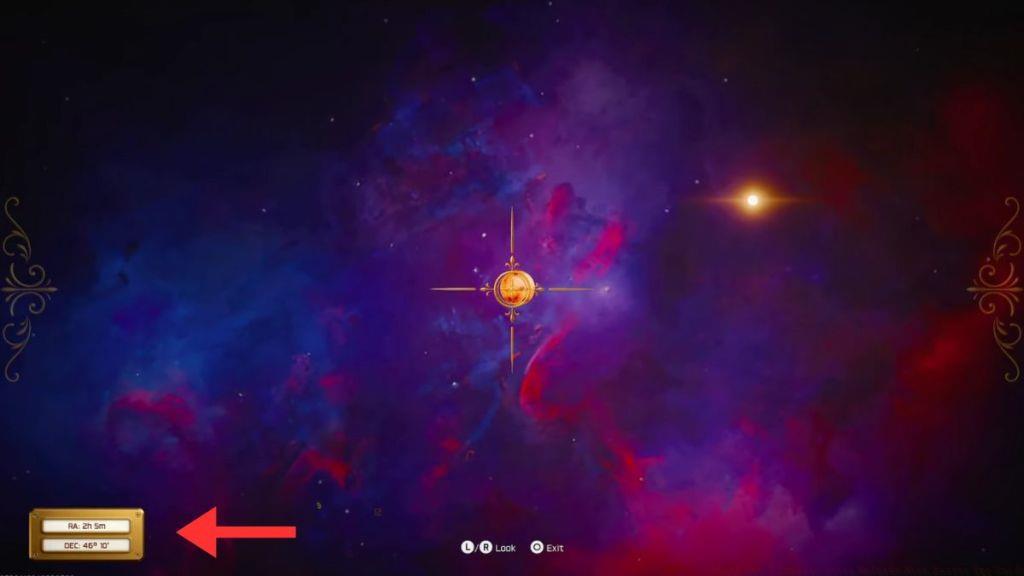
After documenting all necessary information, return to the Planetarium and position yourself directly beneath the solar illumination fixture, which simultaneously functions as a directional indicator. Utilize the orientation markers displayed on this apparatus to accurately project the planetary bodies.
Following successful completion of this celestial alignment, proceed back to the Perfusion Machine and engage with it to initiate a security containment protocol.
Advanced Technique: The sun chandelier’s compass points correspond to standard cardinal directions: up for North, right for East, down for South, and left for West. Understanding this mapping ensures precise planetary targeting without guesswork.
For players seeking comprehensive Battlefield strategies, this puzzle-solving methodology demonstrates the importance of systematic observation and precise execution that translates well to other tactical scenarios throughout the game.
Successfully overcoming Caltheris requires executing a precise three-phase strategy that demands both tactical positioning and target prioritization. During the initial engagement, you must deplete the boss’s health bar completely three separate times, which triggers the spawning of a formidable rock monster entity on the battlefield terrain.
Maintain significant distance as the rock monster aggressively pursues players throughout the combat arena, while carefully evading its devastating ground slam assault that can instantly eliminate unprepared operators. Focus your offensive capabilities exclusively on the illuminated blue vulnerability points during the subsequent two combat stages, as these represent your primary damage-dealing opportunities.
The concluding phase of the Caltheris encounter functions similarly to previous stages but introduces the dangerous new ability to launch purple crystalline projectiles that inflict temporary stun status effects. Progressively reducing its remaining health pool becomes substantially more challenging during this final segment, yet maintaining concentrated firepower on the exposed weak points remains essential for degrading its protective armor layers until you achieve final elimination of the boss entity.
Upon successful completion of the BO7 Astra Malorum primary narrative questline, operators will receive the following exclusive cosmetic and progression rewards:
The experience point allocation provides substantial progression advancement, equivalent to approximately two full matches of successful gameplay in standard modes. For optimal loadout configuration to maximize your combat effectiveness during this demanding encounter, consult our comprehensive BF6 Weapons Unlock guide covering weapon attachments and specialization options.
Indeed, the Black Ops 7 Astra Malorum easter egg can be successfully completed in solo playthroughs, though the challenge intensity increases dramatically compared to coordinated four-player squad operations. Solo operators must exercise exceptional situational awareness and implement advanced kiting techniques to manage multiple threat vectors simultaneously.
Completing the Astra Malorum easter egg rewards participants with the exclusive ‘Bottled Up’ Nikolai Operator skin, a specialized Calling Card design, and a substantial 10,000 experience point bonus. The strategic approach varies significantly between solo and team playstyles, requiring adaptation of your Class Guide selections to optimize for either self-sufficiency or role specialization.
Common tactical errors include inadequate ammunition management during extended phases and failure to pre-position before critical ability activations. Advanced players should master animation canceling during vulnerability windows and implement predictive movement patterns to minimize damage intake. The complete engagement typically requires 25-40 minutes depending on player skill level and loadout optimization, with team play reducing completion time by approximately 30%.
Action Checklist
- Activate power nodes and Pack-A-Punch machine (Rounds 1-3)
- Survive until OSCAR spawns and collect Damage Drone (Rounds 5-7)
- Purchase Cryo Freeze Ammo Mod and harvest 3 Dark Aether Crystals
- Locate randomized flickering lamp post and collect Aberrant Wiring
- Retrieve Car Battery from Ol’ Tessie and eliminate OSCAR via three traps
- Secure LGM-1 Wonder Weapon and defeat final boss
- Purchase Cryo Freeze Ammo Mod from Arsenal machine
- Collect three Dark Aether Crystals using Cryo Freeze ammunition
- Shoot Ol’ Tessie’s hood for Car Battery
- Locate and destroy flickering light post for Aberrant Wiring
- Summon OSCAR and destroy orbiting UFO projectiles for Damaged Drone
- Deploy Oculus Trap in choke point, then Electro-Volt Trap during vulnerability
- Enter recorded DEC codes at Astralist room machine
- Count matching books in Archive of Orbis three rows
- Rotate busts according to book counts (1-3-1 in example)
- Collect three planetary papers from Astralis, Archive, and Luminarium
- Use sun chandelier compass to shoot planets in correct directions
- Trigger lockdown at Perfusion Machine to complete puzzle
- Deplete Caltheris health bar three times to trigger rock monster spawn
- Maintain 15-20 meter distance during rock monster pursuit phase
- Prioritize destruction of all glowing blue weak spots in sequence
- Evade purple stun projectiles in final phase while continuing weak point assault
No reproduction without permission:Tsp Game Club » Black Ops 7 Zombies Astra Malorum Main Easter Egg Guide