TL;DR
- The 4-2-3-1 Wide formation provides the most balanced approach for both attack and defense in EA FC 26
- Player Roles significantly impact team behavior with new Box Crasher and Deep Lying Playmaker options
- Formation selection should match your playstyle: possession, counter-attack, or high-pressure
- Proper striker combinations are crucial for 4-4-2 success, requiring complementary attributes
- Master defensive positioning and manual tracking to prevent counter-attack vulnerabilities
Dominating competitive modes like Champions, Division Rivals, and Tournaments requires more than just assembling meta players—you need formations and custom tactics that maximize their potential. EA FC 26 introduces innovative Player Roles while retaining the tactical framework from previous iterations. This creates familiar setup processes but with noticeable meta shifts that demand strategic adaptation. Our comprehensive guide delivers the optimal formations and custom tactics for FC 26 Ultimate Team success.
We’ve curated five meta formations specifically for EA FC 26, each designed to excel with distinct playing philosophies and strategic approaches.
Tactics
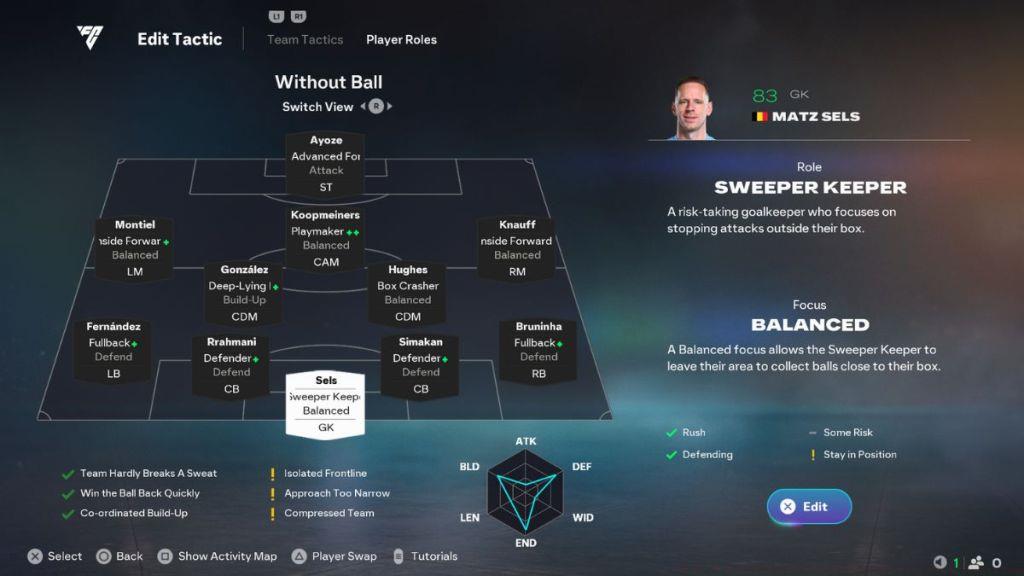
- Tactical Preset: Custom
- Formation: 4-2-3-1 Wide
- Build-Up Style: Balanced
- Defensive Approach: Balanced
- Line Height: 50
Player Roles
- GK: Sweeper Keeper/Balanced
- CB: Defender/Defend
- CB: Defender/Defend
- LB: Fullback/Defend
- RB: Fullback/Defend
- CDM: Box Crasher/Balanced
- CDM: Deep Lying Playmaker/Build-Up
- CAM: Playmaker/Balanced
- LM: Inside Forward/Balanced
- RM: Inside Forward/Balanced
- ST: Advanced Forward/Attack
Despite being early in the game’s lifecycle, the 4-2-3-1 Wide has rapidly established itself as FC 26’s most versatile formation. With these specific Player Roles activated, you achieve exceptional equilibrium between offensive creativity and defensive solidity. Your defensive line maintains exceptional positional awareness, with fullbacks prioritizing defensive responsibilities over adventurous forward runs.
The midfield partnership creates a perfect dynamic—one midfielder retreats to initiate build-up play while their counterpart identifies scoring opportunities through well-timed box arrivals. The wide midfielders invert to overload central channels, generating devastating attacking sequences while maintaining defensive discipline by tracking opposition wingers. This formation’s primary strength lies in maintaining numerical superiority across all pitch sectors, providing an unbeatable tactical foundation.
Pro Tip: The Box Crasher role functions best with high-stamina midfielders possessing strong shooting attributes, while Deep Lying Playmakers should excel in passing and ball control.
Tactics
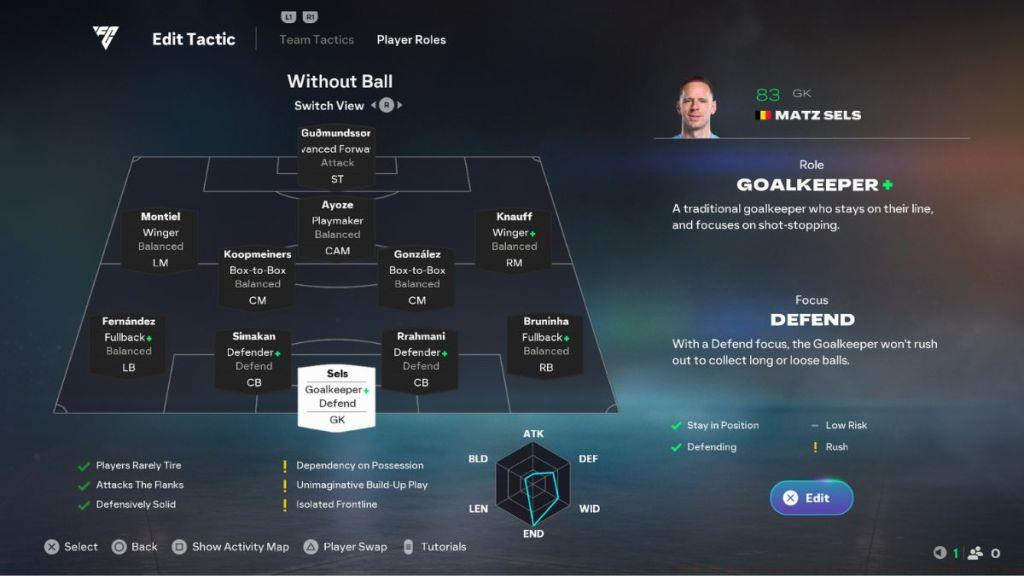
- Tactical Preset: Custom
- Formation: 4-4-1-1 Midfield
- Build-Up Style: Balanced
- Defensive Approach: High
- Line Height: 70
Player Roles
- GK: Goalkeeper/Defend
- CB: Defender/Defend
- CB: Defender/Defend
- LB: Fullback/Balanced
- RB: Fullback/Balanced
- CM: Box-to-Box/Balanced
- CM: Box-to-Box/Balanced
- CAM: Playmaker/Balanced
- LM: Winger/Balanced
- RM: Winger/Balanced
- ST: Advanced Forward/Attack
This aggressive tactical configuration demands technically proficient players for optimal performance, as you’ll maintain an advanced defensive line while manually tracking runners to prevent dangerous turnovers. This strategic compromise becomes worthwhile when pursuing aesthetically pleasing, dominant football. The assigned Player Roles enable fullbacks to advance and generate numerical superiority in wide areas, while your striker positions himself perfectly for low crosses or aerial deliveries.
Both Box-to-Box midfielders will orchestrate sustained pressure around the opponent’s penalty area, creating space for your attacking midfielder to demonstrate creative brilliance. For deeper tactical insights, consult our comprehensive Class Guide to understand player positioning fundamentals.
Common Mistake: Over-committing midfielders forward without adequate cover, leaving you vulnerable to rapid counter-attacks through central channels.
Tactics
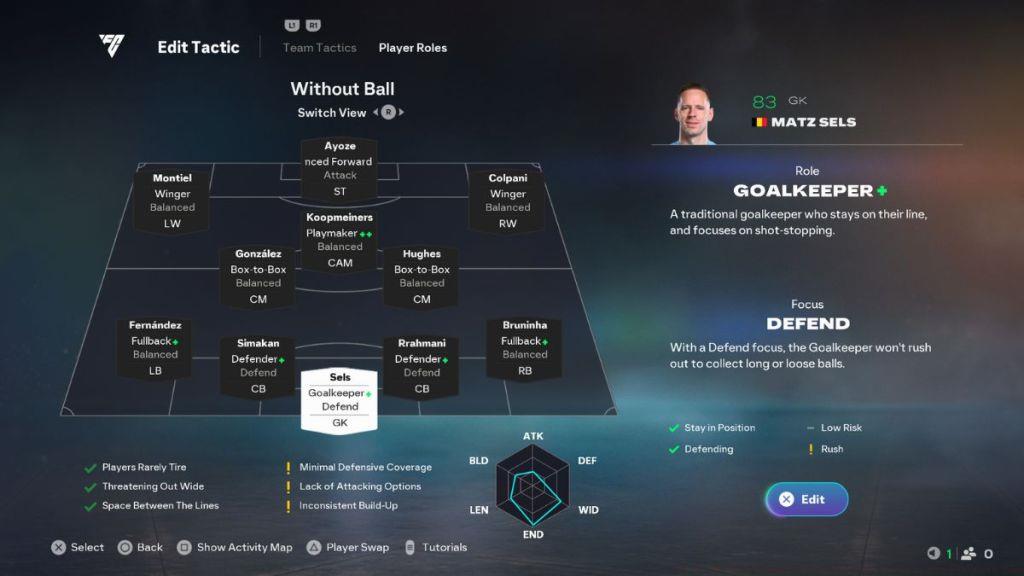
- Tactical Preset: Custom
- Formation: 4-3-3 Attack
- Build-Up Style: Short Passing
- Defensive Approach: Balanced
- Line Height: 50
Player Roles
- GK: Goalkeeper/Defend
- CB: Defender/Defend
- CB: Defender/Defend
- LB: Fullback/Balanced
- RB: Fullback/Balanced
- CM: Box-to-Box/Balanced
- CM: Box-to-Box/Balanced
- CAM: Playmaker/Balanced
- LM: Winger/Balanced
- RM: Winger/Balanced
- ST: Advanced Forward/Attack
Similar to the 4-4-1-1, this FC 26 formation provides extensive attacking width and numerical support, but incorporates a more measured defensive strategy. The defensive line retreats substantially to minimize vulnerability against long-ball counter-attacks, while the build-up philosophy emphasizes patience and intricate passing combinations. If your playing style aligns with the celebrated Tiki-Taka methodology, this 4-3-3 configuration should become your primary tactical system.
Advanced Insight: The Short Passing build-up style works exceptionally well with players possessing high passing accuracy and composure attributes.
Tactics
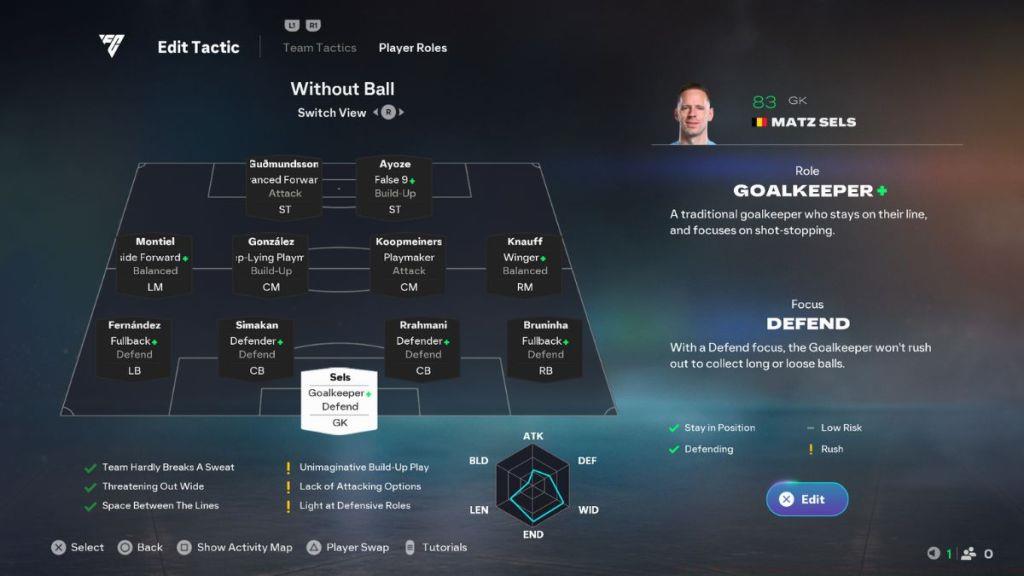
- Tactical Preset: Custom
- Formation: 4-2-2 (Flat)
- Build-Up Style: Counter
- Defensive Approach: Balanced
- Line Height: 50
Player Roles
- GK: Goalkeeper/Defend
- CB: Defender/Defend
- CB: Defender/Defend
- LB: Fullback/Defend
- RB: Fullback/Defend
- CM: Deep Lying Playmaker/Build-Up
- CM: Playmaker/Attack
- LM: Inside Forward/Balanced
- RM: Winger/Balanced
- ST: False 9/Build-Up
- ST: Advanced Forward/Attack
The timeless 4-4-2 delivers proven results: strike partnership upfront, four-man midfield foundation, and an impenetrable defensive line. These components combine to create an incredibly enjoyable yet demanding formation that requires intense focus to prevent defensive lapses.
The entire tactical framework centers around your forward pairing, making optimal striker selection absolutely critical. Target a tall, clinical finisher capable of making penetrating runs behind defensive lines, complemented by a technically gifted forward who drops deeper to connect with wide attackers or dribble past defenders independently. Exercise caution when manually advancing midfielders, as dispossession can rapidly lead to dangerous counter-attacking situations against your exposed defense.
Strategic Combination: Pair a physical striker (85+ strength, 80+ finishing) with a creative forward (85+ dribbling, 80+ passing) for maximum effectiveness.
Tactics
- Tactical Preset: Custom
- Formation: 5-4-1 (Flat)
- Build-Up Style: Counter
- Defensive Approach: Balanced
- Line Height: 59
Player Roles
- GK: Sweeper Keeper/Balanced
- CB: Ball-Playing Defender/Defend
- CB: Defender/Defend
- CB: Ball-Playing Defender/Defend
- LB: Attacking Wingback/Support
- RB: Attacking Wingback/Support
- CM: Playermaker/Roaming
- CM: Holding/Defend
- LM: Inside Forward/Attack
- RM: Inside Forward/Attack
- ST: Advanced Forward/Attack
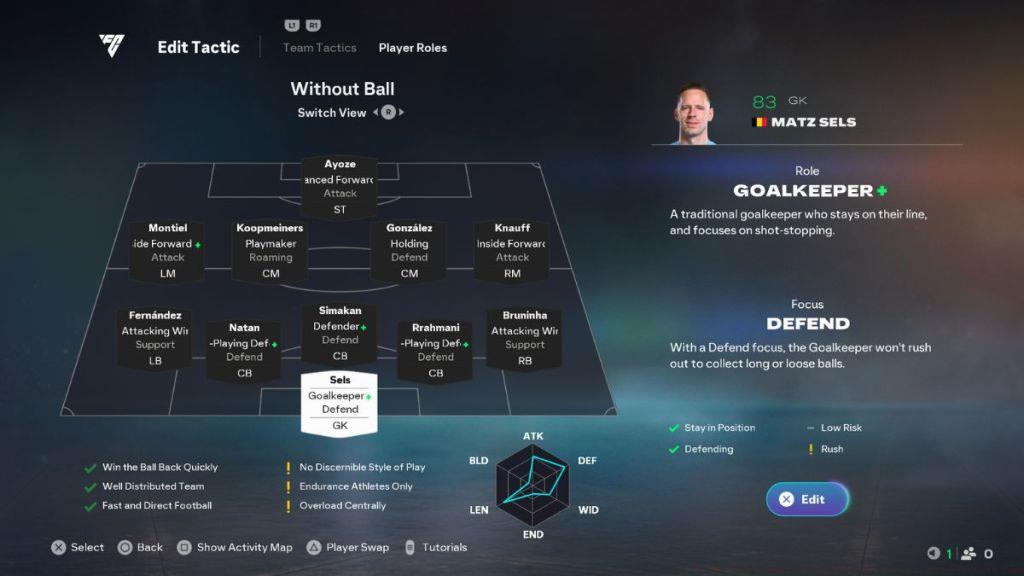
No comprehensive FC 26 formations and tactics guide would be complete without including a defensively robust three-center-back system. This 5-4-1 configuration specializes in frustrating opponents and denying attacking space before unleashing devastating counter-strikes. The approach is uncompromising: three central defenders protecting the penalty area, two attacking wingbacks providing width, and an offensive structure so compact that opposing AI struggles with defensive assignments.
Mastering this formation requires dedicated practice, and you may experience initial losing streaks during the adaptation phase. However, once synchronized with appropriate player personnel, this tactical system becomes exceptionally difficult to abandon.
Learning Curve: Expect 10-15 matches to fully adapt to the defensive positioning requirements and counter-attacking timing.
Player Chemistry Management: Beyond formation selection, player chemistry significantly impacts performance. Ensure your squad maintains minimum 90 chemistry for optimal attribute boosts and cohesive team movement patterns.
In-Game Adjustment Techniques: Successful FC 26 players constantly adapt their tactics mid-match. Monitor your opponent’s patterns and make strategic changes using the D-pad tactical options when necessary.
Common Formation Errors:
– Over-committing fullbacks in defensive formations
– Neglecting midfield defensive cover in attacking setups
– Failing to adjust defensive line height against pacey attackers
– Using incompatible Player Roles that conflict with your tactical approach
Meta Adaptation Strategy: As the game evolves, regularly reassess your formations against the current competitive landscape. For comprehensive strategic guidance, explore our detailed Complete Guide to stay ahead of tactical trends.
Advanced Player Tips:
– Use the training arena to practice Player Role behaviors
– Watch professional player streams to understand advanced tactical applications
– Experiment with different Player Role combinations during less critical matches
This concludes our expert guide to the optimal formations and custom tactics in EA FC 26. The meta formations will inevitably shift as the game’s competitive environment develops, so we’ll consistently update this resource accordingly. Meanwhile, share your preferred tactical configurations in the comments section below.
Action Checklist
- Select formation based on your preferred playstyle (possession, counter, pressure)
- Configure Player Roles according to your players’ strongest attributes
- Test formation in Squad Battles before competitive matches
- Adjust defensive line height based on opponent’s attacking threat
- Monitor performance metrics and adjust tactics accordingly
- Practice manual defending and tracking runners in advanced formations
No reproduction without permission:Tsp Game Club » EA FC 26 Best Formations and Custom Tactics for Ultimate Team Master EA FC 26's meta formations with expert tactics, player roles, and winning strategies for competitive play