TL;DR
- Blue Moon bunkers require player activation via totems found exclusively in Sea 2
- Navigate through Lushgrove island’s complex terrain using specific NPC landmarks
- Server coordination is essential as bunkers remain locked until first activation
- Sea 1 and Sea 2 bunkers offer different rewards and activation methods
- Proper preparation saves significant time navigating the challenging terrain
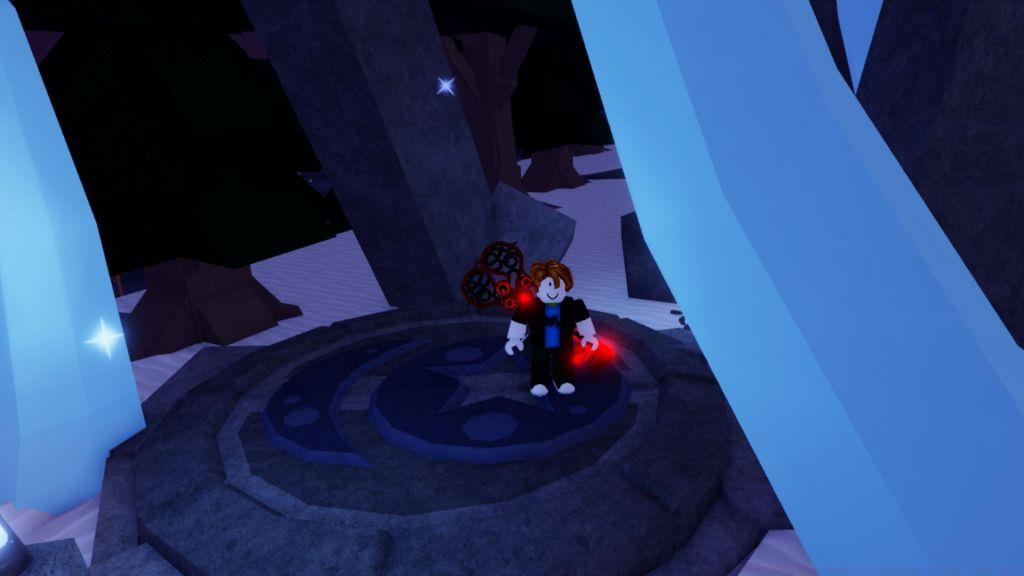
The latest Fisch update introduces an innovative player-driven event system for the Blue Moon bunkers. Unlike traditional automatic spawns, this event empowers you, the Fischers, to initiate the content through strategic item acquisition. The core mechanic revolves around the Blue Moon totem, which serves as your key to unlocking these exclusive fishing locations.
To begin your Blue Moon bunker journey, you must first secure the Blue Moon totem. This crucial item is only obtainable within Fisch’s second sea region. Access Sea 2 by locating the Sea Traveler NPC stationed at Terrapin Island, who facilitates transportation between the game’s maritime zones.
One critical aspect often overlooked by players is the server-wide activation requirement. The bunker gates remain sealed until at least one player successfully completes the unlocking sequence, creating opportunities for cooperative play and strategic timing.
The Sea 2 Blue Moon bunker is precisely positioned at coordinates: X= 1422.3, Y= 156.4, Z= -572. These coordinates place the bunker in a challenging terrain area that requires careful navigation.

Begin your approach by summoning a boat and setting course for Lushgrove island, situated north of Waveborne island. This initial maritime journey typically takes 2-3 minutes depending on your boat type and navigation skills.
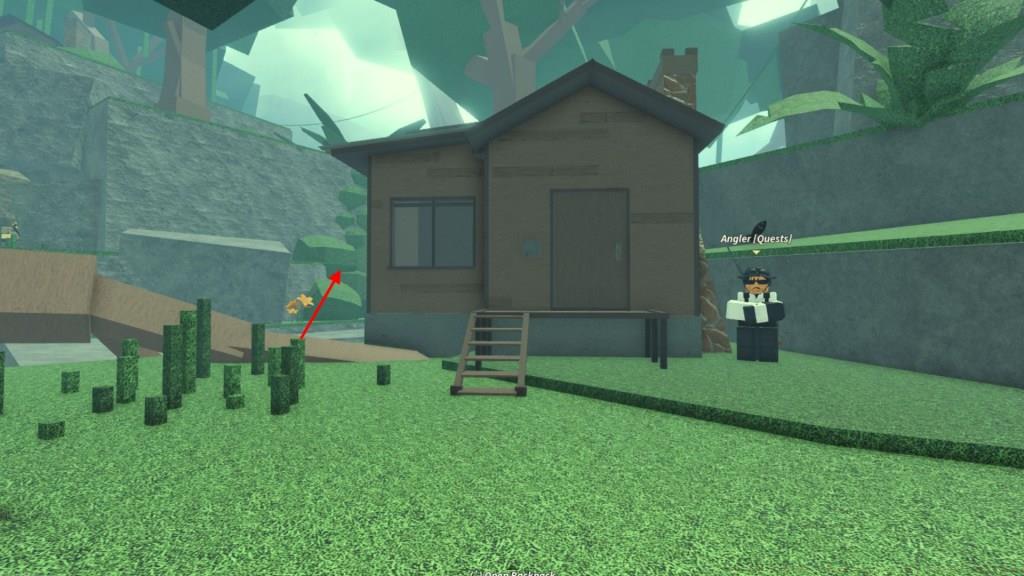
Upon reaching Lushgrove, navigate leftward from the Shipwright’s position to encounter the Angler NPC. This character serves as your primary landmark for the subsequent terrain navigation phase.
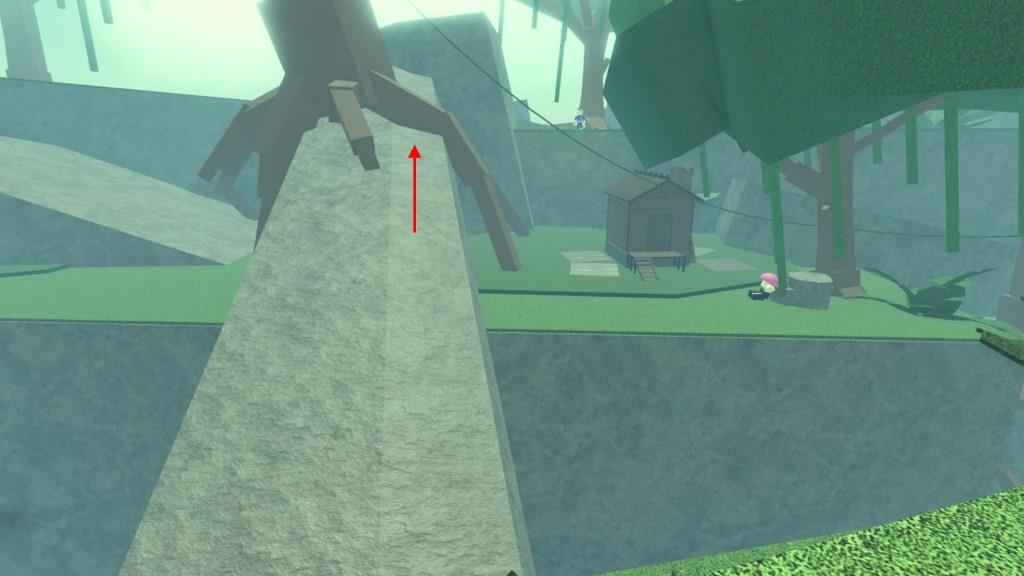
The most challenging segment involves navigating behind the hut to locate the connector bridge, then ascending the stone formations. You’ll identify a distinctive slanting bridge adjacent to the Sporey Mom NPC, which provides access to the final approach path leading directly to the Blue Moon bunker entrance.
While Sea 2 contains the essential Blue Moon totem, Sea 1 offers its own distinct bunker with different activation requirements. The Sea 1 bunker features a more straightforward access method but provides alternative rewards that complement the Sea 2 experience.
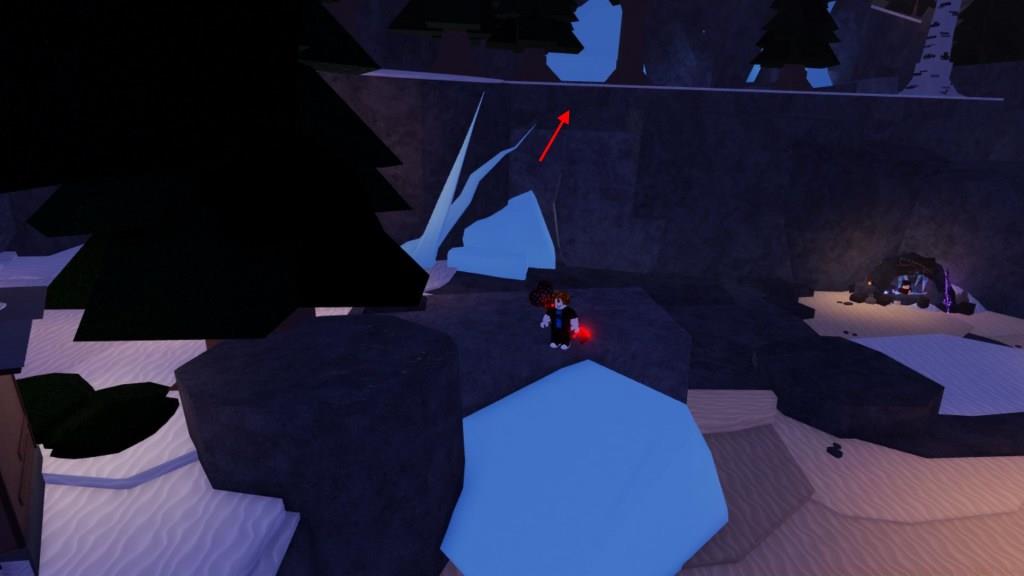
The Sea 1 bunker is strategically positioned in a snowcap region, requiring different environmental preparation than its Sea 2 counterpart. Players should equip appropriate cold-weather gear before attempting access.

Accessing the Sea 1 bunker typically requires 15-20 minutes less preparation time than the Sea 2 variant, making it an attractive option for players with limited session availability.
Reward structures between the two bunkers differ significantly, with Sea 1 focusing on consumable items and Sea 2 offering permanent equipment upgrades. Strategic players often prioritize based on their current progression needs.
Seasoned Fischers recommend several optimization strategies for bunker access. Server hopping can be effective if you find the Sea 2 bunker already activated, but beware of potential cooldown timers that may affect your progression.
A common navigation error involves missing the connector bridge behind the hut. Many players mistakenly continue forward rather than checking the left perimeter, wasting valuable exploration time.
Team coordination provides substantial benefits, particularly for the initial activation. While solo play is possible, having multiple players coordinate totem acquisition and navigation can reduce the overall time investment by 30-40%.
Advanced players suggest preparing multiple totems during a single Sea 2 visit to enable future bunker access without repeating the maritime journey. This forward-thinking approach is especially valuable for players planning multiple fishing sessions during the event period.
Understanding the server reset timing is crucial for planning your bunker attempts. New server instances typically provide the best opportunity for first activation and undisturbed fishing access.
Action Checklist
- Travel to Terrapin Island and locate Sea Traveler NPC for Sea 2 access
- Acquire Blue Moon totem from Sea 2 (essential for both bunkers)
- Navigate to Lushgrove island via boat from Waveborne island
- Follow precise path from Shipwright to Angler NPC to connector bridge
- Ascend stone formations and locate slanting bridge near Sporey Mom NPC
- Access Sea 1 bunker using alternative method (no totem required)
No reproduction without permission:Tsp Game Club » Fisch Blue Moon Bunker Locations in Sea 1 and Sea 2 Complete guide to unlocking Blue Moon bunkers in Fisch Sea 1 and Sea 2 with expert navigation tips