TL;DR
- Blue Moon bestiary requires 500,000 E$ totem purchase and specific weather activation
- All eight fish spawn exclusively during winter with varying weather requirements
- Free Spirit and Azure of Lagoon rods provide optimal progress speed bonuses
- Moon Idol fish has -80% progress speed requiring specialized strategy
- Coordinate bait selection with weather patterns for maximum efficiency
Fisch’s player engagement has faced challenges due to repetitive content cycles, but the April 12 update introduced the innovative Blue Moon bestiary system across both seas. Unlike previous fishing locations, this hidden area demands both financial investment and environmental manipulation through a specialized totem system. This comprehensive walkthrough provides everything you need to successfully navigate this exclusive fishing challenge.
To access the Blue Moon bestiary, you must first conquer the Cthulhu boss to unlock Sea 2 progression. The location centers around Lushgrove island, which becomes accessible after this significant milestone.
Beginning from Waveborne, the starter island, navigate leftward by boat to reach Lushgrove island. Behind the Shipwright’s location, you’ll discover the essential Blue Moon totem available for 500,000 E$ – a substantial but necessary investment for serious anglers.
The hidden Blue Moon bunker entrance sits to the left of the totem at coordinates X=1422.3, Y=156.4, Z=-572. The totem activates a weather-changing Blue Moon event that unlocks the bunker, creating your exclusive fishing environment.
Prepare your fishing gear to encounter these eight exclusive species within the Sea 2 Blue Moon bestiary. Each fish presents unique challenges and conditions for optimal capture.
| Fish Preview | Fish Name | Bait | Season | Time | Weather | Progress Speed |
|---|---|---|---|---|---|---|
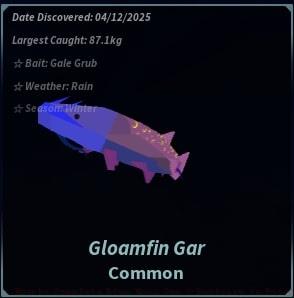 |
Gloamfin Gar | Gale Grub | Winter | Any | Rain | +15% |
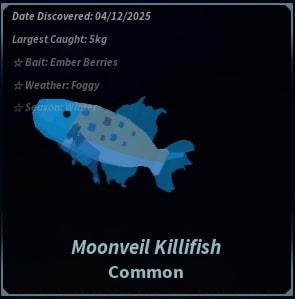 |
Moonveil Killifish | Berries | Winter | Any | Foggy | +40% |
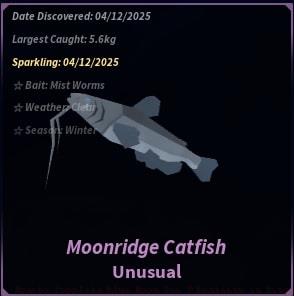 |
Moonridge Catfish | Worms | Winter | Any | Clear | +25% |
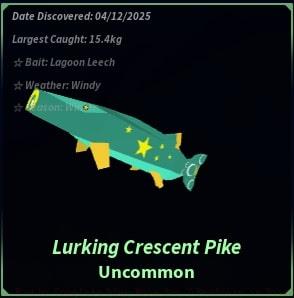 |
Lurking Crescent Pike | Lagoon Leech | Winter | Any | Windy | +45% |
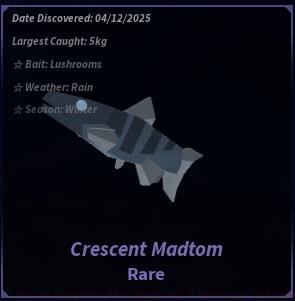 |
Crescent Madtom | Lushrooms | Winter | Any | Rain | +20% |
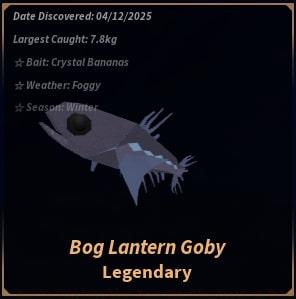 |
Bog Lantern Goby | Crystal Bananas | Winter | Any | Foggy | +30% |
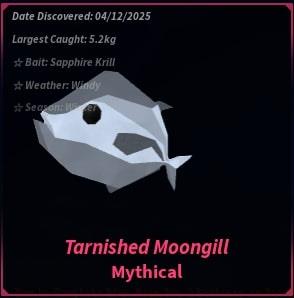 |
Tarnished Moongill | Sapphire Krill | Winter | Any | Any | +5% |
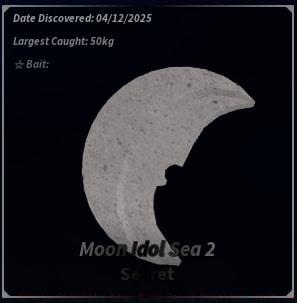 |
Moon Idol – Sea 2 | Any | Winter | Any | Windy | -80% |
Strategic analysis reveals the Moonveil Killifish and Lurking Crescent Pike offer exceptional progress bonuses at +40% and +45% respectively, while the Moon Idol presents a formidable -80% challenge requiring specialized preparation.
While the Sea 2 Blue Moon bestiary fish don’t demand elite equipment, strategic gear selection dramatically improves efficiency and completion time. Understanding rod mechanics and bait interactions transforms this from a grind into a streamlined experience.
For optimal performance, prioritize the Free Spirit Rod, Great Dreamer Rod, or Azure of Lagoon Rod. The Free Spirit and Azure of Lagoon models feature exceptional stabbing passives that accelerate progress during the reeling phase.
The Great Dreamer Rod provides a unique advantage by periodically granting free bestiary fish, significantly reducing the time investment required for completion. For comprehensive equipment guidance, explore our detailed Weapons Unlock guide covering all available fishing tools.
Bait selection requires careful consideration of your rod’s limitations. Since most Sea 2 rods struggle with lure speed and resilience, strategic bait application bridges these performance gaps effectively.
Optimal bait choices include Seaweed, Coral, and Lushrooms, which enhance lure capabilities without compromising other critical statistics. When targeting specific elusive species, utilize their preferred baits to overcome capture difficulties.
Many players underestimate the weather coordination requirements, attempting to fish during incorrect conditions and wasting valuable time. The system requires precise weather matching for each species, with clear, rainy, foggy, and windy conditions each enabling different catches.
A critical error involves bringing inappropriate rods without stabbing passives or free fish mechanics, dramatically extending completion time. The Moon Idol’s -80% progress speed penalty makes equipment selection particularly crucial for this challenging specimen.
Seasonal timing represents another frequent oversight. All Blue Moon bestiary fish spawn exclusively during winter, making attempts during other seasons completely futile.
Advanced players should coordinate their fishing sessions around weather patterns, targeting multiple species during compatible conditions. This systematic approach, combined with understanding Class Guide mechanics, can reduce total completion time by 30-40% compared to random attempts.
For players struggling with progression fundamentals, our comprehensive Complete Guide provides foundational knowledge essential for mastering Fisch’s complex systems.
Action Checklist
- Defeat Cthulhu boss to unlock Sea 2 access
- Purchase Blue Moon totem for 500,000 E$ at Lushgrove island
- Activate totem during winter to open bunker
- Coordinate fishing sessions with specific weather conditions
- Use Free Spirit or Azure of Lagoon rods for stabbing passives
- Apply species-specific baits for challenging fish
- Prioritize high-progress bonus fish during compatible weather
No reproduction without permission:Tsp Game Club » How to Complete Blue Moon Sea 2 Bestiary in Fisch Complete guide to finding and catching all Blue Moon bestiary fish in Sea 2 with expert strategies