Comprehensive Dao Lord boss fight guide with advanced strategies, common pitfalls, and optimization tips for Where Winds Meet players
Understanding the Dao Lord Encounter
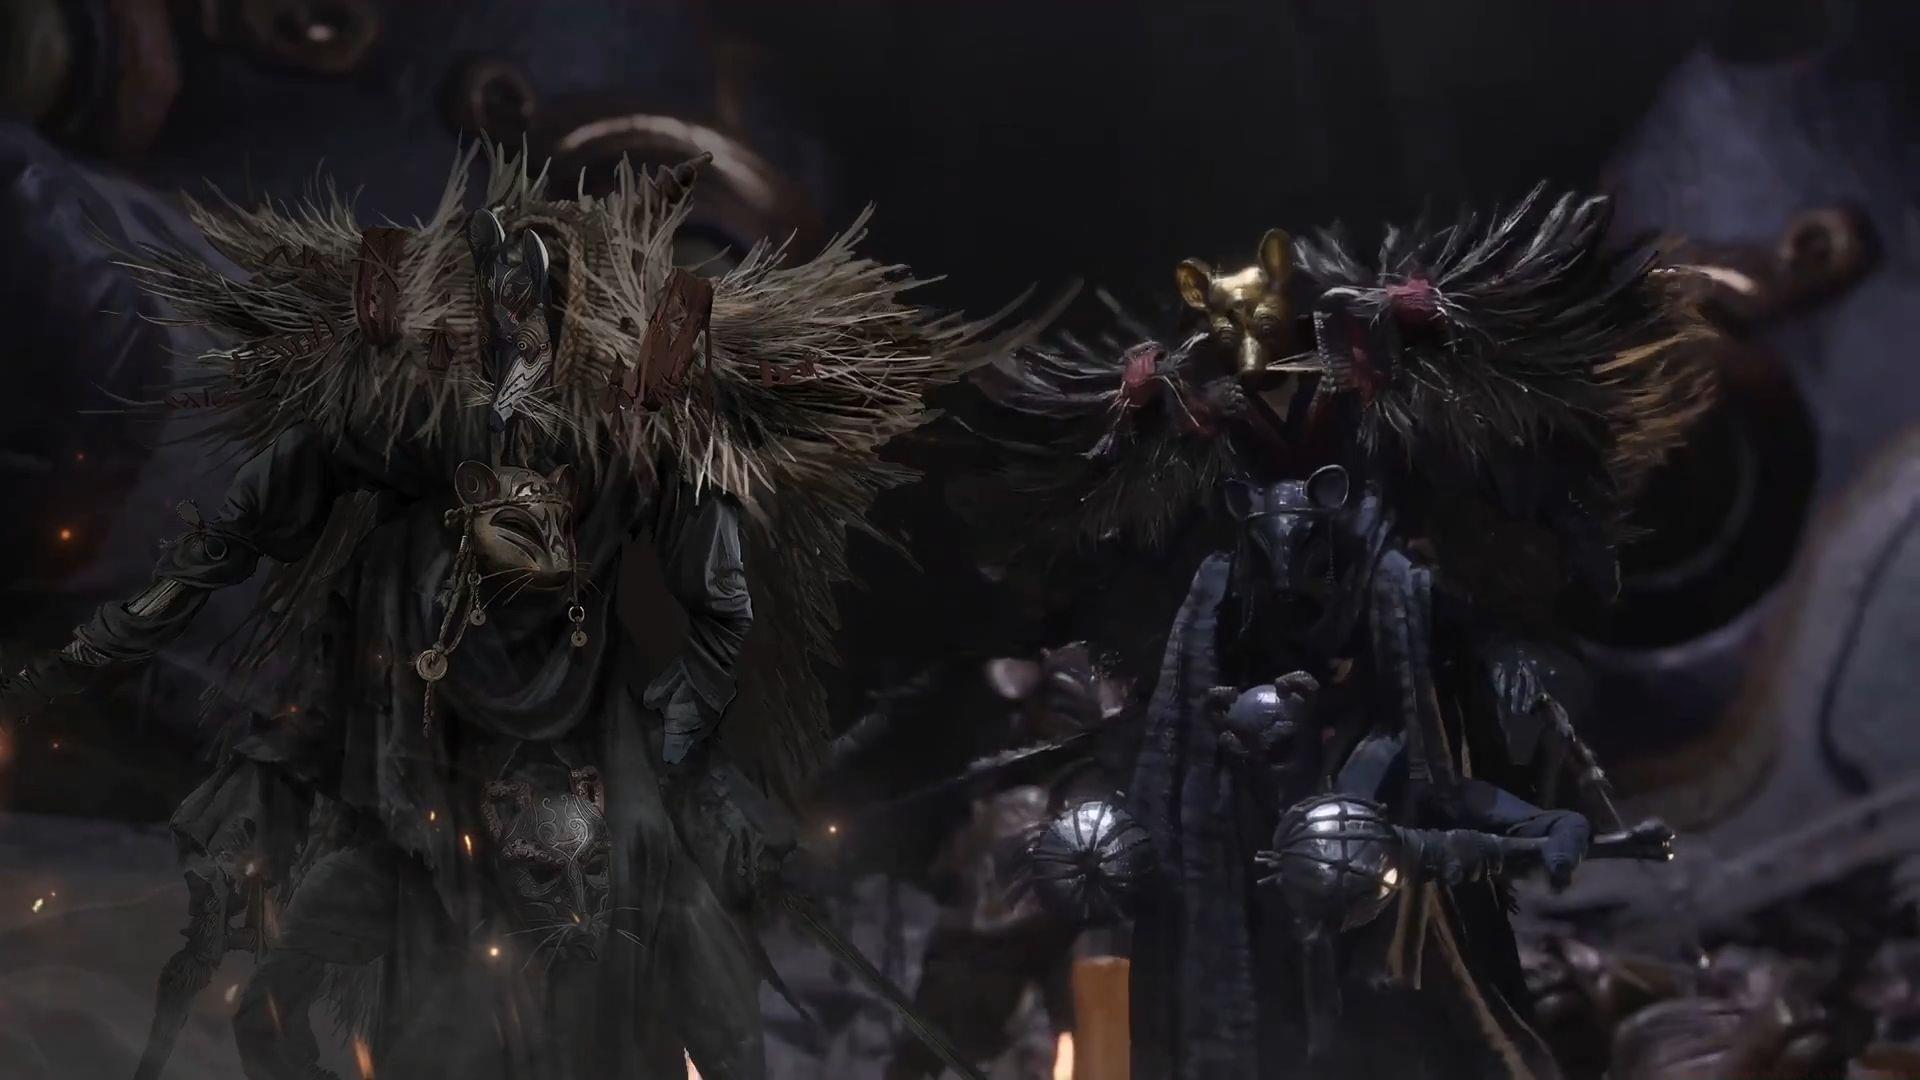
Within the expansive world of Where Winds Meet, the Dao Lord represents one of the most challenging campaign adversaries located in the Kaifeng territory. This formidable opponent remains inaccessible until players successfully advance through a specific sequence of narrative missions. Once these requirements are fulfilled, the boss becomes permanently available for repeated combat attempts, allowing for practice and strategy refinement.
Before engaging in this demanding encounter, warriors must first accomplish the complete Unbound Cavern campaign storyline. This essential prerequisite ensures players have developed adequate combat proficiency and acquired necessary equipment before facing this high-level challenge.
Phase One Combat Mechanics
The initial combat stage against Dao Lord follows conventional boss engagement principles but demands precision execution. The adversary employs diverse assault combinations that necessitate perfectly timed evasive maneuvers and counterattacks. Understanding his movement sequences proves crucial for identifying safe damage-dealing windows.
Successful navigation of this phase requires recognizing three distinct attack patterns: the sweeping horizontal strikes that cover wide areas, the targeted thrust attacks requiring sidestep dodges, and the area-of-effect ground slams that demand backward retreat. Each pattern features specific audio and visual cues that alert attentive players to incoming danger.
Advanced players recommend maintaining medium distance during this phase, close enough to capitalize on brief openings yet far enough to react to sudden charge attacks. The most effective damage windows occur immediately following his three-hit combo completion and during his extended recovery animation after powerful special moves.
Phase Two: The Triad Challenge
The battle dramatically escalates in difficulty during the second stage as Dao Lord divides into three autonomous entities, each possessing independent health metrics. This triad coordination presents the encounter’s greatest challenge, with all duplicates assaulting simultaneously from multiple angles.
A particularly dangerous maneuver during this phase involves all three manifestations submerging beneath the terrain and emerging airborne to execute synchronized diving attacks. This assault pattern creates overlapping damage zones that can quickly overwhelm unprepared combatants.
Strategic positioning becomes paramount during underground emergence sequences. Moving constantly in circular patterns while maintaining awareness of all three clones’ positions significantly reduces vulnerability to coordinated strikes. The moment of emergence provides a critical opportunity for counterattacks if anticipated correctly.
Advanced Combat Strategies
Ranged Weapon Superiority: Employing bow attacks to inflict damage from safe distances proves exceptionally effective during the second combat phase. Projectile weapons allow consistent damage application while maintaining mobility against multiple targets. The optimal strategy involves targeting enemies during their emergence animations when they remain temporarily stationary.
Crowd Control Implementation: Leveraging potent area denial and incapacitation abilities prevents the three Dao Lord manifestations from overwhelming you simultaneously. Freezing, stunning, or slowing effects create crucial breathing room for strategic repositioning and focused assault. Prioritize eliminating individual clones sequentially rather than distributing damage evenly across all three.
Health Management Protocol: Maintaining health above 70% before phase two transition ensures survival through initial clone assaults. Consumable items should be readily accessible during clone emergence sequences when healing opportunities arise. Defensive abilities providing temporary invulnerability frames prove invaluable for surviving unavoidable area attacks.
Common Mistakes and Solutions
Positioning Errors: Remaining stationary or backing into corners represents the most frequent fatal error. This allows clones to surround and trap players in inescapable combo chains. Solution: Maintain constant lateral movement along the arena perimeter to control engagement angles.
Resource Mismanagement: Exhausting stamina or special ability charges during phase one leaves players vulnerable during the more demanding second stage. Solution: Preserve at least 50% stamina and key cooldowns before triggering phase transition.
Targeting Indecision: Switching randomly between clones prolongs the encounter and increases damage taken. Solution: Mark the most aggressive clone visually and focus exclusively on eliminating it first, ignoring others except for necessary dodges.
Also explore our additional Where Winds Meet combat guides:
No reproduction without permission:Tsp Game Club » How to defeat Dao Lord in Where Winds Meet Comprehensive Dao Lord boss fight guide with advanced strategies, common pitfalls, and optimization tips for Where Winds Meet players