TL;DR
- Craft shelves using 6 matching stripped logs arranged in top and bottom rows of crafting grid
- Automate item swapping with Redstone signals for 3, 6, or 9-item hotbar management
- Choose wood types strategically for aesthetic integration with building designs
- Combine shelves with hoppers and comparators for advanced storage automation systems
- Optimize placement for both functional storage and decorative display purposes
The Minecraft 1.21.9 ‘Copper Age’ update introduces revolutionary wall-mounted storage solutions that outperform traditional item frames. These innovative shelves not only provide enhanced display capabilities but also integrate seamlessly with Redstone automation systems, transforming how players manage their inventory. Understanding the material requirements is crucial for efficient crafting.
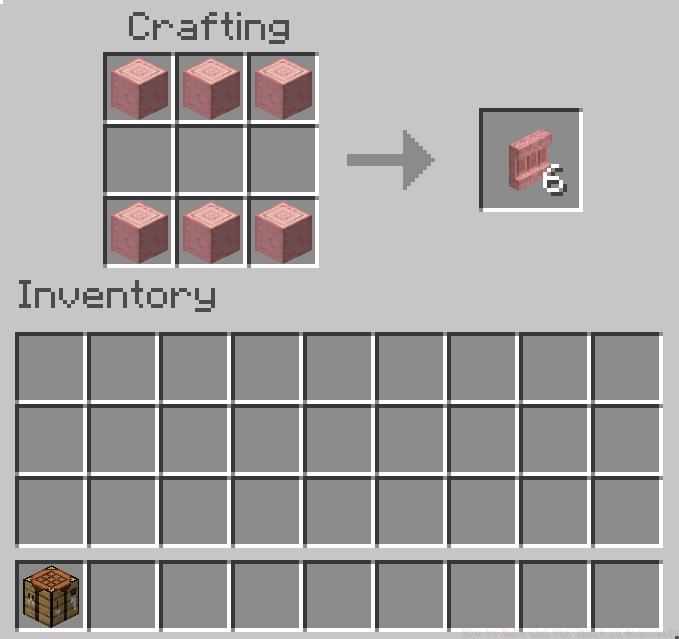
The shelf crafting recipe demands six matching Stripped Logs (selecting any available wood variant). This material choice ensures structural integrity while offering aesthetic flexibility for diverse building styles. Each wood type produces visually distinct shelves that can complement your architectural themes.
Acquiring stripped logs involves a straightforward process: equip any axe tool, approach your chosen tree, and execute a right-click action on the log blocks. This stripping technique converts standard wood into the required material while preserving the wood’s natural characteristics. Repeated application across multiple blocks, followed by left-click harvesting, yields sufficient quantities for shelf production.
Beyond the primary materials, you’ll need access to a crafting table to assemble the shelf components. This essential workstation serves as the manufacturing hub where raw materials transform into functional storage units. Proper preparation ensures a smooth crafting experience without interruptions.
Executing the shelf construction follows a systematic approach that maximizes efficiency while minimizing resource waste. The crafting sequence leverages Minecraft’s grid-based manufacturing system to create durable storage solutions.
Begin by positioning your crafting table on a stable surface and activating it through right-click interaction. This reveals the 3×3 crafting interface where material placement determines the final product. Proper positioning is critical for successful shelf assembly.
The recipe demands strategic log placement: occupy the entire first row with three identical stripped logs, leave the center row completely empty, and fill the bottom row with three additional matching logs. This specific arrangement creates the shelf’s structural framework and determines its functional capacity.
Alternative crafting methods include utilizing the recipe book for automated placement guidance or employing shift-click techniques for rapid material transfer. These approaches streamline the production process, especially when crafting multiple shelves for large-scale storage systems.
Common mistakes to avoid include mixing wood types, which results in failed crafting attempts, or misplacing logs in the center row, preventing proper shelf formation. Always verify material consistency before finalizing the crafting process.
Minecraft shelves offer dual functionality as both manual storage containers and automated inventory management systems. Their versatile design supports various interaction methods depending on your current needs and technological setup.
For basic storage applications, simply right-click the placed shelf to access its inventory interface. This allows direct item placement and retrieval, functioning similarly to chests but with enhanced visual display capabilities. The shelf’s compact design makes it ideal for space-constrained environments.
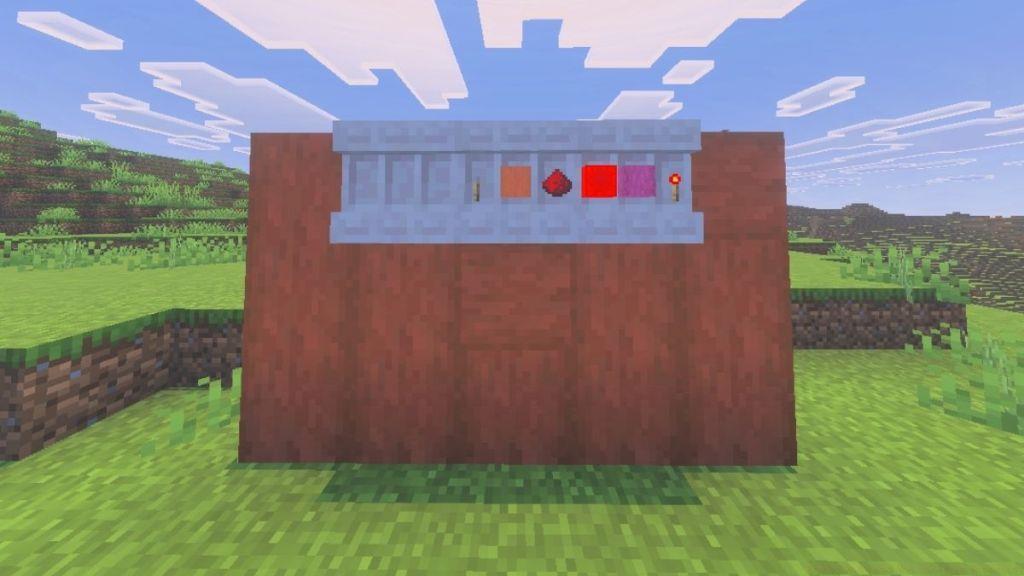
Redstone integration unlocks the shelf’s full potential, enabling sophisticated automation features. When connected to a Redstone power source, shelves can execute controlled item exchanges with your hotbar inventory. This revolutionary capability transforms how players manage their active tools and resources.
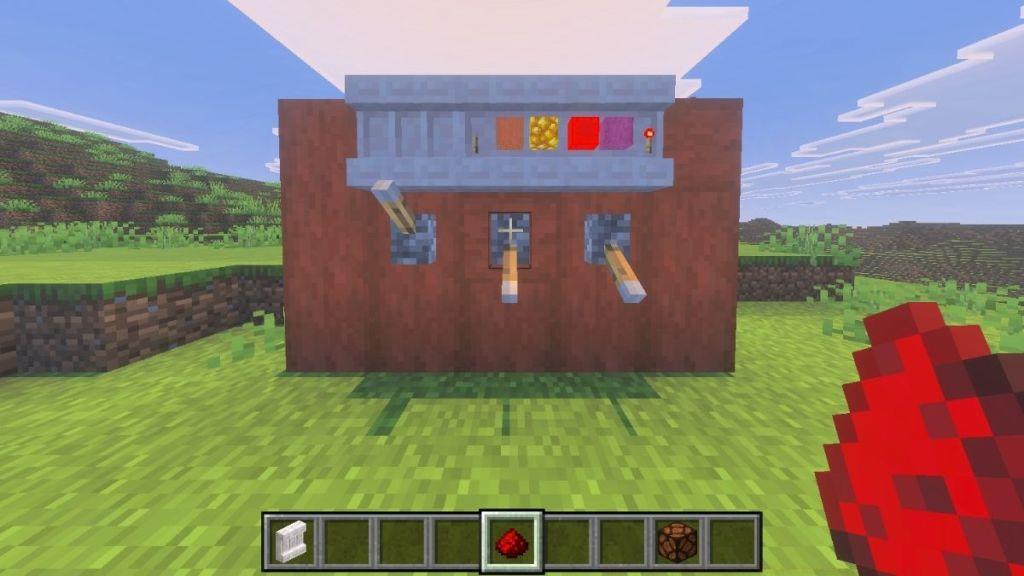
The automation system supports three distinct swapping modes: 3-item exchange for quick tool rotations, 6-item transfer for medium inventory adjustments, or complete 9-item hotbar replacement for total loadout changes. This granular control empowers players to adapt quickly to changing gameplay situations.
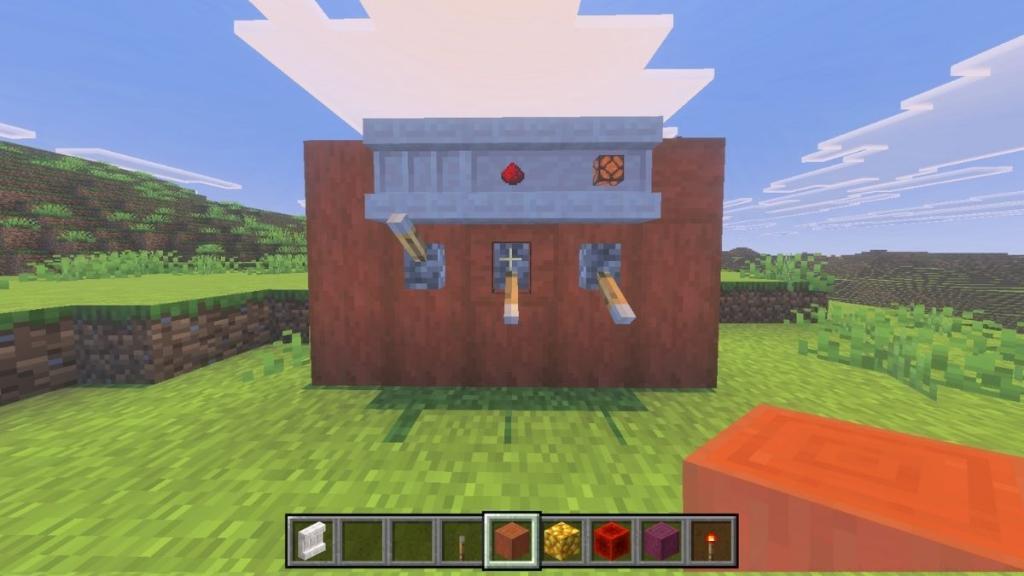
Advanced implementation strategies include connecting shelves to hopper systems for automated item distribution or using comparators to create inventory monitoring networks. These advanced setups require understanding Redstone mechanics but offer unparalleled storage management efficiency.
Strategic placement considerations involve positioning shelves near workstations for quick material access, in combat areas for rapid weapon switching, or throughout bases for decentralized storage networks. Each placement strategy serves different functional purposes while enhancing your build’s visual appeal.
Action Checklist
- Gather 6 identical stripped logs using an axe on tree blocks
- Set up crafting table and arrange logs in top and bottom rows only
- Place shelf on wall and test manual storage functionality
- Connect Redstone circuit for automated item swapping capabilities
- Integrate with hopper systems for advanced automation networks
No reproduction without permission:Tsp Game Club » How to Make and Use Shelf in Minecraft Master Minecraft shelf crafting, automation techniques, and advanced storage strategies for efficient item management