TL;DR
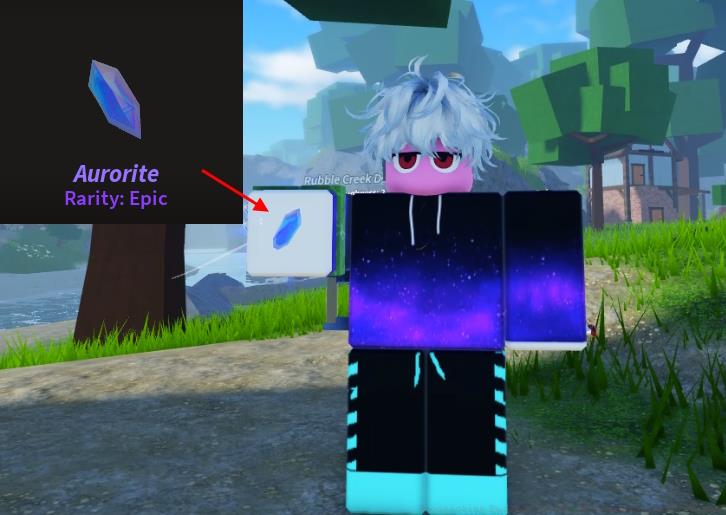
- Aurorite is the essential epic gem required for all pan enchantments, found throughout the game world
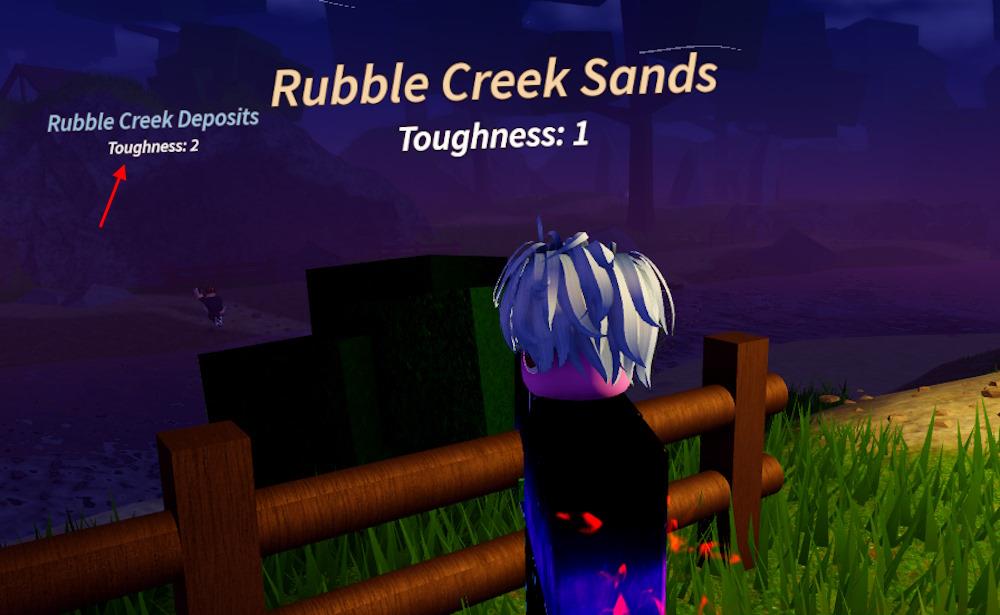
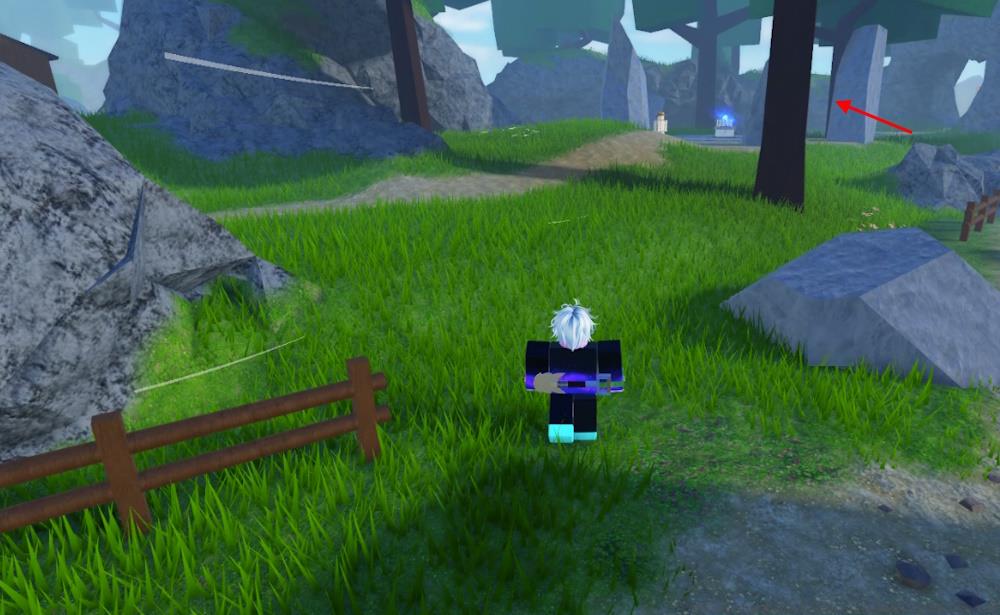
- The enchantment table is located near Rubble Creek Deposits between four large pillars with symbols
- Enchantment success depends on both preparation and understanding probability distributions
- S-Tier enchants like Blessed and Midas provide massive stat boosts but have extremely low drop rates
- Strategic farming and progression planning significantly improve enchantment efficiency
Whether you’re consistently uncovering premium gemstones or primarily gathering modest gold pieces, applying enchantments to your pans in Prospecting dramatically enhances your mining efficiency. These magical enhancements not only elevate your pan’s core attributes but also increase the market value of excavated materials. This comprehensive Prospecting enchantment manual explores the complete enchantment procedure, necessary components, and an exhaustive catalog of available magical upgrades.
To perform pan enchantments in Prospecting, adventurers must acquire Aurorite. This legendary mineral proves challenging to locate but can be unearthed across all game regions. Given its random discovery nature, miners with reduced luck statistics will encounter significant difficulty obtaining it. Upon securing your first specimen, you may initiate the magical enhancement sequence.

Pro Tip: Focus your mining efforts in areas with higher mineral density, as Aurorite spawn rates correlate with overall resource concentration. Beginners should prioritize upgrading their basic equipment before attempting Aurorite hunts to improve discovery chances.
- To enchant your pan, journey to the archaeologist’s encampment within the game world.
- Initially, from your starting position, traverse the waterway and proceed toward the Rubble Creek Deposits.
- Next, navigate to your right flank and search for four substantial pillars adorned with mystical inscriptions.
- There, positioned centrally within the circular courtyard in Prospecting, awaits the enchantment workstation.


Within Prospecting’s mechanics, pan enchantment operations function during both daylight and nocturnal cycles. This design eliminates concerns about temporal restrictions when enhancing your equipment. Prior to commencing the ritual, access your Prospector Inventory and designate the specific pan you intend to magically augment.
Common Mistake: Many players overlook checking their inventory before approaching the enchantment table, causing unnecessary backtracking. Always verify you have both Aurorite and the selected pan equipped.
To successfully enchant a pan in Prospecting, meticulously follow these sequential steps:
- Approach the mystical workstation while carrying Aurorite in your possession.
- Then maintain pressure on the E key when interacting with the Enchantment interface.

Advanced Technique: For players seeking specific enchantments, consider saving before the enchantment process and reloading if undesirable results occur. This strategy requires approximately 2-3 minutes per attempt but can save hours of farming time when targeting rare upgrades.
The enchantment interface displays all possible outcomes with their respective probabilities, allowing informed decision-making. Each enchantment consumes one Aurorite regardless of success, so plan your resource allocation accordingly. Understanding the underlying probability mechanics significantly improves your long-term enchantment strategy, similar to weapon progression systems in our BF6 Weapons Unlock Guide where strategic planning outweighs random chance.
| Enchantment | Effects | Pull Chance |
|---|---|---|
| Lucky | +5 Luck | 10% |
| Strong | +20 Capacity | 20% |
| Gigantic | +40 Capacity | 5% |
| Swift | +0.1 Shake Speed | 20% |
| Glowing | +0.25 Shake Speed | 5% |
| Forceful | +2 Shake Strength | 20% |
| Destructive | +5 Shake Strength | 5% |
| Boosting | +10% Size Boost | 5% |
| Titanic | +20% Size Boost and +25 Capacity | 1% |
| Greedy | +20% Sell Boost | 5% |
| Midas | +50% Sell Boost | 1% |
| Blessed | +25 Capacity and +10 Luck | 1% |
| Unstable | +25% Modifier Boost | 2% |
Statistical Insight: The probability distribution reveals that 60% of enchantments will yield common upgrades (Strong, Swift, Forceful), while only 4% will produce the elite S-Tier enhancements. This mathematical framework operates similarly to class specialization systems detailed in our BF6 Class Selection Guide, where understanding percentages dramatically improves outcome predictability.
Each enchantment category serves distinct playstyles—capacity boosts benefit hoarders, speed enhancements suit rapid miners, and luck improvements help treasure hunters. Choose based on your preferred mining methodology.
| Enchant Rank | Enchantments |
|---|---|
| S Tier | Blessed, Midas |
| A Tier | Titanic, Unstable, Greedy |
| B Tier | Gigantic, Lucky, Destructive |
| C Tier | Boosting, Forceful, Glowing |
| D Tier | Strong, Swift |
S-Tier Analysis: Blessed and Midas enchantments represent the pinnacle of pan enhancement, offering compound statistical advantages that synergize with multiple mining approaches. Their 1% acquisition probability makes them endgame objectives requiring substantial resource investment.
Progression Strategy: Beginners should target B and C-Tier enchantments initially, as these provide meaningful improvements with reasonable 5-20% discovery rates. Intermediate players can pursue A-Tier upgrades, while veterans reserve S-Tier pursuits for optimized late-game farming, similar to advanced tactics in our Battlefield 6 Complete Guide where gradual advancement proves more effective than immediate elite targeting.
Tier Selection Criteria: Rankings consider statistical impact, probability accessibility, and versatility across different mining scenarios. This systematic evaluation mirrors comprehensive gameplay optimization found in professional gaming guides.
Efficiency Optimization: Maximize your Aurorite acquisition by concentrating mining sessions in high-yield zones during peak gameplay hours. The mineral’s spawn mechanics incorporate both fixed location probabilities and dynamic world state influences, requiring adaptive exploration tactics.
Area-Specific Tactics: Different regions offer varying Aurorite discovery rates. Dense mineral areas typically provide 15-25% higher spawn chances but require upgraded equipment for effective extraction. Balance your farming between accessibility and yield potential.
Pro Tip: Equip luck-enhancing gear before Aurorite hunting expeditions, as this statistic directly influences rare material discovery. Players reporting consistent success typically maintain at least +8 luck through equipment and temporary buffs.
Time Investment Analysis: Based on community data, average players can expect to find 1-2 Aurorite specimens per hour of dedicated mining. This translates to approximately 3-6 enchantment attempts during a standard gaming session, making resource conservation crucial.
Common Pitfall: Many miners exhaust their Aurorite reserves on mediocre enchantments early in their progression. Reserve your initial specimens for guaranteed meaningful upgrades rather than gambling on low-probability elite enhancements prematurely.
Advanced Technique: Coordinate with other players to cover multiple mining zones simultaneously, then trade or pool resources. This cooperative approach can triple effective farming rates and is particularly valuable when targeting specific endgame enchantments.
Action Checklist
- Acquire Aurorite through focused mining in high-density zones with luck-enhancing equipment
- Navigate to enchantment table via Rubble Creek Deposits and four symbolic pillars
- Select target pan from Prospector Kit inventory before approaching table
- Execute enchantment by holding E key while positioned at the mystical interface
- Evaluate results against tier list and plan subsequent farming based on outcome
- Implement save/reload strategy if targeting specific rare enchantments
No reproduction without permission:Tsp Game Club » Prospecting Enchant Guide – All Enchants and Tier List Master Prospecting enchantments with essential materials, strategic locations, and tier-ranked upgrades for maximum efficiency
