TL;DR
- Miner Shard and Blast Chip dominate S-Tier for resource farming and combat efficiency
- A-Tier runes like Flame Spark and Drain Edge offer specialized power for specific builds
- Always match runes with compatible weapon types and races for maximum effectiveness
- Avoid C-Tier Rot Stitch due to unreliable mechanics and better alternatives
- Combine runes with weapon upgrades and armor recipes for unstoppable performance
Runes function as strategic power amplifiers for your gear in The Forge, transforming ordinary equipment into formidable tools of destruction. When properly selected and implemented, these enhancements can dramatically elevate both offensive output and defensive resilience. Each rune attaches directly to your weapons and armor, delivering substantial statistical improvements and unique combat capabilities. However, navigating the diverse selection of 11 available runes presents a significant strategic challenge that requires careful consideration.
The acquisition system ties specific rune drops to particular enemy types, creating targeted farming opportunities for dedicated players. Understanding which foes yield your desired enhancements becomes crucial for efficient progression. Importantly, not every rune delivers equivalent value—some abilities simply fall short of practical utility in most combat scenarios.
Our comprehensive tier evaluation positions the most impactful runes at the top, while relegating less effective options to lower tiers. Beginners can leverage mid-tier runes as stepping stones while gradually progressing toward elite enhancements. Always complement your rune selection with active The Forge promotional codes and race rerolls aligned with your chosen enhancements. Below you’ll find our meticulously ranked assessment of every available rune.
For detailed ability breakdowns and trait analysis of individual runes, explore our dedicated The Forge rune compendium.
| Tier | Runes |
|---|---|
| S Tier | Miner Shard, Blast Chip |
| A Tier | Flame Spark, Venom Crumb, Chill Dust, Drain Edge |
| B Tier | Frost Speck, Rage Mark, Briar Notch, Ward Patch |
| C Tier | Rot Stitch |
S-Tier runes represent the pinnacle of power in The Forge, offering transformative abilities that redefine combat efficiency. These elite enhancements should become primary farming targets for serious players seeking maximum performance. A-Tier options deliver excellent reliability across most gameplay scenarios, serving as either primary choices or strong alternatives when S-Tier runes remain unavailable.
B-Tier runes provide situational value that can shine in specific build configurations or against particular enemy types. C-Tier enhancements generally offer insufficient return on investment compared to their opportunity costs.
| Runes | Pro(s) | Con(s) |
|---|---|---|
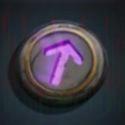 Miner Shard |
+ Unparalleled efficiency for mining operations and accelerated ore collection + Dramatically reduces resource gathering time investment + Essential for players focusing on crafting and equipment progression |
– Provides zero combat utility during enemy engagements – Requires weapon switching for optimal resource farming |
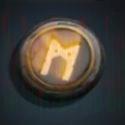 Blast Chip |
+ Represents the ultimate damage-per-second enhancement available + Delivers massive area damage scaling with your weapon’s base damage + Groups multiple enemies for efficient elimination, saving substantial combat time + Exceptionally effective with high-damage weapons like greatswords and hammers |
– Concentrated enemy groups can unleash dangerous burst damage – Performs poorly with low-damage weapons such as daggers – Requires careful positioning to avoid being overwhelmed |
Pro Tip: Equip Miner Shard on a dedicated mining weapon and Blast Chip on your primary combat equipment. This dual-setup approach maximizes both resource acquisition and combat effectiveness without compromise.
| Runes | Pro(s) | Con(s) |
|---|---|---|
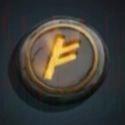 Flame Spark |
+ Exceptional single-target elimination capability + Perfect synergy with Demon race attributes + Delivers substantial fire damage proportional to weapon damage |
– Ineffective against clustered enemy formations – Underperforms with low base damage weapons – Limited utility in crowd control situations |
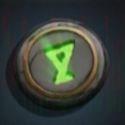 Venom Crumb |
+ Excellent choice for rapid-attack builds + Solid alternative when S-Tier runes remain unavailable + Provides consistent damage amplification through poison effects |
– Falls short of Flame Spark or Blast Chip performance – Requires specific attack speed thresholds for optimal value |
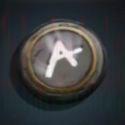 Chill Dust |
+ Superior crowd control through enemy freezing mechanics + Creates valuable defensive windows by immobilizing threats + Enables strategic repositioning during intense combat |
– Lacks direct damage enhancement capabilities – Provides no statistical improvements to your character – Primarily utility-focused rather than damage-oriented |
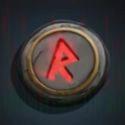 Drain Edge |
+ Delivers near-invulnerability through continuous health regeneration + Amplifies physical damage output significantly + Exceptional compatibility with Shadow, Demon, and Golem races |
– Health restoration diminishes with slower weapon types – Requires consistent physical damage application for maximum benefit – Less effective against enemies with high physical resistance |
Advanced Strategy: Combine Flame Spark with high-critical weapons for boss encounters, while utilizing Chill Dust for crowd control in dungeon scenarios. This situational approach maximizes A-Tier rune effectiveness.
| Runes | Pro(s) | Con(s) |
|---|---|---|
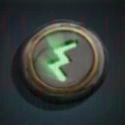 Briar Notch |
+ Effective for damage-tanking playstyles + Valuable learning tool for combat mechanics mastery + Compatible with uranium-focused build configurations |
– Highly situational activation requirements – Challenging to consistently trigger the ability – Underwhelming even for specialized low-health builds |
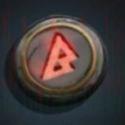 Rage Mark |
+ Strong compatibility with Minotaur race traits + Ideal for builds specializing in low-health strategies + Excellent synergy when paired with Drain Edge + Beginner-friendly introduction to advanced combat mechanics |
– Contradicts optimal dodging and parrying techniques – Maintaining high health pools generally provides superior survivability |
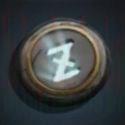 Frost Speck |
+ Freezes enemies to extend damage windows + Significantly enhances tank build effectiveness + Provides reliable crowd control in defensive scenarios |
– Inconsistent ability cooldown timing – Provides minimal benefit to pure damage builds – Outclassed by Blast Chip or Flame Spark for offensive purposes |
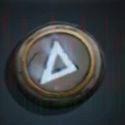 Ward Patch |
+ Reasonable defensive option for specific scenarios + Can provide unexpected survivability in desperate situations |
– Unpredictable ability activation mechanics – Excessive randomness reduces reliability – Drain Edge consistently outperforms as a defensive choice |
Common Mistake: Many players overinvest in B-Tier runes early game. Instead, use them as temporary solutions while actively farming for A and S-Tier enhancements to accelerate your power progression.
| Rune | Pro(s) | Con(s) |
|---|---|---|
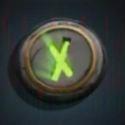 Rot Stitch |
+ Provides area-of-effect coverage and damage-over-time passive + Works adequately with Minotaur race builds + Can clear weaker enemy groups efficiently |
– Excessively conditional activation requirements – Rage Mark and Drain Edge offer superior alternatives – Lacks damage mitigation, increasing vulnerability during combat |
Expert Advice: Rot Stitch represents a classic “trap option” that appears appealing but delivers disappointing performance. The area damage appears substantial initially but fails to scale effectively into later game content. Most players should completely avoid investing time farming this rune unless pursuing specific challenge runs or completionist goals.
Mastering rune implementation requires understanding advanced synergy mechanics. The Demon race dramatically amplifies Flame Spark’s fire damage output, while Minotaur characters synergize powerfully with Rage Mark’s low-health mechanics. Always consider your character’s racial attributes when selecting rune enhancements.
Weapon Pairing Mastery: High-damage weapons like greatswords and hammers maximize Blast Chip’s area damage potential. Conversely, fast-attacking weapons such as daggers and rapiers work best with Venom Crumb’s rapid poison application.
Progression Path Optimization: Begin with readily available B-Tier runes to establish basic combat capability. Progressively farm A-Tier enhancements as you encounter the corresponding enemy types. Finally, target S-Tier runes as endgame objectives to complete your optimized build.
That concludes our comprehensive guide to The Forge runes tier list. Explore our detailed Battlefield 6 Complete Guide for broader gameplay context. Additionally, consult our BF6 Weapons Unlock Guide to maximize your equipment potential. For character optimization, reference our BF6 Class Selection Guide for race and class synergies.
Combine your selected runes with optimal pickaxes, weapon recipes, and armor recipes to achieve unstoppable performance throughout The Forge.
We welcome community discussion about these rankings. Share your experiences and alternative perspectives in the comments section below.
Yes. You can remove Runes from your equipment at the Runemaker’s establishment within The Forge.
No. Rune crafting remains unavailable within The Forge’s current systems.
Action Checklist
- Farm Miner Shard first for efficient resource gathering progression
- Acquire Blast Chip for primary combat weapon enhancement
- Match Flame Spark with Demon race characters for maximum single-target damage
- Combine Drain Edge with Shadow or Golem races for sustain builds
- Avoid investing significant time in C-Tier Rot Stitch due to poor performance
No reproduction without permission:Tsp Game Club » The Forge Runes Tier List Master The Forge with our definitive rune tier list and expert optimization strategies for maximum combat efficiency
