TL;DR
- Blitzcrank’s high health pool and straightforward gameplan make him ideal for fighting game newcomers
- Master the steam gauge system for temporary armor and enhanced combo potential during engagements
- Utilize command grab mixups to break defensive opponents and create relentless pressure situations
- Coordinate with team assists to extend combos and create unpredictable offensive sequences
- Advanced techniques include frame traps, whiff punishment, and matchup-specific strategy adjustments
Mastering Blitzcrank’s unique blend of grappling prowess and mechanical innovation provides both immediate satisfaction and long-term competitive potential in 2XKO. This steam-powered combatant delivers a perfect balance of accessibility and technical depth that appeals to players across skill levels.
Ready to harness the mechanical might of Blitzcrank in 2XKO? This industrial grappler brings crushing command throws, defensive armor mechanics, and exceptional team coordination tools to every match. Whether you’re seeking an approachable introduction to fighting games or aiming to incorporate a versatile support character into your lineup, Blitzcrank offers both fundamental simplicity and strategic complexity simultaneously.
2XKO Champion Deep Dive: Mastering Blitzcrank’s Toolkit
Blitzcrank distinguishes himself as one of the most welcoming yet technically rewarding fighters in 2XKO’s character selection. His clear-cut strategy focuses on closing distance, executing command throws, and facilitating explosive team combinations through his outstanding assist functionality.
Key advantages that define Blitzcrank’s playstyle:

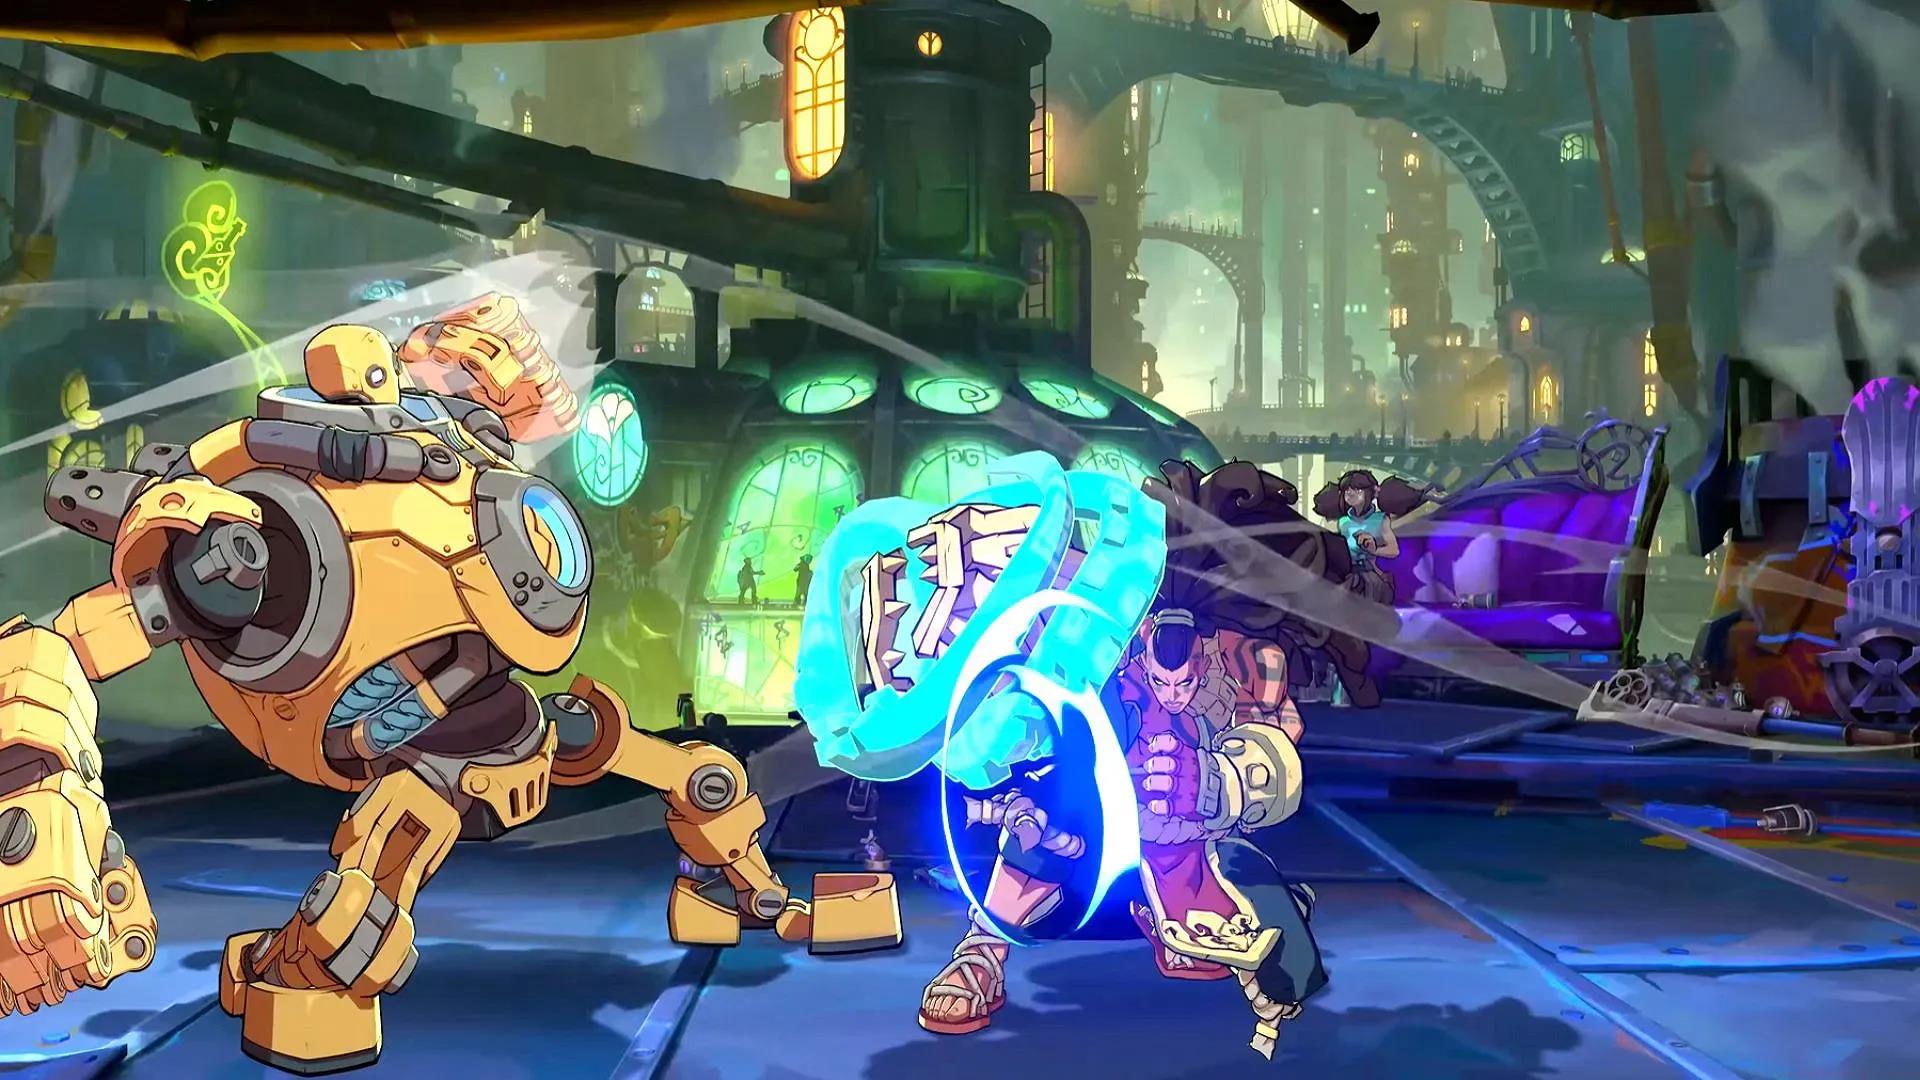
Blitzcrank’s steam gauge represents a dynamic resource system that fundamentally alters his defensive and offensive capabilities when activated. Understanding this mechanic’s intricacies separates novice players from seasoned Blitzcrank specialists.
The steam gauge accumulates through successful attacks, blocked damage, and specific special moves. When fully charged, activating the gauge provides temporary armor on certain moves, allowing Blitzcrank to power through opponent attacks while maintaining offensive pressure. This armor property makes his approach significantly more threatening, particularly against characters reliant on keep-away tactics.
Strategic steam gauge usage tips:
Common mistake: Players often waste their steam gauge on predictable approaches that experienced opponents can easily evade. Instead, use the threat of activation to force defensive reactions, then punish accordingly.

Blitzcrank’s command grabs form the cornerstone of his offensive gameplan, providing powerful tools to break through defensive opponents and score substantial damage. Mastering the timing, spacing, and setup of these throws is essential for maximizing his pressure potential.
Effective command grab utilization requires understanding their range limitations, startup frames, and recovery periods. Unlike regular throws, command grabs cannot be teched conventionally, forcing opponents to either jump, attack, or use invincible moves to avoid them. This creates a potent rock-paper-scissors dynamic that skilled Blitzcrank players exploit relentlessly.
Advanced mixup techniques:
Pro tip: Vary your grab ranges and timings to avoid becoming predictable. Occasionally using command grabs from maximum distance can catch opponents off-guard who expect closer-range attempts.

While Blitzcrank excels at singular powerful strikes, his combo game provides essential damage accumulation and positional advantages. Learning his most efficient sequences ensures you maximize every opening while managing valuable resources effectively.
Blitzcrank’s combos typically begin with confirmable normal attacks that lead into special moves, command grabs, or steam gauge-enhanced extensions. His damage output scales impressively in the corner, where wall splats and limited escape options create devastating pressure situations.
Essential combo categories:
Execution tip: Practice confirming from your fastest normal attacks (typically light punches or kicks) to capitalize on unexpected hits. Blitzcrank’s damage potential makes even small confirmations worthwhile.
Common optimization error: Beginners often attempt maximum damage combos in situations where simpler, more reliable sequences would secure the round. Match your combo selection to the current game state and resource availability.

Blitzcrank’s exceptional assist capabilities make him a valuable component in numerous team compositions, providing both defensive coverage and offensive extension opportunities. Understanding his partner potential unlocks significantly more strategic depth than solo play alone.
His assist typically functions as a reliable defensive tool that can interrupt opponent pressure or extend your point character’s combos. The timing and placement of assist calls separate basic usage from advanced tactical application, creating opportunities that would otherwise be impossible.
Synergy development strategies:
For comprehensive team-building strategies beyond Blitzcrank, consult our Class Guide which details optimal character combinations and role distributions.
Advanced technique: Practice “double assist” sequences where both your assists work in tandem to create nearly unblockable mixup situations, though this requires precise timing and resource management.

Once you’ve mastered Blitzcrank’s fundamental tools, advanced techniques separate competent players from true specialists. These optimizations require precise execution and deep matchup knowledge but provide significant competitive advantages.
Frame data mastery enables you to identify true pressure opportunities versus fake pressure that opponents can escape. Understanding which of your moves are plus on block (advantageous) versus minus (disadvantageous) determines your offensive flow and defensive responses.
High-level optimization areas:
For deeper mechanical understanding applicable across multiple characters, explore our Complete Guide to fighting game fundamentals and system mechanics.
Progression tip: Focus on mastering one advanced technique at a time rather than attempting to implement everything simultaneously. Consistent practice of specific skills yields better results than scattered training.
Action Checklist
- Practice basic command grab inputs until execution becomes muscle memory
- Learn 2-3 bread-and-butter combos from key normal attacks
- Master steam gauge activation timing during opponent pressure
- Develop assist extension combos with your preferred team composition
- Implement frame traps and tick throws into your pressure sequences
- Study matchup-specific strategies against top-tier characters
No reproduction without permission:Tsp Game Club » 2XKO Champion Guide: Blitzcrank Master Blitzcrank's steam-powered grappler mechanics, command grab setups, and team synergy strategies in 2XKO