TL;DR
- Grenades serve tactical purposes beyond damage – distraction, area denial, and enemy control
- Loadout preparation is critical: equip explosives before deployment via inventory or quick slots
- Master the ‘cooking’ mechanic by holding fire button for precise detonation timing
- Bison Driver deals maximum single-target damage while Hornet Driver excels at crowd control
- Strategic combinations of different grenade types create powerful synergistic effects
Arc Raiders revolutionizes explosive gameplay by transforming grenades from simple damage tools into sophisticated tactical instruments. Unlike conventional shooters where throwables primarily inflict harm, these devices provide critical battlefield control through distraction, area denial, and enemy suppression capabilities. With ARC machines presenting formidable obstacles between extraction points and survival, understanding when to deploy concealment, stun, or disarming explosives becomes as vital as mastering your primary weapons.
Strategic loadout preparation forms the foundation of effective explosive deployment. Before ascending to the combat zone, players must strategically position their chosen grenades within accessible slots. This preparatory phase determines your reactive capabilities when encountering hostile forces. Whether obtained through crafting systems, loot caches, or purchased from vendors, proper equipment arrangement ensures rapid response during intense engagements.
Execution mechanics involve two primary methods: standard inventory access or streamlined quick slots. For deliberate selection, access your inventory and manually equip the desired explosive. However, during high-pressure situations, assigning grenades to quick-access slots via the ‘Q’ button provides immediate deployment capability. The advanced ‘cooking’ technique—holding the fire button to control detonation timing—separates novice raiders from seasoned veterans.
Arc Raiders features a diverse arsenal of throwable devices categorized by their combat functions. Understanding each explosive’s unique properties enables strategic selection based on mission objectives and anticipated enemy compositions.
High-Impact Damage Specialists: These explosives prioritize immediate destruction. The Bison Driver stands as the pinnacle of raw power, delivering 100 damage across a substantial 10-meter radius—making it ideal for eliminating heavily armored targets or clustered enemies. However, its limited availability through specific acquisition methods requires conservative deployment.
Area Denial and Control Tools: Devices like the Blaze Grenade create persistent hazard zones, dealing 5 damage per second over 10 seconds across 10 meters. This category excels at controlling choke points and denying enemy advancement routes.
ARC-Specific Countermeasures: Specialized equipment including the Hornet Driver provides extended 10-second stun duration against mechanical threats while offering brief 0.5-second disruption against human opponents.
| Name | Description | Stats | Crafting Recipe | Apollo Price |
|---|---|---|---|---|
| Bison Driver | Can be thrown to create a violent singularity | Damage: 100 Stun: N/A Radius: 10 m Duration: N/A |
N/A | N/A |
| Blaze Grenade | A grenade that detonates on impact, covering an area in fire that deals damage over time | Damage: 5/s Stun: N/A Radius: 10 m Duration: 10 s |
Explosive Bench III 2x Oil 7x Metal Parts |
N/A |
| Fireball Burner | Can be thrown to create small fires | Damage: 5/s Stun: N/A Radius: 2 m Duration: 10 s |
N/A | N/A |
| Gas Grenade | Lingering toxic cloud on impact, drains stamina of Raiders | Damage: 25/s stamina drain Stun: N/A Radius: 7.5 m Duration: 20 s |
Explosive Bench I 4x Chemicals 2x Rubber Parts |
810 |
| Heavy Fuze Grenade | Detonates after a delay, explosive damage in radius | Damage: 80 Stun: N/A Radius: 7.5 m Duration: 3 s fuse |
? | 1920 |
| Hornet Driver | Can be recycled into ARC Alloy | Damage: N/A Stun: 0.5 s for Raider / 10 s for ARC Radius: 6 m Duration: N/A |
N/A | N/A |
| Jolt Mine | Proximity mine, pops up and stuns anything | Damage: N/A Stun: 4 s for Raider / 10 s for ARC Radius: 5 m Duration: N/A |
? | 1920 |
| Light Impact Grenade | Impact detonation, small radius | Damage: 30 Stun: N/A Radius: 2.5 m Duration: N/A |
Basic Bench / Explosive Bench I 1x Plastic 3x Chemicals |
810 |
| Lure Grenade | Noise device, distracts ARC machines | Damage: N/A Stun: N/A Radius: 50 m Duration: 15 s |
Utility Bench II 2x Speaker Comp 2x Plastic Parts |
N/A |
| Showstopper | Delayed explosion, stuns enemies | Damage: N/A Stun: 2 s for Raider / 10 s for ARC Radius: 6 m Duration: N/A |
? | N/A |
| Shrapnel Grenade | Bursts into razor fragments | Damage: 60 Stun: N/A Radius: 6 m Duration: N/A |
N/A | N/A |
| Smoke Grenade | Lingering smoke to obscure vision | Damage: N/A Stun: N/A Radius: 7.5 m Duration: 20 s |
Utility Bench I 7x Chemicals 1x Canister |
1920 |
| Snap Blast Grenade | Sticks to surfaces, explosive delay | Damage: 70 Stun: N/A Radius: 7.5 m Duration: N/A |
Explosive Bench II 7x Chemicals 1x Magnet |
1920 |
| Snitch Scanner | Can be thrown to call in ARC | Damage: N/A Stun: N/A Radius: N/A Duration: N/A |
N/A | N/A |
| Synthesized Fuel | Used for crafting, must be shot to explode | Damage: 80 Stun: N/A Radius: 7.5 m Duration: N/A |
N/A | N/A |
| Tagging Grenade | Delayed detonation, tags Raiders and ARC | Damage: N/A Stun: N/A Radius: 6 m Duration: 30 s |
Utility Bench III 4x Plastic 2x Sensors |
N/A |
| Trigger’Nade | Remote-detonated impact explosive | Damage: 90 Stun: N/A Radius: 7.5 m Duration: N/A |
? | N/A |
| Wasp Driver | Recycled into ARC Alloys — must be shot | Damage: 80 Stun: N/A Radius: 5 m Duration: N/A |
N/A | N/A |
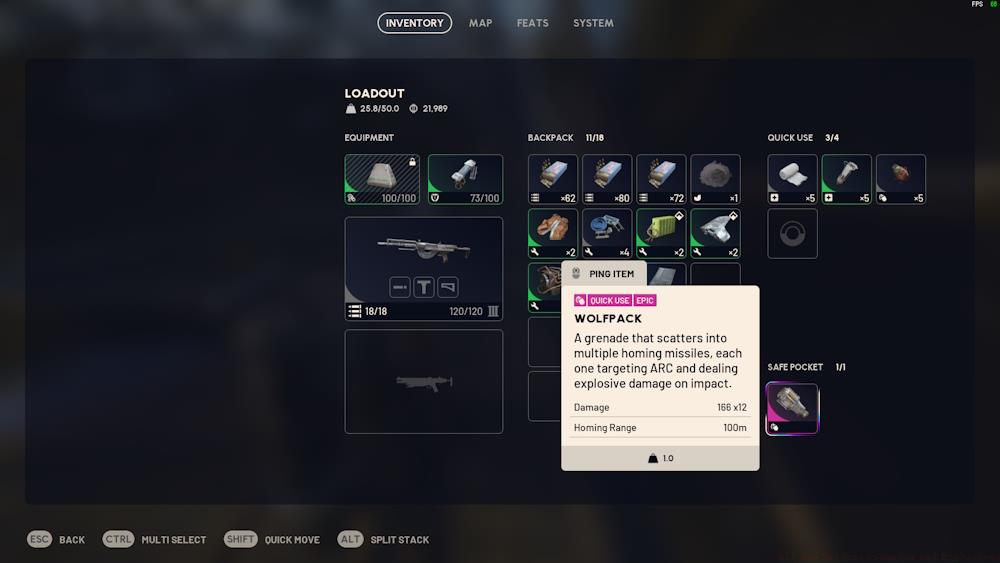
| Wolfpack | Splits into multiple homing missiles | Damage: 166×12 Stun: N/A Radius: 100 m Duration: N/A |
? | N/A |
Bison Driver delivers 100 area damage, establishing it as the most powerful explosive device available to raiders.
While Bison Driver excels at eliminating single targets, Hornet Driver provides superior crowd control capabilities with extended stun duration against multiple ARC units.
Mastering grenade deployment requires understanding timing, positioning, and situational awareness. Advanced raiders employ calculated throwing arcs that account for enemy movement patterns and environmental geometry. The most common error involves premature detonation—throwing too early allows enemies to evade, while delayed throws risk close-quarters casualties.
Optimal Deployment Sequences: Begin engagements with distraction devices like Lure Grenades to manipulate enemy positioning. Follow with area denial explosives to control engagement zones, then deploy high-damage devices against concentrated targets. This layered approach maximizes explosive effectiveness while conserving valuable resources.
Team Coordination Tactics: In squad scenarios, assign specialized explosive roles. Designate one member for crowd control using stun devices, another for area denial, and a third for high-impact damage. Coordinate simultaneous detonations to overwhelm enemy defenses and create tactical openings.
Common Strategic Errors: Many raiders underestimate the importance of cooking timing. Failing to hold the fire button sufficiently results in enemies having time to react, while excessive cooking risks self-damage. Additionally, neglecting to pre-equip grenades in quick slots causes critical delays during reactive combat situations.
For comprehensive combat strategies beyond explosives, consult our BF6 Weapons Unlock Guide to optimize your primary armament selection. Understanding Class Guide principles enhances your understanding of role specialization and team composition dynamics.
Action Checklist
- Pre-equip grenades in quick slots before deployment using ‘Q’ key assignment
- Practice cooking mechanics by holding fire button for 1-2 seconds before release
- Experiment with grenade combinations in controlled environments
- Master throwing arc calculations accounting for enemy movement patterns
No reproduction without permission:Tsp Game Club » All Arc Raiders Grenades and Explosives Master Arc Raiders explosives with strategic deployment tips, damage analysis, and advanced combat tactics