TL;DR
- Battlefield 6 features four distinct classes: Assault, Recon, Engineer, and Support
- Each class has unique gadgets, weapon proficiencies, and signature traits for specialized roles
- Team composition balance is crucial for success in Conquest and other game modes
- Advanced players should master class synergies and communication strategies
- Proper class selection and execution significantly impacts match outcomes
The Battlefield 6 class system represents a strategic evolution of the franchise’s signature role-based gameplay mechanics. Unlike the flexible loadout systems found in competitors, this structured approach forces players to specialize in specific combat functions that contribute to team success. The four distinct classes—Assault, Recon, Engineer, and Support—each serve vital battlefield functions that, when properly coordinated, create unstoppable tactical combinations.
Understanding class synergies is essential for dominating Conquest matches and completing challenging Assignments. Each role comes equipped with specialized gadgets, unique weapon proficiencies, and signature traits that dramatically impact gameplay dynamics. This system encourages teamwork over individual performance, rewarding squads that maintain balanced compositions.
New players often underestimate how class selection influences match outcomes. The strategic depth becomes apparent when facing organized opposition in NATO versus Pax Armata scenarios, where proper role distribution can determine victory or defeat. For comprehensive strategies, consult our Battlefield 6 Complete Guide.
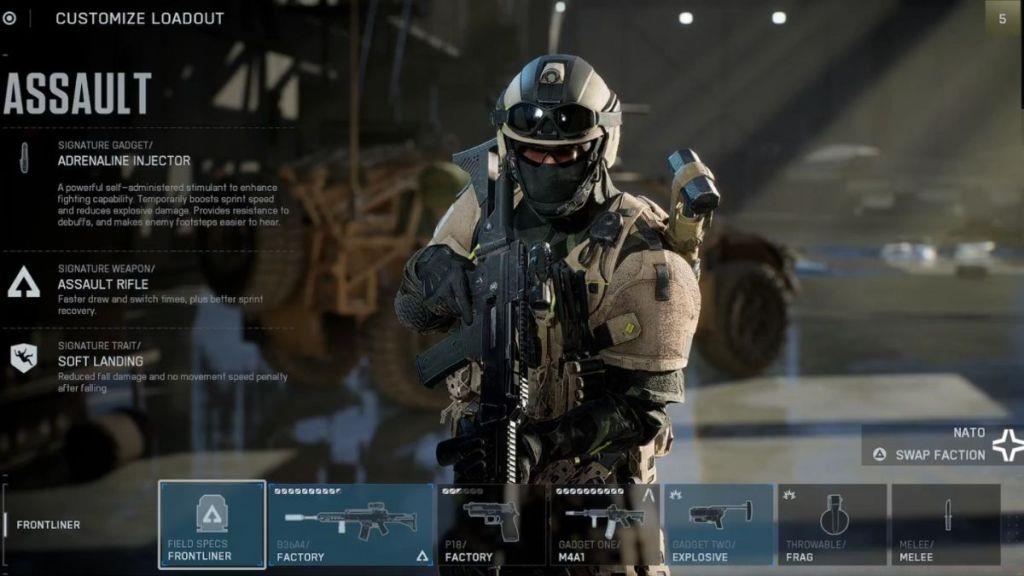
The Assault class serves as the spearhead of any offensive operation, specializing in breaking through enemy defenses and creating opportunities for teammates. These frontline specialists excel in close to medium-range engagements where their aggressive playstyle shines.
Adrenaline Injector (Signature Gadget): This crucial survival tool provides temporary blast and suppression resistance, remaining active until you sustain damage. Advanced players activate it just before pushing objectives or engaging in explosive-heavy environments.
Assault Rifles (Weapon Proficiency): Benefit from significantly faster weapon draw and switch times, allowing rapid target acquisition during dynamic combat situations.
Soft Landing (Signature Trait): Reduces fall damage by approximately 40% and eliminates movement speed penalties after descending from heights.
Pro Tip: Coordinate your pushes with Support players providing covering fire. The Adrenaline Injector’s resistance bonuses make you ideal for initiating captures on contested points. Avoid wasting this ability during low-threat moments—save it for critical assaults on fortified positions.
Common Mistake: Many Assault players become too aggressive and overextend without team support. Remember that your role involves creating opportunities, not necessarily securing all kills independently.
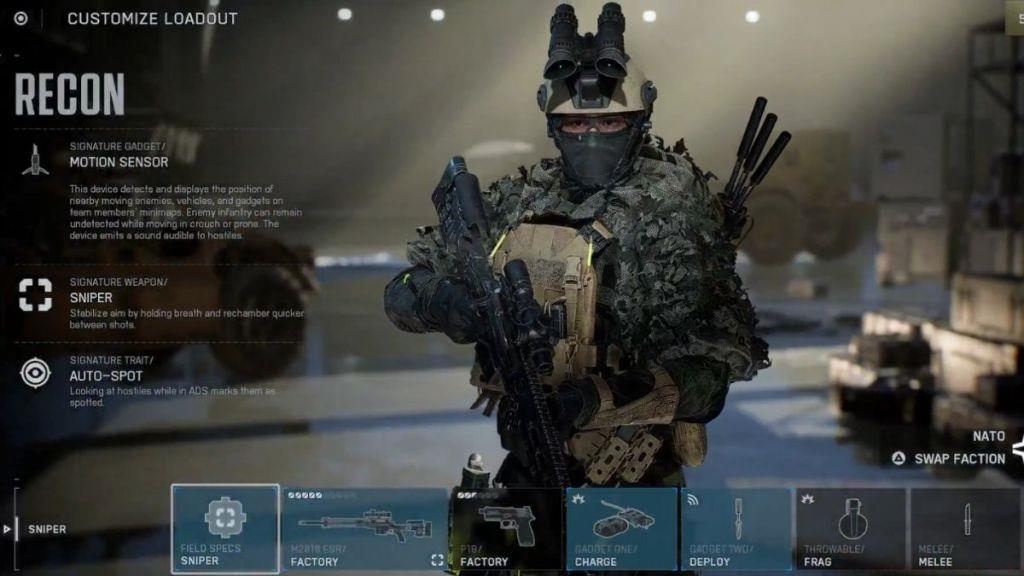
Recon specialists provide the intelligence backbone for successful operations, excelling at gathering information and eliminating high-value targets from distance. Their gameplay revolves around positioning, patience, and precise execution rather than raw aggression.
Observation Device (Signature Gadget): Advanced spotting technology that marks enemies through obstacles and provides real-time positional data to your entire team.
Sniper Rifles (Weapon Proficiency): Enhanced stability when aiming down sights and reduced scope sway, enabling more accurate long-range engagements.
Steady Breath (Signature Trait): Dramatically reduces weapon recoil and improves breath control for sustained aiming periods.
Pro Tip: Position yourself with clear sightlines to multiple objectives rather than focusing on a single area. Effective Recon players constantly rotate positions to avoid counter-sniping while maintaining surveillance coverage.
Common Mistake: Stationary snipers become predictable targets. Maintain mobility between 3-4 strategic positions each match to remain effective without becoming vulnerable.
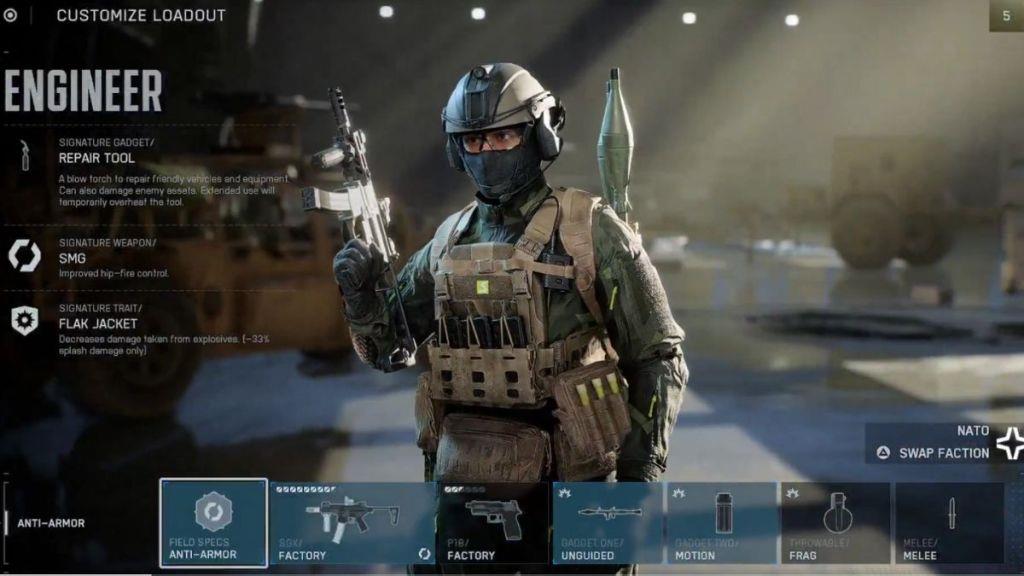
Engineers dominate vehicle warfare and defensive operations, specializing in both destroying enemy armor and maintaining friendly mechanical assets. Their versatility makes them indispensable in game modes with heavy vehicle presence.
Repair Tool (Signature Gadget): Versatile equipment that repairs friendly vehicles and damages enemy ones. The tool also damages infantry at close range.
SMGs and Shotguns (Weapon Proficiency): Improved hip-fire accuracy and faster reload times with these close-quarters weapon types.
Quick Fix (Signature Trait): Repair actions complete 25% faster, and you receive reduced explosive damage from vehicle-related explosions.
Pro Tip: Prioritize repairing critical vehicles during intense firefights rather than waiting for safe moments. A functioning tank during a push often determines objective capture success.
Common Mistake: Engineers often focus exclusively on anti-vehicle duties. Remember that your repair capabilities provide equal value—sometimes more—than your destruction potential.
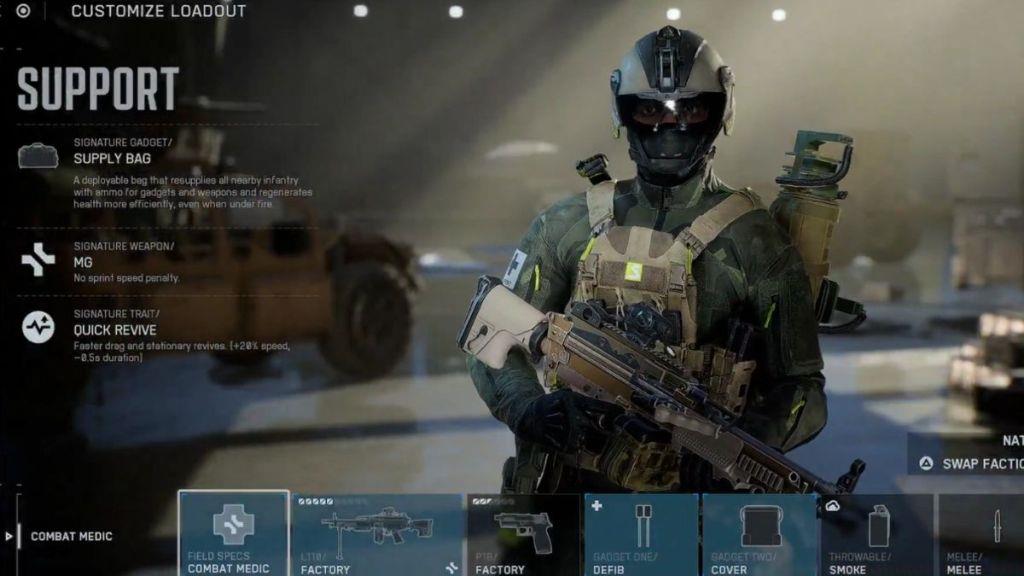
Support players sustain team operations through ammunition provision, suppressive fire, and defensive fortifications. Their presence enables sustained offensive pushes and resilient defensive stands.
Ammo Crate (Signature Gadget): Deploys a resupply station that replenishes ammunition and gadgets for nearby teammates.
LMGs (Weapon Proficiency): Reduced overheating and improved bipod deployment speed when using light machine guns for sustained suppression.
Fortified (Signature Trait): Take 15% less damage from explosions and build defensive fortifications 30% faster.
Pro Tip: Position your ammo crates behind cover but within easy access for teammates holding defensive positions. The strategic placement often matters more than the crate itself.
Common Mistake: Support players frequently adopt stationary positions that limit their effectiveness. While suppressive fire is valuable, repositioning to support different squad elements creates more dynamic impact.
For weapon-specific strategies that complement your class choice, explore our BF6 Weapons Unlock Guide for detailed loadout optimization.
Mastering individual classes represents only half the battle—understanding how they interact creates truly dominant squads. The most successful teams maintain balanced compositions that cover all essential battlefield functions.
Ideal Squad Composition: For most Conquest scenarios, aim for 2 Assault, 1 Recon, 1 Engineer, and 1 Support player. This distribution provides offensive power, intelligence, vehicle capability, and sustainment.
Game Mode Specialization: Adjust your class distribution based on objective types. Rush modes benefit from additional Assault and Engineer presence, while larger Conquest matches require more Recon and Support specialists.
Communication Protocols: Establish clear role assignments before matches begin. Designate primary medics, ammunition providers, vehicle specialists, and intelligence gatherers to maximize efficiency.
Advanced Synergy: Coordinate Assault pushes with Support suppression and Recon spotting. Engineers should prioritize vehicles threatening your advancing infantry. This coordinated approach overwhelms disorganized opponents.
For detailed class selection strategies tailored to specific playstyles, our BF6 Class Selection Guide provides additional strategic depth and counter-picking advice.
Action Checklist
- Master all four class fundamentals in practice matches
- Practice class-specific gadgets in controlled environments
- Coordinate with squad members to test class synergies
- Experiment with different team compositions across game modes
- Develop communication protocols for class coordination
No reproduction without permission:Tsp Game Club » All Battlefield 6 Classes Explained: Gadgets, Traits, and More Master Battlefield 6's four specialized classes with expert strategies, team tactics, and optimization tips