Complete Battlefield 6 map guide with strategic tips and tactical approaches for every battlefield
Introduction to Battlefield 6’s Launch Map Pool
The Battlefield 6 open beta provided a limited sampling of available content, but the complete game delivers a robust nine-map lineup at launch. These officially confirmed battlefields represent Electronic Arts’ commitment to diverse combat experiences across multiple continents and environments. Understanding each map’s layout and strategic opportunities is essential for maximizing your performance and enjoyment.
Seasoned Battlefield veterans will appreciate the thoughtful map design that caters to various playstyles, while newcomers should prioritize learning terrain advantages and tactical positioning. The current rotation balances nostalgia with innovation, featuring both reimagined classics and entirely new combat zones designed specifically for Battlefield 6’s enhanced destruction mechanics and movement systems.
Urban Combat Maps Analysis
Urban warfare enthusiasts will find three distinct city environments offering intense close-quarters combat with strategic depth beyond simple run-and-gun gameplay.
Siege of Cairo transforms Egypt’s capital into a multi-layered combat zone where tactical positioning determines survival. The narrow alleyways create natural choke points ideal for ambushes, while the crumbling structures provide dynamic cover that can be destroyed to create new sightlines. Pro tip: Use demolition charges strategically to open new routes or collapse buildings on enemy positions. Avoid clustering in obvious strongpoints as experienced tank drivers will anticipate these positions.
Iberian Offensive leverages Gibraltar’s verticality for complex multi-level engagements. The map’s destructible infrastructure means no position remains safe indefinitely, forcing constant repositioning. Rooftop snipers must remain mobile as surfaces can collapse beneath them, while assault classes should master the underground tunnel networks for flanking maneuvers. Common mistake: Overcommitting to building defense without escape routes when structures begin collapsing.
Saints Quarter emphasizes aggressive close-quarters combat around its central fountain area. The tight corridors and numerous interior spaces favor shotguns and SMGs, while the abundant destructible walls enable creative entry points. Advanced tactic: Use rocket launchers to create new pathways through buildings rather than just targeting enemies directly.
Large-Scale Battlefield Maps
Vehicle specialists and long-range engagement enthusiasts will thrive on Battlefield 6’s expansive maps designed specifically for combined arms warfare and strategic positioning.
Liberation Peak offers Tajikistan’s mountainous terrain as the perfect playground for armored divisions and air support. The rocky outcrops provide natural cover for tank maneuvers while creating deadly ambush opportunities for anti-vehicle specialists. Essential strategy: Coordinate with reconnaissance teammates to mark enemy vehicle movements and control the high ground overlooking key objectives. Poor vehicle positioning here often leads to quick destruction from elevated anti-tank positions.
Mirak Valley stands as Battlefield 6’s largest combat zone, supporting every vehicle type in intense combined arms warfare. The massive open areas demand careful movement and squad coordination to avoid becoming easy targets for long-range engagements. Pro advice: Utilize transport vehicles for rapid position changes rather than attempting long foot marches across open ground. Helicopter pilots should master terrain-hugging flight patterns to avoid anti-air installations.
Specialized Combat Environments
Battlefield 6’s map variety extends beyond traditional urban and vehicle combat to include specialized environments catering to specific gameplay preferences and nostalgic callbacks.
Empire State provides pure infantry combat in Brooklyn’s dense urban landscape, eliminating vehicle dominance to emphasize tactical shooting and positioning. The close-range engagements favor aggressive playstyles but reward strategic use of cover and verticality. Optimal loadout: Combine smoke grenades with high-rate-of-fire weapons to push contested areas effectively. Avoid the common mistake of camping in obvious windows as experienced players will pre-aim these locations.
New Sobek City blends open desert combat with tight construction site interiors, creating a hybrid environment that demands adaptable tactics. Transitioning between long-range desert engagements and close-quarters building clearance requires weapon versatility and situational awareness. Strategic approach: Carry a primary weapon for medium-range engagements with a secondary sidearm optimized for close-quarters emergencies.
Operation Firestorm returns from Battlefield 3 with enhanced destruction and visual effects, maintaining its signature chaotic vehicle battles amidst burning oil fields. Veterans should note the redesigned flanking routes and additional cover positions that refresh the classic layout. The persistent flames create dynamic hazard zones that can trap unwary players, making environmental awareness crucial.
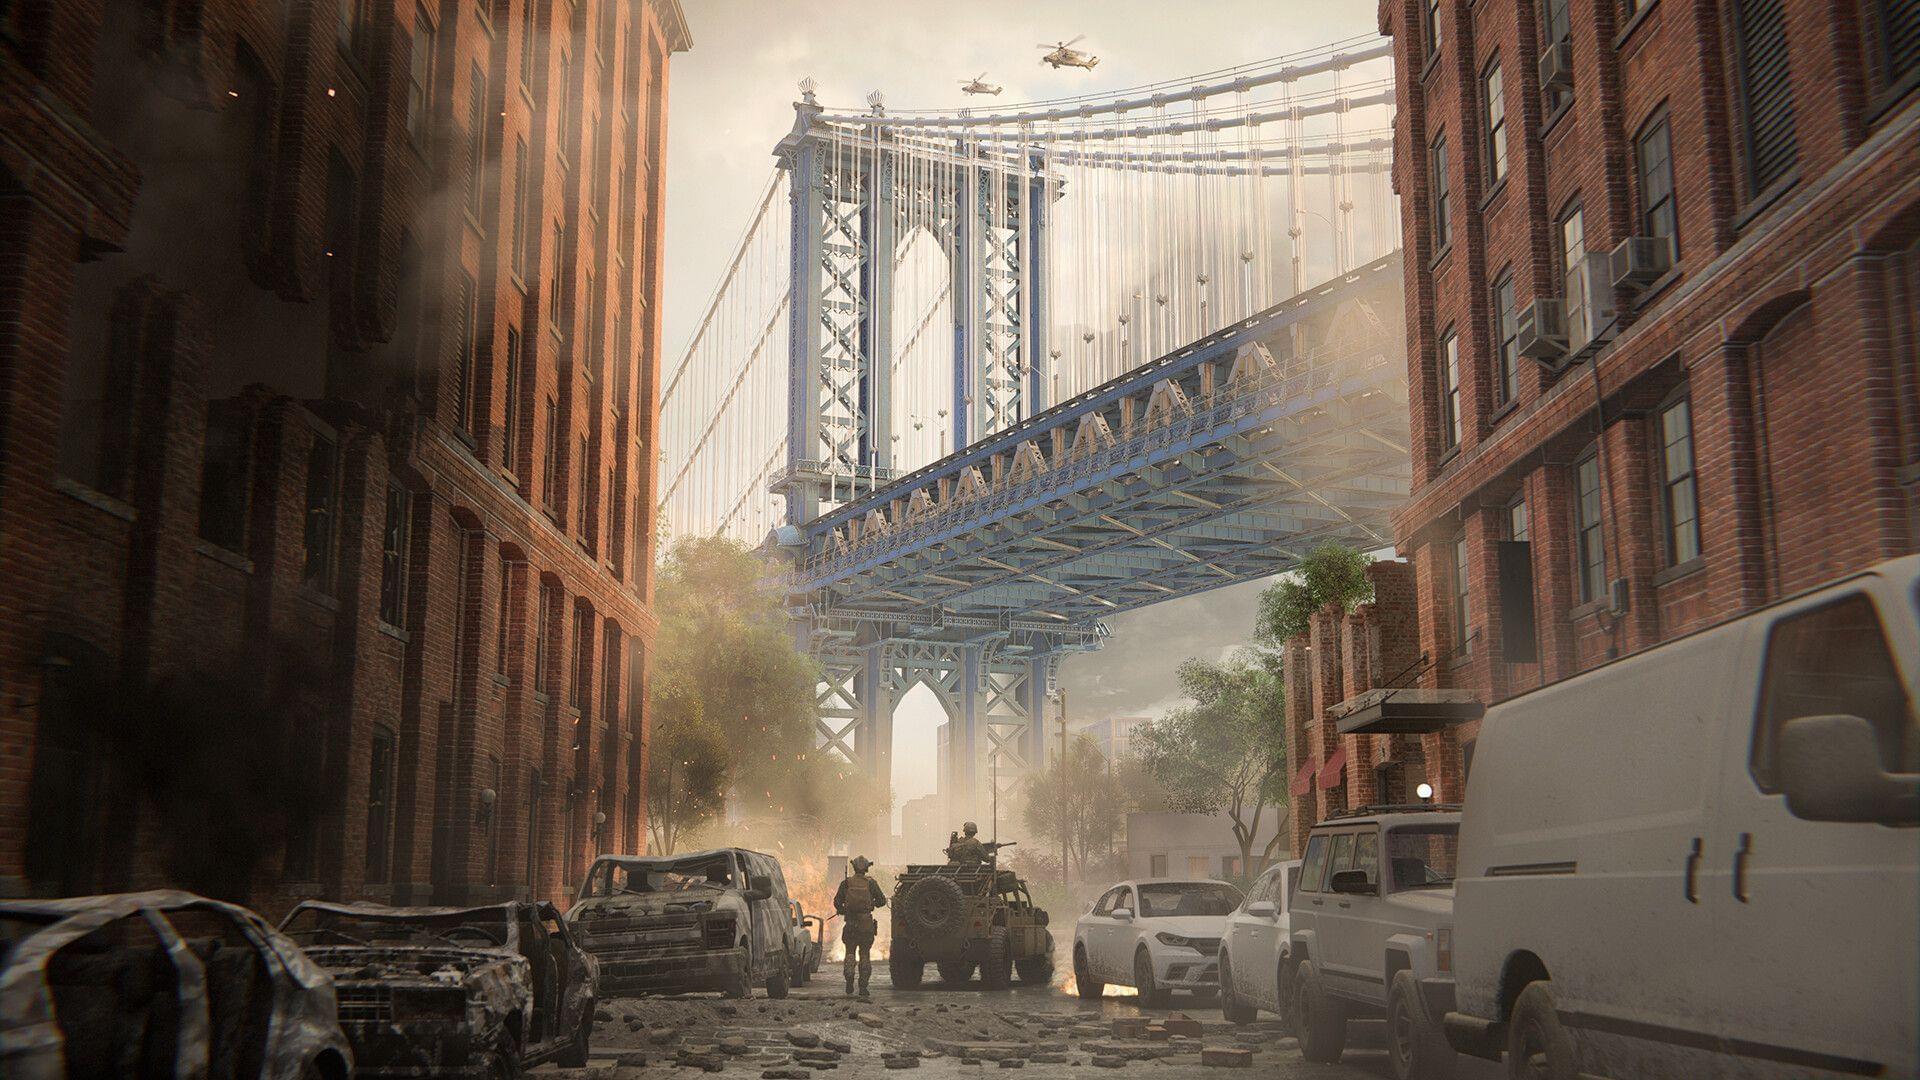
Manhattan Bridge creates unique linear combat on New York’s iconic structure, blending close-quarters infantry fighting with aerial support. The constrained bridge layout makes flanking difficult but not impossible through creative use of support vehicles and air drops. Advanced tactic: Use engineer class to deploy mobile cover and create temporary strongpoints along the bridge’s length.
Advanced Map Strategies and Pro Tips
Mastering Battlefield 6’s maps requires more than basic knowledge—it demands strategic adaptation to each environment’s unique characteristics and meta-game developments.
Class Selection Strategy: Your chosen specialization should complement both the map type and your squad composition. Urban maps heavily favor Assault and Medic classes for close-quarters survival, while large vehicle maps demand Engineer and Support roles for sustained combat. Recon specialists should prioritize maps with elevation advantages and long sightlines like Liberation Peak.
Common Rookie Mistakes: New players frequently underestimate destructible environments, treating buildings as permanent cover. They also overextend without squad support on large maps and ignore audio cues indicating vehicle approach. Another critical error involves selecting inappropriate weapons for map scale—attempting sniper rifles in tight urban corridors or shotguns on open vehicle maps.
Optimization Techniques: Advanced players should master map-specific movement patterns, learning safe traversal routes and ambush hotspots. Environmental interaction goes beyond destruction—learn which objects provide indestructible cover and which can be used for tactical advantages. Communication with squad members about enemy positions and resource needs becomes increasingly important as player skill levels rise.
Electronic Arts has confirmed that seasonal content updates will introduce additional maps to the rotation, making foundational knowledge of the launch maps essential for adapting to future battlefield expansions. Current map mastery provides the strategic foundation for long-term competitive success as the game evolves.
No reproduction without permission:Tsp Game Club » All maps in Battlefield 6 Complete Battlefield 6 map guide with strategic tips and tactical approaches for every battlefield