TL;DR
- Support class combines LMG firepower with medical capabilities without movement penalties
- L110 LMG with specific attachments dominates mid-range engagements with sustained fire
- Strategic smoke grenade deployment enables safe revives and objective captures
- Advanced positioning turns any cover into devastating firing positions using Steady Aim
- Team coordination transforms Support from solo player to force multiplier
Command the battlefield in Battlefield 6 as Support with our comprehensive loadout guide, weapon configurations, and advanced tactical approaches for peak team performance.
The Support specialization in BF6 elevates you to become the essential foundation of your squad, operating powerful light machine guns while preserving ally survival through critical medical interventions and revival operations. Whether you’re establishing suppression zones or executing emergency rescues for downed comrades, perfecting this adaptable role can decisively influence combat outcomes.
What distinguishes Support isn’t merely raw destructive capability – it’s the exceptional fusion of heavy armaments lacking mobility restrictions and preservation skills that establish your critical value across all gameplay modes. You’ll dominate control points, deliver protective barrages, and guarantee your unit sustains offensive pressure through calculated revival operations.
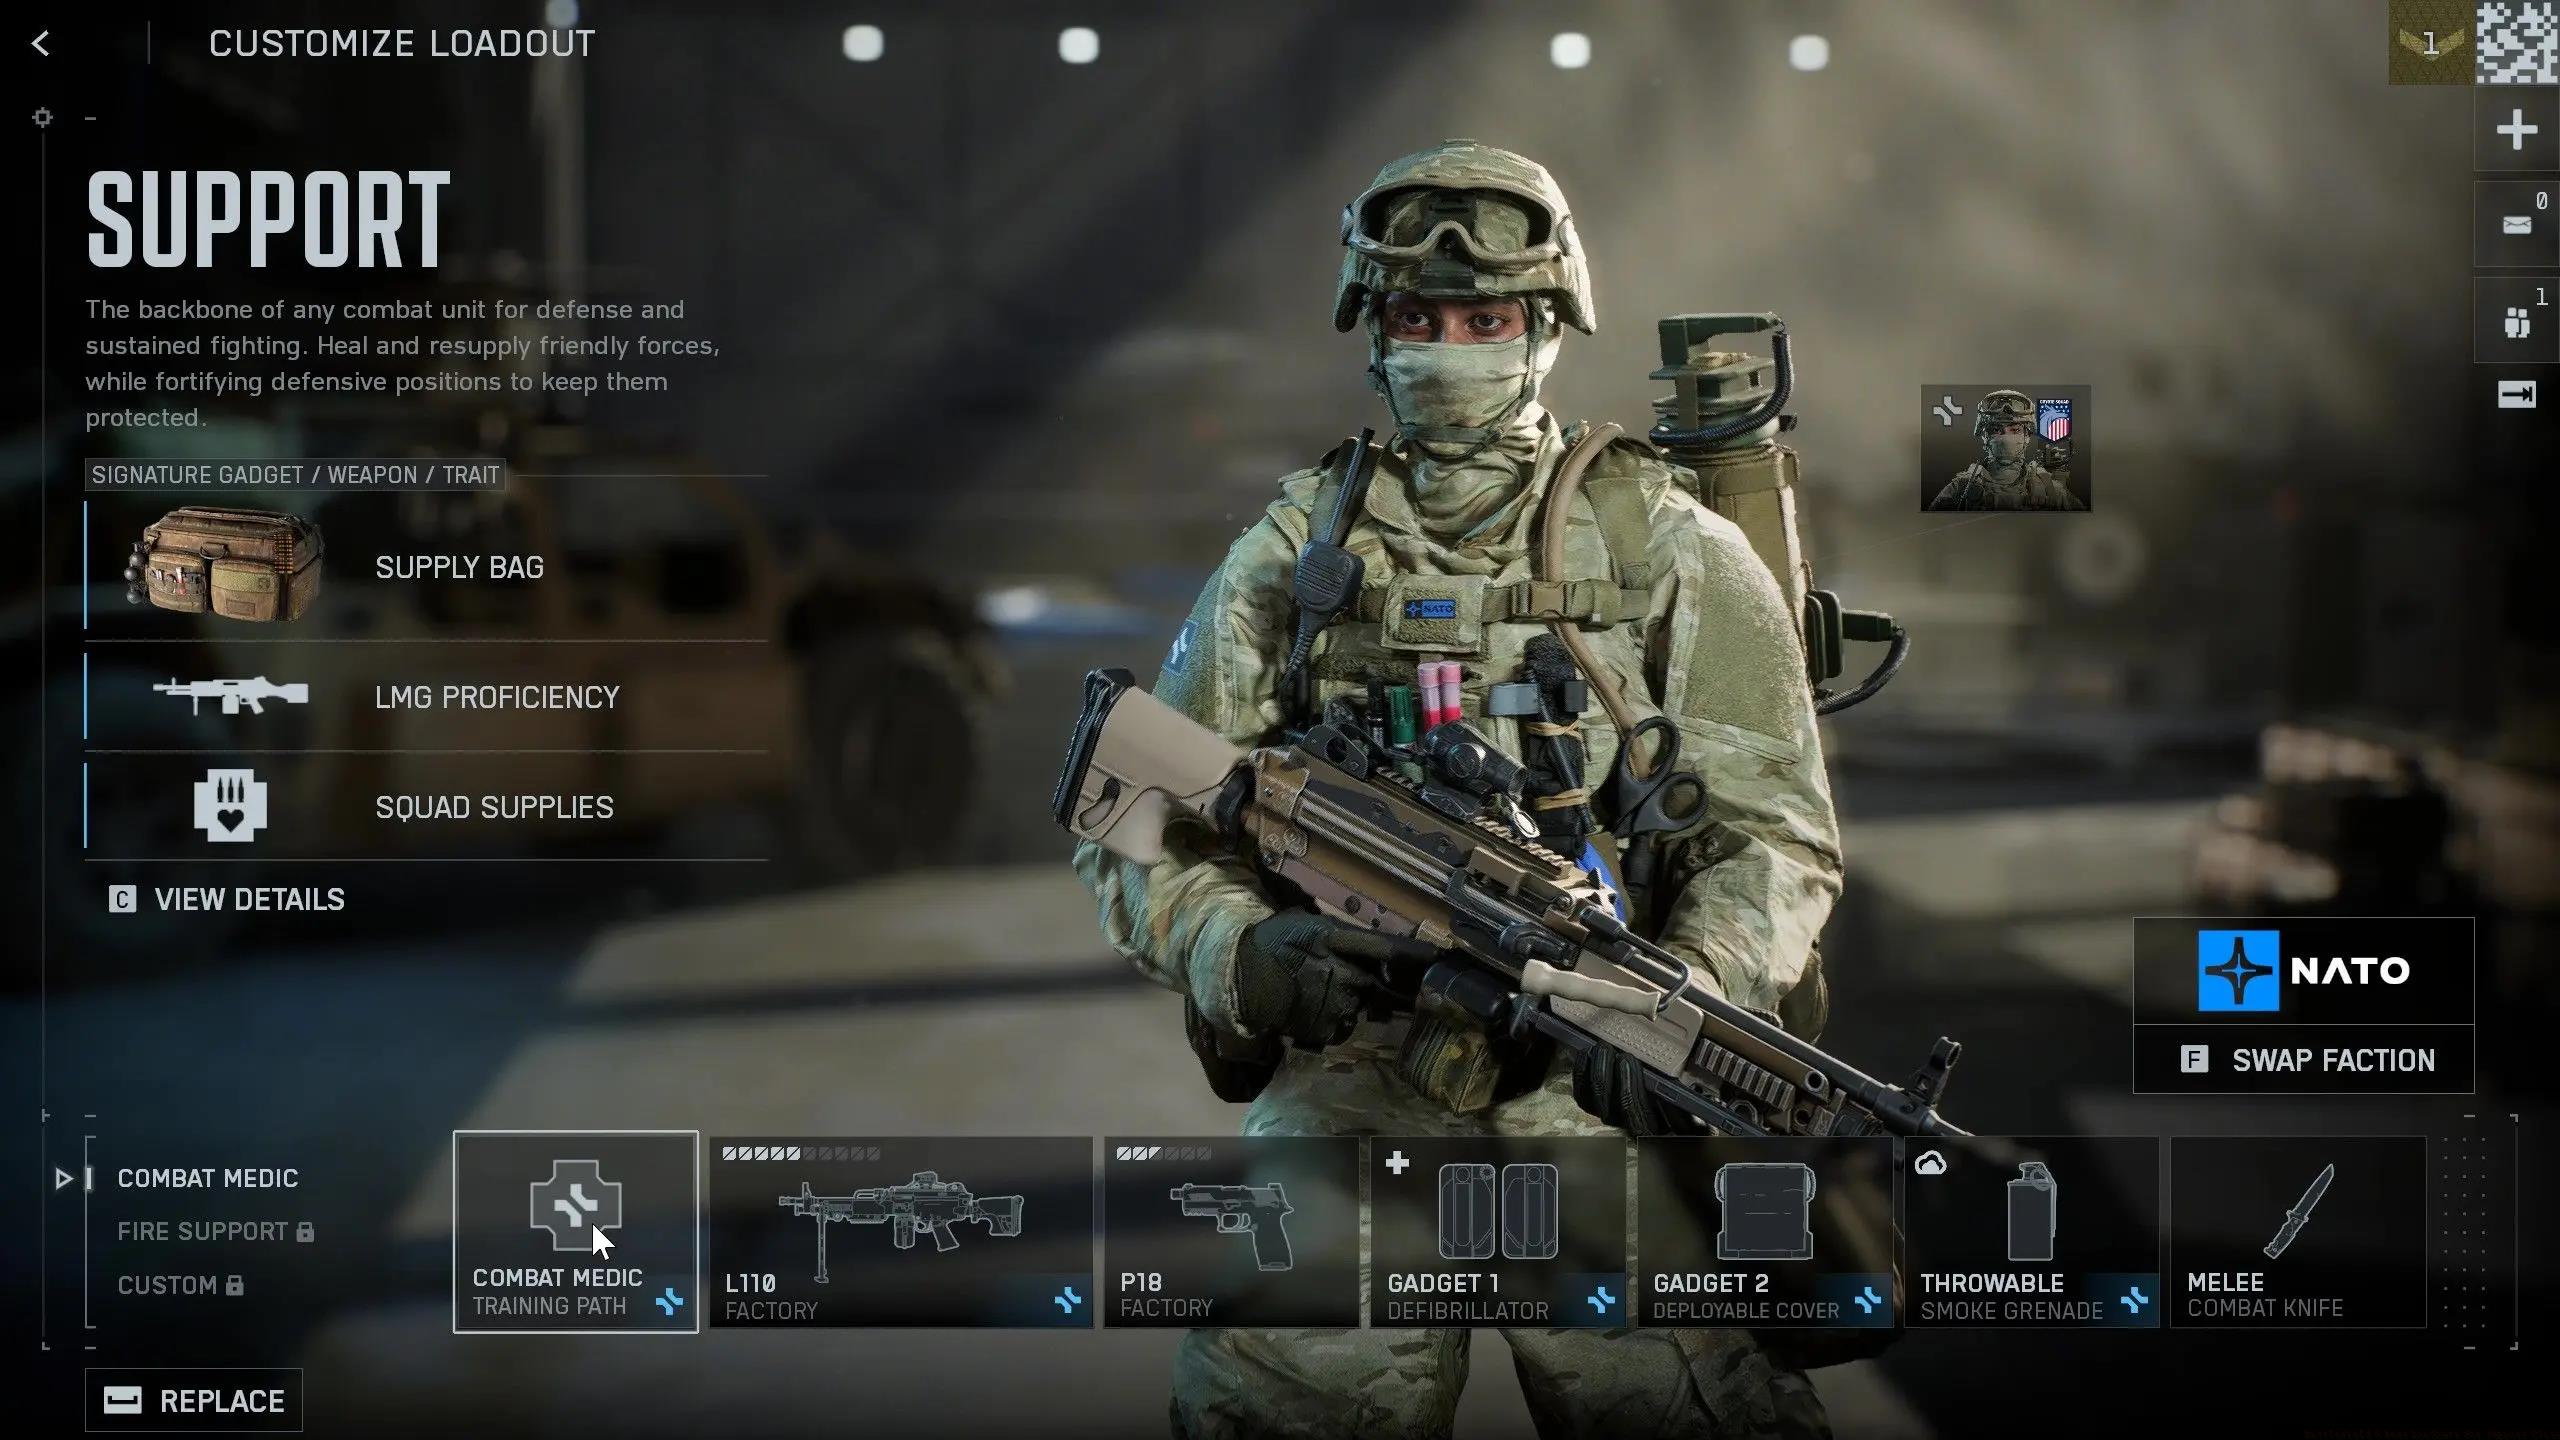
Battlefield 6 Best Loadouts for Support Class
The Support role provides three definitive benefits that establish it as a dominant selection. Initially, you’re the exclusive class immune to LMG mobility restrictions, enabling full-speed sprinting while bearing the game’s most substantial firearms. This movement benefit proves transformative when relocating or advancing on objectives.
Secondly, your accelerated revival capability triggers more rapidly than any alternative class, establishing you as the premier combat medic. Paired with your inherent durability, you can charge into hazardous areas to rescue squad members that other roles cannot approach safely.
Ultimately, Support obtains exclusive equipment like the Supply Container and Portable Shield, permitting tactical superiority creation and extended combat sustainability that would exhaust alternative roles.
Battlefield 6 Best Loadouts for Support Class
Comprehending your inherent capabilities proves vital for optimal performance. Steady Aim significantly enhances weapon precision during mounted deployment, converting any protective position into an overwhelming firing station. This advantage integrates ideally with LMGs, which thrive on continuous discharge from stabilized locations.
Explosives Resistant delivers 25% explosive harm mitigation, maintaining your survival in objective combat chaos where grenades and projectiles constantly circulate. This durability enhancement proves particularly crucial when reviving allies during active enemy engagement.

Advanced Perk Synergy: The combination of Steady Aim and Explosives Resistant creates a powerful defensive foundation that few other classes can match. When mounted behind Deployable Cover, you become nearly immovable from key positions, able to sustain fire while surviving explosive spam common in Conquest mode objectives.
Hidden Movement Benefit: While not explicitly stated, Support players experience less accuracy penalty when firing while moving compared to other LMG users. This subtle advantage allows for more aggressive positioning shifts while maintaining reasonable suppression capability.
The L110 light machine gun represents the pinnacle of Support firepower, offering exceptional magazine capacity combined with manageable recoil patterns when properly configured. This weapon becomes truly dominant when paired with specific attachments that enhance its natural strengths.
Optimal Attachment Configuration: Begin with the Extended Barrel for increased bullet velocity and damage range, crucial for mid-range engagements. Combine this with the Stubby Grip for superior recoil stabilization during sustained fire. The 3.5x Scope provides target acquisition at optimal LMG ranges while maintaining peripheral awareness.
Advanced Recoil Management: The L110’s horizontal recoil pattern tends to pull slightly right during extended bursts. Compensate by gently pulling left during sustained fire. For maximum accuracy, fire in 8-10 round bursts when engaging beyond 50 meters.

Ammunition Strategy: The standard 100-round box magazine provides ample suppression capability, but advanced players should monitor their ammunition expenditure during prolonged engagements. Time your reloads during natural combat pauses rather than waiting for complete depletion.
Range Optimization: The L110 performs exceptionally between 30-80 meters, where its damage profile remains strong while recoil remains controllable. Avoid close-quarters engagements where SMGs dominate and long-range fights where designated marksman rifles excel.
The P18 sidearm serves as your critical emergency weapon when the L110 requires reloading during close-quarters confrontations. This high-capacity pistol provides reliable stopping power with minimal recoil, making it ideal for defensive situations.
Optimal Sidearm Setup: Equip the Suppressor for stealthy revives and flanking maneuvers, combined with the Quick Draw Holster for faster switching when your primary weapon empties unexpectedly. The Mini Reflex Sight provides target acquisition speed without obscuring your peripheral vision.
Emergency Engagement Protocol: When forced to use your secondary, prioritize positioning over aggression. Use the P18 to create space for an L110 reload rather than attempting to win extended firefights. Two to three well-placed shots typically provide sufficient time to retreat or switch back to your primary.
Advanced Technique: Master the quick-switch cancel by immediately swapping to your pistol after initiating an L110 reload, then canceling the pistol draw animation by switching back. This advanced maneuver can save precious seconds in critical situations.

Your gadget selection fundamentally determines your strategic impact on the battlefield. The Supply Bag and Deployable Cover combination provides both sustainability and positional advantage that can control entire sectors of the map.
Supply Bag Tactics: Deploy ammunition caches in covered positions near objective areas rather than directly on capture points. This encourages teammates to utilize cover while resupplying and reduces your exposure to enemy fire. Remember that the Supply Bag also replenishes gadget ammunition, making it crucial for engineers and assault players.
Deployable Cover Placement: Position shields at 45-degree angles to common engagement directions rather than facing them directly toward enemy approaches. This provides better protection against grenades and allows for safer peeking. In urban environments, use covers to block doorways and funnel enemies into your firing lanes.
Counter-Gadget Options: Against vehicle-heavy teams, consider swapping Deployable Cover for the AT Mine or C5 Explosive. Place mines on uncommon approach routes rather than main roads, as experienced drivers typically avoid obvious placement zones.
Advanced Strategy: Coordinate with squad mates to create overlapping fields of fire using multiple Deployable Covers. This “strongpoint” strategy can make your squad nearly immovable from key objectives, especially in Pax Armata game modes.
Your medical capabilities transform you from a simple gunner into a combat multiplier. Mastering revival techniques and medical supply management separates competent Support players from truly game-changing ones.
Revive Optimization: Your accelerated revive animation completes approximately 40% faster than standard revives. Use this advantage to save teammates in situations where other classes would fail. Always prioritize revives based on strategic position rather than proximity – a well-placed sniper or anti-tank specialist is often more valuable than multiple infantry.
Medical Supply Management: Your medical crate has a cooldown period after deployment. Time your deployments based on anticipated need rather than current injuries. During offensive pushes, pre-place medical supplies along the advance route to sustain the assault.
Risk Assessment Protocol: Before attempting any revive, quickly assess the threat environment. Check for visible enemies, listen for specific weapon sounds, and note any active grenade indicators. If multiple teammates are down in the same area, it often indicates an ongoing threat that must be neutralized first.
Advanced Technique: Use the “revive slide” maneuver by initiating a slide just before reaching a downed teammate. This maintains your momentum while activating the revive, reducing your exposure to enemy fire.
Smoke grenades represent perhaps the most underutilized tool in the Support arsenal. Proper deployment can create opportunities for revives, objective captures, and strategic repositioning that would otherwise be impossible.
Screen Placement Strategy: Deploy smoke between enemy positions and your advance route rather than directly on your location. This obstructs enemy sightlines while maintaining your visibility of the objective. For revives, place smoke slightly toward the enemy position to create a larger safe zone.
Revive Corridor Creation: When multiple teammates are down in an exposed area, deploy smoke in a staggered pattern rather than a single cloud. This creates a safer approach path while making it more difficult for enemies to predict your movement.
Objective Concealment: During capture attempts, throw smoke grenades at the edges of the objective area rather than the center. This conceals your approach while allowing you to maintain visibility within the capture zone itself.
Advanced Technique: Combine smoke grenades with your Deployable Cover to create “smoke shields” that provide both visual obstruction and physical protection. This is particularly effective against sniper-heavy teams in open terrain.
Strategic positioning separates exceptional Support players from average ones. Your ability to control engagement distances and angles fundamentally determines your effectiveness and survival.
Chokepoint Domination: Identify natural funnel points where enemy movement becomes predictable. Position yourself with covered escape routes and multiple angles of withdrawal. Avoid over-committing to positions, no matter how advantageous they appear initially.
Flank Protection Protocol: While your team focuses on primary engagement directions, position yourself to cover common flanking routes. Your sustained fire capability makes you ideal for discouraging or eliminating flanking attempts.
Fallback Positions: Always identify secondary and tertiary positions before engaging. When your primary position becomes compromised, having pre-planned fallback points prevents panic retreats and maintains defensive continuity.
Elevation Advantage: When possible, position yourself on elevated terrain that provides overview of the objective area. The L110’s effectiveness at medium range makes height advantages particularly devastating.
Advanced Strategy: Create “kill zones” by positioning yourself where enemies must expose themselves to engage objectives. Use your Suppressive Fire capability to force enemies into unfavorable engagements or delay their advances.
Your maximum potential as Support only emerges through effective team coordination. Communication transforms your individual capabilities into squad-wide advantages.
Squad Synergy: Coordinate with Assault players to create combined arms teams – your suppression enables their aggressive advances. Pair with Recon specialists to protect their positions while they provide intelligence. Our Class Guide details optimal squad compositions for different game modes.
Callout Protocols: Develop specific callouts for ammunition needs, medical requirements, and suppression requests. Clear communication prevents resource waste and ensures timely support. Use directional callouts rather than vague position descriptions.
Objective Prioritization: During Assignments and objective-based modes, coordinate with your squad to focus on strategically valuable targets rather than simply following the crowd. Your sustained fire capability makes you ideal for defending captured points while teammates attack new objectives.
Resource Management: Track your squad’s specialist composition and adjust your support accordingly. Engineer-heavy teams require constant ammunition resupply, while medic-dense squads benefit more from your defensive capabilities.
For comprehensive team strategies and advanced coordination techniques, consult our Complete Guide to Battlefield 6 teamwork mechanics.
Action Checklist
- Configure L110 LMG with Extended Barrel, Stubby Grip, and 3.5x Scope
- Practice 8-10 round burst control at 50+ meter ranges
- Master smoke grenade placement for revive corridors and objective concealment
- Develop pre-planned fallback positions for each primary engagement zone
- Coordinate with squad to create overlapping fields of fire using Deployable Covers
No reproduction without permission:Tsp Game Club » Battlefield 6 Best Loadouts for Support Class Master Battlefield 6 Support class with optimized LMG builds, tactical positioning, and team coordination strategies for maximum impact