TL;DR
- The ABR A1 excels as a mid-to-long range tactical rifle with devastating three-round burst potential
- Essential attachments include Gain-Twist Barrel for damage range and Compensator for recoil stabilization
- Pair with close-range SMG like Ladra or C9 to cover all engagement distances effectively
- Master burst timing and positioning to maximize the weapon’s one-burst elimination capability
- Adapt your playstyle to leverage the rifle’s precision strengths while mitigating close-quarters weaknesses
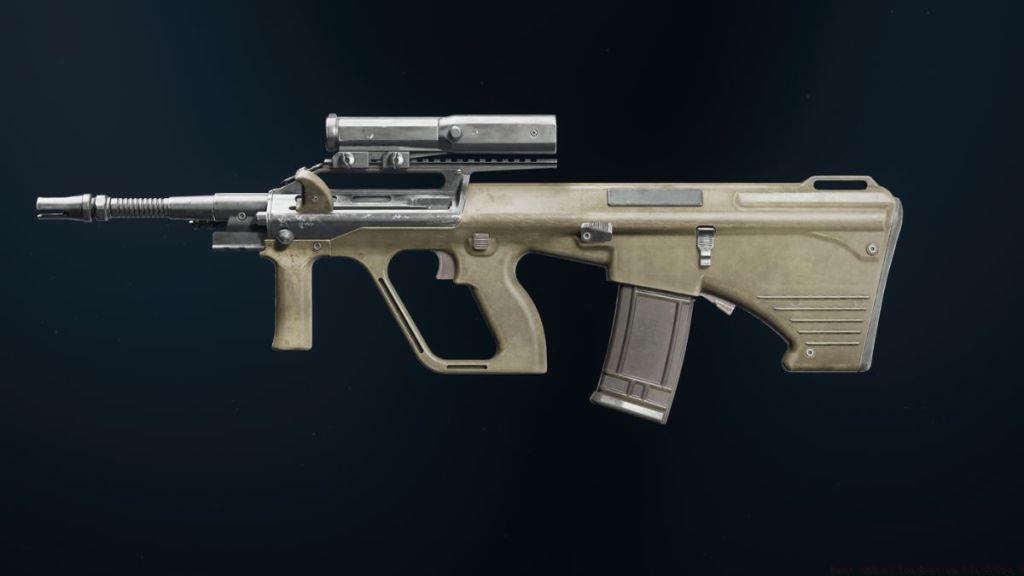
The ABR A1 tactical rifle represents one of Warzone’s most formidable long-range engagement tools, offering exceptional precision and burst damage potential. Originally introduced as the AUG during Black Ops Cold War’s Verdansk era, this weapon dominated the meta for multiple seasons with its consistent three-round burst performance. The Black Ops 6 Season 5 update reintroduced the rifle under its new designation while preserving its core damage profile and handling characteristics.
What makes the ABR A1 particularly valuable in the current Warzone landscape is its ability to eliminate opponents in a single well-placed burst when optimized correctly. This burst-fire mechanism requires strategic timing and positioning but rewards skilled players with rapid target elimination. Unlike fully automatic rifles, the ABR A1 demands precision and calculated engagement selection rather than sustained fire volume.
Strategic positioning becomes crucial when employing the ABR A1 effectively. The weapon thrives in medium to extended range encounters where its burst precision can be fully utilized without exposing you to close-quarters disadvantages. Understanding optimal engagement distances separates average users from masters of this tactical rifle system.
Constructing the ideal ABR A1 configuration requires balancing ranged effectiveness with recoil management. Our tested loadout focuses on maximizing the weapon’s strengths while compensating for its inherent burst-fire limitations. Each attachment serves a specific purpose in creating a cohesive combat system rather than isolated stat improvements.
- Optic: Willis 3x
- Muzzle: Compensator
- Barrel: Gain-Twist Barrel
- Underbarrel: Vertical Foregrip
- Magazine: Extended Mag II
The Willis 3x optic provides superior target acquisition and clarity compared to the integrated sight, particularly at the ABR A1’s optimal engagement ranges. If you’ve mastered the default reticle, consider reallocating this slot to a Rear Grip for enhanced handling characteristics. The Compensator attachment delivers essential vertical recoil mitigation, dramatically improving burst consistency and follow-up shot accuracy.
Our testing confirms the Gain-Twist Barrel as non-negotiable for serious ABR A1 deployment. This barrel extension significantly boosts bullet velocity while enhancing damage retention at distance. Combined with the Vertical Foregrip for additional stability and Extended Mag II for sustained engagement capacity, this configuration transforms the ABR A1 into a precision instrument capable of challenging even sniper rifles in certain scenarios.
Advanced players should experiment with the Bipod underbarrel when employing defensive positioning strategies, particularly in modes like Conquest where holding angles becomes strategically valuable. The key is understanding that attachment choices should complement your intended playstyle rather than simply maximizing statistical outputs.
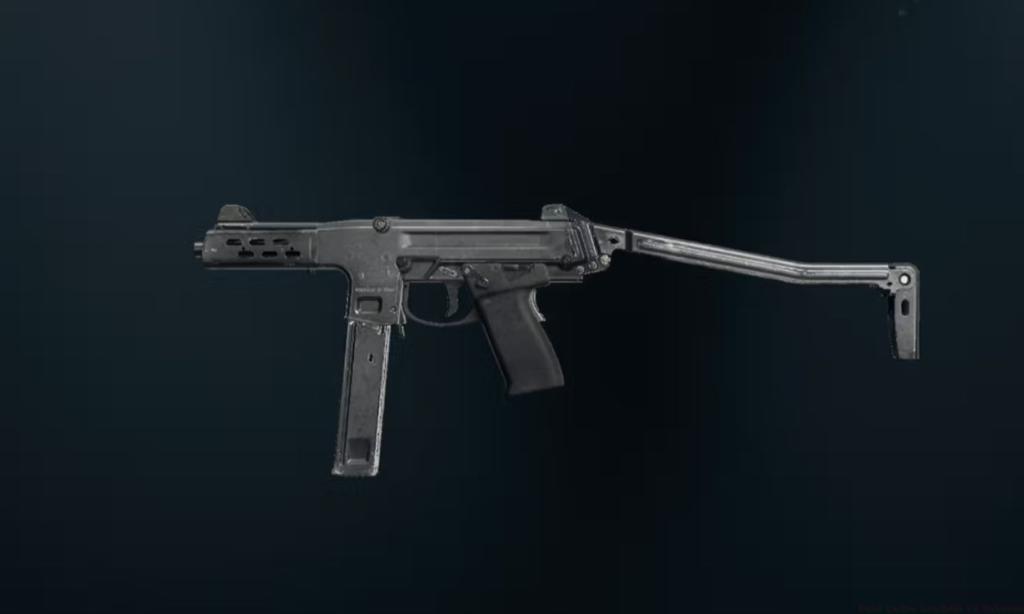
Strategic secondary weapon selection proves critical when maining the ABR A1, as the rifle’s burst-fire nature creates vulnerabilities in close-quarters engagements. The Ladra SMG represents an ideal pairing with its exceptional mobility and rapid time-to-kill within 0-15 meter ranges. This SMG complements the ABR A1’s weaknesses while allowing you to maintain aggressive positioning when necessary.
The C9 SMG offers an excellent alternative with superior recoil control and magazine capacity, though at the cost of slightly reduced mobility. Both options provide the close-range dominance necessary to offset the ABR A1’s limitations in tight spaces and building clearance scenarios.
Loadout balancing requires understanding engagement distance coverage. The ABR A1 dominates from approximately 30-80 meters, while your SMG should handle everything inside 20 meters. The 20-30 meter overlap zone represents your most challenging engagement distance, requiring either precise burst placement or rapid weapon switching based on situational awareness.
For players progressing through BF6 Weapons Unlock challenges, focusing on SMG attachments that enhance sprint-to-fire time and hip-fire accuracy will yield the greatest combat effectiveness when paired with the ABR A1’s ranged superiority.
Mastering the ABR A1 extends beyond attachment selection into nuanced combat execution and strategic decision-making. The weapon’s burst-fire mechanism demands precise timing between bursts rather than continuous trigger discipline. Optimal technique involves allowing the weapon to reset completely between bursts while maintaining sight picture on your target.
Positioning represents your most powerful tool when utilizing the ABR A1 effectively. Seek elevated positions with clear sightlines to medium-range engagement zones while maintaining accessible cover for reloading and repositioning. Avoid pushing aggressively into confined spaces where your burst-fire limitation becomes a critical disadvantage.
Common mistakes include attempting to use the ABR A1 as a primary close-quarters weapon or failing to account for the brief delay between bursts. Advanced players learn to pre-aim at common enemy positions and utilize the weapon’s first-burst accuracy to secure eliminations before opponents can react effectively.
For comprehensive strategic guidance applicable across multiple weapon systems, consult our Battlefield 6 Complete Guide for foundational principles. Additionally, understanding how the ABR A1 fits within broader BF6 Class Selection strategies will enhance your overall combat effectiveness and team contribution.
The ABR A1 truly shines when employed as part of a coordinated squad where teammates can cover your close-range vulnerabilities while you provide precision fire support from optimal distances. This weapon rewards tactical patience and positioning intelligence over raw aggression and reflex speed.
Action Checklist
- Unlock all essential attachments through focused gameplay in designated modes
- Practice burst timing and reset in private matches or against bots
- Master engagement distance awareness through targeted positioning drills
- Develop weapon switching muscle memory for close-range transitions
- Integrate ABR A1 into your preferred class setup and refine loadout balance
No reproduction without permission:Tsp Game Club » Best ABR A1 Loadout and Class Setup in Warzone Master the ABR A1 tactical rifle with optimized loadouts, strategic attachments, and advanced combat techniques for Warzone dominance