TL;DR
- Chapter 12 contains 9 hidden areas with valuable rewards including weapon skins, collectibles, and power-ups
- Strategic exploration requires careful observation of environmental cues and proper use of shield mechanics
- The Kreed Makyr Collectible Toy requires finding a separate Secret Key to access
- Life Sigil discovery involves complex environmental navigation and combat preparation
- Optimal route planning saves 15-20 minutes compared to backtracking approaches
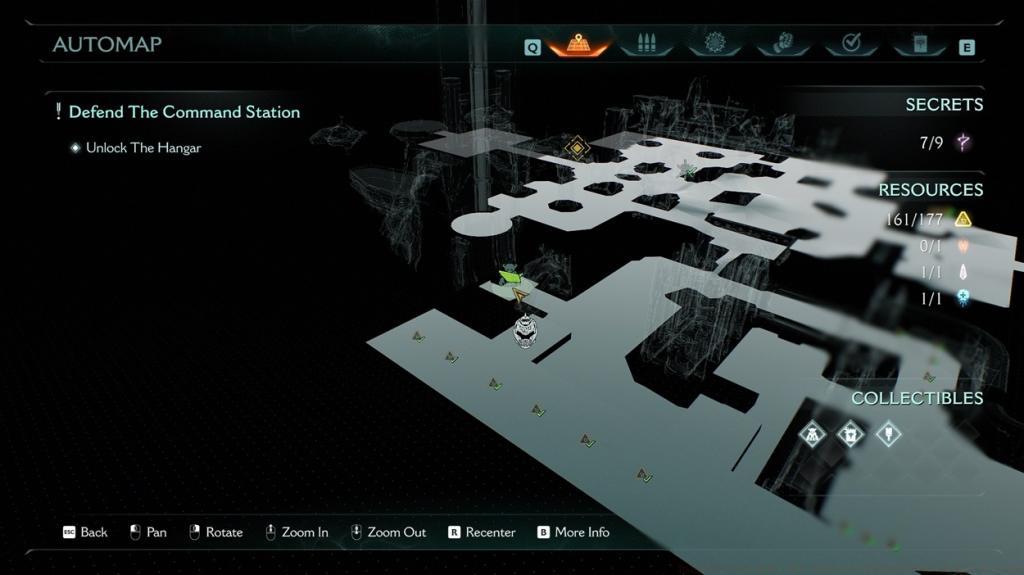
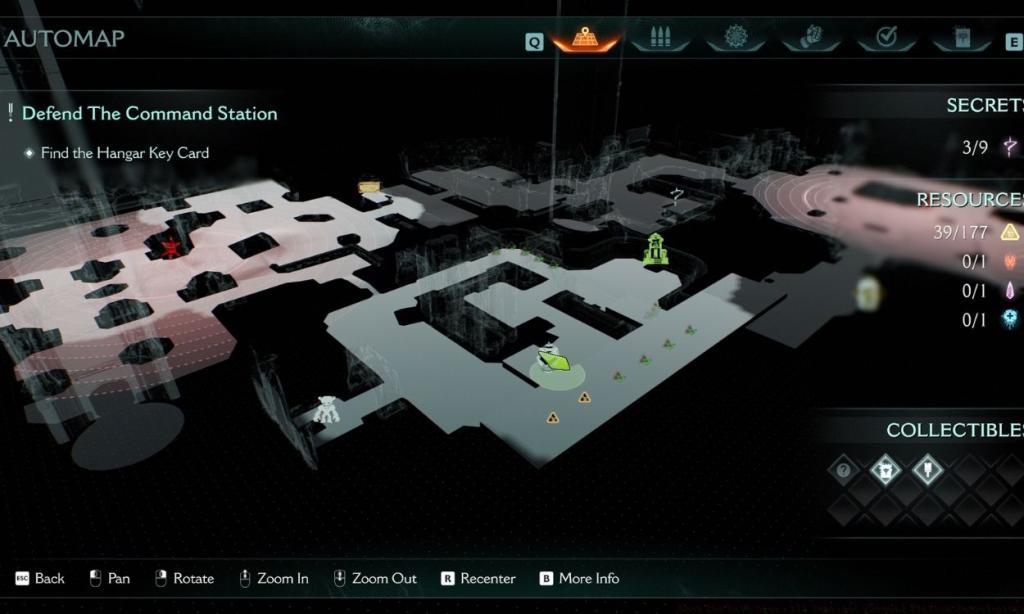
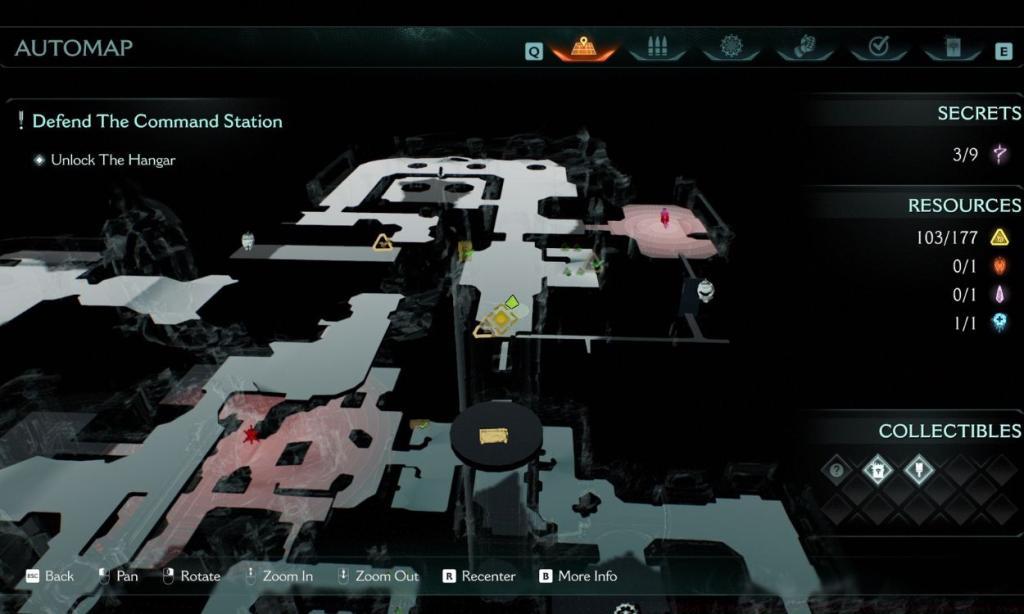
Doom The Dark Ages Chapter 12 unfolds within the formidable Sentinel Command Station, a military complex that presents a more linear progression compared to other levels in the game. As the Slayer, your mission involves defending critical command centers and passageways against relentless demonic assaults. Beyond the primary objectives, this chapter conceals nine meticulously hidden areas containing valuable resources and collectibles. Our comprehensive guide provides detailed navigation strategies to ensure you uncover every hidden treasure while maintaining combat readiness.
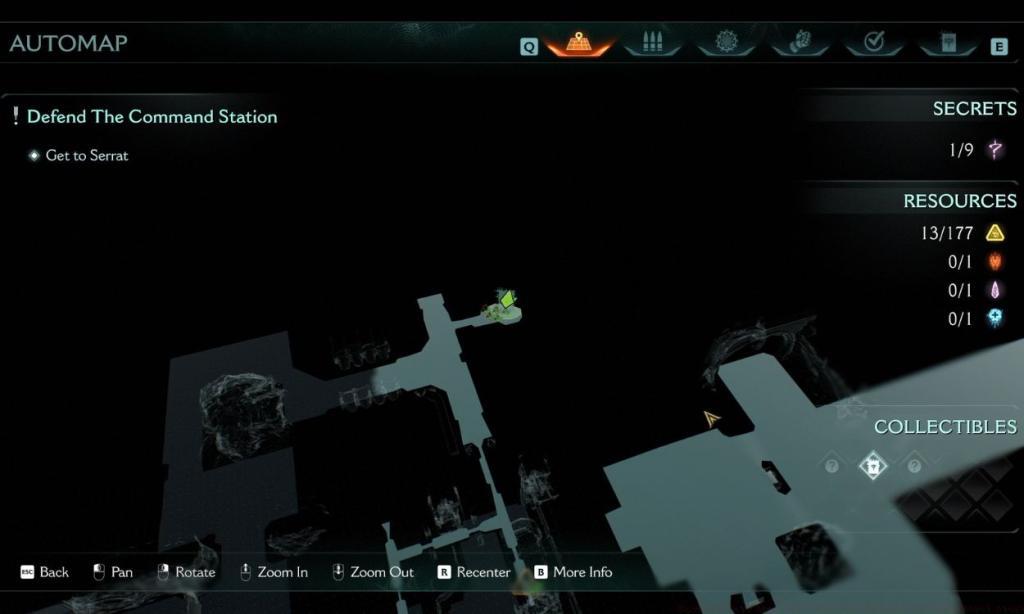
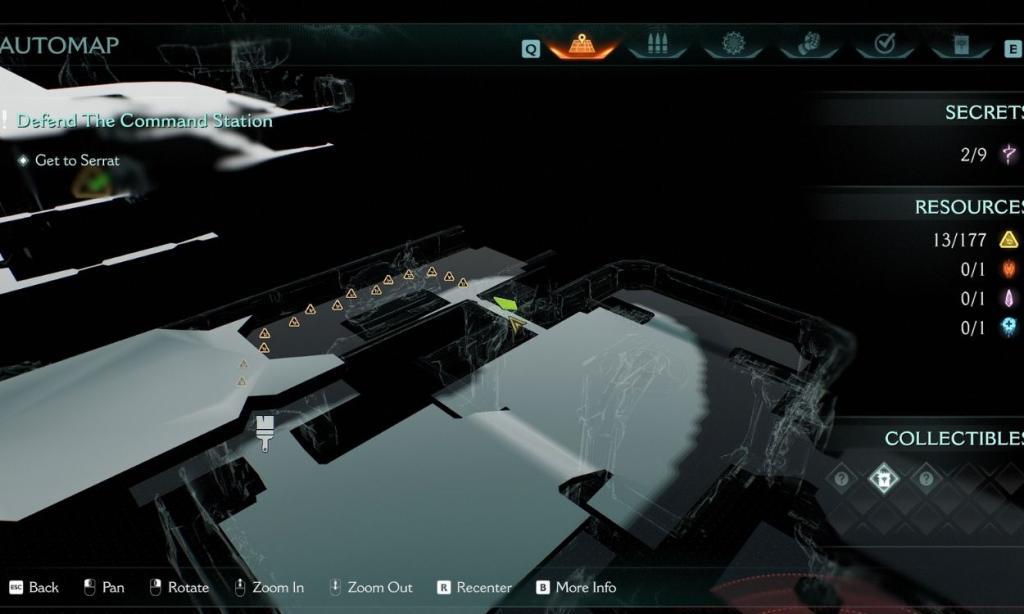
The Sentinel Command Station’s architectural design follows a hub-and-spoke pattern, with the central command room serving as the primary navigation point. Understanding this layout is crucial for efficient secret hunting, as many hidden areas branch from this central location. The level’s linear nature actually works to your advantage, creating predictable progression patterns that make systematic exploration more manageable.
Strategic secret discovery requires balancing progression with thorough environmental scanning. Experienced players recommend maintaining constant awareness of wall textures, listening for audio cues indicating breakable surfaces, and periodically checking overhead and floor-level areas that are easily overlooked during intense combat sequences.
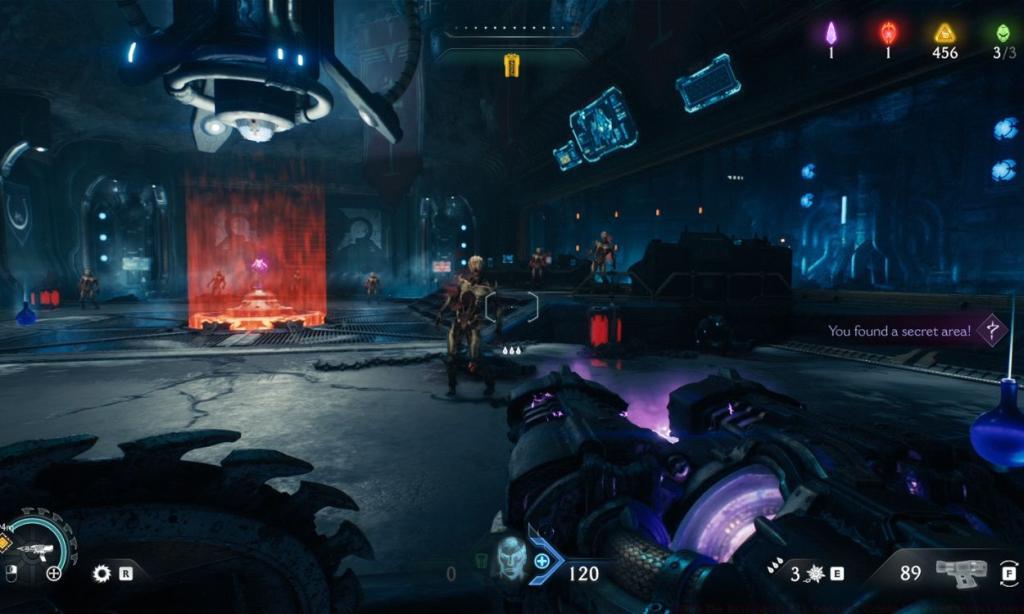
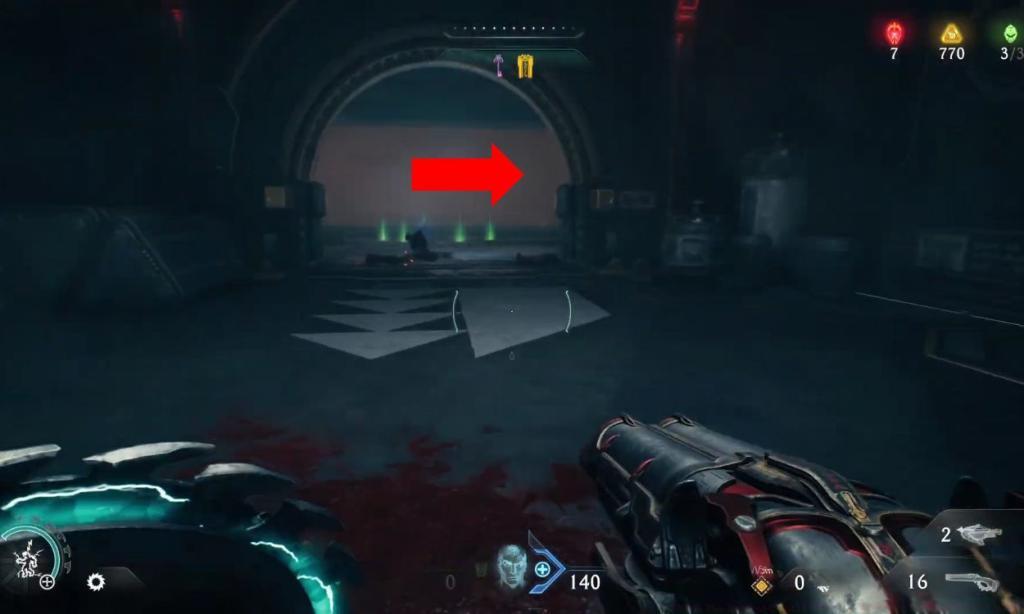
Secret Area 1: Codex Entry – Progress along the main objective path until you navigate past the hazardous exploding vent mechanism. Immediately afterward, scan the right-side corridor for structural damage revealing a compromised wall section. This concealed opening grants access to valuable lore documentation that expands your understanding of the game’s narrative.

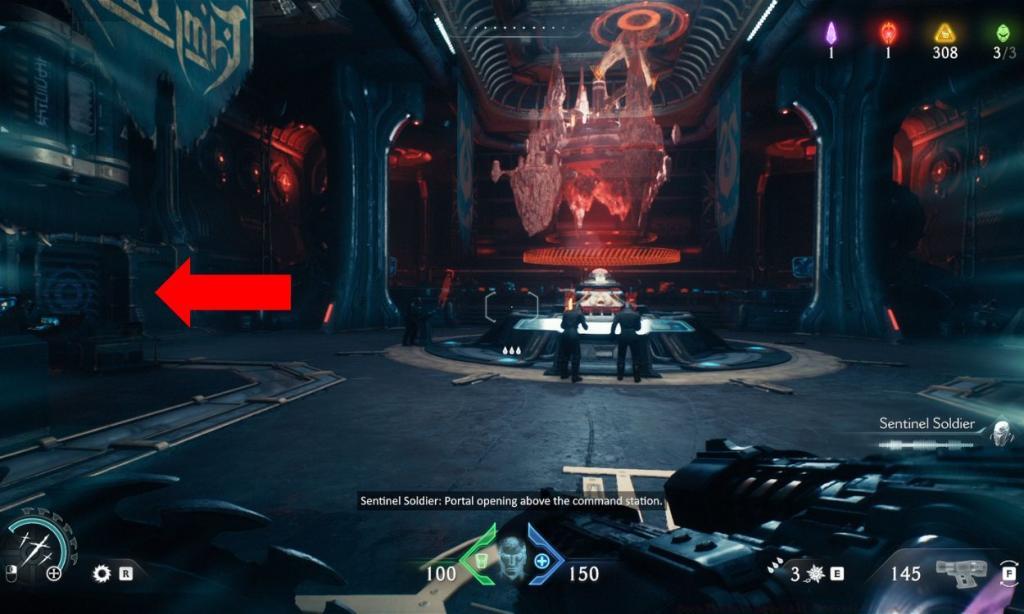
Secret Area 2: Weapon Skin – Continue advancing toward your primary mission marker until you descend into the central command chamber populated with allied non-player characters. Position yourself facing the main control interface, then direct your attention leftward to identify a destructible wall surface. Employ your shield’s bash ability to breach this barrier, revealing exclusive cosmetic customization for your arsenal.
Secret Area 3: Kreed Makyr Collectible Toy – As you traverse the established route, you’ll eventually reach a spacious hall terminating at a secured door demanding yellow keycard authorization. Upon arrival, examine the collapsed wall structure on your left, which creates a connective passage to an adjacent corridor system.
Within this secondary passage, you’ll encounter a locked barrier operable only with the elusive Secret Key. For precise key location details, consult our specialized acquisition guide. This concealed chamber houses the highly sought-after Kreed Makyr Collectible Toy, a valuable addition to any completionist’s inventory.

Secret Area 4: Climbing Route Discovery – Adhere to directional indicators until reaching the proximate Sentinel Shrine location. Position yourself external to the metallic gate providing shrine access, then survey your left flank to detect scalable wall surfaces. Ascend this vertical pathway and execute a rightward maneuver to unveil this fourth concealed zone.
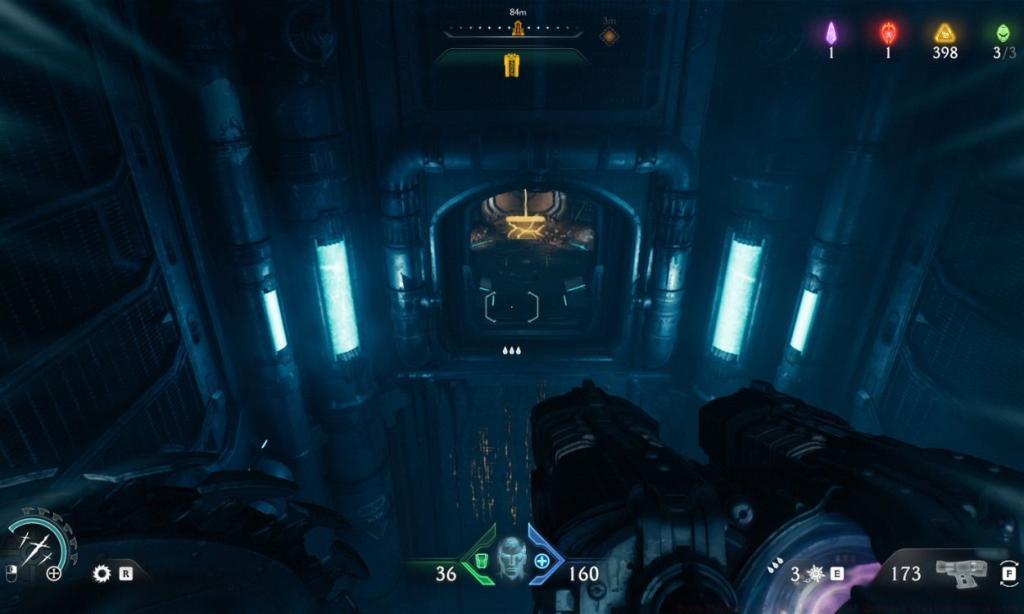
Secret Area 5: Elevated Gold Cache – After utilizing the vertical transport to reach the upper level, continue following navigation markers until securing the yellow keycard. Employ this access card to unlock the metallic barrier situated within the same chamber. This reveals a direct descent opportunity to a lower platform, with a compact recess visible overhead containing precious metallic resources. Execute a precision leap to access this elevated repository.
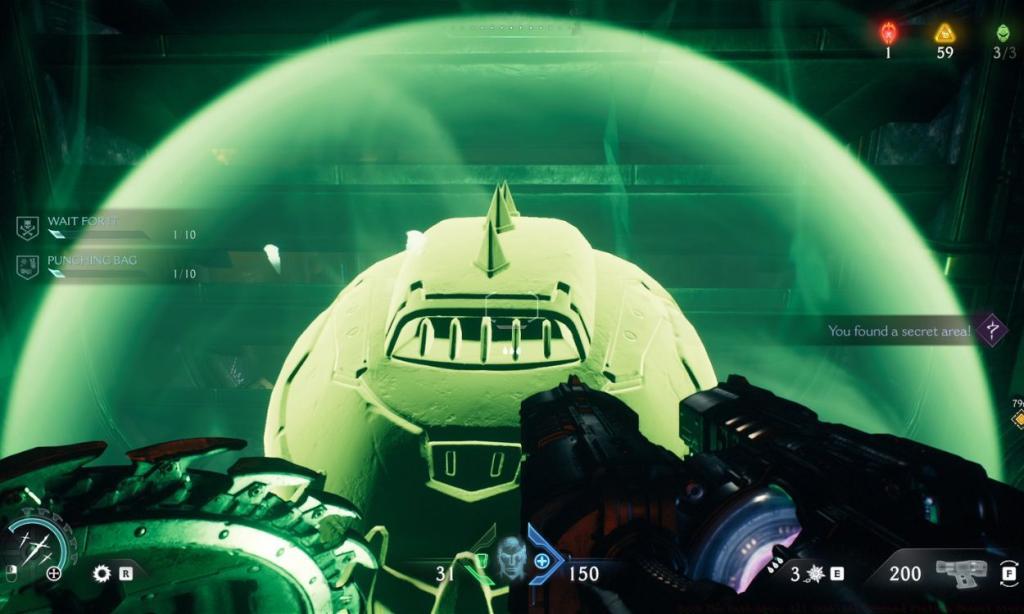
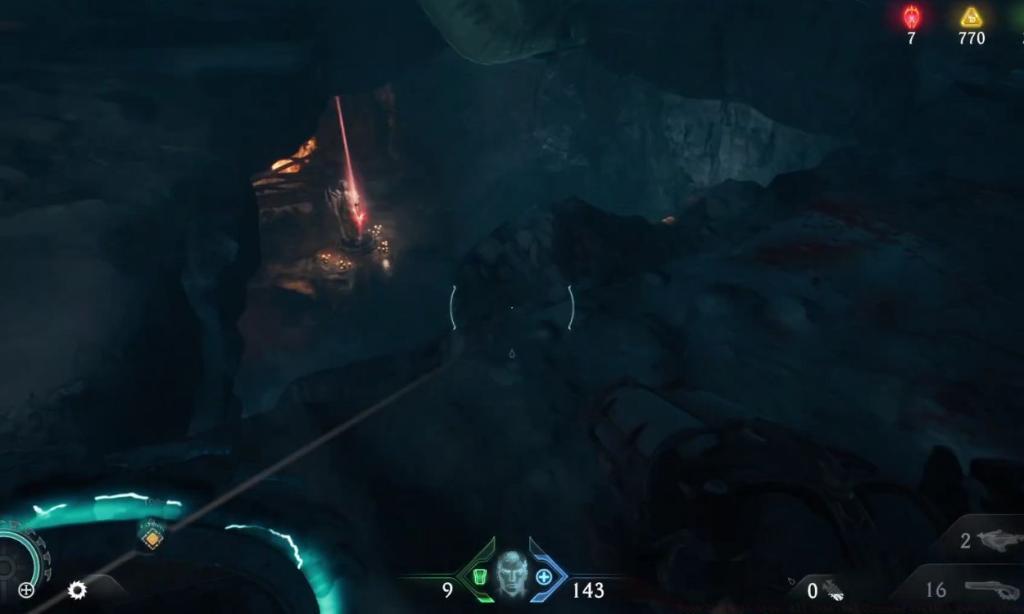
Secret Area 6: Life Sigil Complex – Upon securing the golden resource stash, perform a complete directional reversal to identify another destructible wall segment. Utilize shield impact mechanics to penetrate this barrier, then conduct thorough reconnaissance of the connecting ventilation system. This exploration reveals additional scalable surfaces leading to further breakable obstructions.

Before demolishing the final barrier, simply reorient yourself to detect a cleverly concealed Life Sigil, providing permanent health augmentation. This represents one of the most challenging discoveries in the chapter, requiring both environmental awareness and precise movement execution.
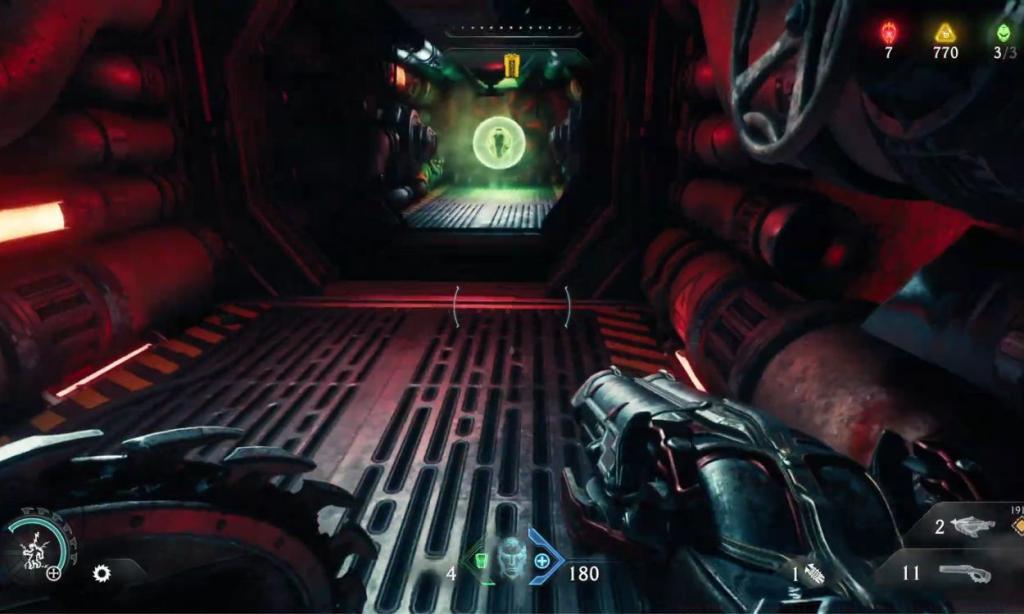
After obtaining the sigil enhancement, you may proceed to shatter the forward barrier. Prepare for immediate hostile engagement, as this transition triggers aggressive demonic response from prepared ambush forces.
Mastering Chapter 12’s secrets requires more than just following directions—it demands strategic thinking and environmental mastery. The linear level design actually creates predictable enemy spawn patterns that you can exploit. Demons typically appear after triggering specific environmental events or collecting major items, giving you opportunities to prepare ambush points or escape routes.

Environmental audio cues provide critical hints about nearby secrets. The faint humming of energy sources often indicates proximity to power-ups, while subtle scratching or crumbling sounds may reveal breakable walls nearby. Veteran players recommend playing with headphones to detect these subtle auditory indicators that can lead to hidden discoveries.
Route optimization can significantly reduce your completion time. By combining secret discovery with main objective progression, experienced players can clear the chapter in approximately 45 minutes with full completion, compared to 60+ minutes using backtracking methods. Always survey areas thoroughly before advancing to avoid missing subtle visual cues indicating hidden passages.
Action Checklist
- Scan for damaged walls immediately after passing the exploding vent
- Use shield bash on left wall in central command room for weapon skin
- Locate caved-in wall in expansive hall before keycard door
- Find Secret Key and access Kreed Makyr Collectible Toy
- Scale climbable wall near Sentinel Shrine gate
- Execute precision jump to elevated gold cache after obtaining yellow keycard
- Navigate complex Life Sigil route with multiple breakable walls
No reproduction without permission:Tsp Game Club » Doom The Dark Ages: All Sentinel Command Station Secret Areas Complete guide to finding all 9 secret locations in Doom The Dark Ages Chapter 12 with expert strategies