TL;DR
- Eliminate Juvenile Stings first to remove boss damage reduction and enable vulnerability
- Prioritize Break Effect characters and AoE damage dealers for optimal swarm clearing
- Strategic Nemesis state selection on your main DPS maximizes damage output during key phases
- Save defensive cooldowns for Primordial Tide AoE attacks to prevent team wipes
- Build teams around elemental weaknesses: Physical, Fire, and Wind damage dealers
The Harbinger of Death: Swarm Nightmare represents one of Honkai Star Rail’s most challenging encounters introduced in version 3.8. This corrupted Iron Cavalry unit emerges from Penacony’s storyline as part of Gropher Wood’s scheme to resurrect the Swarm, ultimately strengthening Order and attempting to revive the entity known as Ena. Understanding this boss requires both mechanical proficiency and strategic foresight.
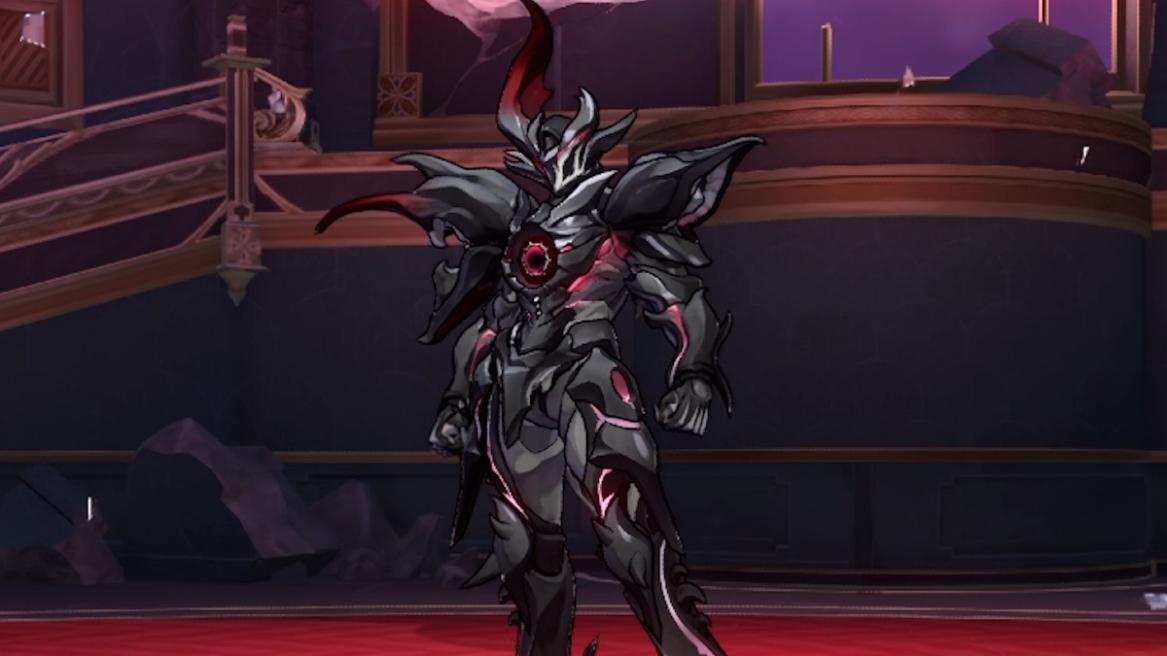
This encounter demands precise execution and team coordination, as the boss employs multiple layers of damage reduction mechanics that can frustrate unprepared players. The key to success lies in managing the summoned Juvenile Stings while capitalizing on the temporary vulnerability windows they create when eliminated.
Success against the Harbinger of Death requires mastering several interconnected mechanics that dictate the fight’s flow. The boss cycles through distinct phases that require different tactical responses from your team composition.
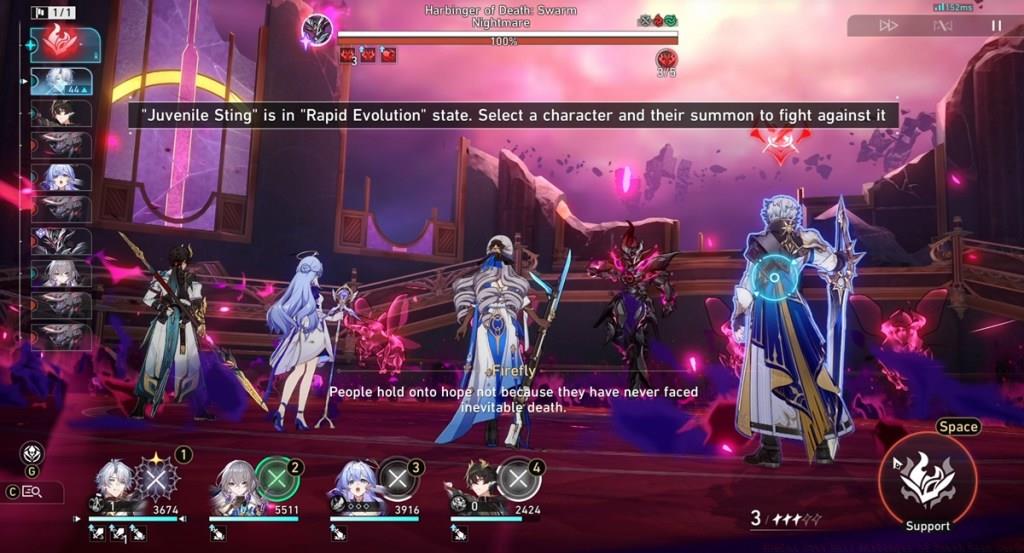
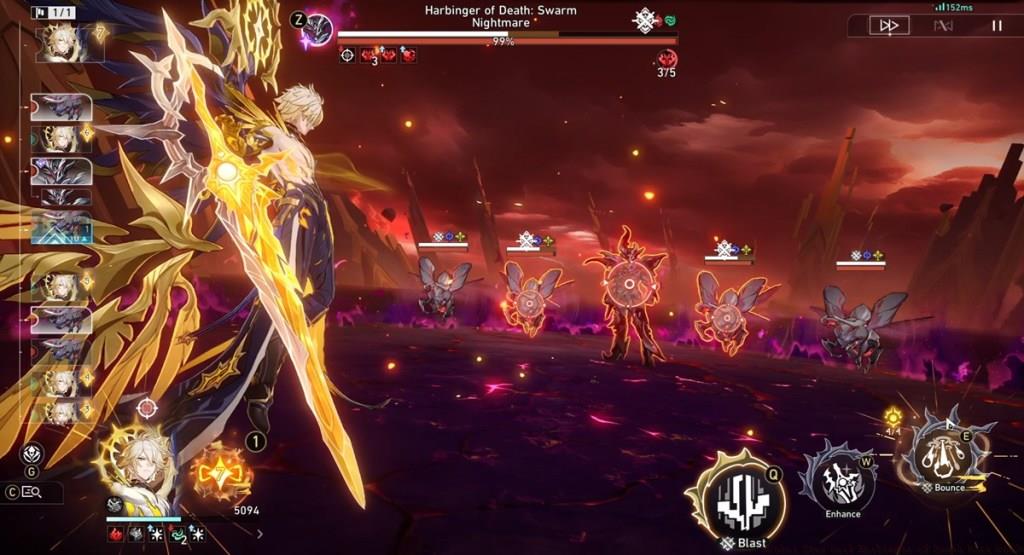
The most critical mechanic involves the Gene Duplication state, which triggers when the boss uses Rend, Putrefy, Engorge. During this phase, the boss summons Juvenile Stings that gain the Rapid state, significantly increasing their speed and threat level. This creates the Nemesis selection opportunity where you must strategically choose which character receives enhanced Break Effect and immediate action capabilities.
| Move Name | Explanation |
|---|---|
| Rend, Putrefy, Engorge | Initiates Gene Duplication state, boosting Speed while summoning Juvenile Stings with Rapid status. Players then designate one team member as Nemesis, granting them instant action and heightened Break Effect. Remaining allies lose critical hit capabilities during this phase. |
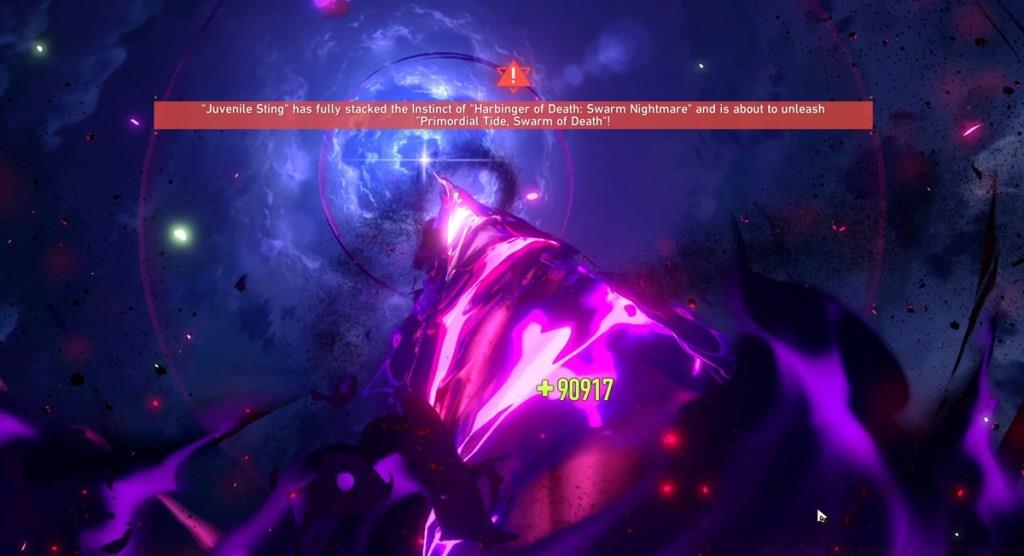
| Primordial Tide, Swarm of Death | Executes massive area-of-effect Fire damage attack that can decimate unprepared teams. |
| Primal Hunger | Further accelerates the summoned Juvenile Stings’ action frequency. |
| Whirling Carapace | Converts portion of damage taken into Corrosion stacks. When Primordial Tide, Swarm of Death is used, boss regenerates health equivalent to accumulated Corrosion. |
| Universal Blight, Howl of the Life Eater | During Gene Duplication, damage output scales with active Juvenile Sting count. These summons prioritize attacking the Nemesis-marked character, with their strikes contributing to a stacking mechanic that eventually triggers Primordial Tide, Swarm of Death. |
Advanced players should note that the Corrosion mechanic from Whirling Carapace creates an additional layer of complexity. The boss essentially stores a percentage of the damage you deal, then converts it into self-healing during its major AoE attack. This means burst damage phases must be carefully timed to avoid feeding excessive healing to the encounter.
Building the right team composition is crucial for overcoming the Harbinger of Death’s complex mechanics. The boss thrives in prolonged engagements where its damage reduction and summon spam can overwhelm standard team setups. Success hinges on characters capable of rapidly clearing multiple targets while capitalizing on Break Effect bonuses.
The boss exhibits specific elemental vulnerabilities to Physical, Fire, and Wind damage types, making characters specializing in these elements particularly effective. Break-focused characters gain additional value due to the Nemesis state’s Break Effect amplification, creating windows of exceptional damage potential.
| DPS | Support | Sustain |
|---|---|---|
| Firefly | Ruan Mei | Lingsha |
| Hysilens | Bronya | Gallagher |
| Phainon | Sunday | Aventurine |
| Blade | Tribbie | Dan Heng Permansor Terrae |
| Argenti | Fugue | Natasha |
| Black Swan | The Dahlia | Fu Xuan |
| Saber | Harmony Trailblazer | Huohuo |
| Anaxa | Pela | |
| Castorice | Jade | |
| Feixiao | Robin |
Proven team compositions that consistently succeed against this challenging encounter include:
- Firefly Break: Firefly, The Dahlia, Fugue/Harmony Trailblazer, Lingsha
- Phainon Hypercarry: Phainon, Sunday, Cerydra, Dan Heng Permansor Terrae
- Anaxa Hypercarry: Anaxa, Cerydra, Cyrene, Dan Heng Permansor Terrae
- Saber Hypercarry: Saber, Sunday, Tingyun, Huohuo
- Feixiao Follow-up ATK: Feixiao, Tribbie, Robin, Dan Heng Permansor Terrae
When selecting between these team archetypes, consider your available character investments and relic quality. The Firefly Break composition offers exceptional consistency due to its synergy with the boss’s Break Effect mechanics.
Executing the correct strategy transforms this seemingly impossible encounter into a manageable challenge. The fundamental approach revolves around target priority management and resource allocation throughout the fight’s different phases.
Your primary objective throughout the encounter should be eliminating Juvenile Stings as they appear. These summons not only contribute to the boss’s damage output through Universal Blight, Howl of the Life Eater, but their presence also enables the boss’s substantial damage reduction. Only when all active Juvenile Stings are defeated does the boss become vulnerable to significant damage.
- Focus fire on Juvenile Stings immediately upon their summoning to minimize their impact
- Deploy characters with substantial area-of-effect capabilities to clear multiple summons simultaneously
- Conserve defensive cooldowns specifically for the Primordial Tide, Swarm of Death AoE attack
- Designate your main damage dealer as the Nemesis to maximize Break Effect damage during vulnerability windows
- Coordinate ultimate abilities to burst down the boss during brief windows of opportunity
A common mistake players make is attempting to damage the boss directly while Juvenile Stings remain active. This approach wastes resources since the boss takes significantly reduced damage during these phases. Instead, use single-target abilities on the boss only when no summons are present, otherwise focusing all damage on clearing the field of additional threats first.
Advanced optimization involves tracking the boss’s Corrosion stacks from Whirling Carapace. Time your heaviest damage phases to occur when Corrosion is minimal to prevent excessive self-healing during Primordial Tide, Swarm of Death. This level of precision typically reduces clear times by 30-40% compared to basic strategies.
Action Checklist
- Prioritize eliminating Juvenile Stings immediately upon summoning to remove boss damage reduction
- Designate main DPS as Nemesis when Gene Duplication activates
- Save defensive cooldowns and healing for Primordial Tide AoE attacks
- Build team around Physical, Fire, or Wind element characters
- Coordinate ultimate abilities for burst damage during boss vulnerability phases
No reproduction without permission:Tsp Game Club » Honkai Star Rail Harbinger of Death Boss Guide Master the Harbinger of Death Swarm Nightmare boss mechanics and counter strategies in Honkai Star Rail 3.8