Master the Bo Sorcerer boss fight with strategic preparation, optimal summon timing, and advanced combat techniques
Boss Overview and Strategic Location Preparation
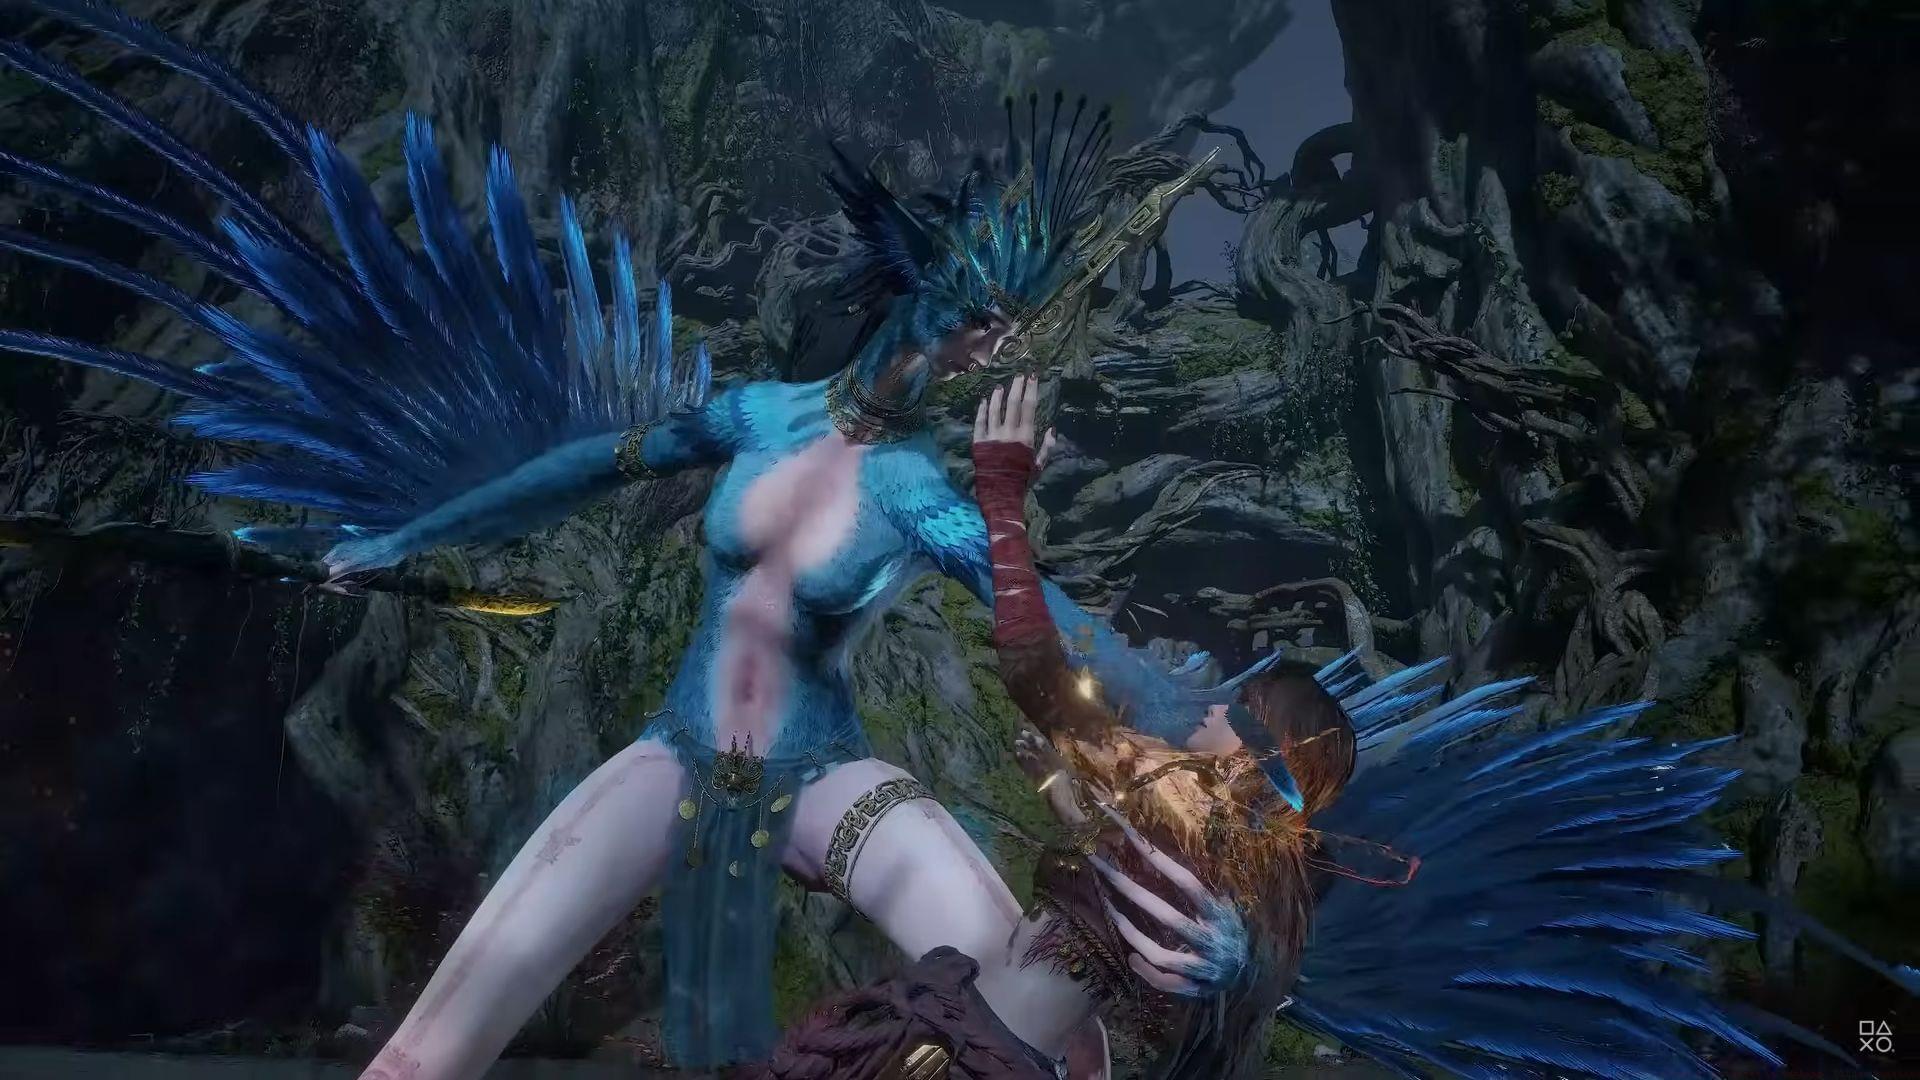
Bo Sorcerer in Wuchang: Fallen Feathers represents a significant mid-game challenge encountered within Mt. Zhenwu’s Avian Dwelling arena. This demanding encounter rigorously tests your evasion capabilities while confronting an adversary that seamlessly blends rapid spear combinations with erratic magical assaults. The confrontation unfolds through two distinct approaches—either engaging solo or leveraging White-Robed Elder assistance if you previously secured his alliance at the Refugee Camp. The divergence in challenge intensity between these methodologies is substantial, necessitating thorough preparatory measures.
The boss occupies territory beyond Mt. Zhenwu’s Avian Marsh sector. While advancing through this wetland environment, systematically topple trees to establish expedited routes returning to the Avian Dwelling shrine. From this checkpoint, traverse the concealed passage located behind the shrine to directly access her combat zone. Preemptively clearing this trajectory dramatically reduces the penalty associated with repeated attempts, transforming a potentially frustrating experience into a manageable learning process.
Essential Loadout Configuration and Equipment Optimization
Also read — How to defeat General of the North – Ai Nengqi in Wuchang: Fallen Feathers
- Axe with Lifeleech Needle – Delivers tremendous poise-breaking potential while providing health sustainability during extended combos
- Longsword with Lifeleech Needle – Offers superior mobility and faster recovery frames for players preferring reactive combat styles
- Echo of Huang Yan – Essential for accumulating Corruption damage during safe attack windows, particularly effective against her magical defenses
- Echo of Dhutanga or Infernal Flames – Dhutanga provides defensive utility while Infernal Flames adds burst damage options for aggressive playstyles
- Crimson Lantern Fruit – Critical healing consumable that can be used during Elder’s aggro periods without interruption
Advanced Loadout Tip: Consider equipping both axe and longsword to enable situational weapon switching. The axe excels during poise-break opportunities while the longsword provides safer poking damage during high-mobility phases. This versatility significantly increases your adaptive capability throughout the fight’s evolving dynamics.
White-Robed Elder Summon Mechanics and Optimal Timing
Avoid immediately summoning the Elder when initiating combat. The initial phase remains manageable through solo play, and this conservation strategy preserves his assistance for when genuine necessity arises. Engage her conventionally until health diminishes below the 50% threshold, triggering her transformation sequence into the secondary phase—this represents the perfect opportunity to deploy the Bone Whistle. The brief metamorphosis animation provides adequate respite to execute the summon without retaliation risk.
Following successful summoning, the Elder will absorb majority aggression throughout the tornado phase, granting you freedom to recuperate health, reposition strategically, or align charged axe attacks to dismantle her poise. Combine this with Lifeleech enhancements to regenerate vitality during powerful assaults. The secondary phase introduces deliberate aqueous tornadoes that pursue your position; execute evasion maneuvers at the final possible instant to prevent staggering.
Throughout these opportunities, projectile abilities such as Echo of Soulwood transform into secure options for consistent Corruption accumulation. Pro Timing Tip: The transformation sequence between phases lasts approximately 3-4 seconds—sufficient for summoning plus one quick heal or buff application. Attempting summons during active combat typically results in severe punishment.
Solo Combat Mechanics and Comprehensive Attack Pattern Analysis
Confronting Bo Sorcerer independently in Wuchang: Fallen Feathers presents substantially increased difficulty since you must navigate all assault patterns without diversion. Her ability repertoire integrates thrusting attacks, swift combinations, and projectile water magic complemented by multiple punishing capabilities:
- Aerial Jump Slash (both phases): She ascends and hovers momentarily, emitting golden radiance mid-flight before plunging downward in a vertical cleave. Monitor for the luminous effect, then coordinate your evasion immediately preceding contact.
- Water Bubbles: Consistently discharged in successive pairs; evade at the ultimate moment to circumvent splash injury. The second bubble always follows 0.8 seconds after the first—count mentally to perfect your timing.
- Water Tornadoes (second phase): Conjures four gradually advancing tornadoes that monitor your location. While individual impact damage remains modest, they induce knockback and stun effects, creating vulnerability to subsequent attacks if dodged incorrectly.
- Grab Attack: Projects her limbs to capture you, violently impacting you against the terrain before executing multiple stomping motions. This maneuver inflicts catastrophic damage and should be prioritized for avoidance above all other attacks.
Advanced Pattern Recognition: Her spear combos typically follow a 3-hit pattern with the third attack having extended reach. Dodging diagonally forward through the first two strikes often positions you perfectly for counterattacks during her recovery animation.
Advanced Combat Optimization and Progression Recommendations
Regarding armaments, the axe configuration with Lifeleech Needle performs optimally for substantial damage bursts during poise disruption, though if you experience difficulty landing secure strikes, transition to a longsword setup for accelerated follow-up attacks post-evasion. Her elevated agility renders Clash mechanics comparatively unreliable, therefore concentrate on flawless dodges and concise attack opportunities.
Character progression beyond level 100 additionally assists in mitigating this encounter’s difficulty surge. Stat Distribution Priority: Focus on vitality and your primary damage stat first, with secondary investment in stamina for increased dodge capacity. Players struggling with reaction times should consider incorporating the “Echo of Iron Wall” for additional defensive security during learning phases.
Check out — How to remove Despair in Wuchang: Fallen Feathers
Common Mistakes to Avoid: Never become greedy with attack chains—her recovery windows are shorter than most bosses. Always disengage after 2-3 hits maximum. Additionally, don’t waste healing items during her tornado phase unless the Elder has aggro, as the tracking projectiles will likely interrupt your animation.
No reproduction without permission:Tsp Game Club » How to defeat Bo Sorcerer in Wuchang: Fallen Feathers Master the Bo Sorcerer boss fight with strategic preparation, optimal summon timing, and advanced combat techniques