Master the challenging Mount Fay climb to unlock Hornet’s Double Jump ability in Hollow Knight Silksong with expert strategies
Understanding the Double Jump Mechanic
Double Jump in Hollow Knight Silksong represents a pivotal mobility upgrade for Hornet that becomes available during the late-game progression cycle. While completing Act 2 remains possible without this aerial enhancement, accessing the game’s third act mandates acquiring the Faydown Cloak that enables this crucial movement ability. The acquisition process demands navigating one of Silksong’s most challenging environmental puzzles within the treacherous Mount Fay region.
Many players underestimate the strategic importance of double jump capabilities until they encounter vertical challenges that demand precise aerial control. Unlike basic jumps, the double jump provides mid-air correction opportunities, extends exploration range significantly, and creates new combat possibilities through enhanced positioning. Professional players often prioritize this upgrade immediately upon reaching the appropriate game stage due to its transformative impact on both navigation and combat effectiveness.
Navigating to Mount Fay
Initiating your ascent requires precise route planning from The Slab’s Bellway transportation hub. Take the leftward pathway from the Bellway station to begin your journey toward the frost-encrusted slopes of Mount Fay. This initial navigation phase serves as your first test, with the environment gradually transitioning from rocky terrain to icy landscapes that preview the challenges ahead.
Preparation before attempting Mount Fay cannot be overstated. Ensure you’ve collected sufficient healing resources and upgraded your needle capabilities to handle the environmental threats. Many unsuccessful attempts stem from inadequate preparation rather than lack of skill. Consider completing nearby side quests to bolster your resource stockpile, particularly Rosaries for bench activation and healing items to counter the relentless environmental damage.
Navigation pro tip: Mark your path mentally or with in-game tools as you ascend, as descent routes often differ from ascent paths. The mountain’s layout contains multiple branching paths, but the primary route to the summit remains consistently leftward with gradual elevation increases.
Conquering Mount Fay’s Challenges
Mount Fay presents a symphony of environmental threats that can abruptly end your expedition. Chilly winds function as a persistent damage-over-time mechanic, gradually depleting Hornet’s health unless you strategically position yourself near warmth sources. The landscape bristles with icy spike formations that demand precise platforming to navigate safely.
Movement mastery becomes your greatest asset in this hostile environment. Employ your complete mobility toolkit: dash maneuvers for rapid horizontal movement, strategic jumping for vertical progression, wall jumps for vertical ascents, and quick directional changes to avoid collapsing terrain. The environment features destructible wall sections that crumble shortly after contact, requiring agile responses and forward planning.
Advanced technique: Master the pogo jump by striking downward with your needle while airborne, creating rebound opportunities from enemies and certain environmental elements. This technique proves invaluable for crossing wide gaps and recovering from mistimed jumps. Enemy grappling provides additional aerial mobility options when conventional platforming reaches its limits.
Strategic lamp positioning offers crucial respite from the relentless cold winds. These warmth sources create temporary safe zones where you can plan your next movement sequence or recover health. The damage-over-time effect from cold exposure accumulates rapidly, making lamp navigation as important as physical platforming. Expert players often memorize lamp locations to create efficient routes through the most hazardous sections.
Advanced Climbing Strategies
Upon reaching the intermediate cavern systems, you’ll encounter both hostile creatures and essential resting points. These subterranean sections contain benches that require Rosary currency investment to activate, providing crucial recovery opportunities. Allocate your resources wisely, as subsequent challenges may demand additional bench access further along your ascent.
The climbing intensifies beyond the caverns with the introduction of false wall obstacles. These deceptive barriers conceal additional benches and sometimes contain valuable resources. Develop a methodical approach to wall inspection, watching for subtle visual cues like texture inconsistencies or environmental anomalies that signal breakable surfaces.
Beyond these obstacles lies the most technically demanding segment, where single missteps can reset substantial progress. This segment demands perfect execution of previously learned techniques while introducing wind current mechanics that alter movement physics. Tools like Ascendant’s Grip become invaluable for recovering from near-falls and managing health resources efficiently when healing opportunities are scarce.
Common mistake: Rushing through difficult sections often leads to repeated failures. Instead, adopt a measured pace, analyzing each platforming sequence before execution. Professional players recommend practicing individual challenging segments repeatedly rather than attempting the entire climb in single continuous efforts. This segmented approach builds muscle memory for the most technically demanding movements.
Claiming Your Reward
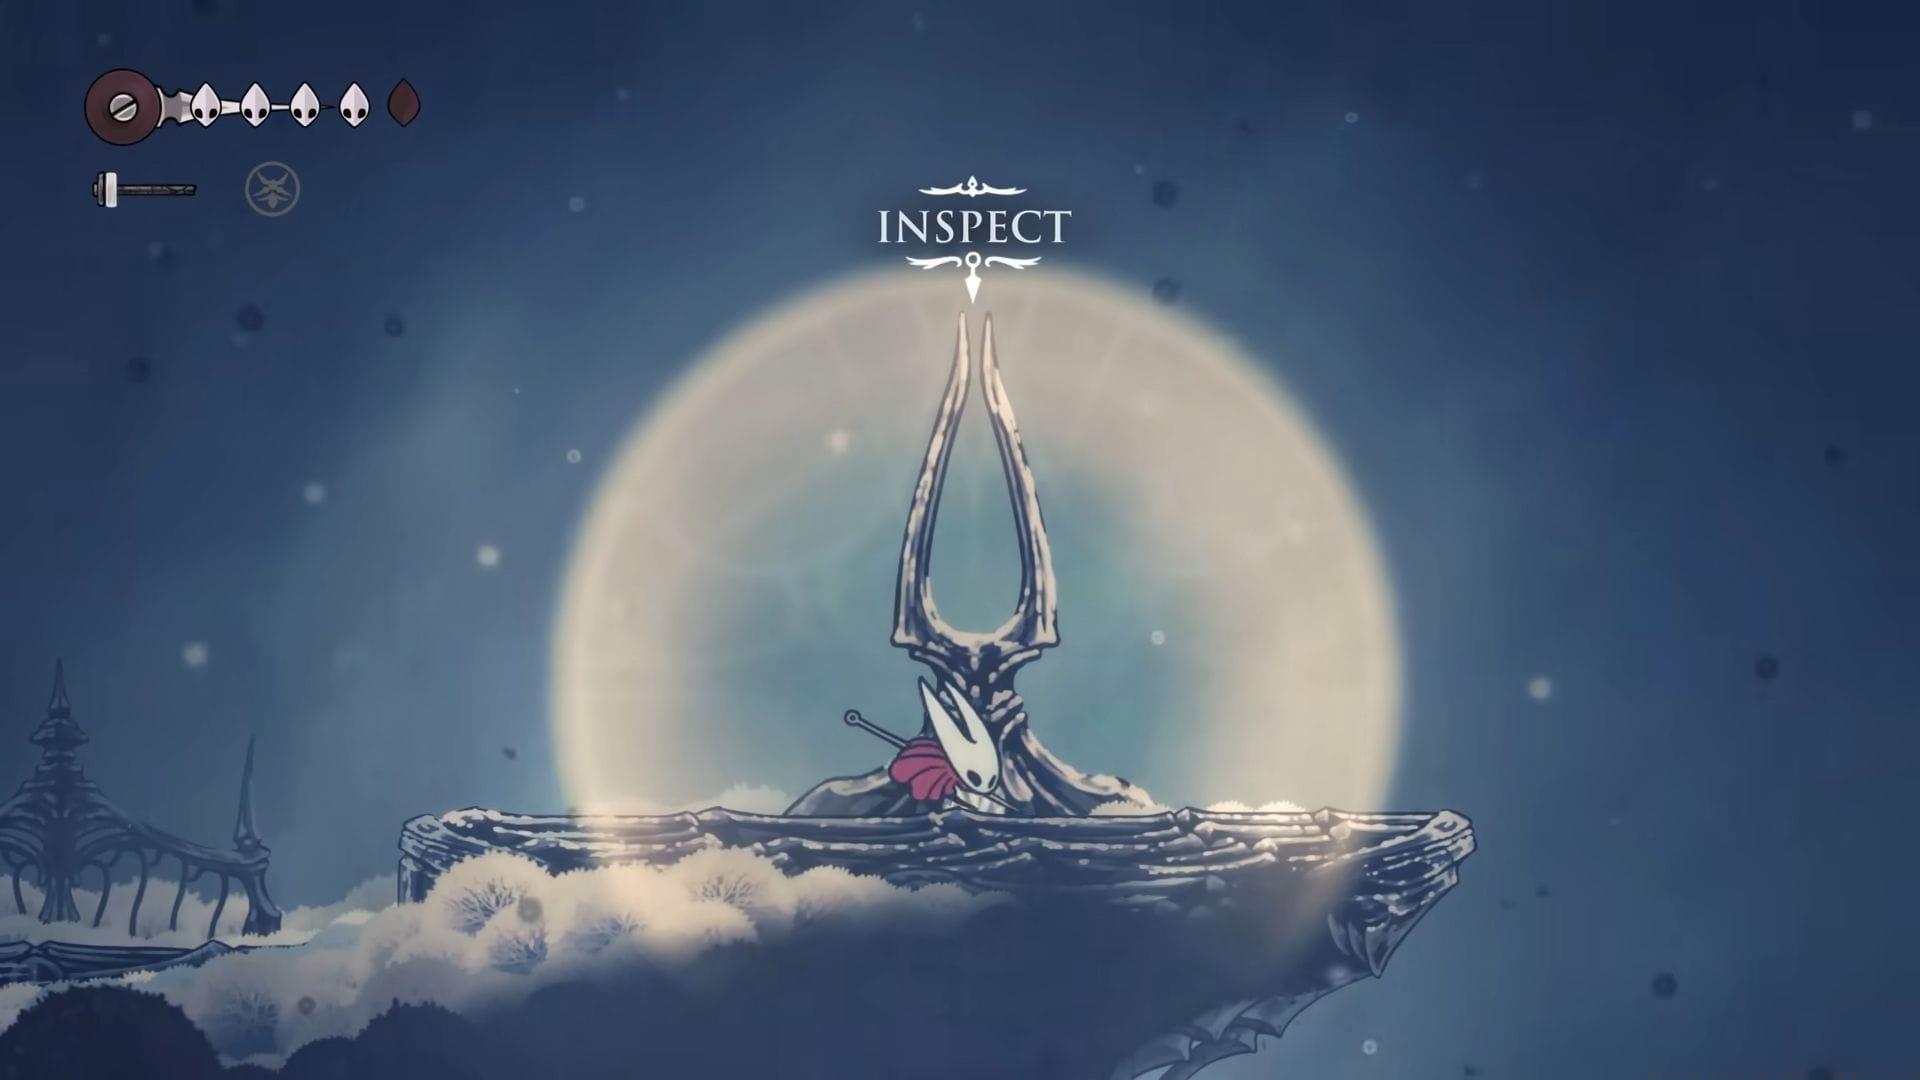
The summit approach utilizes Wind Current mechanics to reach the peak’s mechanism. These air flows create upward momentum when entered correctly, but can also disrupt movement if approached haphazardly. Time your entries to maximize lift while maintaining control over Hornet’s positioning.
At the summit apparatus, activate your Needolin instrument to transform the Faydown Cloak into your permanent double jump ability. This activation sequence concludes your challenging ascent and permanently enhances Hornet’s mobility capabilities. The double jump fundamentally changes exploration and combat dynamics, opening previously inaccessible areas and creating new tactical options.
Post-acquisition tip: Immediately practice your new double jump ability in safe environments to develop muscle memory before engaging in combat scenarios. The timing and rhythm differ significantly from single jumps, requiring adjustment period. Many players underestimate the learning curve and attempt difficult platforming sequences prematurely, resulting in unnecessary damage or death.
With the Faydown Cloak secured, you now possess the key to Hollow Knight Silksong’s third act and enhanced mobility throughout the game world. This achievement represents one of the most significant power spikes in Hornet’s arsenal, rewarding the skillful navigation and persistence demanded by Mount Fay’s formidable challenges.
No reproduction without permission:Tsp Game Club » How to get Double Jump in Hollow Knight Silksong Master the challenging Mount Fay climb to unlock Hornet's Double Jump ability in Hollow Knight Silksong with expert strategies