TL;DR
- Begin with 3 Flask charges, upgrade via Marika’s Churches marked by golden map icons
- Church locations randomize each run but remain fixed on night two – plan routes accordingly
- Maximum 4 churches per run, each grants +1 charge, no duplicate upgrades allowed
- Defeating the final boss automatically provides an additional flask charge
- Prioritize church visits early to establish healing foundation for entire expedition
The Flasks of Crimson Tears serve as your primary survival tool in Elden Ring Nightreign, delivering immediate health restoration when consumed. Unlike the original game’s Golden Tears collection system, Nightreign introduces a completely different upgrade approach that requires strategic exploration.
Players commence their journey with three sacred flasks available for health recovery. This limited starting capacity makes early upgrades crucial for surviving the escalating challenges of Limveld’s dangerous environments. The healing potency remains consistent with previous Elden Ring mechanics, but acquisition methods have been fundamentally redesigned.
Strategic flask management becomes essential since you cannot replenish charges at Sites of Grace. This design shift emphasizes proactive exploration over reactive resource management, requiring players to plan their upgrade routes carefully from the expedition’s outset.
To enhance your flask capacity, seek out Marika’s Churches scattered throughout Limveld’s landscape. These sacred structures become accessible immediately upon arriving during night one of your expedition, providing early upgrade opportunities.
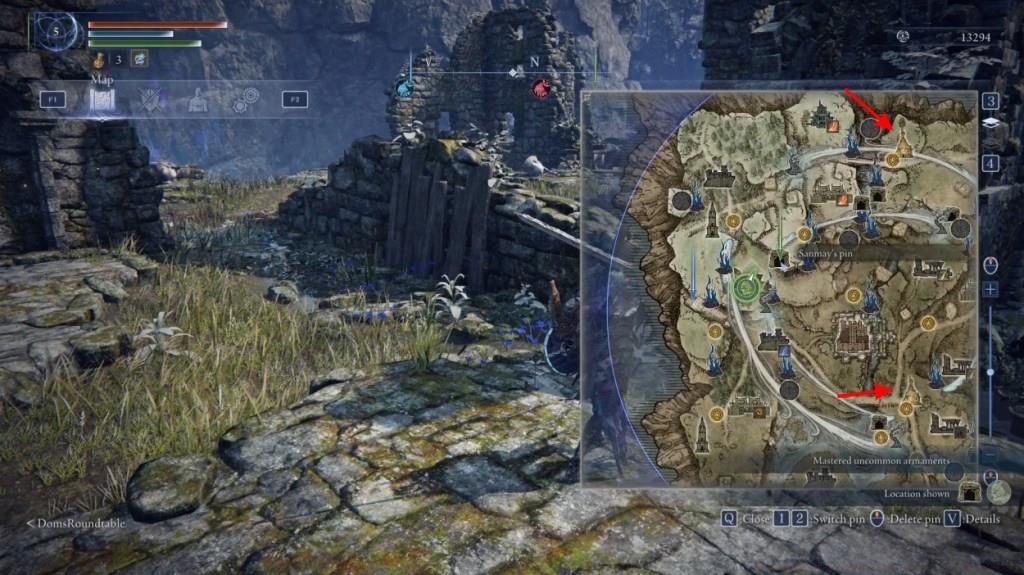
Identify these crucial locations by consulting your map and scanning for distinctive golden icons that mark their positions. The visual indicator resembles the example displayed in the accompanying image, making recognition straightforward during navigation.
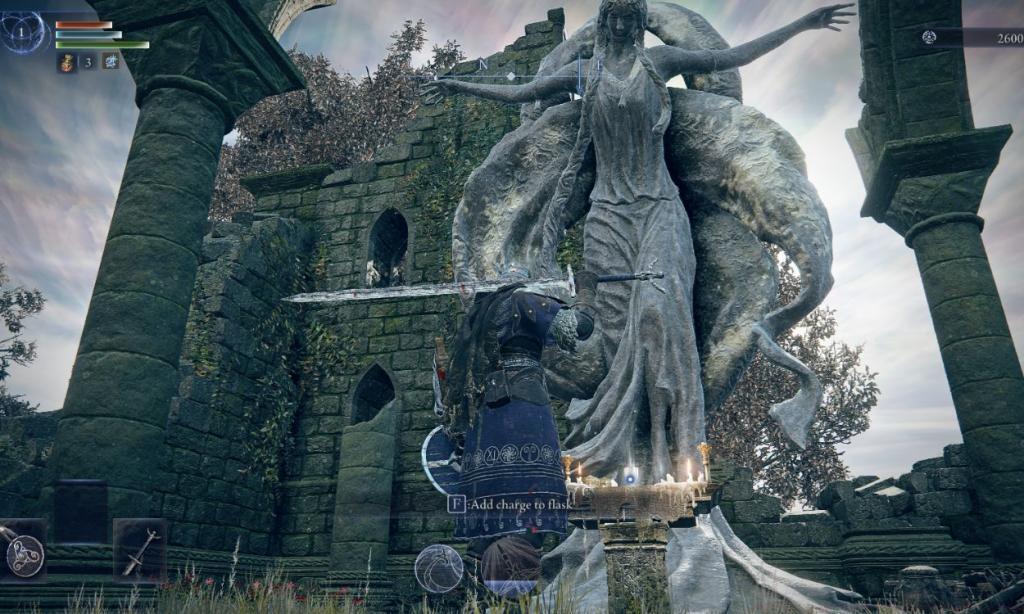
Upon reaching a church entrance, proceed inside and approach the religious altar positioned near the Marika statue. Interaction with this sacred object permanently increases your flask charges by one, significantly boosting your survivability potential.
Pro Tip: Church positions reset randomly with each new run, but once night two commences, these locations become fixed. This mechanic rewards players who memorize favorable spawn patterns across multiple attempts, similar to mastering class-specific strategies in other tactical games.
While exploring Limveld, understand that church locations undergo randomization at each run’s beginning, creating unique upgrade paths every attempt. However, these positions stabilize during night two, allowing for consistent routing in later expedition phases.
A critical limitation prevents repeated interactions with identical churches for additional upgrades. Based on extensive gameplay observation, the maximum church count encountered within a single session appears capped at four structures.
Common Mistake: Many players waste valuable time attempting to revisit previously upgraded churches, unaware that each provides only a single permanent charge increase. This misunderstanding frequently leads to inefficient route planning and missed opportunities.
Successfully conquering the final boss during night two automatically rewards players with an extra flask charge. This bonus provides significant late-game advantage, complementing the charges acquired through church exploration.
We strongly advocate prioritizing church visits during your initial exploration phases. Establishing maximum healing capacity early creates a robust foundation that benefits every subsequent combat encounter. The upgrade process remains remarkably safe since hostile entities typically avoid these sacred grounds, much like understanding core game mechanics in other strategic titles.
Optimization Strategy: Plan efficient routes that connect multiple churches while progressing toward your primary objectives. This approach mirrors the strategic planning required for weapon progression in comparable gaming experiences, where resource optimization determines success.
Action Checklist
- Check map immediately upon starting for golden church icons
- Visit first church, interact with altar near Marika statue for +1 charge
- Plan efficient route connecting multiple churches while exploring
- Complete all 4 possible church upgrades before night two
- Defeat final boss on night two for automatic additional charge
No reproduction without permission:Tsp Game Club » How to Get More Flasks in Elden Ring Nightreign Master Flask upgrades in Elden Ring Nightreign with strategic church locations and expert survival tips