TL;DR
- Brute Justice requires precise tower soaking and multi-boss synergy management
- A3S introduced puzzle mechanics that required flawless communication and planning
- Early Heavensward raids featured overtuned DPS checks that demanded near-perfect execution
- Team role designation and cooldown timing are critical success factors
- Modern raiding benefits from lessons learned during these groundbreaking encounters
Arriving in Heavensward patch 3.2, A8S marked the climax of the Midas raid series, presenting players with the formidable Brute Justice. This mechanical behemoth combines the core mechanics of Brawler, Blaster, Swindler, and Vortexer into one relentless encounter. The true challenge emerged when these individual components synchronized their attacks during the Voltron-style merger, creating overwhelming pressure that tested even veteran raid groups.
Progression teams invested up to 17 days mastering Brute Justice’s intricate dance. Initial attempts were hampered by technical issues including erratic mine placement and seemingly unmitigatable damage patterns. Even after patches resolved the most severe bugs, the multi-boss coordination demanded unprecedented situational awareness from every participant. A single positioning error during tower activation sequences or missile volleys could instantly terminate hours of advancement.
Critical Mechanics Breakdown
-
J-Storm: This devastating ultimate ability functions as a soft enrage timer, punishing groups that fail to maintain consistent damage throughput.
-
Tower Soaks: Maintaining at least two players within designated tower zones prevents catastrophic raid-wide energy discharges that would otherwise wipe the party.
-
Link-Up/Overload: These synchronized ability combinations merge multiple boss mechanics simultaneously, demanding impeccable positioning and movement coordination from all eight raid members.
Advanced Strategy Implementation
-
Role Specialization: Clearly define assignments for explosive device management, mine baiting procedures, and tower occupation duties well before each combat phase transition.
-
Voltron Merge Preparation: When Brute Justice assembles its combined form, anticipate rapid-fire mechanic sequences. Maintain composure and execute rehearsed movement patterns rather than reacting impulsively to the visual chaos.
-
Strategic Cooldown Deployment: Tank and healing specialists must carefully sequence their major defensive capabilities to coincide with predictable high-damage intervals throughout the encounter.
While many recall A8S with lingering frustration, others cherish the unique sense of achievement gained from mastering such a complex engagement. This encounter demanded revolutionary teamwork standards during an experimental period in encounter design evolution.
Struggling with The Cloud of Darkness Chaotic Raid mechanics? Simplify your progression with our FFXIV The Cloud of Darkness Chaotic Raid Boost—our skilled team navigates the challenging mechanics on your behalf, enabling you to acquire premium equipment and exclusive rewards without the associated stress!
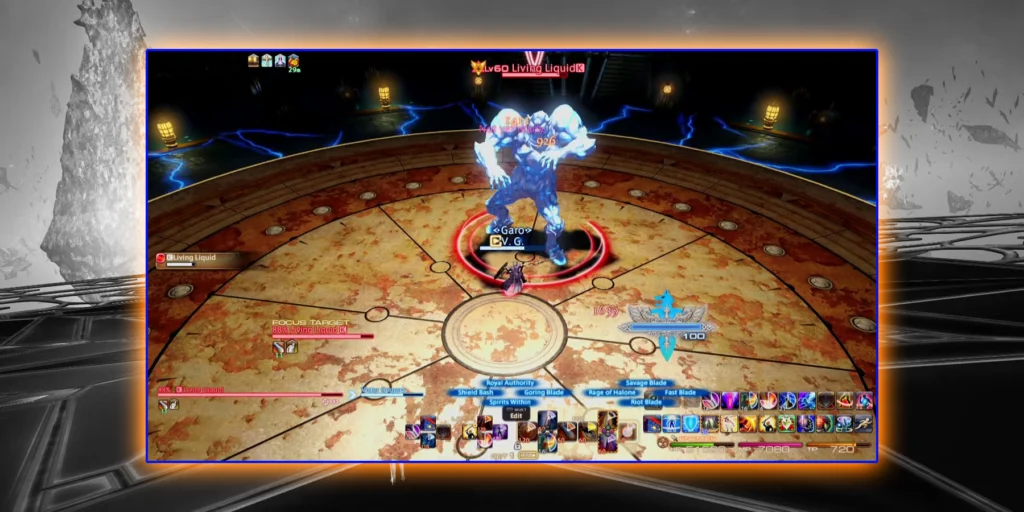
Positioned within the demanding Gordias raid tier, A3S (Living Liquid) demolished the confidence of elite progression teams during Heavensward’s inaugural months. Squads dedicated entire lockout periods attempting to surpass this solitary encounter. Numerous groups never progressed to witness Gordias’ concluding battle. That exemplifies its sheer brutality. Living Liquid alternates between humanoid configuration and gigantic hand formation, discharging aqueous projectiles, summoning subordinate slime creatures, and delivering lethal tank-destroying attacks.
Initial assessments suggested impossibility, with assumptions that equipment thresholds remained insufficient for the damage verification requirements. Indeed, pioneering completions occurred at the absolute threshold of enrage timers. The shape-shifting characteristic additionally introduced innovative puzzle-style mechanics lacking direct predecessors in earlier raid content.
Signature Mechanical Challenges
-
Fluid Swing: These tank-demolishing strikes can eliminate a tank instantly if defensive cooldowns or aggro transfer protocols are mismanaged.
-
Protean Wave: Hydrodynamic cones radiating from the boss across multiple vectors, permitting zero tolerance for player overlap or positional errors.
-
Giant Hand Phase: Throughout this segment, the encounter may seize the primary tank. Remaining members must liberate the immobilized tank while simultaneously managing meteor impacts and additional enemy spawns.
Achieving victory in A3S represented a monumental accomplishment for those possessing the persistence to refine their tactical approaches. Contemporary raiders may still encounter significant difficulty, particularly when utilizing synchronized equipment. The engagement persists as an authentic benchmark for defining ‘barrier boss’ difficulty thresholds.
Experiencing difficulties with challenging FRU content? Explore our FFXIV FRU Boost—our professional players manage the most demanding engagements, assisting you in obtaining prestigious equipment and recognition without excessive effort!
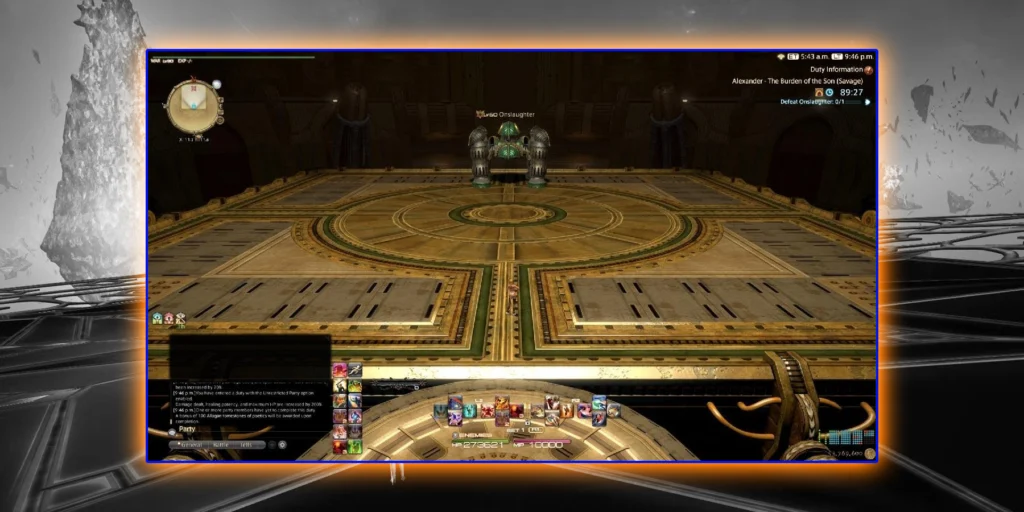
Progression teams initially faced Fate Calibration Alpha, a critical phase where Perfect Alexander unleashes an unavoidable raid-wipe ability. The only countermeasure was obtaining a concealed enhancement called Enigma Codex, which remained undiscovered for days. The solution involved eliminating a specific add—Perfect Alexander’s core—using precise timing earlier in the encounter to activate this essential buff. Discovering this mechanism required extensive experimentation and systematic elimination of alternative approaches.
Puzzle Elements: The Enigma Codex challenge alone tested even elite raiders, who exhaustively explored every conceivable tactical variation to circumvent the devastating wipe mechanic.
Puzzle Elements: The Enigma Codex challenge alone tested even elite raiders, who exhaustively explored every conceivable tactical variation to circumvent the devastating wipe mechanic.
Varied Mechanics: Each boss segment introduces fresh interpretations of familiar assaults. Brute Justice and Cruise Chaser materialize simultaneously, challenging your ingrained response patterns.
Varied Mechanics: Each boss segment introduces fresh interpretations of familiar assaults. Brute Justice and Cruise Chaser materialize simultaneously, challenging your ingrained response patterns.
Perfect Alexander’s Final Phase: An overwhelming sequence of laser arrays, explosive devices, system alerts, and the notorious “DPS conundrum” superimposed upon one another.
Perfect Alexander’s Final Phase: An overwhelming sequence of laser arrays, explosive devices, system alerts, and the notorious “DPS conundrum” superimposed upon one another.
Long Runtime: Maintaining concentration throughout 17 continuous minutes proves mentally exhausting. Numerous players dedicated multiple weeks simply to reach the concluding phase with regularity.
Long Runtime: Maintaining concentration throughout 17 continuous minutes proves mentally exhausting. Numerous players dedicated multiple weeks simply to reach the concluding phase with regularity.
Strategic Phase Learning Approach
Successful TEA completion demands breaking down the encounter into manageable segments. Begin by mastering the Liquid Hand and Brute Justice combination, then advance to Cruise Chaser mechanics, and only subsequently confront Perfect Alexander’s complexities. This incremental methodology prevents cognitive overload and enables teams to build confidence through repeated success in individual phases before attempting the full sequence.
Frequently shortened to DSR, Dragonsong’s Reprise (Ultimate) debuted in Endwalker update 6.11. Many regard it as a masterwork combining cinematic narrative elements from Heavensward’s Dragonsong Conflict with demanding high-level gameplay. Seven separate stages evaluate your complete raid toolkit. Even one minor error can terminate an otherwise promising attempt. Although featuring a progression save following King Thordan’s defeat, the confrontation still extends approximately 18 minutes upon reaching the ultimate phase.
Mid-Fight Checkpoint: After Monarch Thordan’s downfall, the instance records your advancement. This may appear beneficial, but it equally implies the latter portion becomes exceptionally extended and demanding.
Mid-Fight Checkpoint: After Monarch Thordan’s downfall, the instance records your advancement. This may appear beneficial, but it equally implies the latter portion becomes exceptionally extended and demanding.
DSR’s Formidable Obstacles
- Empowered Nidhogg Sequence: This segment examines positioning precision, aerial assault evasion, and managing numerous role-specific impairments simultaneously.
- Hraesvelgr & Nidhogg Combined Assault: Two enormous draconic entities attacking concurrently can produce chaotic combat conditions. One overlooked damage absorption or improperly utilized defensive ability terminates the entire group’s effort.
- Concluding Confrontation: The narrative reconstructs itself, unveiling a synthesis of dragon and warrior that intensifies the challenge. Coordinating meteor impacts, visual attention mechanics, and grouping indicators simultaneously proves anxiety-inducing.
Dragonsong’s Reprise distinguishes itself through emotional storytelling integration with technical combat requirements. The encounter’s musical score and cinematic references resonate with players familiar with the main storyline, creating memorable moments that enhance the raiding experience beyond mere mechanical execution.
Learn Phase-by-Phase: Deconstruct Liquid Hand combined with Brute Justice, subsequently address Cruise Chaser, and only then engage Perfect Alexander’s complexities.
Learn Phase-by-Phase: Deconstruct Liquid Hand combined with Brute Justice, subsequently address Cruise Chaser, and only then engage Perfect Alexander’s complexities.
Use Written or Visual Timelines: Many raiders depend on graphical guides or individual annotations to monitor each mechanic’s timing precisely.
Use Written or Visual Timelines: Many raiders depend on graphical guides or individual annotations to monitor each mechanic’s timing precisely.
Accept Wiping as Normal: TEA represents a journey of gradual enhancement. You’ll probably perfect each segment numerous iterations before achieving the definitive completion.
Accept Wiping as Normal: TEA represents a journey of gradual enhancement. You’ll probably refine each segment numerous iterations before achieving the definitive completion.
Proactive Learning Methodology
Implementing structured practice sessions with specific phase repetition accelerates mastery. Designated training periods focusing exclusively on problematic mechanics until automatic execution develops significantly reduces future error rates and enhances overall raid consistency across multiple attempt sequences.
Players who conquer TEA receive the prestigious “The Perfect Legend” designation. Many describe TEA as the most gratifying Ultimate to perfect because it examines problem-resolution capabilities alongside conventional technical proficiency.
Dragonsong’s Reprise: Emotional Storytelling Meets Brutal Difficulty
Widely regarded as one of Final Fantasy XIV’s most emotionally resonant encounters, Dragonsong’s Reprise (Ultimate) stands as a masterpiece that seamlessly integrates cinematic narrative from the Heavensward expansion with punishing high-end gameplay mechanics. This seven-phase marathon tests every aspect of your raid arsenal, demanding flawless execution and unwavering concentration throughout its approximate 18-minute duration.
The encounter’s unique appeal stems from how it weaves familiar musical themes and story moments into an increasingly complex mechanical tapestry. Veteran players frequently cite the fight’s ability to evoke genuine emotional responses while simultaneously requiring peak performance.
Many raiding groups report spending several months in progression, with some teams documenting over 700 attempts before achieving their first clear. The emotional weight of certain narrative reveals has even caused wipes when players became too emotionally invested in pivotal cutscene moments.
The Omega Protocol: Information Overload and Technical Perfection
At the absolute pinnacle of difficulty sits The Omega Protocol (Ultimate), a six-phase technical showcase that many experienced raiders consider the single most challenging piece of content Square Enix has ever created for the MMORPG.
What distinguishes TOP from previous Ultimates is the sheer density of information processing required. Mechanics like Hello World v2 assign multiple overlapping debuffs to each player simultaneously, requiring precise resolution sequences while managing ongoing boss attacks and positioning requirements.
Phase Mastery Techniques
Successful clearance of these encounters hinges on developing deep familiarity with each phase’s specific requirements. For Dragonsong’s Reprise specifically, raiders should focus on mastering the initial sections to minimize repetition and build momentum through the encounter’s progression.
One critical strategy involves breaking down complex multi-phase encounters into manageable learning segments. Rather than attempting to master the entire fight simultaneously, progressive learning allows teams to build confidence and refine execution through systematic improvement.
Progressive Phase Learning: Dedicate specific practice sessions to individual phases before attempting full runs. This approach reduces mental fatigue and enables targeted improvement on specific trouble areas.
Team Coordination Essentials
Effective communication and role assignment form the foundation of successful Ultimate progression. Designate specific players to handle mechanics like divebomb positioning, tower soaking responsibilities, and debuff management protocols.
Communication Protocols: Establish clear callout responsibilities for transitional mechanics and emergency situations.
Calm Under Pressure: The most challenging phases often combine multiple mechanics simultaneously, testing both individual skill and collective composure.
Mental Preparation and Persistence
Approaching these encounters requires recognizing that failure is an integral part of the learning process.
Advanced Optimization Strategies
Beyond basic execution, top-tier groups implement sophisticated optimization techniques:
-
Resource Management Planning: Coordinate defensive cooldowns, healing resources, and damage optimization across the entire encounter duration.
One commonly overlooked aspect involves anticipating cascade failure scenarios and developing contingency plans for common mistake recovery.

Pushing the boundaries of player skill in Final Fantasy XIV (FFXIV) represents the absolute peak of MMO raiding challenges. These encounters demand more than just mechanical execution – they test mental fortitude, team synergy, and strategic adaptability over extended progression periods.
Merely a fraction of the player base manages to clear these monumental challenges while current. Those who succeed often describe the experience as transformative, combining intense pressure with moments of breakthrough that redefine their approach to gaming challenges entirely.
Understanding the historical context behind these encounters reveals how Square Enix has refined difficulty balancing through community feedback and design iteration across multiple expansions.

Crowning the list as FFXIV’s most demanding encounter, The Omega Protocol (Ultimate) stands as the current benchmark for raid difficulty. Introduced in Endwalker patch 6.31, this six-phase marathon incorporates mechanics from Omega’s various forms throughout the Stormblood expansion, creating an information-saturation challenge that overwhelms even seasoned raiders.
Why TOP Represents the Ultimate Test
-
Information Processing Under Pressure: Mechanics like Hello World v2 assign multiple overlapping debuffs requiring sequenced resolution while managing simultaneous boss attacks.
-
Limit Cut Pattern Recognition: Incorrect number assignments force specific movement patterns where accidental teammate collisions guarantee failure.
-
Sustained Concentration Demands: Single errors cascade into full wipes, wasting 10-15 minute attempts and testing group morale endurance.
-
Competitive Integrity Questions: The world race controversy involving unauthorized zoom-out modifications highlighted how desperately teams sought advantages against this challenge.
Progression Methodology for TOP
-
Comprehensive Phase Analysis: Successful teams don’t just memorize mechanics but understand debuff interaction dynamics and role-specific responsibilities.
-
Mental Resilience Development: This encounter pushes even cohesive statics toward breaking points. Regular encouragement and celebrating incremental improvements maintains necessary momentum through extended progression periods.
-
Realistic Attempt Expectations: Prepare for several hundred wipes, with each failed attempt providing learning opportunities for refinement.
Upon finally defeating Omega, the game rewards your dedication with the Ultimate Omega weapon and the prestigious “The Alpha Legend” title. Many veteran players describe experiencing disbelief rather than immediate celebration, struggling to comprehend that their monumental effort has finally concluded.
Finding it tough to overcome the intense Omega Protocol (TOP) raid in FFXIV? Skip the struggle and grab our FFXIV TOP Boost—our elite raid team tackles the hardest parts, so you easily unlock exclusive gear and impressive achievements without the hassle!
For players beginning their raiding journey, establishing a solid foundation proves crucial before tackling Ultimate-level content.
Veteran raiders who conquered these legendary encounters typically recall specific breakthrough moments – that attempt where everyone survived a devastating phase combination, or the moment realization dawned that victory was imminent.
Advanced raiding development follows a natural progression curve. Begin with current Savage tiers to develop fundamental mechanical awareness, rotation optimization under pressure, and effective communication protocols during high-stakes situations.
Progression Team Composition Strategy: Building your static requires careful consideration beyond just player skill levels. Seek individuals sharing similar goals, availability, and, most importantly, compatible personalities capable of maintaining positive attitudes through repeated failure cycles.
That’s the essence of Final Fantasy XIV‘s hardest raids: They demand everything you’ve got, but the payoff is extraordinary. Good luck, have fun, and may your future contain more “Duty Complete” screens than you ever thought possible.
Final Fantasy XIV raiding evolution demonstrates how community feedback directly influences developer design decisions.
Never allow these encounters to intimidate you into surrender. While grueling, they offer profoundly rewarding experiences that forge unbreakable bonds between teammates. The shared struggle, inside jokes developed through countless wipes, and that final triumphant moment create memories persisting for years beyond the initial clearance.
Are you a newer player hoping to attempt these raids one day? Begin with current Savage tiers and systematically advance upward. Construct a robust foundation by perfecting basic mechanical responses, refining your damage rotation under pressure conditions, and mastering clear communication during critical moments.
Seasoned raiders who overcame these mythic challenges can likely remember distinct epiphany instances—the attempt where all members successfully navigated a punishing phase combination, or that instant when comprehension struck that the boss would finally fall.
High-level raiding in FFXIV maintains perfect equilibrium between frustration and exhilaration. This content isn’t universally appealing, but those embracing the challenge frequently discover unprecedented gaming satisfaction levels.
Action Checklist
- Establish clear role assignments for bomb disposal, mine diversion, and tower occupation prior to phase transitions
- Practice Voltron merge sequences in isolation before attempting full progression runs
- Develop cooldown rotation schedules aligned with predictable high-damage intervals
- Create visual diagrams for tower soak positions and movement pathways
- Master each TEA phase individually before attempting full sequence runs
- Create visual timelines or written notes for mechanic tracking
- Establish clear role assignments for tower soaks and mechanic handling
- Master Phase 1 execution to near-perfection before progressing to later stages
- Establish clear role assignments for specific mechanics and positioning requirements
- Complete current Savage tier to build fundamental mechanical awareness and team coordination skills
- Form static team with clear communication protocols and compatible schedules
- Practice specific mechanics in dedicated learning parties before attempting full progression
- Study phase-specific guides and create personal strategy notes for each encounter
- Implement cooldown rotation planning for tanks and healers specific to each fight
No reproduction without permission:Tsp Game Club » 10 Hardest FFXIV Savage & Ultimate Raids: The Definitive Ranking