TL;DR
- The AWP costs $4,750 and delivers one-shot kills to chest/head with high risk-reward dynamics
- Master positioning, timing, and counter-strafing to eliminate movement accuracy penalties
- Learn aggressive and passive playstyles to adapt dynamically to enemy strategies
- Utilize smokes, flashes, and molotovs to create advantageous sniper engagements
- Develop mental resilience and game sense to control match tempo and pressure opponents
Introduction to the AWP in CS2
What is the AWP?
The Arctic Warfare Police sniper rifle stands as CS2’s definitive long-range weapon, capable of eliminating fully armored opponents with a single torso shot. This $4,750 investment represents one of the game’s most significant economic commitments, demanding exceptional skill to justify its substantial price point. Unlike automatic rifles, the AWP enforces deliberate, calculated gameplay where every trigger pull carries immense consequence.
CS2 maintains the AWP’s legendary status as the premier choice for precision-focused players. Its deliberate firing cadence, pronounced movement restrictions, and distinctive acoustic signature create a steep learning curve that separates casual users from dedicated specialists. When wielded by experienced marksmen, this weapon transforms into a strategic asset capable of single-handedly securing bomb sites or halting enemy advances with well-timed eliminations.
The weapon’s inherent characteristics demand intelligent engagement selection, enemy movement prediction, and tactical discretion. Each discharged round carries critical importance—failing to connect typically results in immediate retaliation, while successful hits can completely reverse round momentum within moments.
Importance of the AWP in Competitive Play
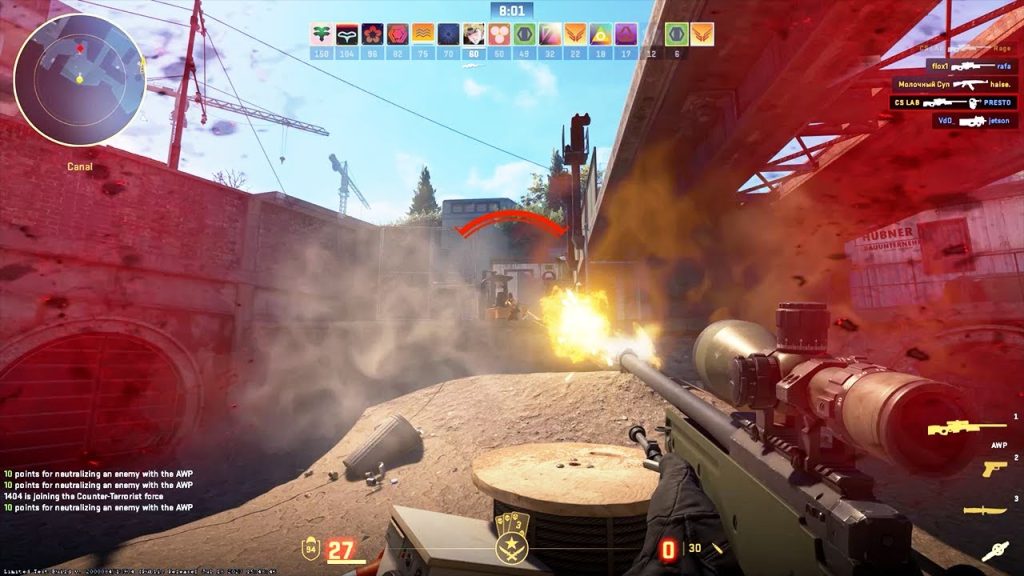

Within competitive CS2 environments, the AWP transcends mere firepower to become a tactical instrument that dictates team formations and strategic approaches. Fielding a proficient AWPer unlocks diverse tactical possibilities, from dominating Mirage’s central corridor to blocking Inferno’s Banana control.
Counter-Terrorist snipers typically anchor vital map sectors or govern choke points. Their mere presence compels adversaries to expend additional utility, alter routing patterns, or entirely circumvent specific areas. Terrorist-side AWPers function as vanguard elements—neutralizing defenders from distance and generating penetration opportunities for advancing teammates.
Professional teams frequently construct complete economic rounds around their primary sniper. When their star marksman acquires sufficient funds for the iconic green rifle, they recalibrate strategies to optimize the weapon’s battlefield influence. This degree of strategic deference underscores the AWP’s indispensable contribution to collective success.
Understanding the Basics of Sniping
Sniper Roles and Responsibilities
Expert sniping extends beyond spectacular eliminations or improbable un-scoped shots. True mastery encompasses area denial, intelligent placement, and operational discipline. The primary sniper function involves intelligence gathering, critical angle maintenance, and initiating picks that precipitate round victories. This necessitates comprehensive understanding of positioning dynamics, engagement timing, and tactical withdrawal protocols.
CS2 AWPers frequently operate as infiltration specialists or defensive anchors depending on map requirements. You might secure Dust II’s Long A passage or monitor Inferno’s apartment complexes. Your strategic positioning can impede enemy advances, compel utility expenditure, or completely restrict territorial control. Terrorist-side objectives involve identifying defensive vulnerabilities—intercepting rotation patterns, capitalizing on excessive aggression, or creating site access through clean entry frags.
Sniper duties transcend simple elimination metrics. You must preserve operational viability, safeguard the AWP during disadvantageous situations, and deliver precise enemy location intelligence. This role mandates elevated situational awareness since premature AWP loss frequently devastates team economies and strategic blueprints.
Mental Preparation for a Sniper
Elite AWPers combine mechanical precision with cognitive sharpness and emotional stability. The psychological strain of maintaining critical sightlines while anticipating potential enemy appearances demands exceptional mental fortitude. Maintaining composure under pressure, executing intelligent decisions, and resisting frustration after missed opportunities becomes paramount.
Self-assurance represents another critical component. Indecision breeds hesitation, and hesitation proves fatal during AWP engagements. Trust your tactical placement, reflexive capabilities, and game intelligence. When committing to engagements, follow through completely. If rounds miss their mark, execute controlled withdrawals and repositioning rather than descending into panic.
Proficient AWPers understand how to manipulate game tempo. Occasionally, the psychological threat posed by an AWP outweighs its actual firing capacity. Through strategic positioning alone, you can decelerate enemy initiatives, induce poor decision-making, and psychologically pressure opponents into tactical errors.
Mastering the AWP Mechanics
AWP Firing Mechanics and Timing
The AWP exhibits zero tolerance for imprecise timing. Unlike assault rifles, it lacks rapid successive firing capability or substantial error margins. Following each discharge, an extended bolt-cycling animation compels either continued angle commitment or tactical repositioning. Consequently, comprehensive timing comprehension becomes fundamentally essential.
CS2’s AWP firing dynamics incorporate nuanced modifications compared to CS:GO. The innovative sub-tick architecture means projectile registration now depends more extensively on movement precision than previous iterations. Achieving effectiveness requires perfecting the “stop-shoot” methodology—achieving complete immobility before initiating fire to preserve maximum accuracy.
This skill demands dedicated practice. Simply activating scope view and discharging while transitioning or airborne guarantees failure. Instead, develop counter-strafing proficiency: momentarily engage opposite directional inputs to achieve instantaneous halting before trigger activation.
Engagement timing selection proves equally vital. Sometimes delaying half a second to secure guaranteed eliminations outperforms hasty firing that reveals positional data. That marginal temporal advantage frequently determines round outcomes.
Movement and Accuracy (Scope, Walk, Crouch)
Every dedicated AWPer must comprehend movement’s impact on projectile trajectory. Any mobility during scope activation or firing sends rounds wildly off-target. This reality makes intelligent placement critical—you must situate yourself where stationary safety becomes achievable.
Stealth movement (Shift binding) minimizes acoustic signatures, beneficial for covert angle acquisition, though complete cessation remains necessary before discharge. Crouching assists shot stabilization and target profile reduction, though excessive repetition generates predictability. Strategic AWPers vary their stance configurations—alternating between standing, crouching, or rapid-scoping to maintain enemy uncertainty.
Scope utilization represents another distinguishing element between competent and exceptional snipers. Two magnification tiers exist—employ initial zoom (single right-click) for intermediate ranges and enhanced magnification (double right-click) for extended-distance surveillance. Transitioning between zoom levels consumes time, necessitating pre-planned angle selection.
You should additionally master practical quick-scoping—not the theatrical variety showcased in compilation videos, but the functional technique involving near-simultaneous scope activation and firing after achieving immobility. This facilitates accelerated responsiveness during constrained engagements without accuracy compromise.
Aiming and Crosshair Placement
Pre-Aiming and Holding Angles
Pre-aiming constitutes the cornerstone of reliable AWP performance. Rather than reacting to potential enemy locations, you pre-position your crosshair precisely where opponent craniums or torsos will most likely materialize. This requires familiarity with common positions—where adversaries typically emerge, where they establish defensive holds, and how they navigate the battlefield.
Angle maintenance revolves around tactical discipline. Constant dramatic flicks remain unnecessary. Frequently, the optimal elimination represents the simplest—if you’re already covering the correct trajectory and enemies enter your field of view, that represents complimentary frags. Allow opponents to commit the tactical blunder of challenging your position.
Two primary angle categories exist: restricted visibility angles and expansive viewing angles. Restricted angles minimize exposure but constrain reaction windows. Expansive angles provide superior visibility but increase vulnerability. Based on situational requirements, select appropriate configurations. Avoid perpetual default positioning to prevent predictability.
Crosshair positioning also matters during transitional movements. Maintain your crosshair aligned with cranial elevation and centered where enemies will probably appear. This methodology ensures only unidirectional adjustments during firing—not simultaneous vertical and horizontal corrections.
Best AWPing Positions on Popular Maps
Mirage: Mid, Window, and Cat Control
Mirage offers sniper paradise through extended sightlines and strategic mid dominance. The Window location arguably represents CS2’s most legendary AWP vantage point. From this elevated platform, you command Connector access, Top Mid control, and even Catwalk surveillance capabilities. With advantageous spawn timing and coordinated Window smoke deployment, you establish early territorial command and eliminate careless terrorist-side players attempting mid control.
Catwalk presents another dominant position. After advancing forward, Cat enables transitions into Mid Boxes or Underpass, surprising lurking opponents, or providing B short coverage from distance. Effective communication with your connector teammate generates lethal crossfire configurations.
Terrorist-side AWP deployment from Top Mid enables counter-sniping against CT AWPers in Window or Connector. Patience proves critical here—anticipate aggression, penalize rotations, and utilize your AWP for map accessibility. For aggressive initiatives, consider Window penetration with flash support for early eliminations. Mirage rewards confident, intelligent AWP tactics.
Inferno: Banana, Mid, and B Site
Inferno features more confined spaces yet provides abundant advantageous AWP angles. Banana represents classic sniper battleground territory. Counter-Terrorist side, you can initiate early Banana peeks for eliminations, though ensure mollie and flash assistance availability. Effective smoke lineups combined with early picks grant comprehensive map tempo control.
From B Site deployment, positioning behind new box or coffins facilitates rapid target acquisition during T-side rushes or delayed peeks into CT spawn. AWPers securing B positions can either anchor defensively or rapidly transition to A if required—Inferno prioritizes intelligent positioning above uncalculated aggression.
Inferno’s Mid corridor remains narrow, though terrorist-side, you can establish position behind logs or second mid awaiting enemy peeks. AWP utilization here demands exceptional patience—you’re engaging psychological warfare, anticipating CT overextension. If opponents refrain from advancing, execute methodical progression with your team, AWP leading directional clearance.
Dust II: Long Doors, Mid Doors, A Site
Dust II contains some of CS2’s most extensive AWP sightlines. Counter-Terrorist side, Long Doors represents early confrontation location. Rapid peeking with spawn superiority can secure eliminations, though involves substantial risk. Alternatively, maintain defensive positions from Car or Pit with support—these protective angles enable accurate firing without becoming easily traded.
Mid Doors constitutes the primary engagement zone. Competent mid AWPers can regulate Catwalk advances, monitor Lower Tunnel activity, and even prevent Xbox jumping maneuvers. Terrorist-side, snipers monitoring CT Mid or maintaining extended-range positions outside B can instantly unlock round progression.
From A Site deployment, maintaining positions from Ramp or Goose enables simultaneous Cat and Long control. Combine your AWP with rifler short coverage, and you’ve established impregnable defense. Dust II’s open architecture creates ideal environments for self-assured snipers.
Utility Usage to Support AWPers
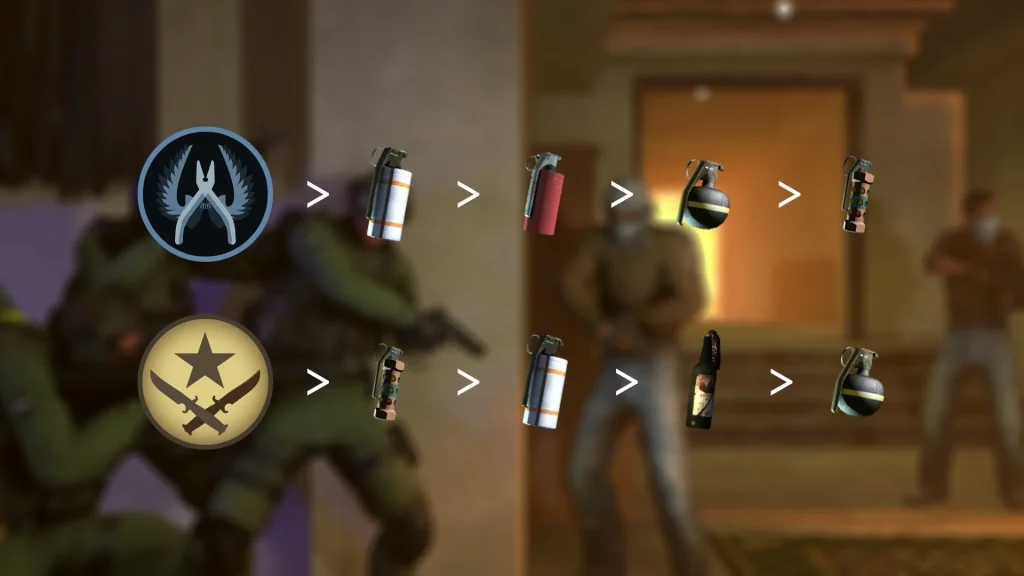

Smokes, Flashes, and Molotovs for AWP Play
Tactical equipment represents the AWPer’s most valuable ally. Properly executed flash deployment can generate complimentary eliminations. Ideal smoke placement enables tactical repositioning. Strategic molotov usage can manipulate enemies into your crosshair trajectory. You’re not merely a precision shooter—you’re a strategic commander.
Begin with smoke deployment strategies. As an AWP specialist, you can utilize them to obstruct enemy visibility or isolate individual engagements. Requireing mid control on Mirage? Deploy Top Mid smoke, then initiate Window peeks. Maintaining B control on Inferno? CT smoke deployment can decelerate rushes and induce poor tactical choices.
Flashbang devices serve as critical survival tools. During solo angle challenges, employ pop-flash deployment—instantaneous detonation within enemy sightlines. Additionally, request teammate flash support, particularly when contesting Banana or Long A territories. Avoid unassisted peeking without some form of tactical support.
Molotovs function exceptionally with AWP tactics. You can displace opponents from angles, prevent rushes, or sever enemy rotation patterns. Mollying under Mirage’s Balcony compels enemies to vault into your scope. Mollying Inferno’s Sandbags inhibits aggressive terrorist hiding during initial rounds.
The essential principle? Integrate your utility with precise timing and intelligent positioning. Avoid wasteful deployment. Structure your AWP initiatives around temporal and positional advantages.
How to Use Utility Defensively as an AWPer
Defensive utility deployment should facilitate time acquisition, push obstruction, and safe repositioning. For instance, while securing Mirage’s B Site, deploy entrance smoke, delay their advancement, and transition to Van or Bench for constrained angle maintenance.
Execute defensive flash deployment for disengagement protocols. If rounds miss their targets and require withdrawal, deploy wall-bounce flashes and immediately reposition. This prevents enemy pursuit and provides secondary engagement opportunities from superior positions.
Molotovs remain underutilized within AWPer equipment sets. Employ them reactively. Audible footstep detection? Molotov the entrance. Awareness of enemy execution preparation? Deploy molly to disrupt their timing.
Defensive utility transcends mere delay tactics—it represents intelligent gameplay. You aim to manipulate enemy movement into predictable patterns, then eliminate them during unexpected moments. Strategic AWPers can transform 1v3 scenarios into successful clutch situations through correct utility implementation.
Advanced AWP Strategies
Aggressive vs. Passive AWPing
Every AWP specialist develops distinctive stylistic approaches. Some embrace the excitement of forward-leaning peeks. Others prefer anchoring positions and capitalizing on enemy errors. Elite AWPers master both methodologies—and understand when to transition between tactical approaches.
Forward-leaning AWP tactics revolve around initiative seizure. Advance Mid territory, initiate early peeks, surprise your adversaries. This approach functions optimally when possessing support systems, advantageous spawn positioning, and confidence in marksmanship capabilities. The surprise element represents your primary tactical weapon here.
Avoid excessive aggression. Forward-leaning approaches without adequate support typically result in premature elimination and AWP loss. Consequently, comprehensive map knowledge and timing precision become critically important. Learn optimal peeking locations for each battlefield and only initiate aggressive maneuvers when tactically justified.
Passive AWP tactics, conversely, emphasize prolonged strategic gameplay. Angle maintenance, peeking anticipation, and site anchoring. This methodology appears less spectacular but delivers equivalent impact. It generates psychological pressure on enemies to initiate first movements—and when they comply, you’re prepared.
The strategic transformation occurs when transitioning between stylistic approaches mid-match. Initiate with aggressive tactics to disrupt enemy rhythm. Subsequent rounds, maintain defensive positioning and allow opponents to enter your scope trajectory. Maintain adversary uncertainty and you’ll consistently maintain tactical superiority.
Rotating and Repositioning Mid-Round
Competent AWPers avoid static positioning. Following eliminations or contact establishment, you must reposition. Why? Because adversaries now possess your positional intelligence, and they’ll circumvent or counter your positions subsequently.
Repositioning might involve withdrawal to safer angles or complete site transitions. Secured Mid eliminations on Mirage? Transition to B or Cat subsequent rounds. Captured Long targets on Dust II? Maintain positions from Goose or CT Ramp next engagement.
Mid-round transitions also prove critical. As round development progresses, your team might request assistance at alternative locations. Transition rapidly though intelligently. Avoid sprinting across exposed terrain. Employ smoke deployment and flash coverage for personal protection or utilize spawn routing alternatives.
Strategic AWPers cultivate unpredictability. Never maintain identical positioning more than twice consecutively. Generate circumstances where enemies must expend additional temporal and utility resources simply determining your location. That psychological advantage proves invaluable.
Economy and the AWP
When to Buy the AWP
The AWP represents significant economic commitment. You must understand when the investment justifies associated risks. As general principle, only acquire the AWP when:
- You possess armor protection and utility support systems
- Your team maintains full rifle and grenade purchasing capability
- You’re confident in delivering tactical influence
AWP acquisition during partial-buy or force-buy scenarios involves substantial risk. If elimination occurs prematurely, it constitutes massive economic damage. Though specific situations—like solo B site defense—might warrant justification.
Coordinate with your tactical unit. Avoid perpetual AWP purchasing expecting teammate support. As primary AWPer, they might provide weapon drops during critical rounds. Value the weaponry and exercise careful handling.
Eco Round AWPing Strategies
Occasionally you encounter limited financial resources and AWP preservation from previous engagements. These represent economic disadvantage rounds—minimal funding, elevated risk. Though with AWP availability, they’re not hopeless situations.
Execute passive gameplay and seek elimination opportunities. Maintain constrained angles where you can secure frags and execute withdrawals. Avoid excessive peeking—your objective involves securing one or two eliminations and upgrading teammate firearms.
You might additionally attempt baiting tactics. Allow pistol-equipped teammates to initiate peeks first, then trade with your AWP deployment. The resulting chaos can generate engagement windows for successful target elimination.
Remember: every discharged round carries significance. You lack financial capacity for repurchasing. Exercise efficiency, maintain patience, and avoid weapon wastage.
Communication and Team Synergy
Calling Out Enemy Positions
As an AWP specialist, you frequently maintain optimal battlefield visibility. Leverage this advantage. If detecting Mid peeking or Cat jumping adversaries, communicate immediately. Precise callouts can secure round victories—avoid vague “he’s there” statements. Specify “AWP Mid Window,” “1 underpass,” or “crossing to B” intelligence.
Vocal participation additionally assists rifler positioning optimization. If monitoring Mid territory, inform your team so they can concentrate on alternative sectors. If transitioning positions, announce early to prevent tactical surprise.
Clear communication establishes trust—and with trust, your team can execute strategies that optimize your AWP performance.
Working With Riflers and Entry Fraggers
Your rifle-equipped teammates constitute your operational foundation. They deploy your flash devices, monitor flanking positions, and generate operational space. As an AWPer, learn collaborative operation.
Coordinate peeking timing. Allow them initial advancement, trade if eliminated, or synchronize advances to surprise enemies. Utilize rifle teammates to displace opponents from corners inaccessible through scope clearance.
Entry fragging specialists additionally value reliable AWPer support. You can provide coverage during site penetration, maintain post-plant angle coverage, or obstruct retake initiatives. Avoid isolation—function as integrated team component.
Isolated AWPers can secure individual engagements. Well-supported AWPers can secure complete match victories.
Practicing and Improving AWP Skills
Aim Training Maps and Routines
Achieving AWP proficiency requires more than simple match exposure—it demands structured practice regimens. CS2 provides diverse aim training environments, and you should incorporate them into daily preparation routines. Two community-preferred options include “Aim Botz” and “training_aim_csgo2”—they continue functioning effectively within CS2 and assist reflex shot development, target tracking, and quick-scoping proficiency.
Here’s exemplary daily AWP training structure:
- Warm-up (10 minutes): Utilize Aim Botz or comparable training environment. Concentrate exclusively on cranial and thoracic shot placement while maintaining stationary positioning. Simulate authentic AWP movement patterns—cessation, scope activation, discharge, reset.
- Flick training (10 minutes): Employ training_aim_csgo2 or Aimbotz with mobile bot configurations. Practice rapid horizontal flicking maneuvers, replicating common engagement angles.
- Scope timing drills (5 minutes): Practice rapid-scoping into designated targets and immediate firing initiation. Concentrate on rhythmic patterns and reaction velocity.
- Angle holding practice (10 minutes): Load strategic environment like Mirage or Dust II and practice maintaining specific angle coverage. Imagine enemy peeking scenarios and respond accordingly.
Additionally incorporate deathmatch server participation. Join sniper-exclusive deathmatch lobbies where all participants utilize AWPs. It generates chaotic environments, though develops muscular memory and sharpens instinctive capabilities during high-pressure scenarios.
Finally, avoid procedural rushing. AWP mastery involves confidence development and precision cultivation. If accelerating training protocols, you’ll only acquire detrimental habits. Maintain consistency, monitor progression metrics, and challenge self-improvement weekly.
Watching Demos and Learning from Pros
Among the most underrated improvement tools involves observing professional AWPer demonstration recordings. Watch how s1mple, ZywOo, or dev1ce navigate battlefields. Observe their crosshair positioning, tactical discipline, and utility deployment before and after every discharge.
During demo observation, document observations:
- What angles do they maintain?
- When do they initiate forward movement versus tactical withdrawal?
- How do they support their tactical units with AWP deployment?
CS2’s integrated demo analysis tools or third-party platforms like HLTV and YouTube provide accessible VOD availability. Observe both terrorist and counter-terrorist perspectives and monitor how elite snipers adapt during mid-round developments. Replay identical rounds multiple instances to comprehend their tactical decision-making processes.
Avoid passive observation—replicate their behavioral patterns. Load practice server environments and duplicate their positioning, peeking patterns, and movement protocols. This “active study” methodology helps integrate top-tier habits into your gameplay methodology.
Introduction to the AWP in CS2
What is the AWP?
The Arctic Warfare Police sniper rifle stands as CS2’s most iconic precision weapon, capable of eliminating opponents with a single torso or headshot. Priced at $4,750, this high-risk investment demands exceptional game sense and mechanical precision to justify its cost. Unlike automatic rifles, the AWP imposes severe movement penalties and features a slow firing rate, making each shot critically important.
CS2’s updated mechanics introduce subtle but significant changes to AWP handling. The sub-tick system now places greater emphasis on movement precision and timing accuracy. Missing your initial shot often leaves you vulnerable to immediate counter-attacks, while successful hits can completely shift round momentum in your favor.
Successful AWP operation requires players to anticipate enemy movements, select engagements carefully, and maintain positional discipline throughout each match.
Importance of the AWP in Competitive Play


In competitive CS2 matches, the AWP transcends being merely a powerful firearm—it becomes a strategic tool that dictates team play patterns. Fielding a skilled AWPer unlocks diverse tactical possibilities, from securing mid control on Mirage to denying Banana access on Inferno. A competent sniper can halt enemy advances before they develop momentum.
Counter-Terrorist AWPers typically anchor critical map sections or control choke points. Their mere presence compels opponents to expend additional utility, alter their routes, or completely avoid specific areas. On the Terrorist side, an effective AWPer acts as the vanguard—eliminating defenders from distance and creating penetration opportunities for teammates.
Professional teams frequently construct entire economic rounds around their primary sniper. When their star player can afford the weapon, teams adjust strategies to maximize its impact, demonstrating the weapon’s crucial role in competitive success.
Understanding the Basics of Sniping
Sniper Roles and Responsibilities
Effective sniping extends beyond spectacular headshots or improbable no-scope kills. It encompasses area control, strategic positioning, and tactical discipline. The sniper’s primary function involves gathering intelligence, maintaining key sightlines, and securing opening eliminations that lead to round victories.
Within CS2’s tactical framework, AWPers frequently operate as lurkers or anchors depending on map requirements. You might find yourself securing Long A on Dust II or monitoring apartments on Inferno. Your strategic presence can delay enemy pushes, force utility expenditure, or completely deny map control. As a Terrorist sniper, your objective centers on identifying defensive weaknesses—intercepting rotating players, punishing over-aggression, or creating site entries with clean picks.
Sniper duties transcend mere elimination counts. You must maintain survival, preserve the AWP when strategically necessary, and communicate enemy positions with precision. This role demands elevated situational awareness since losing the weapon early creates substantial economic and strategic disadvantages for your team.
Mental Preparation for a Sniper
Elite AWPers demonstrate more than just precise aim—they maintain mental sharpness and emotional composure. The psychological pressure of maintaining critical angles while anticipating enemy peeks can overwhelm unprepared players. Mental resilience becomes essential—you must remain calm under pressure, make intelligent decisions, and avoid frustration following missed shots.
Self-confidence represents another critical factor. Hesitation stemming from self-doubt proves fatal in AWP engagements. You must trust your positioning decisions, reaction capabilities, and game intuition. When committing to a shot, follow through completely. If you miss, retreat and reposition rather than panicking.
Successful AWPers understand how to manipulate game tempo. Sometimes, the psychological threat of an AWP outweighs its actual deployment. Through strategic positioning alone, you can decelerate enemy plays, force poor decisions, and induce opponent mistakes through psychological pressure.
Mastering the AWP Mechanics
AWP Firing Mechanics and Timing
The AWP offers no forgiveness for poor timing decisions. Unlike assault rifles, it lacks rapid fire rates or significant error margins. Following each discharge, an extended bolt animation forces either continued angle commitment or tactical withdrawal.
CS2’s revised firing mechanics introduce nuanced alterations compared to CS:GO. The updated sub-tick system means shot registration depends more heavily on movement precision and timing accuracy than previous iterations.
This demands dedicated practice. You cannot simply scope and fire while moving or jumping—that approach guarantees failure. Instead, master counter-strafing: briefly tapping the opposite directional key to achieve immediate movement cessation before trigger engagement.
Understanding optimal shot timing proves equally crucial. Occasionally, waiting an additional half-second for a guaranteed elimination outweighs taking a rushed shot that reveals your position. That brief delay can determine round outcomes between victory and defeat.
Movement and Accuracy (Scope, Walk, Crouch)
Every serious AWPer should comprehend how movement impacts shot precision. If you discharge while moving during scoping or firing sequences, your projectile will deviate significantly from your crosshair placement.
Walking (utilizing the Shift key) reduces audible movement cues, beneficial for stealthy angle acquisition, but you’ll still require complete movement cessation before firing.
Crouching assists shot stabilization and reduces your target profile, but avoid over-reliance to prevent predictability. Intelligent AWPers vary their stance—standing, crouching, or employing quick-scope techniques to keep adversaries uncertain.
Scope utilization represents another distinguishing factor between competent and exceptional snipers. Two magnification levels exist—employ primary zoom (single right-click) for intermediate distances and secondary zoom (double right-click) for extended-range engagements. Transitioning between zoom settings consumes time, so pre-determine your intended angles.
You should also practice tactical quick-scoping—not the theatrical variety seen in compilation videos, but the practical application involving near-simultaneous scoping and firing after movement cessation. This enables faster response capabilities in confined situations without accuracy compromise.
Aiming and Crosshair Placement
Pre-Aiming and Holding Angles
Pre-aiming establishes the foundation for consistent AWP performance. Rather than reacting to potential enemy locations, you position your crosshair precisely where opponent heads or torsos will most likely appear.
Angle maintenance centers on tactical discipline. You don’t require constant flick-shot attempts. Sometimes, the most effective shot involves minimal adjustment—if you’re already covering the correct trajectory and the enemy advances into your line of fire, that represents an uncontested elimination.
Two primary angle categories exist: restricted visibility angles and expanded visibility angles. Tight angles minimize your exposure profile but concurrently restrict your reaction window. Wide angles provide superior visual coverage but increase your vulnerability exposure. Base your selection on situational requirements and team necessities. Avoid habitual selection of identical angles to prevent predictability.
Crosshair positioning also matters during transitions between locations. Maintain your crosshair aligned with head-level elevation and centered where adversaries will probably materialize. This approach ensures you only need vertical or horizontal adjustments during engagement—not simultaneous corrections.
Best AWPing Positions on Popular Maps
Mirage: Mid, Window, and Cat Control
Mirage serves as a sniper’s paradise thanks to its extensive sightlines and strategic mid control importance. The Window location stands as perhaps the most legendary AWP position throughout Counter-Strike history. From this vantage, you dominate Connector access, Top Mid control, and even monitor Catwalk approaches effortlessly. With favorable spawn positioning and coordinated Window smoke deployment from teammates, you can establish early control and eliminate careless Terrorist players attempting mid domination.
Another powerful position involves Catwalk control. Once you’ve established forward presence, Cat enables aggressive pushes into Mid Boxes or Underpass areas, intercept lurking opponents unexpectedly, or provide covering fire for B short engagements from distance. Effective communication with your connector teammate can establish lethal crossfire configurations.
On the attacking side, AWP deployment from Top Mid allows counter-sniping against CT AWPers in Window or Connector positions. Patience proves essential here—anticipate aggressive plays, punish rotational movements, and utilize your AWP to create map openings. If you’re feeling confident, contemplate aggressive Window peeks with flash support for early elimination attempts. Mirage benefits confident, intelligent AWP tactics.
Inferno: Banana, Mid, and B Site
Inferno presents somewhat tighter corridors, yet still offers numerous advantageous AWP angles. Banana represents a classic sniper battleground. On defensive setups, you can peek down Banana early for elimination opportunities, but ensure you possess molotov and flashbang support. Proper smoke deployment strategies and early picks can grant your team comprehensive control over the match’s tempo.
From B Site defensive positions, playing behind new box or coffins permits rapid flick shots against Terrorist rushes or delayed peeks into CT spawn areas. AWPers securing B positions can either anchor firmly or rotate rapidly to A site if required—Inferno rewards strategic positioning over reckless aggression.
Mid on Inferno remains constrained, but on the Terrorist side, you can position yourself behind logs or second mid locations and await enemy peeks. AWP utilization here demands patience—you’re engaging in psychological warfare, anticipating CT overextension. If they refrain, advance methodically with your team, AWP leading to clear angles systematically.
Dust II: Long Doors, Mid Doors, A Site
Dust II features some of CS2’s most extensive AWP sightlines. On CT setups, Long Doors represents an early engagement zone. Rapid peeking with spawn advantages can secure eliminations, but carries significant risk. Alternatively, maintain positions from Car or Pit with teammate support—these defensive angles enable accurate shooting without easy trade scenarios.
Mid Doors serves as the primary action center. A proficient mid AWPer can regulate Catwalk advances, monitor Lower Tunnel movements, and even prevent Xbox jumping attempts. On Terrorist deployments, a sniper observing CT Mid or maintaining extended-range angles outside B can instantly create round-winning opportunities.
From A Site defensive setups, holding from Ramp or Goose positions allows simultaneous Cat and Long control. Combine your AWP coverage with rifle support monitoring short access, and you’ve established an impregnable defensive structure. Dust II’s expansive design creates an ideal environment for confident snipers.
Utility Usage to Support AWPers


Smokes, Flashes, and Molotovs for AWP Play
Tactical equipment serves as the AWPer’s most valuable ally. A properly executed flashbang can secure uncontested eliminations. An accurately placed smoke grenade enables tactical repositioning. A molotov can compel adversaries directly into your sight picture. You’re not merely a precision shooter—you’re a strategic planner.
Begin with smoke deployment strategies. As an AWPer, you utilize them to obstruct enemy visibility or create isolated engagements. Require mid control establishment on Mirage? Deploy Top Mid smoke, then advance from Window positions. Securing B defense on Inferno? A CT-oriented smoke can delay rushes and induce poor decision-making.
Flashbang utilization represents your survival mechanism. If you’re independently peeking angles, employ pop-flash techniques—those detonating immediately within enemy sightlines. You can also request teammate flash support, particularly when contesting high-traffic areas like Banana or Long A access points. Avoid unsupported dry peeking entirely.
Molotovs function exceptionally well within AWP tactical frameworks. You can flush concealed positions, prevent aggressive rushes, or sever enemy rotational pathways. Igniting areas beneath Balcony on Mirage forces opponents to leap directly into your scope alignment. Burning Sandbags on Banana prevents aggressive Terrorist players from establishing early round concealment.
The critical factor? Integrate your equipment usage with precise timing and positioning considerations. Avoid wasteful deployment. Structure your AWP engagements around temporal and spatial utility advantages.
How to Use Utility Defensively as an AWPer
During defensive scenarios, your utility should facilitate time acquisition, push prevention, and safe repositioning. For instance, if you’re maintaining B Site defense on Mirage, deploy entrance smoke coverage, delay their advancement, and transition to Van or Bench locations for more confined angle coverage.
Employ flashbangs defensively to enable disengagement. If you fail your initial shot and require withdrawal, execute wall-bank flash deployment and reposition immediately. This prevents enemy pursuit and grants secondary engagement opportunities from superior positions.
Molotovs remain significantly underutilized within AWPer equipment selection. Utilize them reactively. Detect audible footsteps? Deploy entrance molotov coverage. Identify execute preparation? Release molotov deployment to disrupt their timing coordination.
Defensive utility application extends beyond simple delay tactics—it involves intelligent play. You aim to manipulate enemy movements into predetermined areas, then eliminate them when least anticipated. An intelligent AWPer can transform 1v3 scenarios into successful clutches through proper equipment utilization.
Advanced AWP Strategies
Aggressive vs. Passive AWPing
Every proficient AWPer develops a distinctive stylistic approach. Some thrive on aggressive peek engagements. Others prefer anchoring positions and capitalizing on opponent errors. Elite snipers master both methodologies—and understand when to transition between approaches.
Aggressive AWP tactics center on initiative assumption. Advance Mid control, execute early peeks, surprise your adversaries. This approach functions optimally when you possess teammate support, favorable spawn positioning, and confidence in your shooting capabilities. The surprise element becomes your primary tactical weapon here.
However, avoid excessive aggression. Unsupported aggressive play can result in early elimination and AWP loss. That’s why comprehensive map knowledge and timing precision prove so vital. Learn optimal peeking locations for each competitive environment and only pursue aggression when strategically justified.
Passive AWP methodology, conversely, emphasizes extended-game strategies. Angle maintenance, anticipation of enemy peeks, and bombsite anchoring. While less visually spectacular, this approach delivers equivalent impact. It applies pressure forcing enemies to initiate movement—and when they comply, you’re prepared.
The strategic advantage emerges when you can fluidly transition between both approaches during match progression. Initiate with aggressive tactics to disrupt opponent rhythm. Subsequent rounds, adopt defensive positioning and permit adversaries to advance into your scope coverage. Maintain uncertainty and you’ll consistently maintain tactical superiority.
Rotating and Repositioning Mid-Round
Competent AWPers avoid positional stagnation. Following elimination acquisition or enemy contact, you must relocate. Why? Because opponents now possess your location intelligence, and they’ll either avoid or counter your positions subsequently.
Positional adjustment could involve retreating to safer angles or completely rotating to alternative sites. Did you secure Mid elimination on Mirage? Transition to B or Cat control subsequent rounds. Intercepted Long A on Dust II? Maintain Goose or CT Ramp positions next engagement.
Mid-round rotational movements also prove crucial. As round dynamics evolve, your team might request assistance at different locations. Rotate rapidly but intelligently. Avoid sprinting across exposed terrain. Utilize smoke and flash deployment for personal coverage or employ spawn routing alternatives.
An effective AWPer maintains unpredictability. Never maintain identical positions more than two consecutive rounds. Create scenarios where enemies must expend additional time and utility merely determining your whereabouts. That psychological advantage proves invaluable.
Economy and the AWP
When to Buy the AWP
The AWP represents substantial economic investment. You must recognize appropriate purchase timing. General guidelines suggest AWP acquisition only when:
- You possess protective armor and supporting utility equipment.
- Your team maintains full rifle and grenade purchasing capability.
- You possess confidence in your impact potential.
AWP purchasing during partial-buy or force-buy situations carries significant risk. If eliminated early, it creates massive economic disadvantage. However, specific circumstances—like solo B site defense—might justify the expenditure.
Coordinate with your team organization. Avoid consistent AWP purchasing expecting automatic teammate support. If you serve as primary AWPer, teammates might provide weapon drops during critical rounds. Value the weapon appropriately and handle it with careful consideration.
Eco Round AWPing Strategies
Occasionally you encounter limited financial resources with preserved AWP from previous rounds. These represent economic disadvantage rounds—limited funding, elevated risk. But with AWP availability, they’re not hopeless scenarios.
Adopt passive approaches and seek elimination opportunities. Maintain confined angles where you can secure kills and withdraw safely. Avoid excessive peeking—your objective involves securing one or two eliminations and upgrading teammate firearms.
You can also attempt baiting tactics. Allow pistol-equipped teammates to peek initially, then trade eliminations with your AWP coverage. The resulting chaos can create engagement windows for successful shooting.
Remember: each discharge carries weight. You lack rebuy financing. Maintain efficiency, exercise patience, and avoid weapon wastage.
Practicing and Improving AWP Skills
Aim Training Maps and Routines
Achieving AWP proficiency requires more than simple match exposure—it demands structured practice regimens. CS2 provides diverse aim training environments, and you should incorporate them into daily preparation routines. Two community-preferred options include “Aim Botz” and “training_aim_csgo2”—these continue functioning effectively in CS2 and assist in developing reflex shooting, target tracking, and tactical quick-scoping capabilities.
Sample daily AWP training structure:
- Warm-up (10 minutes): Utilize Aim Botz or comparable training environments. Concentrate exclusively on cranial and thoracic shots during stationary positioning. Simulate authentic AWP movement patterns—cessation, scope acquisition, discharge, reset sequence.
- Flick training (10 minutes): Employ training_aim_csgo2 or Aimbotz with mobile targets. Practice rapid horizontal flicks, replicating common angle engagements.
- Scope timing exercises (5 minutes): Practice tactical quick-scoping into targets and immediate firing execution. Focus on rhythmic consistency and reaction velocity.
- Angle maintenance practice (10 minutes): Load competitive maps like Mirage or Dust II and practice maintaining specific angles. Visualize enemy peek scenarios and respond accordingly.
Avoid neglecting deathmatch server participation. Join sniper-exclusive deathmatch environments where all participants employ AWPs. While chaotic, this builds muscular memory and sharpens instinctive responses during high-pressure situations.
Finally, avoid rushing skill development. AWP proficiency centers on confidence and precision. Rushed training cultivates poor technical habits. Maintain consistency, monitor progression metrics, and challenge yourself for weekly improvement.
Watching Demos and Learning from Pros
Among the most undervalued improvement tools involves professional demonstration analysis. Observe how elite players like s1mple, ZywOo, or dev1ce navigate competitive spaces. Observe their crosshair positioning, their tactical discipline, and their equipment utilization before and following each engagement.
During demonstration review sessions, maintain documentation:
- Which angles do they maintain?
- When do they advance versus withdraw?
- How do they support teammates through AWP deployment?
Platforms like CS2’s integrated demonstration viewer or third-party services including HLTV and YouTube offer accessible video-on-demand content. Review both attacking and defensive perspectives and observe how premier snipers adapt during round progression. Replay identical rounds multiple times to comprehend their decision frameworks.
Avoid passive viewing—replicate their actions. Load practice server environments and mirror their positions, peeking techniques, and movement patterns. This “active learning” methodology helps integrate elite-level habits into your gameplay approach.
Effective mid-round movement separates elite AWPers from average players. When your squad requests reinforcement at an alternative bombsite, execute swift but deliberate rotations. Never expose yourself by dashing across vulnerable territory without adequate protection.
Deploy smoke screens and flash grenades to mask your relocation or utilize spawn pathways for safer transitions.
Top-tier snipers maintain unpredictability through systematic position variation. Avoid maintaining identical angles for consecutive rounds. Force opponents to dedicate additional resources and time simply identifying your current location. This psychological advantage provides immeasurable tactical benefits.
The Arctic Warfare Police rifle represents a significant financial commitment at $4,750. Understanding purchase timing is crucial for maximizing return on investment. Follow these fundamental acquisition principles:
- Ensure you possess both armor and supporting tactical equipment.
- Verify your team can still afford complete rifle setups and grenades.
- Maintain confidence in your ability to generate meaningful impact.
Acquiring the sniper during partial economic rounds or forced purchases carries substantial risk. Early elimination results in catastrophic financial damage. However, specific scenarios—such as solo defense of bombsite B—may validate the expenditure.
Coordinate purchasing strategies with your teammates. Don’t automatically buy the AWP every round expecting comprehensive support. If you serve as the primary sniper, colleagues may provide the weapon during pivotal rounds. Respect the firearm’s value and handle it responsibly.
Occasionally you encounter situations with minimal funds while retaining an AWP from prior rounds. These economy rounds present low financial resources but high danger potential. However, possessing the sniper rifle transforms these situations from hopeless to strategically manageable.
Adopt conservative positioning and seek opportunistic eliminations. Maintain narrow angles where you can secure kills and safely withdraw. Avoid excessive peeking—your objective involves obtaining one or two frags to upgrade teammates’ firearms.
Implement calculated baiting strategies. Allow pistol-equipped allies to initiate contact, then capitalize with your AWP for trade kills. The resulting confusion creates openings for successful shots.
Remember: each bullet carries weight. You lack financial capacity to repurchase. Exercise efficiency, maintain patience, and conserve the weapon’s utility.
As a sniper specialist, you frequently maintain superior visual control over key map areas. Leverage this advantage strategically. When observing opponents peeking Mid or navigating Catwalk, communicate immediately using precise terminology. Specific callouts win rounds—avoid vague descriptions like “he’s there.” Instead specify “AWP Mid Window,” “1 underpass,” or “crossing to B.”
Vocal coordination enhances rifler positioning effectiveness. If you’re monitoring Mid, inform your squad so they can concentrate on alternative zones. When transitioning between positions, announce movements early to prevent positional surprises.
Transparent communication fosters trust—and with established confidence, your team can implement tactics that optimize your AWP performance.
Your rifle-equipped teammates form your operational foundation. They deploy flash grenades, protect your flanking positions, and establish tactical space. As an AWP operator, learn collaborative engagement techniques.
Synchronize peeking timing. Permit allies to initiate, execute trades if they fall, or coordinate simultaneous engagements to surprise adversaries. Utilize rifle specialists to clear corners inaccessible through your scope.
Entry fraggers similarly benefit from dependable sniper support. You can provide covering fire during site penetration, maintain post-plant angles, or disrupt retake attempts. Avoid isolation—function as an integrated team component.
An isolated AWPer can secure individual encounters. A properly supported sniper can capture entire matches.
Developing AWP proficiency requires more than competitive match exposure—it demands systematic training approaches. CS2 provides numerous aim development maps, and you should incorporate them into daily preparation sessions. Two widely-used community creations are “Aim Botz” and “training_aim_csgo2”—both function effectively in CS2 and assist in refining reflex shots, target tracking, and rapid-scoping techniques.
Establish a comprehensive daily AWP training regimen:
- Warm-up (10 minutes): Utilize Aim Botz or comparable training environments. Concentrate exclusively on delivering head and torso impacts while stationary. Replicate authentic sniper movement patterns—halt, zoom, fire, reset.
- Flick development (10 minutes): Employ training_aim_csgo2 or Aimbotz featuring mobile targets. Practice swift horizontal adjustments, simulating common engagement angles.
- Scope timing exercises (5 minutes): Practice rapid-scoping maneuvers targeting practice dummies and discharging immediately. Focus on rhythm maintenance and reaction acceleration.
- Angle maintenance practice (10 minutes): Load strategic maps like Mirage or Dust II and practice maintaining specific sightlines. Visualize enemy peeks and respond appropriately.
Don’t disregard deathmatch servers either. Participate in sniper-exclusive deathmatch environments where all participants employ AWPs. While chaotic, these sessions develop muscle memory and sharpen instincts during high-pressure scenarios.
Finally, avoid rushing your development process. Sniper mastery centers on confidence and precision. Accelerated training cultivates detrimental habits. Maintain consistency, monitor progression, and challenge yourself to enhance performance weekly.
Precision timing separates elite AWPers from average snipers. One critical error involves peeking without proper synchronization with your team’s utility deployment. If you expose yourself before your teammate’s flashbang detonates, you present the enemy with an uncontested elimination opportunity. Conversely, delayed peeking may cause you to miss crucial entry opportunities during executes.
Seasoned AWPers develop an intuitive understanding of combat rhythm. They coordinate their movements with flash detonation timing, initiate rotations before bomb plant scenarios, and maintain shot discipline for optimal engagement windows. This expertise develops through extensive match experience, but systematic review of your demos helps identify specific moments where timing miscalculations resulted in lost eliminations.
A frequently overlooked mistake involves excessive greediness. Not every engagement requires taking the shot. Strategic angle maintenance often provides greater tactical value than risky peeking attempts. Prioritize intelligent decision-making over spectacular plays.
Nothing disrupts an opposing sniper’s effectiveness more than well-placed utility. When facing enemy AWPers, exercise heightened situational awareness. Avoid dry peeking contested angles. Instead, coordinate with teammates to deploy utility that forces enemy repositioning or wasted ammunition.
Flashbangs serve as your primary counter-sniping tool. A properly executed pop-flash around corners can temporarily blind snipers, creating brief windows to secure eliminations. Smoke grenades prove equally valuable—obscuring sightlines compels repositioning or inefficient shot expenditure.
Molotov cocktails effectively deny common AWP positions like Window, Goose, or Car. If targets don’t reappear after your incendiary deployment, they’ve likely retreated or rotated. Capitalize on this created space intelligently.
Another potent strategy involves coordinated flanking maneuvers. Enemy snipers frequently operate in isolation or along map peripheries. Leverage this tendency by navigating through mid or exploiting timing gaps to encircle positions. Surprise enemy AWPers from unexpected angles to secure pivotal picks that compromise defensive setups.
Finally, leverage auditory cues strategically. Hearing AWP scope activation or discharge signals opportunities to press advantages from alternate approaches. Split-push executions prove particularly effective since single snipers cannot simultaneously cover multiple engagement vectors.
AWPers face one significant constraint: their weapon’s cyclical firing rate. Following each discharge, they enter a vulnerable state. Capitalize on this limitation through systematic shot baiting—deploy one teammate to execute jump or shoulder peeks, drawing enemy fire, then immediately commit secondary players to capitalize on the cooldown period.
This methodology proves especially potent in confined spaces where sniper rifles demonstrate reduced effectiveness. Force missed shots to gain tactical control.
Additionally, employ fake site executions to manipulate enemy positioning. Deploy smokes and flashbangs toward one bombsite, generate audible distractions, then execute rapid rotations. Snipers struggle with quick repositioning demands since adjustments risk exposure.
Timing precision remains paramount. Delaying your peek by mere seconds might intercept enemies during scope transitions or off-angle positioning. Learn to interpret enemy rhythm patterns to consistently outmaneuver even the most skilled opponents.
For dedicated AWPers, configuration optimization becomes non-negotiable. Begin with zoom sensitivity calibration. Most professional competitors utilize values ranging from 0.8 to 1.0, facilitating enhanced scoped control. Prioritize fluid, predictable reticle movement over erratic flicking.
Customize your control bindings accordingly. Numerous players assign zoom functionality to Mouse4 or Mouse5 for accelerated scope access. Some additionally bind quick-switch commands to Q or MouseWheel to reset discharge animations—an advantageous technique for expedited bolt cycling.
Consider this professional configuration framework:
- Zoom Sensitivity Ratio: 0.85
- Scoped Sensitivity Multiplier: Customize based on preference (initialize at 0.85)
Ensure your crosshair configuration aligns with your AWP methodology. Compact dot or gap-style reticles without spread provide unobstructed vision while scoped. Additionally, deactivate scope blur effects through configuration files for improved visual clarity.
Your hardware selection significantly influences AWP performance metrics. Initiate with your pointing device—select lightweight models with minimal latency and exceptional sensor performance. Industry favorites encompass:
- Logitech G Pro X Superlight
- Zowie ZA series
- Razer Viper V2 Pro
AWP Fundamentals: Building Your Sniper Foundation
Understanding the AWP’s Role in CS2
The Arctic Warfare Police sniper rifle represents the pinnacle of precision weapons in Counter-Strike 2, demanding both technical mastery and strategic intelligence. At $4,750, this high-stakes investment requires careful economic planning and situational awareness. The weapon’s defining characteristics—single-shot lethality, significant movement penalty, and distinctive firing sound—create a high-risk, high-reward dynamic that separates casual users from dedicated specialists.
CS2 introduces subtle mechanical refinements through the sub-tick system that heighten the importance of movement precision. Unlike automatic rifles that allow for spray control and rapid follow-up shots, the AWP demands absolute commitment to each engagement. Missing your initial shot creates a vulnerable window where opponents can capitalize during the bolt-cycling animation.
Successful AWPers recognize that their value extends beyond simple frags. Your presence on the map influences enemy decision-making, often forcing opponents to alter their routes or expend valuable utility just to counter your presence.
Mastering Movement and Accuracy Fundamentals
Precision movement forms the bedrock of effective AWPing. The critical “stop-shoot” principle requires complete cessation of movement before firing to maintain accuracy. Many aspiring snipers underestimate how even minimal lateral movement can completely derail your shot placement.
Counter-strafing represents an essential technique where you tap the opposite movement key to achieve instant stopping momentum. This micro-movement dance separates consistent performers from inconsistent players.
Crouching provides stability benefits but comes with predictability trade-offs. Smart AWPers vary their stance between standing and crouching positions to maintain unpredictability. Scope management involves strategic use of both zoom levels—primary zoom for medium-range engagements and secondary zoom for extreme-distance precision.
Advanced Firing Techniques and Timing
Shot timing transcends simple reaction speed. It involves anticipating enemy movements, understanding peek timing, and recognizing when to hold your shot versus taking a speculative attempt.
Practical quick-scoping—distinct from montage-style theatrics—enables rapid target acquisition in close-quarters situations. This technique involves scoping and firing in near-simultaneous execution after achieving stationary position.
Many intermediate players struggle with patience, taking rushed shots that reveal their position without securing kills. The discipline to wait that extra half-second often determines round outcomes.
Map-Specific AWP Dominance: Positioning for Maximum Impact
Mirage: Controlling the Chessboard
Mirage’s design creates a sniper’s paradise with extensive sighlines and critical control points. The Window position stands as perhaps the most iconic AWP location in Counter-Strike history, offering sightlines into Connector, Top Mid, and Catwalk approaches.
Early round execution requires spawn advantage utilization combined with teammate smoke support to establish immediate mid control. From this vantage, you can punish careless T-side players attempting mid control without proper utility backup.
Catwalk advancement enables Mid Box control, Underpass monitoring, and B short support. Effective communication with your connector player establishes deadly crossfire setups that overwhelm opponents.
T-side AWPing from Top Mid allows counter-sniping against CT AWPers in Window or Connector positions.


Inferno: Close-Quarters Sniper Excellence
Inferno’s tighter layout still provides numerous high-value AWP angles. Banana control represents a classic sniper battleground where early peeks can establish map tempo control.
CT-side Banana peeking requires molotov and flashbang support to mitigate early round aggression risks. B Site positioning behind new box or coffins enables quick reaction flicks against T-side rushes and delayed peek opportunities into CT spawn areas.
Mid control on Inferno demands patience and mental fortitude. T-side AWPers can utilize log positions or second mid angles to catch overextending CT players.
Dust II: Long-Range Sniper Dominance
Dust II features some of Counter-Strike’s most extensive sightlines. Long Doors positioning creates early round contest opportunities, though these engagements carry significant risk without proper support.
Mid Doors control enables Catwalk push prevention, Lower Tunnels monitoring, and Xbox jump denial capabilities.
A Site defensive positioning from Ramp or Goose provides simultaneous Cat and Long control. This multi-angle coverage transforms your AWP into a defensive fortress when combined with rifle support watching short approaches.
Utility Mastery: Enhancing Your AWP Effectiveness


Smoke and Flashbang Combination Strategies
Strategic utility usage transforms competent AWPers into game-changing assets. Smoke grenades serve dual purposes—blocking enemy vision lines and creating isolated duel opportunities.
Flashbangs provide essential engagement support, particularly when peeking angles solo. Pop-flash techniques that detonate instantly in enemy sightlines create temporary advantage windows.
Molotov applications extend beyond area denial. They can force enemy movement into predetermined kill zones or disrupt execute timing coordination.
The critical success factor involves synchronizing utility deployment with positioning advantages. Planning AWP engagements around utility timing transforms risky peeks into calculated advantage situations.
Defensive Utility Strategies for AWPers
Defensive utility prioritizes time creation, push prevention, and safe repositioning capabilities.
Defensive flash deployment enables safe disengagement following missed shots. This prevents enemy pursuit and enables secondary position establishment.
Reactive molotov usage based on audio cues can shut down enemy advances before they materialize.
Communication Protocols and Team Synergy
As an AWPer, your elevated vantage points provide superior battlefield intelligence. Precise callouts should specify weapon types, positions, and movement directions rather than vague location descriptions.
Vocal coordination assists rifle teammates in understanding covered areas and focusing attention appropriately.
Clear communication establishes team trust foundations, enabling coordinated execution of AWP-centric strategies.
Rifle teammates form your operational backbone, providing flash support, flank security, and space creation.
Entry fragger synchronization represents another critical teamwork element. Covering their site entries, holding post-plant angles, and shutting down retake attempts.
Isolation represents the AWPer’s greatest vulnerability. A well-supported sniper wins games, while a lone AWPer merely wins individual engagements.
Advanced AWP Strategies: From Intermediate to Elite Performance
Aggressive vs Passive Playstyle Optimization
Every AWPer develops a distinctive operational style that reflects their personality and strengths. Understanding when to employ aggressive initiative versus passive patience separates consistent performers from situational contributors.
Aggressive AWPing emphasizes surprise elements and timing exploitation. This approach works optimally when supported by teammate coordination, spawn advantages, and confidence in shot execution.
However, aggression without tactical support frequently results in early deaths and AWP losses that cripple team economies.
Passive AWPing focuses on long-game strategy, angle holding discipline, and bombsite anchoring responsibilities.
The most effective AWPers master both styles and understand contextual switching requirements. Starting aggressively disrupts enemy rhythm, while subsequent passive play encourages opponent mistakes through psychological pressure.
Economic Decision Making and Weapon Management
The AWP’s substantial cost demands careful financial planning. General guidelines suggest purchasing only when armor and utility support exists, teammates can maintain rifle capabilities, and personal confidence aligns with potential impact.
Economic round strategies involve passive positioning and selective engagement prioritization. The objective centers on securing one or two kills to enable teammate weapon upgrades.
Shot baiting techniques utilize pistol teammates to draw enemy fire, creating trading opportunities.
Pro Player Analysis and Strategic Adaptation
Professional AWPers provide invaluable learning opportunities through their demonstrated techniques and decision-making processes.
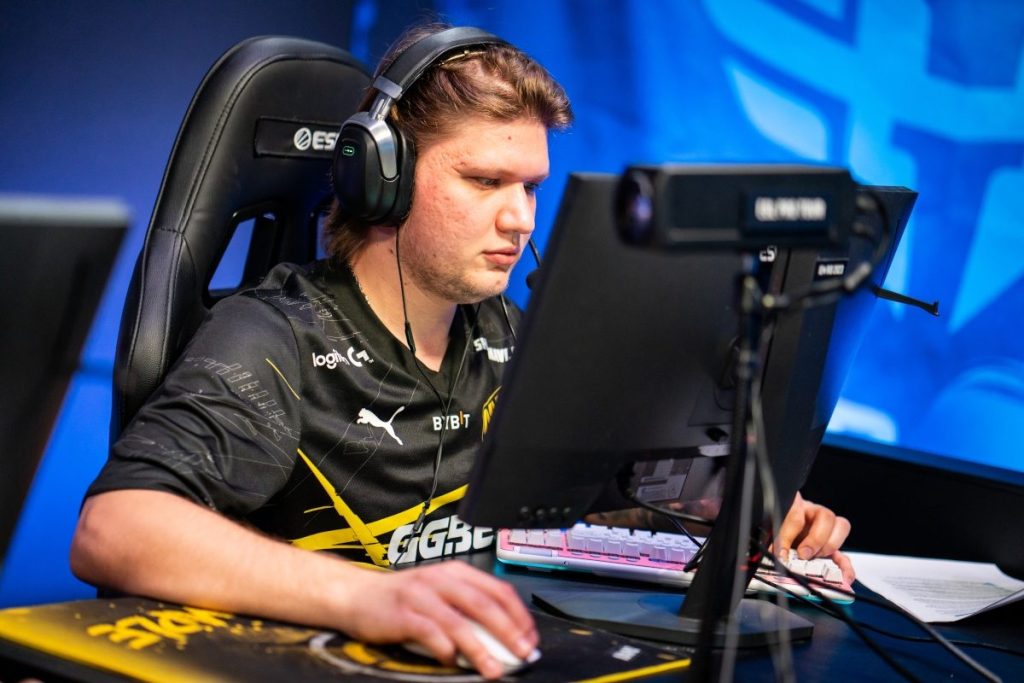

s1mple demonstrates hyper-aggressive, unpredictable AWPing that capitalizes on mechanical excellence and deep game intelligence.
ZywOo exhibits fluid adaptation and intelligent decision-making that emphasizes timing over raw reaction speed.
dev1ce represents textbook fundamental execution with consistent positioning, passive play optimization, and exceptional team synergy.
Active demo study involves position replication, movement pattern analysis, and utility usage observation.
Beyond victory observation, study adaptation patterns during challenging matches. How professional AWPers respond to counter-strategies proves equally informative as their dominant performances.
Mental resilience development represents the final component separating good AWPers from great ones. Composure under pressure, confidence in decision-making, and resilience following mistakes form the psychological foundation for consistent high-level performance.
Every missed engagement provides learning opportunities, while close rounds offer growth potential. Dedication transforms missed shots into learning experiences and eventual consistent execution.
Action Checklist
- Master counter-strafing technique to achieve instant immobility before firing
- Practice 35-minute daily AWP training routine including warm-up, flick training, and angle holding practice
- Analyze professional AWPer demos focusing on positioning, utility usage, and rotation timing
- Develop both aggressive and passive playstyles and learn when to transition between approaches
- Implement utility coordination with teammates for optimal AWP support
- Practice 10-minute stationary shooting drills focusing exclusively on head and torso target regions
- Study pro player demonstrations focusing on their angle selection and rotation timing
- Master counter-strafing techniques for immediate movement cessation
- Develop both aggressive and passive playstyles for tactical unpredictability
- Establish systematic rotation patterns, changing positions every 2-3 rounds
- Implement economic assessment protocol before AWP purchases
- Develop precise communication terminology for enemy positioning
- Practice eco-round survival tactics in custom games
- Analyze professional player demos focusing on rotation timing and utility usage
- Practice peeking synchronization with teammate flashes in retake scenarios
- Implement coordinated baiting tactics in mid-round engagements
- Review demos to identify timing errors and repositioning opportunities
- Optimize zoom sensitivity settings within 0.8-1.0 range
- Practice counter-strafing for 15 minutes daily to master movement precision
- Study one pro AWPer demo weekly, focusing on their positioning and adaptation patterns
- Master two map-specific AWP positions with utility coordination
- Develop personal economic guidelines for AWP purchasing decisions
- Implement communication protocols for precise enemy position reporting
No reproduction without permission:Tsp Game Club » AWP Guide: How to Snipe in CS2
