TL;DR
- Complete two-stage challenges requiring suppression, hip-fire damage, and multi-kills with LMGs
- Reach Rank 23 to unlock challenges, then focus on specific weapon requirements
- Suppression mechanics involve firing near enemies without hitting to degrade their combat effectiveness
- Strategic map control and game mode selection can cut completion time by 40-60%
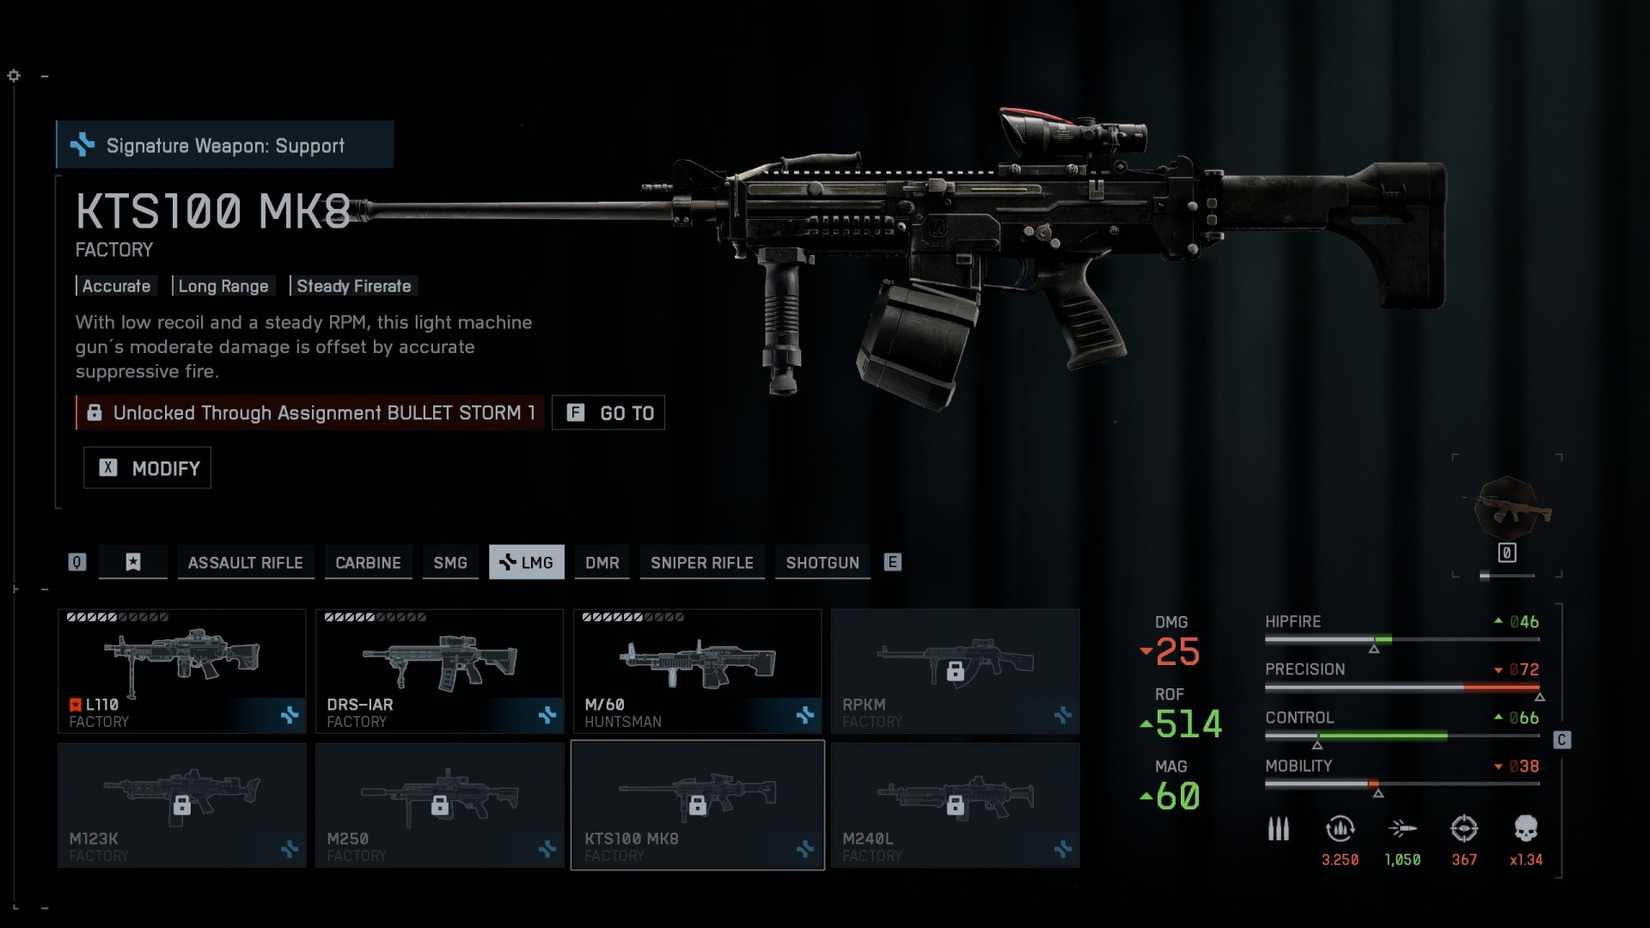
- Unlock KTS100 MK8 and M240L LMGs – among the game’s most powerful support weapons
While Battlefield 6 features an extensive arsenal of available firearms, the most dominant LMGs remain locked behind specific multiplayer progression systems. Successfully completing the Bullet Storm assignments will grant access to two exceptional light machine guns that can dramatically enhance your combat effectiveness, particularly when playing as Support class specialists.
A significant portion of Battlefield 6‘s weaponry requires completion of dedicated challenges, making strategic progression essential for maintaining competitive performance in the evolving meta. Fortunately, these specific assignments become considerably more manageable when approached with the correct tactical methodology and game mode selection. This comprehensive guide details the most efficient approaches to conquering both Bullet Storm challenges within Battlefield 6‘s multiplayer environment.
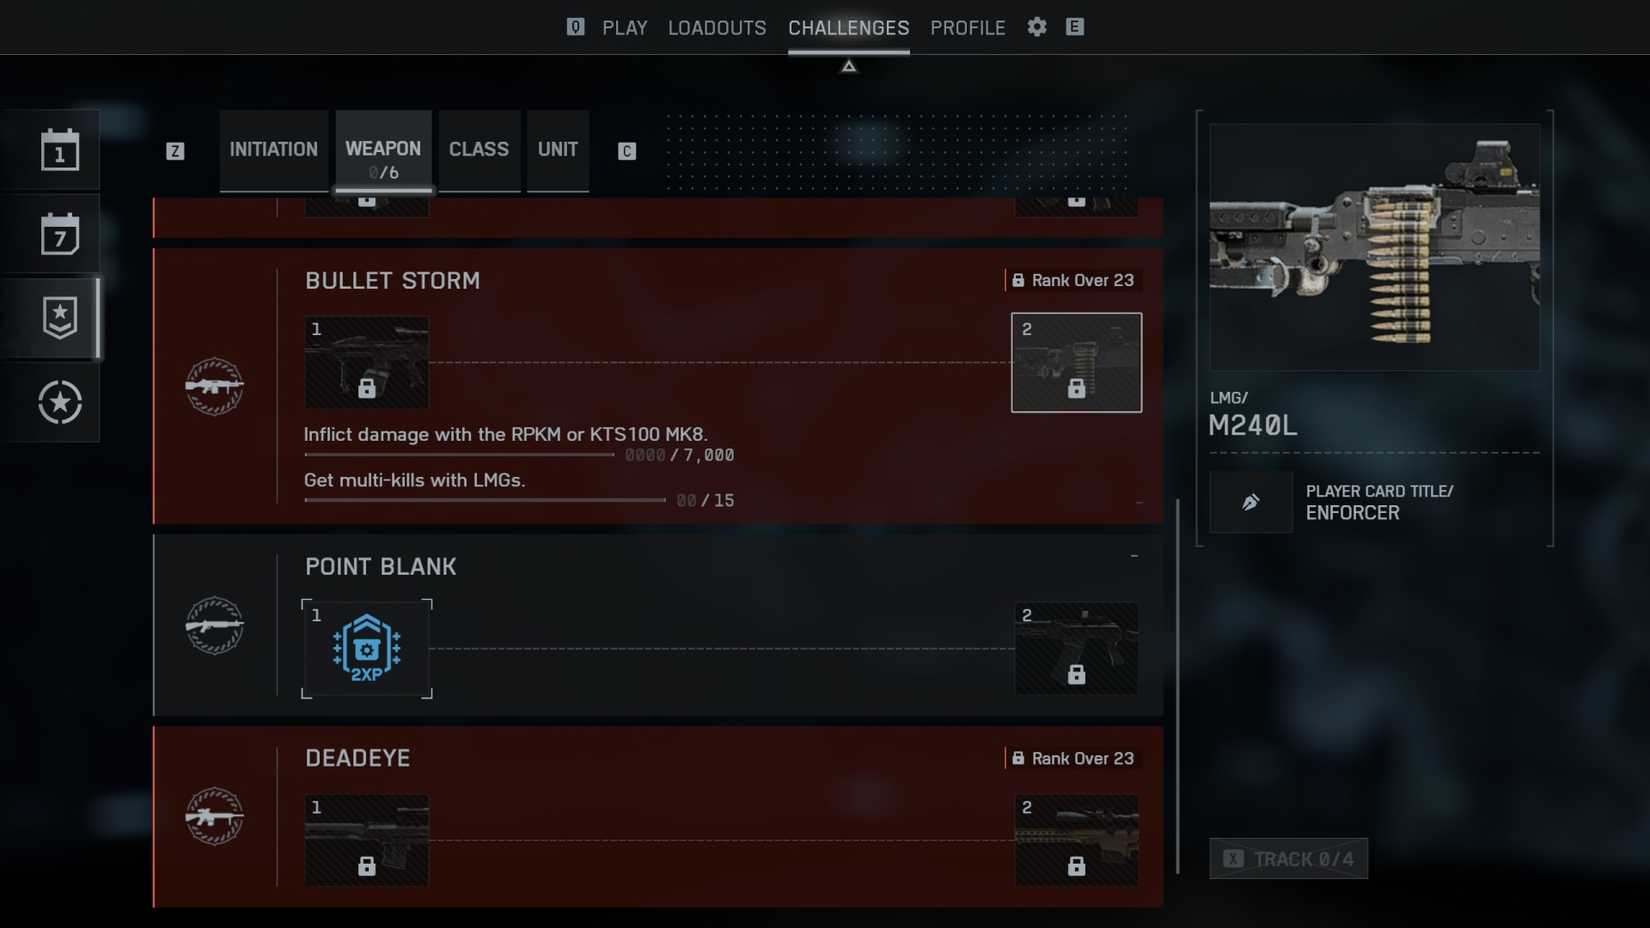
The Bullet Storm progression system consists of two distinct challenge tiers within Battlefield 6. Access to these assignments becomes available only after achieving Rank 23 through multiplayer advancement.
|
Challenge |
Requirement |
Reward |
|---|---|---|
|
Bullet Storm 1 |
|
|
|
Bullet Storm 2 |
|
|
These particular assignments rank among the more straightforward challenges within Battlefield 6, though certain mechanical systems may prove confusing for inexperienced operators. The initial challenge phase centers around mastering hip-fire engagement techniques and effective suppression methodologies.
For players seeking to expand their BF6 arsenal, understanding these progression systems becomes essential. For comprehensive weapon strategies, consult our detailed BF6 Weapons Unlock Guide covering all available firearms.
Suppression mechanics in Battlefield 6 function through a sophisticated system where directing sustained fire toward enemy positions without securing hits triggers significant combat debuffs. When opponents experience suppression effects, their aiming stability deteriorates substantially and overall combat proficiency decreases by approximately 30-40% based on proximity and volume of fire.
Light machine guns represent the ideal platform for suppression tactics due to their extended effective ranges and substantial ammunition capacities. The suppression system operates on a cumulative basis – sustained fire within a 5-10 meter radius of enemy combatants builds the effect progressively. Many players mistakenly believe they must directly hit enemies to progress, when in reality strategic area denial provides faster completion.
Advanced suppression tactics involve predicting enemy movement through choke points and pre-firing corridors. Combining suppression with strategic positioning can reduce challenge completion time by nearly half compared to unstructured approaches. For broader tactical context, our Complete Guide covers all advanced combat systems.
Transitioning to the secondary challenge tier requires focused elimination proficiency and damage output using two designated LMG platforms. The KTS100 MK8 becomes accessible upon completing the initial Bullet Storm assignment, while the RPKM offers a highly modular design adaptable to diverse combat preferences.
Strategic game mode selection dramatically impacts progression speed. Conquest and breakthrough modes provide ideal environments due to their extended engagement durations and concentrated player movements. A single well-executed match on high-density maps can yield 40-60% of required progression metrics.
Optimal loadout configuration for rapid challenge completion includes extended magazines, bipods for stability, and optics suited to medium-range engagements. Positioning near objective zones or resupply stations ensures sustained operational capacity without ammunition shortages.
Upon successful completion of both Bullet Storm assignments, operators gain access to two premier LMGs within Battlefield 6. These weapons excel particularly for Support class specialists, enabling sustained defensive operations and area denial capabilities. For detailed class optimization, reference our comprehensive Class Selection Guide covering all specialization options.
Action Checklist
- Achieve Rank 23 through standard multiplayer progression
- Select Conquest mode on high-player-count servers for maximum suppression opportunities
- Position at choke points and pre-fire corridors to efficiently complete suppression requirements
- Configure LMG with extended magazine and bipod for optimal challenge performance
- Focus on hip-fire engagements in close-quarters combat zones to accumulate damage requirements
- Utilize unlocked KTS100 MK8 or RPKM for secondary challenge damage and multi-kill objectives
No reproduction without permission:Tsp Game Club » Battlefield 6: How to Complete Bullet Storm Challenges Master Battlefield 6 Bullet Storm challenges to unlock powerful LMGs with expert suppression and hip-fire tactics