TL;DR
- Chapter 10 contains 10 secret areas with Collectible Toys, Rubies, and Codex pages
- Master shield throwing mechanics for accessing multiple hidden platforms and breaking counterweights
- The secret key unlocks three separate gates containing major rewards including Gore Nest challenges
- Watch for armor pickup trails and scalable walls as indicators of nearby secret locations
- Prepare for demon ambushes when exploring corridors and always check under structures
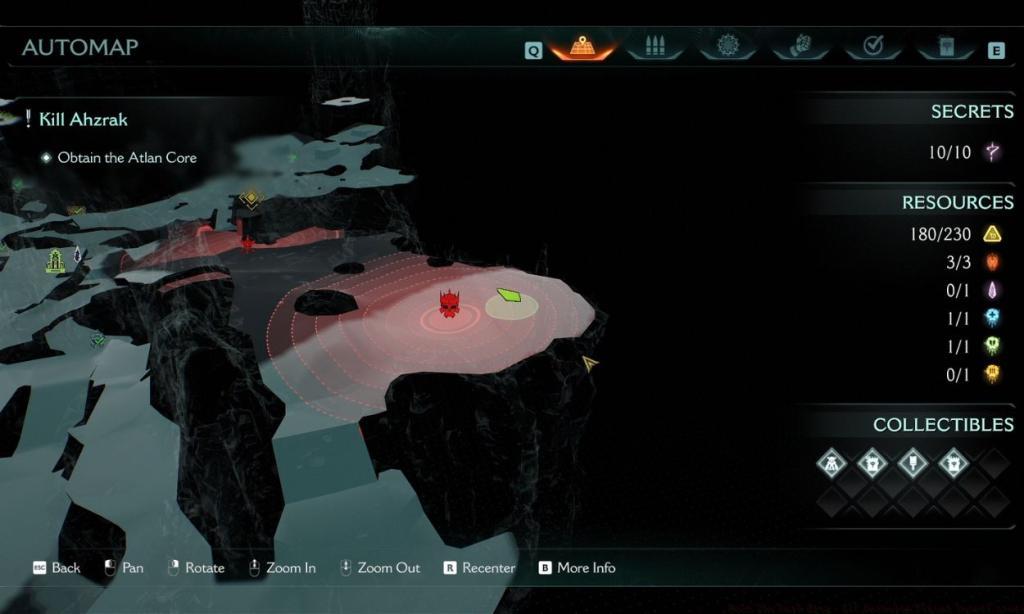
Doom The Dark Ages Chapter 10 immediately establishes its infernal setting with the stark visual declaration ‘HELL’ in bold typography, signaling the Slayer’s descent into the most harrowing realm yet. This chapter represents one of the series’ most unforgettable journeys through the netherrealm as you pursue Prince Ahzrak in a relentless solo campaign. The Forsaken Plains district conceals numerous clandestine locations essential for achieving perfect completion metrics. Our comprehensive walkthrough delivers precise navigation instructions for uncovering every hidden zone while avoiding common exploration pitfalls.
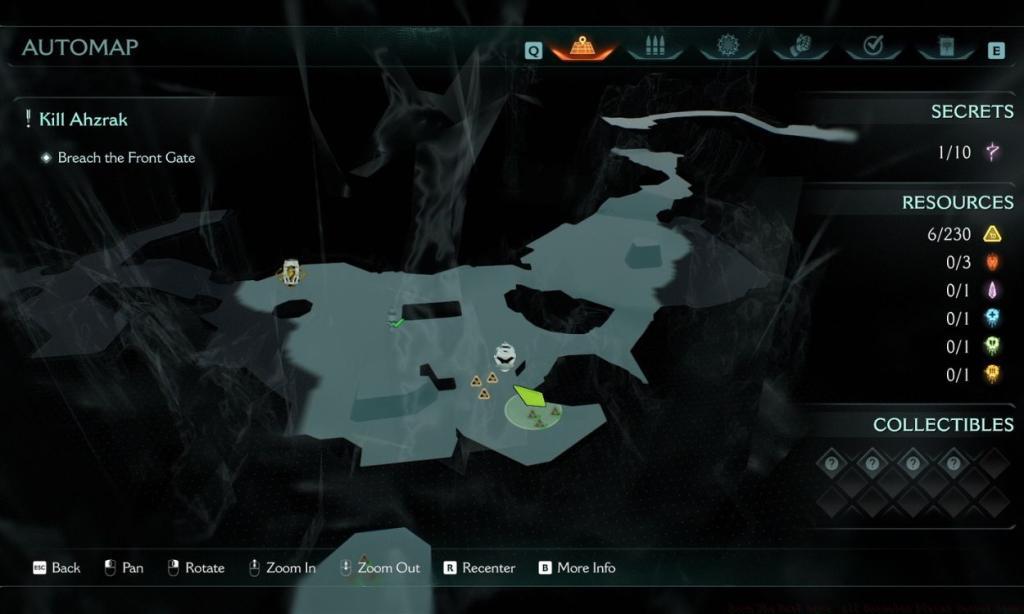
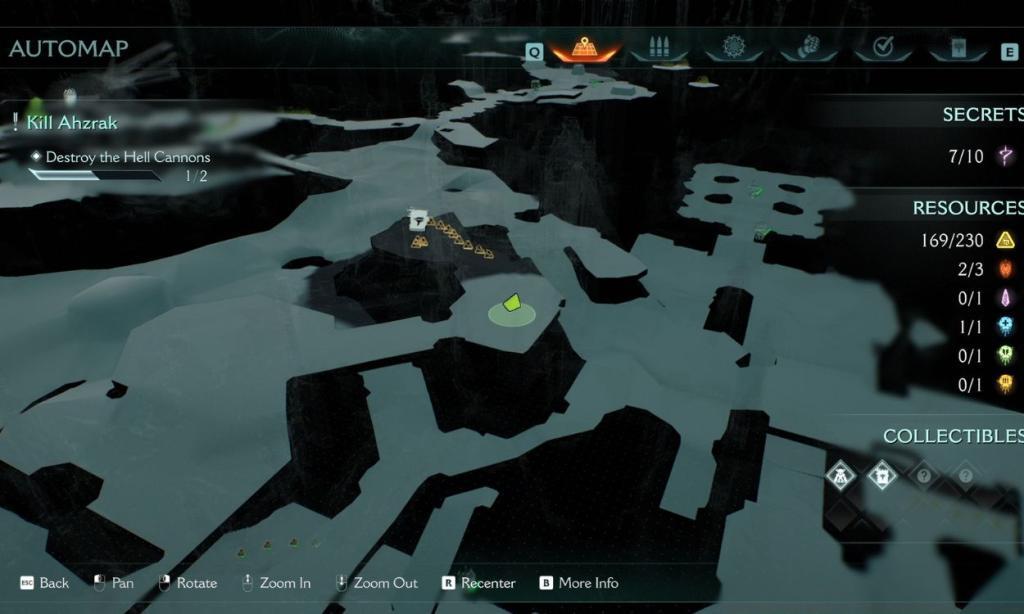
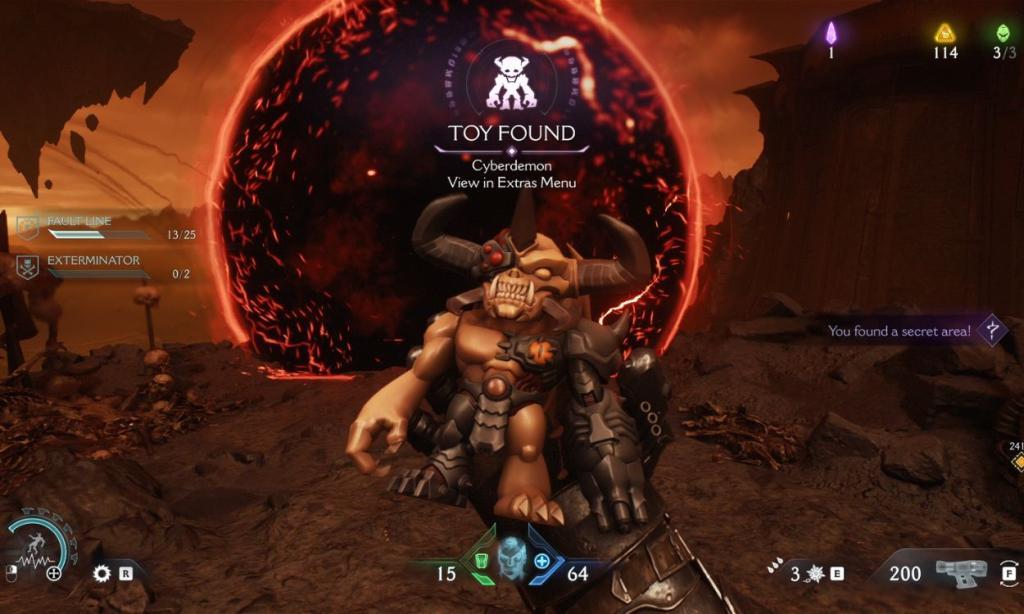
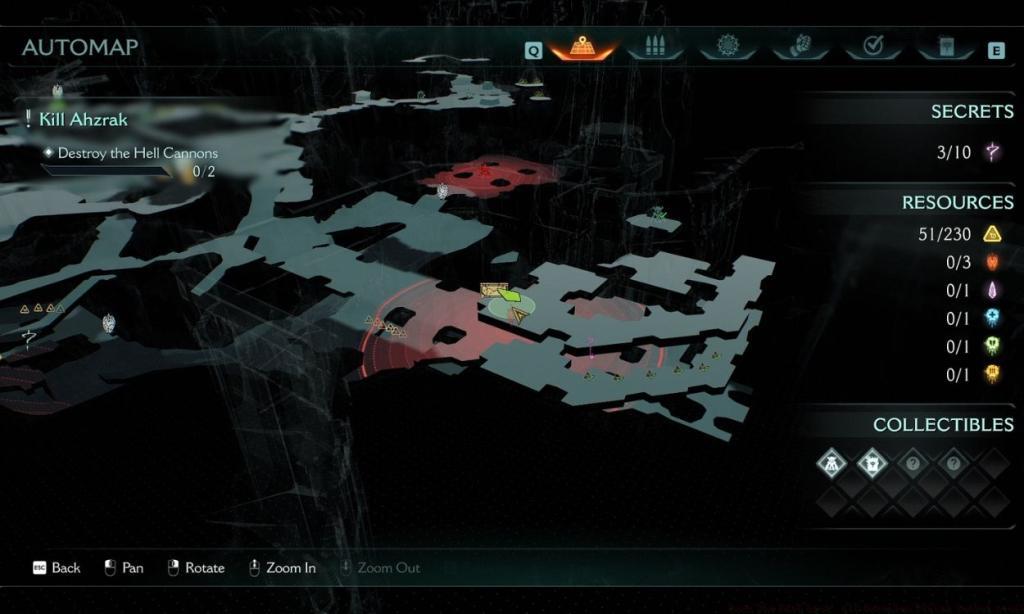
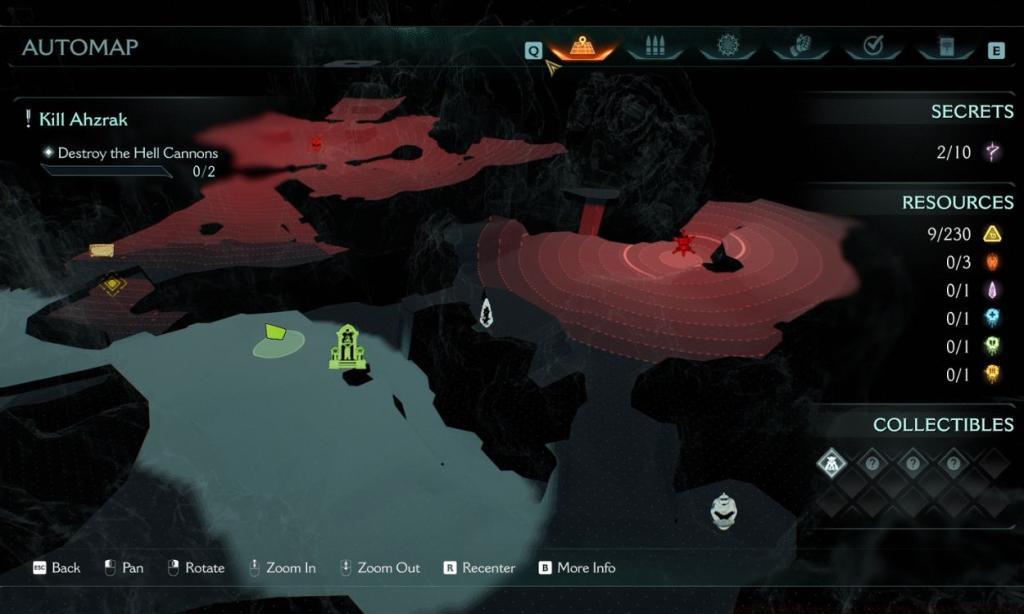
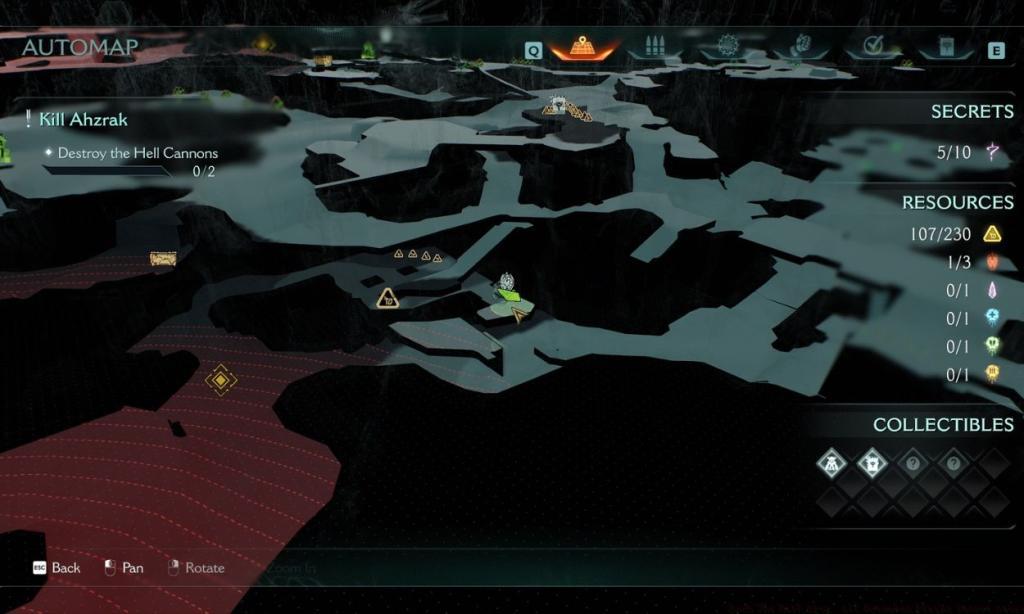
Chapter 10 contains exactly 10 concealed zones that yield substantial rewards including exclusive Collectible Toys, valuable Rubies currency, and narrative-expanding Codex pages. Advanced players should prioritize these discoveries as they significantly enhance both gameplay progression and lore comprehension. The following sections provide detailed coordinates and approach methodologies for each secret location.
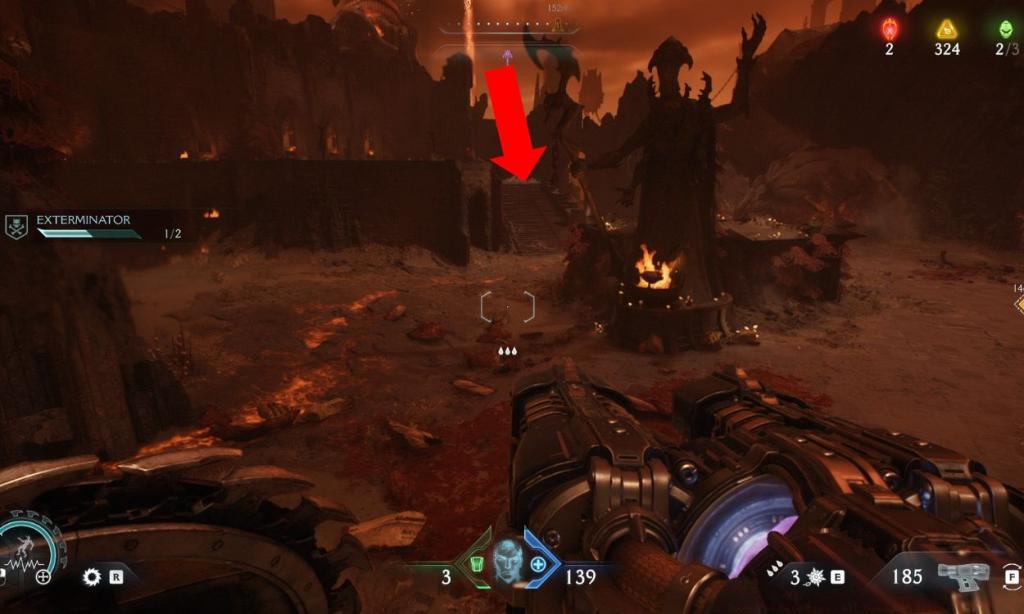
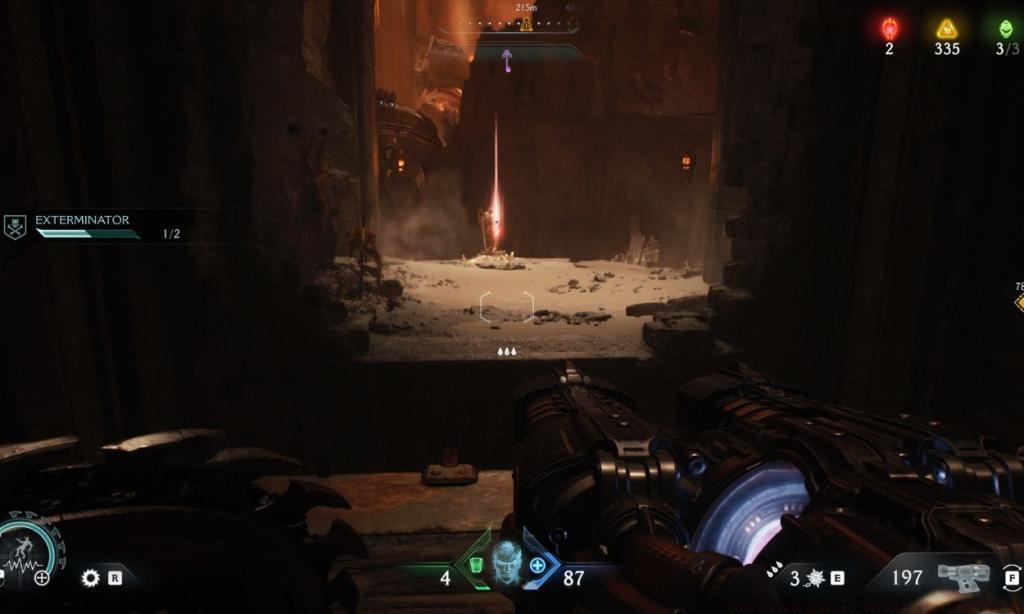
Upon arriving in Hell’s domain, progress along the primary mission objective until reaching the imposing front gates. From this vantage point, scan leftward to identify climbable rock formations featuring a green skeleton positioned on the larger rock structure ahead. Execute a precise shield throw at the skeletal marker, then leap onto the activated platform. Immediately identify the adjacent scalable rock face visible directly ahead and utilize a momentum-building running jump to access the inaugural concealed zone.
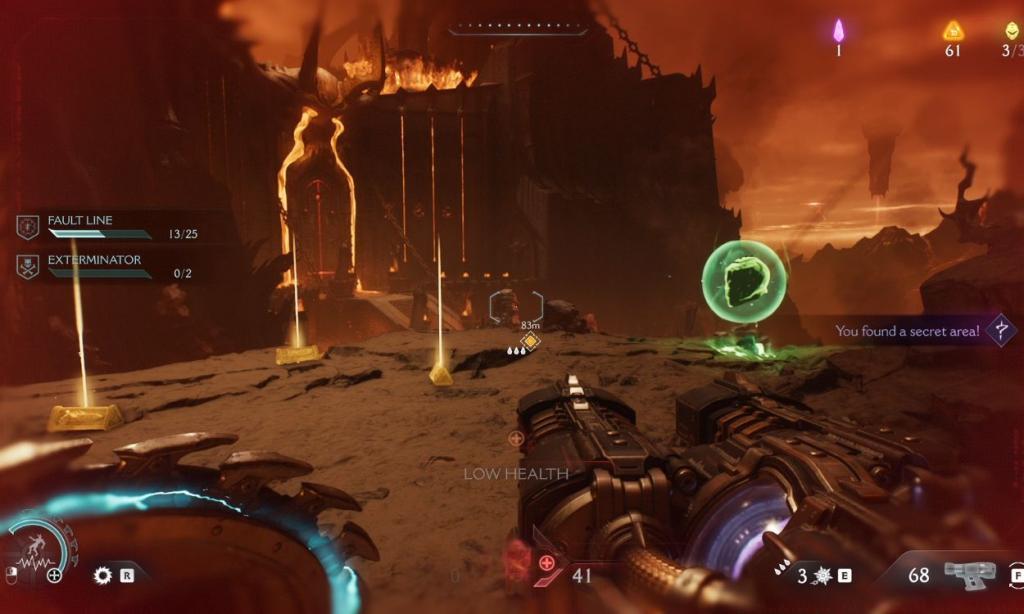
Pro Tip: Ensure you maintain full movement speed before attempting the final jump, as insufficient momentum represents the most frequent failure point for newcomers. The shield throw mechanic requires precise targeting – aim directly at the skeleton’s torso for optimal activation.
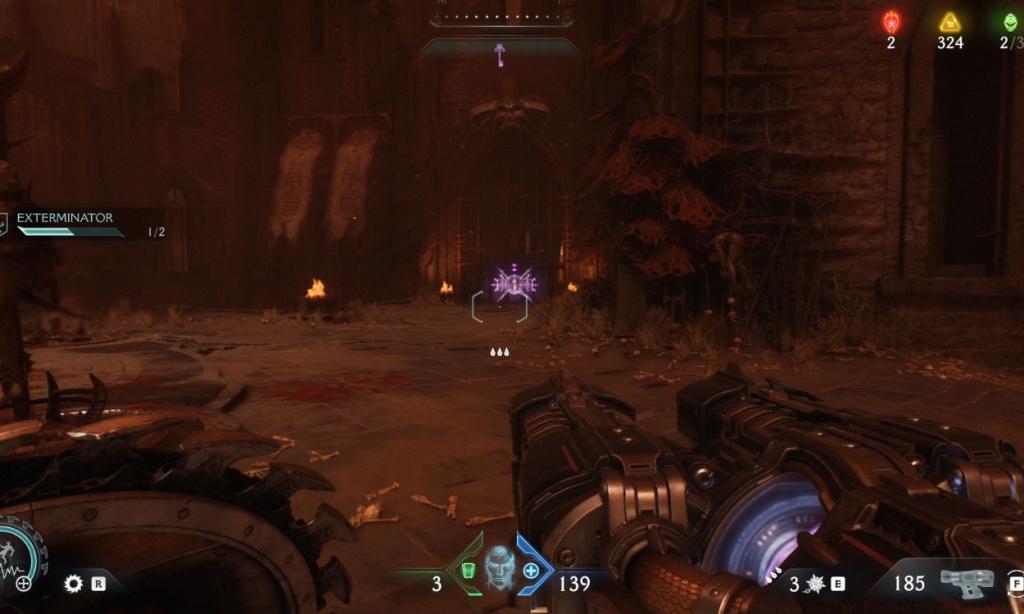
After penetrating the front gate, you’ll encounter a critical decision point with three divergent routes. Proceed straight ahead past the demolished Atlan mech wreckage and identify a staircase ascending to your left. After scaling these steps, execute another left turn to discover a secured metal gate demanding a Secret Key for access. Consult our dedicated key acquisition guide for comprehensive retrieval strategies. Once obtained, unlock this barrier to claim the concealed Codex page within.
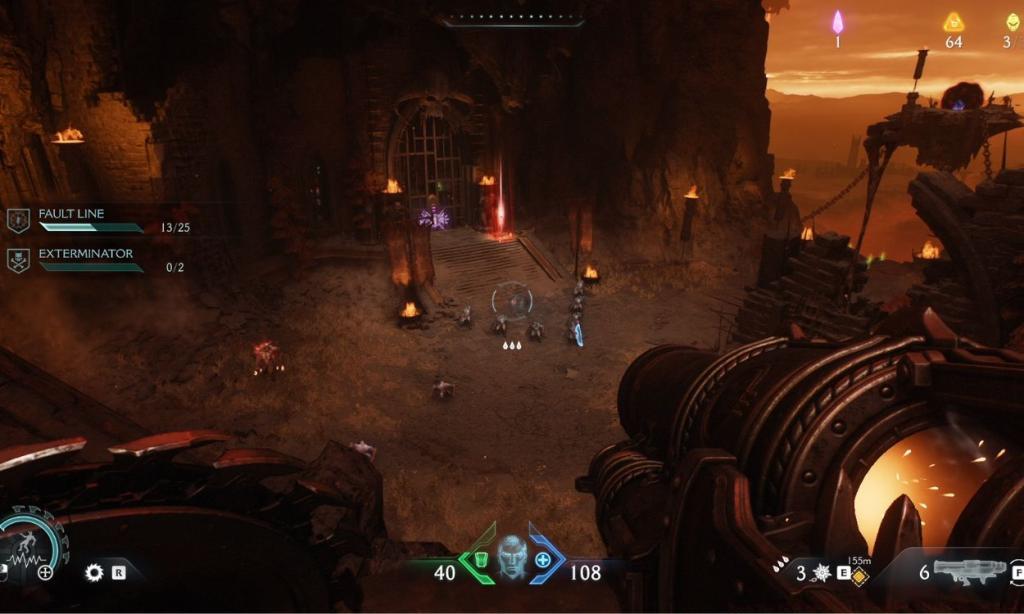
Additional clandestine zones cluster nearby, beginning with another key-operated gate. To reach this location, backtrack toward the primary entrance and this time turn left. You’ll find yourself positioned on an elevated cliff edge – carefully monitor the left side for a lower tier. Descend immediately upon detection and advance toward the secured entrance. This particular gate guards an intense Gore Nest challenge internally, with a valuable Ruby Statue positioned externally.
From this gate’s location, observe directly rightward to identify a sequence of armor collectibles. Track this trail downward to locate a concealed jump pad mechanism. This propulsion device will launch you toward a distant cliff formation where the prized Cyberdemon Collectible Toy awaits collection.

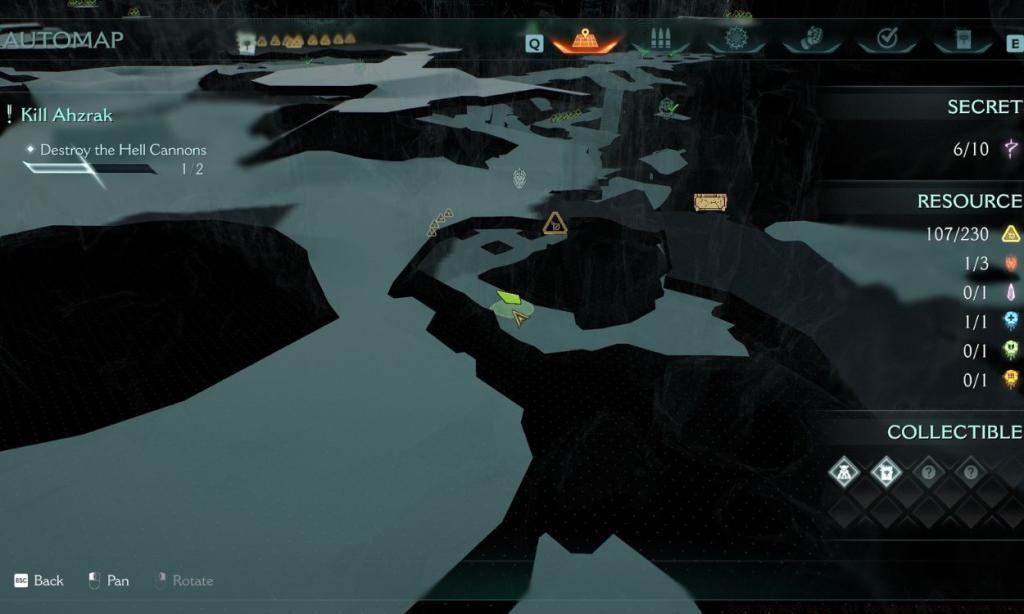
Return to the gate’s frontal position and navigate back toward the previously descended cliff. Continue straight ahead to penetrate deeper into this sector. Following a brief traversal, you’ll encounter a staircase ascending to another metal barrier. This location also serves as the acquisition point for this level’s secret key.
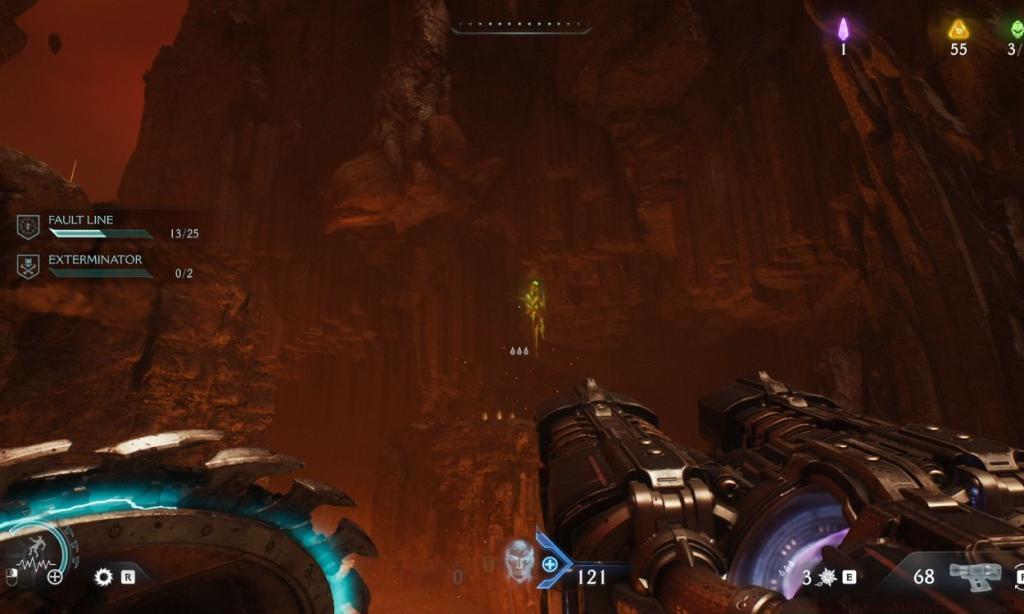
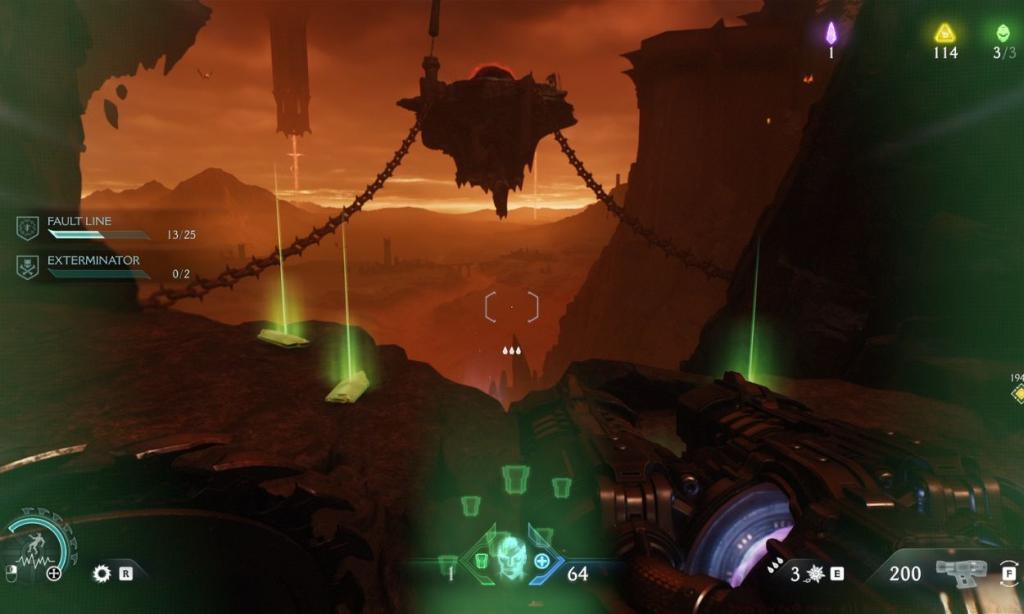
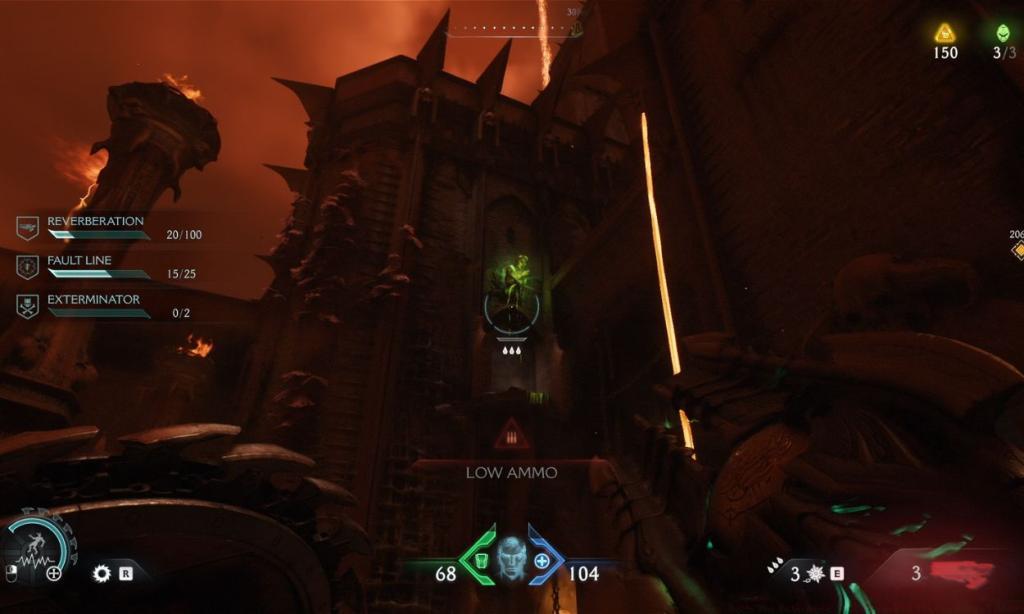
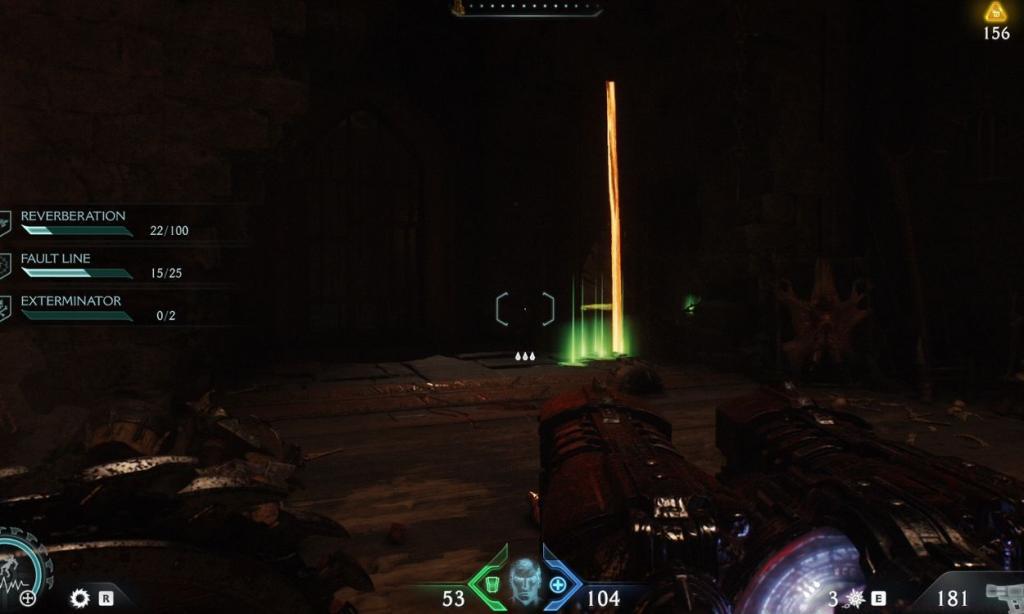
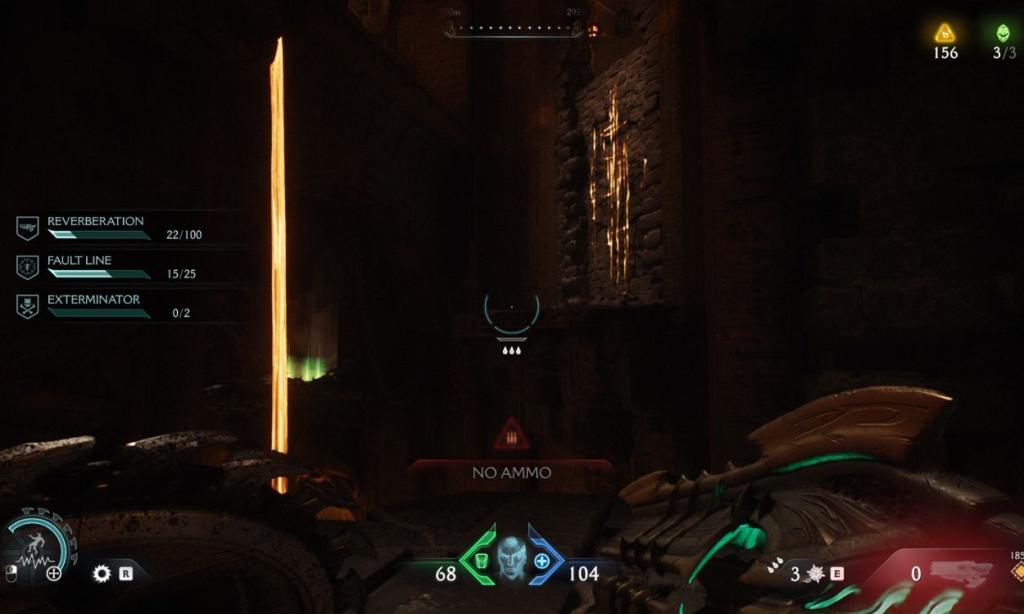
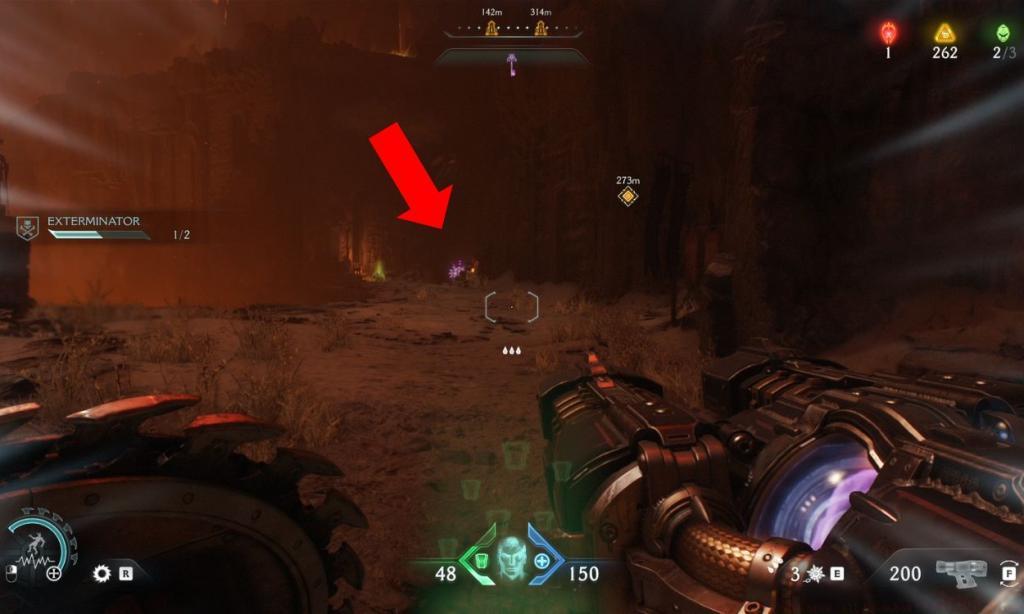
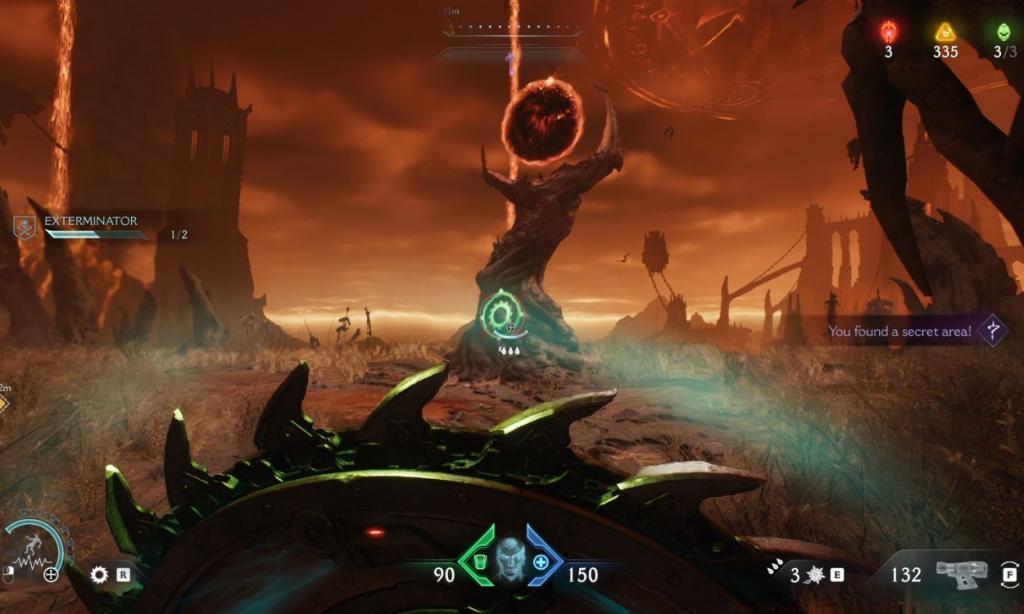
Observe leftward from this gate, aligning with the visual reference provided above. Execute a shield projection toward the jump activation point to reach the elevated tier. Proceed through the narrow passageway and identify a doorway positioned to the left. Peer through this opening to detect a crimson counterweight mechanism – dismantle it using your shield. Continue advancing through the corridor while maintaining combat readiness for an imminent demonic ambush.
After neutralizing the hostile entity, advance toward the armor collection trail situated to its right. You’ll discover a scalable surface that provides access to the concealed zone.
The fifth clandestine location neighbors the Sentinel Shrine discovered in this level quadrant. Utilize our detailed cartographic reference to navigate there efficiently. Upon arrival, inspect immediately beyond the Shinre structure to identify a pathway leading beneath it. Follow this route to its terminus to register this secret as completed.
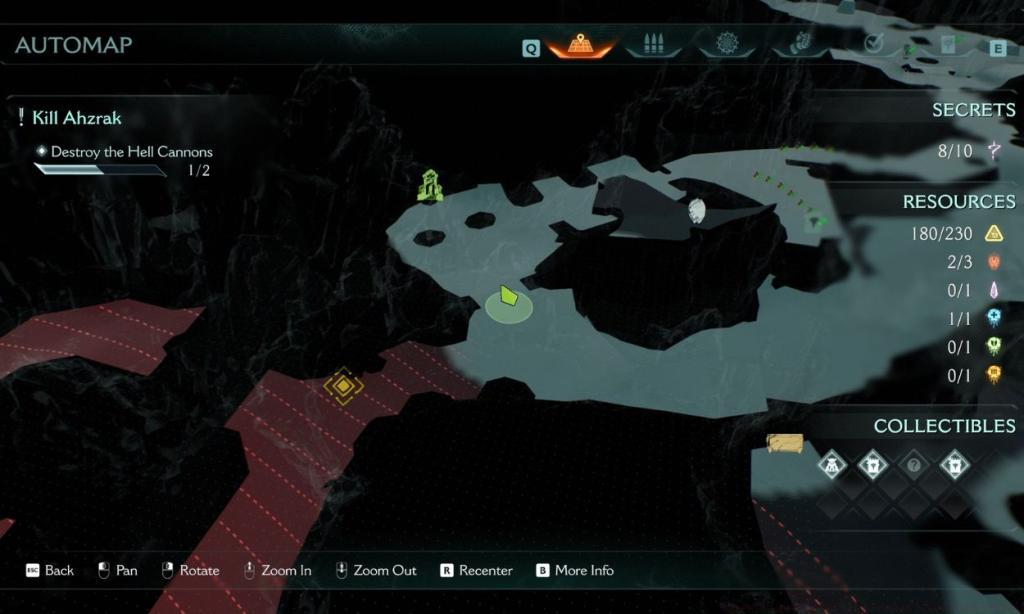

Successfully locating all Chapter 10 secret areas demands strategic navigation and combat preparedness. The most efficient approach involves systematically clearing each sector before advancing, as backtracking through combat-heavy areas significantly increases completion time. Always maintain full ammunition and armor before attempting exploration sequences, as demon ambushes frequently occur in confined spaces. The secret key represents the gateway to three significant reward zones, making its acquisition an early priority.
Common Mistakes to Avoid: Many players fail to maintain sufficient momentum for platforming sequences or underestimate the combat challenges protecting certain secrets. Always survey environments thoroughly from multiple angles, as many concealed entrances become visible only from specific vantage points. The shield mechanics prove essential for multiple secret accesses – practice precise targeting in safer areas before attempting critical throws.
For players seeking comprehensive game mastery, our Complete Guide provides additional advanced techniques. Those interested in weapon optimization should consult our Weapons Unlock resource, while strategic class selection guidance awaits in our Class Guide for maximizing combat effectiveness.
Action Checklist
- Acquire the secret key early to access three major reward zones
- Master shield throwing mechanics for skeleton activation and counterweight destruction
- Follow armor pickup trails to locate jump pads and hidden platforms
- Prepare for demon ambushes in narrow corridors with full combat readiness
- Inspect under structures and behind environmental elements for concealed pathways
No reproduction without permission:Tsp Game Club » Doom The Dark Ages: All Forsaken Plains Secret Areas Complete guide to finding all 10 secret areas in Doom The Dark Ages Chapter 10 with expert navigation tips