TL;DR
- Equip five phantom actions that level with your Knowledge Rank
- Choose phantom jobs that complement your main role’s weaknesses
- Always assess enemy levels before engaging to avoid one-shot deaths
- Coordinate with groups for safer exploration and faster progression
- Master phantom job mechanics to significantly boost damage and survivability
Phantom Jobs represent a revolutionary system exclusive to Occult Crescent, replacing older mechanics like Lost Actions from previous exploration zones. These supplementary roles operate alongside your primary job, providing specialized abilities that activate only within this challenging environment. Unlocking occurs through the ‘New Job, Old Tricks’ questline, eventually granting access to thirteen distinct phantom specializations.
Hotbar Configuration and Action Management
You can simultaneously activate five phantom abilities on a dedicated hotbar interface. These skills progress independently alongside your Knowledge Rank advancement. Most phantom occupations reach their maximum potential at level 6, where they unlock their most devastating techniques. Advancing these roles frequently activates Phantom Mastery, an essential passive trait that amplifies your offensive capabilities throughout Occult Crescent.
Table: Phantom Job Specializations and Core Functions
| Phantom Job | Theme | Key Abilities |
|---|---|---|
| Knight | Tank/Defense | Phantom Guard (mitigation), Pray |
| Monk | Melee DPS | Phantom Kick (heavy strike), Focus |
| Bard | Ranged Support | Occult Tune (party buff), Refrain |
| Chemist | Healer/Item Use | Quick Med (heal), Panacea (cleanse) |
| Thief | Stealth/Utility | Hide (invisibility), Pilfer |
Prioritize at least one phantom specialization that synergizes with your primary role’s vulnerabilities. Fragile ranged spellcasters frequently select Phantom Knight for additional protection. Defensive specialists might opt for Phantom Bard or Chemist to acquire supportive capabilities. Restoration-focused players seeking enhanced solo damage occasionally adopt Monk or Samurai for aggressive offensive capabilities. Don’t hesitate to experiment with different combinations.
Every combat archetype encounters significant threats within Occult Crescent’s dangerous landscape, making thorough understanding of your role’s capabilities and limitations absolutely critical. Here are battle-tested strategies to maintain survival:
Tank Survival Fundamentals
-
Pull with Purpose: Initiate engagements deliberately and allow enemies to target you primarily.
-
Manage Cooldowns: Rotate defensive capabilities systematically against challenging enemy groups.
-
Assess Enemy Level: Even the most resilient tanks will collapse instantly if facing opponents exceeding their Knowledge Rank by five or more levels.
-
Phantom Knight or Time Mage: Utilize Guard or temporal manipulation spells to diminish incoming damage.
Tanks should systematically gather adversaries and position them away from allied party members. When boss-type enemies materialize, your role becomes maintaining battlefield stability through effective aggression management. Always carry emergency potions, particularly when healers become incapacitated.
Healer Survival Priorities
-
Situational Awareness: Avoid becoming so fixated on health indicators that you overlook approaching attacks.
-
Buff Up the Party: Protective tools like Protect or Shell substantially reduce incoming damage.
-
Use Crowd Control: Abilities such as Sleep or Repose create valuable breathing room against multiple opponents.
-
Phantom Bard or Chemist: Consider phantom roles that provide supplementary damage or emergency restoration capabilities.
Healers often shoulder responsibility for everyone’s wellbeing, but remember to prioritize your own safety above all else. Sometimes waiting for a safer opportunity to revive fallen comrades proves wiser than risking complete party elimination.
DPS Survival Techniques
-
Choose Your Fights Wisely: Avoid charging into multiple enemies simultaneously when operating alone.
-
Stay Mobile: Numerous hostile creatures possess lethal area-of-effect attacks capable of eliminating fragile damage dealers in a single strike.
-
Phantom Knight for Defense: Protective barriers and self-healing capacities can rescue vulnerable magical practitioners.
-
Use Items: Carry powerful healing concoctions and maintain equipment condition to preserve damage output.
Damage specialists excel at rapidly eliminating threats. However, don’t allow your enthusiasm for dealing substantial damage to leave you exposed to random super-attacks.
Success in Occult Crescent demands more than basic combat proficiency—it requires strategic adaptation to the zone’s unique mechanics. Here are advanced techniques for maximizing your effectiveness:
Understanding enemy aggression patterns represents a crucial survival skill. Different creatures employ varying detection methods—some rely on visual identification from distance, others respond to auditory cues or proximity triggers. Learning these behavioral nuances enables you to bypass dangerous encounters when underpowered.
Pro Tip: The knowledge EXP penalty system activates at Rank 5, making early exploration (Ranks 1-4) ideal for establishing teleportation networks and familiarizing yourself with the environment’s layout.
Critical knowledge for progression: Enemy chains provide substantial experience bonuses when defeated in rapid succession, particularly when their level closely matches your current Knowledge Rank. Weekly objectives provide massive experience chunks for clearing sufficient enemies or FATEs within the zone. Always complete available side missions, as many provide additional knowledge EXP or specialized currency.
Knowledge Rank Advancement Table
| Knowledge Level | EXP to Next Level |
|---|---|
| 1 → 2 | 100 |
| 2 → 3 | 600 |
| 3 → 4 | 2,800 |
| 4 → 5 | 8,000 |
| 5 → 6 | 15,500 |
| 6 → 7 | 25,000 |
| 7 → 8 | 30,800 |
| 8 → 9 | 37,000 |
| 9 → 10 | 43,740 |
| 10 → 11 | 50,940 |
| 11 → 12 | 58,640 |
| 12 → 13 | 66,750 |
| 13 → 14 | 77,500 |
| 14 → 15 | 89,000 |
| 15 → 16 | 103,160 |
| 16 → 17 | 118,200 |
| 17 → 18 | 136,200 |
| 18 → 19 | 155,400 |
| 19 → 20 | 177,800 |
| 20 (Max) | N/A |
Advanced Strategy: Forming coordinated groups with players within three Knowledge Ranks of each other triggers special chain bonuses, accelerating collective progression dramatically.
While solo exploration in Occult Crescent is technically possible, joining forces with other adventurers dramatically improves both safety and progression efficiency. Eight-player parties operate without traditional role restrictions, allowing flexible team compositions that adapt to the zone’s unique challenges. The open-world format supports dozens of simultaneous participants, making alliance formation straightforward for tackling the area’s most formidable threats.
Forming Parties
Use the shout function within instances to locate existing groups or assemble your own farming squad. Many experienced players organize dedicated “farm parties” focused on chaining enemy kills to maximize knowledge EXP gains. When party members maintain Knowledge Ranks within three levels of each other, special chain bonuses activate, accelerating everyone’s advancement through the dangerous terrain.
Coordinating as a Team
Maintain cohesive unit movement while systematically eliminating enemy groups in sustained chains. Avoid splitting your team or engaging multiple hostile packs simultaneously. Implement target markers to maintain focused damage on priority targets. Clearly communicate when you require healing breaks or MP regeneration periods. Strategically share phantom job abilities, such as protective party shields from Phantom Knight or area-of-effect healing from Phantom Chemist.
Mitigating Death Penalties
Collaborative play significantly reduces the risk of knowledge EXP depletion beyond level 5. When teammates fall in combat, immediate resurrection prevents costly experience loss. This mutual assistance culture benefits all participants, especially during large-scale engagements called Critical Encounters, where coordinated groups face off against exceptionally powerful adversaries.
Struggling with the extensive Main Scenario Quest progression in Final Fantasy XIV? That narrative marathon can definitely hinder your access to premium content. Our MSQ Leveling Boost enables seasoned players to efficiently complete those monotonous tasks, allowing you seamless transition into endgame activities without time-consuming preparation!
The “survival” designation for this region reflects its genuine lethality. Formidable creatures patrol the Crescent landscape, with numerous threats capable of eliminating unprepared adventurers in a single strike. Implementing intelligent tactical approaches helps you navigate these hazards while minimizing frustration.
-
Check Levels: Avoid confronting monsters that substantially surpass your current Knowledge Rank. As a general guideline, engaging enemies more than 5 ranks above your level almost guarantees catastrophic failure.
-
Watch Aggro Types: Different enemy types employ distinct detection mechanisms – some track visual contact, others respond to auditory cues or proximity triggers. Understanding these sensory patterns enables strategic evasion when your combat capabilities are limited.
-
Pull Carefully: Engaging one or two opponents simultaneously proves far safer than attracting multiple hostile groups that could overwhelm your defenses.
-
Observe Mechanics: Many indigenous creatures employ clearly telegraphed assault patterns that inflict massive damage. Evade or counter these attacks promptly.
-
Terrain Advantage: Utilize line-of-sight obstructions like corners and elevated ledges to break pursuit from aggressive mobs. Controlled descents from cliffs can sometimes disrupt enemy tracking if executed safely.
-
Carry a Backup Plan: Maintain Phoenix Down items or Reraise status effects whenever feasible. Should you succumb to injuries, await revival from fellow adventurers rather than immediately selecting “Return.”

Critical Encounters (CEs) represent special high-profile boss FATEs that activate at predetermined intervals. These engagements accommodate up to 72 participants simultaneously, featuring diverse objectives from confronting colossal entities to protecting strategic positions against swarming adversaries. Each encounter typically incorporates an entry phase – position yourself within the designated circular area before the protective barrier seals, otherwise you’ll be excluded from participation.
Unique Mechanics and Loot
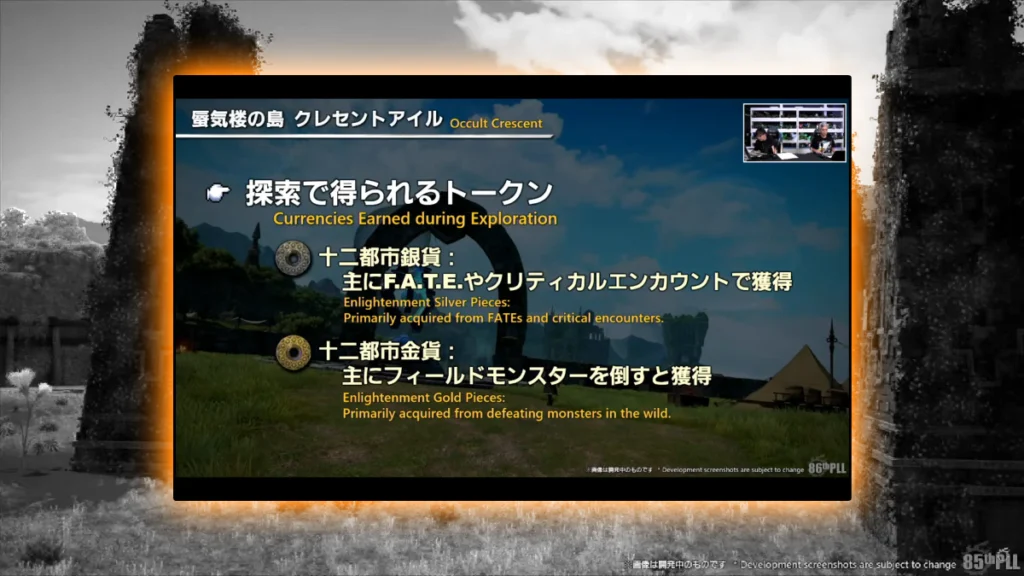
These battles frequently involve multi-stage confrontations with extensive area-of-effect patterns or additional enemy waves. Monitor boss attack indicators consistently and synchronize efforts with tank and healer specialists. Completing the entire engagement provides substantial knowledge EXP rewards alongside Enlightenment currency for acquiring phantom job equipment or specialized gear. Certain phantom occupations exclusively appear as loot drops from CEs, making regular involvement crucial for acquisition probability.
Table: Critical Encounter Rewards Overview
| Reward Type | Purpose |
|---|---|
| Knowledge EXP | Increases your zone rank (essential for power) |
| Enlightenment Silver/Gold | Currency to purchase equipment, consumables, or soul fragments |
| Phantom Job Soul Shards | Unlocks supplementary phantom job specializations |
| Rare Loot (Mounts/Minions) | Collectible items and cosmetic enhancements for character customization |
| Miscellaneous Items (Materia, Potions) | Practical resources to maintain combat effectiveness throughout the Crescent |
Tips for CEs
-
Avoid Overextending: Maintain proximity to healing support personnel.
-
Watch for Red Markers: Consolidate or disperse formation based on specific mechanical requirements.
-
Don’t Release: Await resurrection if defeated to preserve your CE participation credit.
-
Get There Quickly: Activate teleportation nodes early to ensure timely arrival at CE locations before initiation.
Frustrated by repeated failures in Final Fantasy XIV’s extremely challenging Omega Protocol raid? I’ve experienced that struggle personally – it’s genuinely draining. Fortunately, our FFXIV TOP Boost partners you with accomplished raiders who manage the most demanding technical aspects, enabling straightforward acquisition of exclusive accomplishments and equipment minus the typical anxiety!
Instant “Return” on Death
The moment you reach Knowledge Rank 5, your approach to death must fundamentally change. Instead of immediately using the Return option, which triggers significant knowledge EXP loss, you should call out in chat for resurrection assistance. Many experienced players actively monitor for fallen comrades and will provide raises to prevent progression setbacks. This community cooperation becomes especially crucial during Critical Encounters where death penalties can erase hours of effort.
Overconfidence
Combat level alone doesn’t determine your survivability in Occult Crescent. A player at Knowledge Rank 10 with optimized gear can still be one-shotted by a level 18 enemy. The key is recognizing that Knowledge Rank provides both offensive and defensive scaling – a 8-level difference typically means certain death regardless of your main job’s capabilities.
Ignoring Specialized Gear
Elemental resistance becomes critical against specific enemy types. Fire-based creatures in the southern volcanic regions can deal up to 300% more damage to unprepared players. Carry multiple food types and accessory sets to quickly adapt to different damage types you encounter.
Skipping Regular FATEs
Standard FATEs provide approximately 65-80% of the knowledge EXP of critical events while requiring significantly less time investment.
Eating Avoidable AoEs
Nearly 85% of deadly attacks feature visible telegraphs 2-3 seconds before impact. Use this time to either move out of danger zones or activate appropriate defensive cooldowns like Rampart or Sentinel.
Underestimating Veteran Tips
Experienced players often share precise spawn windows (typically 45-90 minute intervals) for rare monsters and bosses.
Burning Out
The journey to Rank 20 requires approximately 35-45 hours of focused gameplay. Breaking this into 2-3 hour sessions across multiple days significantly improves retention and enjoyment.
Understanding the progression curve is essential for efficient advancement through Occult Crescent’s challenges. The knowledge EXP requirements follow an exponential growth pattern, with the most significant jumps occurring between Ranks 15-20 where single death penalties can cost 4-6 hours of progress.
The most effective strategy involves alternating between solo exploration during early ranks (1-4) and group farming sessions from Rank 5 onward. Chain bonuses provide up to 150% additional experience when maintaining continuous combat against appropriately leveled enemies.
Optimal leveling routes typically follow a circular path around the central ruins, focusing on enemy clusters that respawn quickly.
Experience Optimization Techniques
Forming dedicated farming parties of 4-6 players yields the highest experience per hour. The sweet spot for efficient farming is engaging enemies within 2-3 Knowledge Ranks of your current level to maximize chain bonuses while minimizing risk.
Weekly challenge completions provide substantial knowledge EXP injections equivalent to 2-3 hours of standard grinding.
Risk Mitigation Strategies
Always maintain at least one Phoenix Down in your inventory for emergency situations. Additionally, phantom jobs like Chemist provide “Auto-Reraise” effects that can prevent death penalties entirely.
Advanced players recommend carrying potions that provide temporary stat boosts specifically tailored to the enemy types in your current farming area.
Success in Occult Crescent heavily relies on understanding and implementing cooperative strategies. The zone’s design encourages player interaction through shared objectives and mutual protection against devastating penalties.
When forming groups, ensure members’ Knowledge Ranks remain within 3 levels of each other to maximize chain experience bonuses.
Group Coordination Essentials
Establish clear communication protocols for target prioritization, emergency situations, and resource management.
Communication tools like target markers and quick chat commands significantly improve coordination efficiency. Designate primary and secondary targets before engaging enemy groups to minimize chaotic target switching.
Resource Management
Carry a balanced inventory including: healing potions (minimum 10), stat-boosting food (3-5 varieties), and repair materials to maintain optimal combat performance.
Advanced coordination involves assigning specific phantom job roles to party members to create synergistic ability combinations.
Remember that while class selection principles apply here – complement your main job’s weaknesses with appropriate phantom job selections.
For those seeking to optimize their weapon and ability optimization, the same strategic thinking required for choosing optimal phantom jobs.
For comprehensive strategies on maximizing your efficiency, refer to our complete battlefield guide for additional advanced tactics.
Action Checklist
- Unlock all teleport shards during Ranks 1-4 when death carries no penalty
- Select complementary phantom jobs that address your main role’s weaknesses
- Configure five phantom actions on your dedicated hotbar
- Form groups with players within 3 Knowledge Ranks for bonus EXP
- Always assess enemy levels before engagement to avoid instant death
- Carry emergency potions and coordinate resurrections instead of releasing
- Complete weekly challenges and side quests for significant EXP boosts
- Form or join an 8-player party with members within 3 Knowledge Ranks of each other
- Identify and avoid enemies 5+ ranks above your current level
- Learn monster detection types (sight, sound, proximity)
- Unlock all teleport shards during early Knowledge Ranks (1-4)
- Always carry Phoenix Down or maintain Reraise status effects
- Position in CE entry circles before barrier closure
- Unlock all teleport shards immediately upon zone entry
- Establish resurrection protocol – never use Return after Rank 5 without attempting raise first
- Carry elemental resistance gear sets for different enemy types
- Join farming parties for optimal experience chains from Rank 5 onward
- Complete all FATEs encountered, not just critical ones
- Balance progression with other content to prevent burnout
No reproduction without permission:Tsp Game Club » Everything to Know About Occult Crescent in FFXIV Patch 7.25