TL;DR
- Transponders enable fast travel between Chiral Network-connected locations using beach jumping technology
- Requires PCC Level 2 to build and Heartman’s recruitment to unlock the blueprint
- Strategic placement maximizes network coverage and reduces traversal time significantly
- All cargo automatically transfers to destination lockers during beach jumps
- Advanced players should prioritize transponder networks over individual structures
Death Stranding 2 introduces revolutionary transportation mechanics through the Transponder system, offering porters unprecedented mobility across the fractured American landscape. As Fragile’s beach jumping abilities become increasingly limited due to the physical toll, these new structures provide a sustainable alternative for rapid movement between distant locations. Understanding how transponders function within the Chiral Network framework is essential for optimizing your delivery routes and expanding your logistical capabilities.
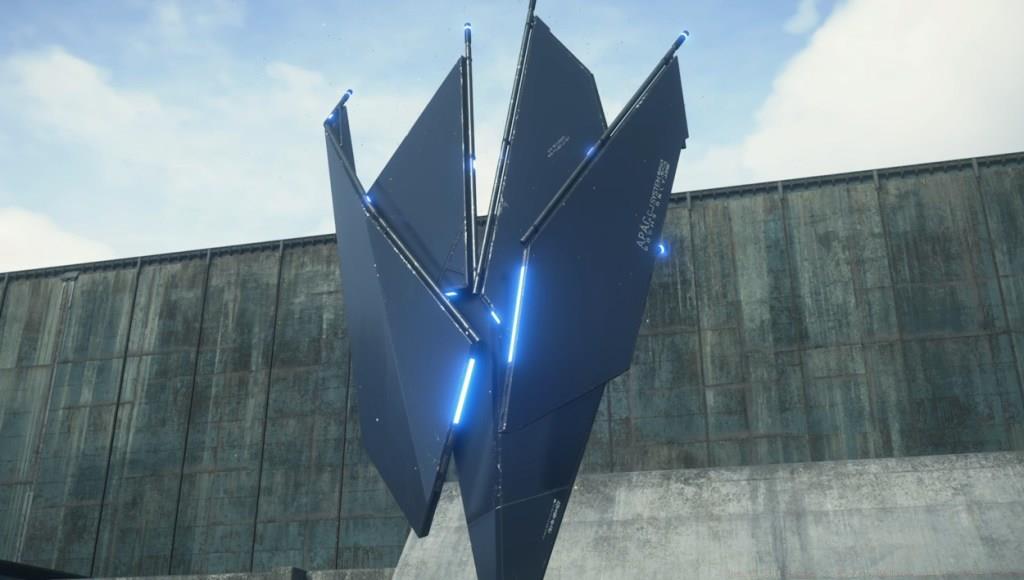
While traditional transponders serve as radio signal transceivers in conventional technology, Death Stranding’s iteration represents a quantum leap in transportation science. These devices harness beach energy to teleport personnel between connected nodes, effectively creating an instant travel network. Heartman’s groundbreaking research during his extended beach visits enabled this technological marvel, allowing ordinary porters to access abilities previously reserved for those with unique chiral sensitivities.
Acquiring the transponder blueprint occurs automatically upon recruiting Heartman to your Drawbridge organization. This milestone triggers the installation of permanent transponder units at all major distribution centers and player-constructed safe houses. However, many remote prepper outposts lack this infrastructure, necessitating strategic construction to establish comprehensive network coverage.
Building your transponder network requires careful planning and resource management. The construction process involves several critical steps that determine the effectiveness of your transportation system.
Construction Requirements: Transponders demand PCC Level 2 fabrication capabilities, representing a significant upgrade from basic structure building. Ensure you’ve progressed sufficiently in the main storyline to access this advanced construction tier before attempting deployment.
Placement Strategy: Optimal transponder locations include high-elevation points with clear sightlines, near resource-rich areas, and along frequently traveled routes between major facilities.
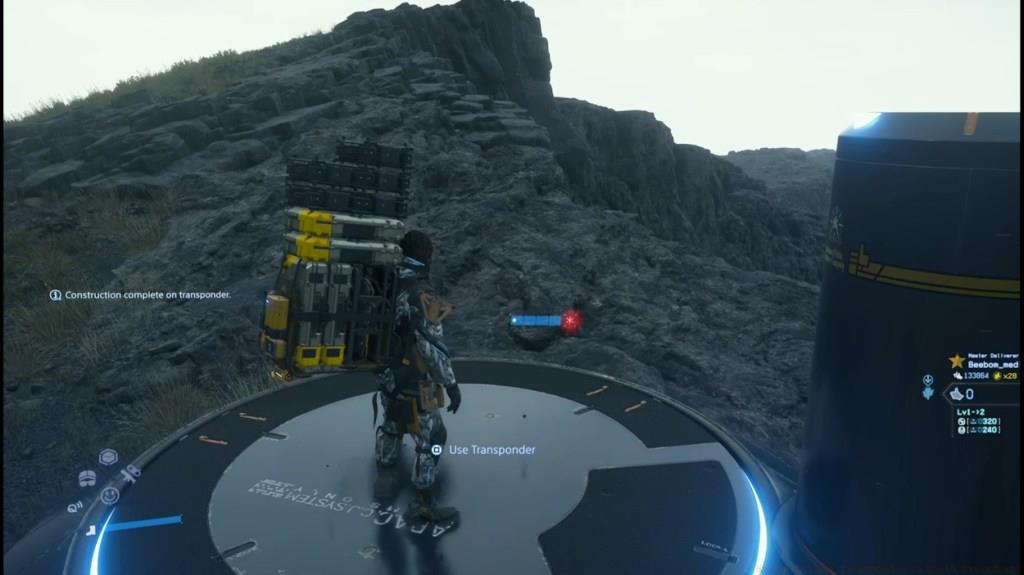
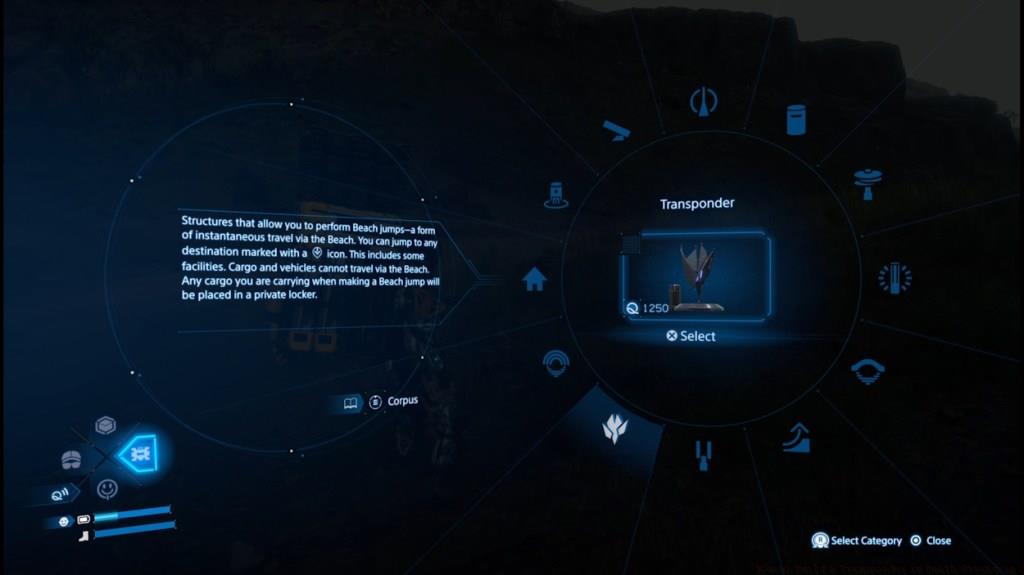
Activation Process: Once constructed, approach the transponder and press the interaction button (typically square on PlayStation controllers) to initiate the travel interface. The system displays all available destinations within your established Chiral Network.
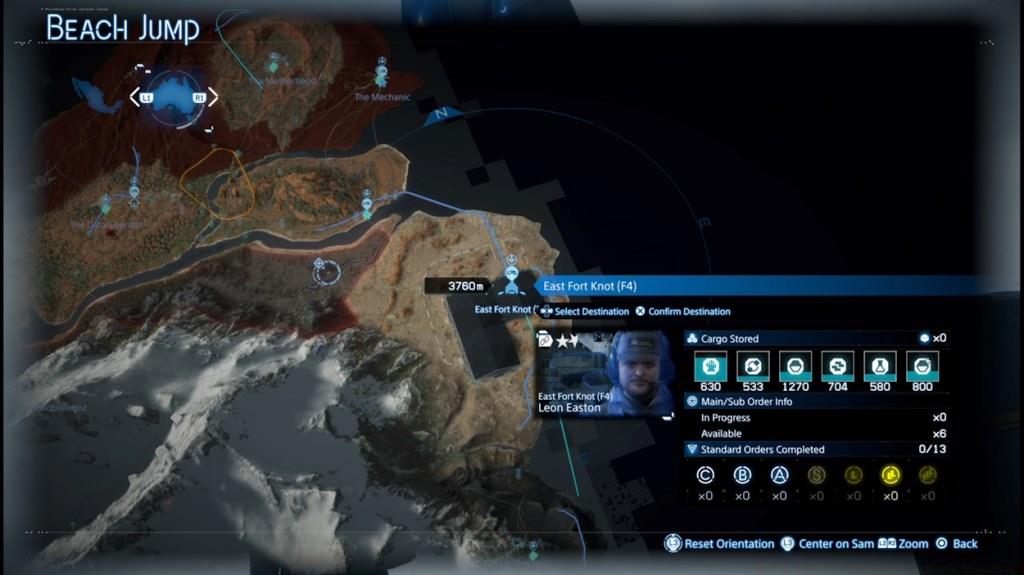
Destination Selection: Choose from major distribution hubs, safe houses, or other player-built transponders. Each beach jump consumes chiral bandwidth but saves hours of traversal time through dangerous terrain.
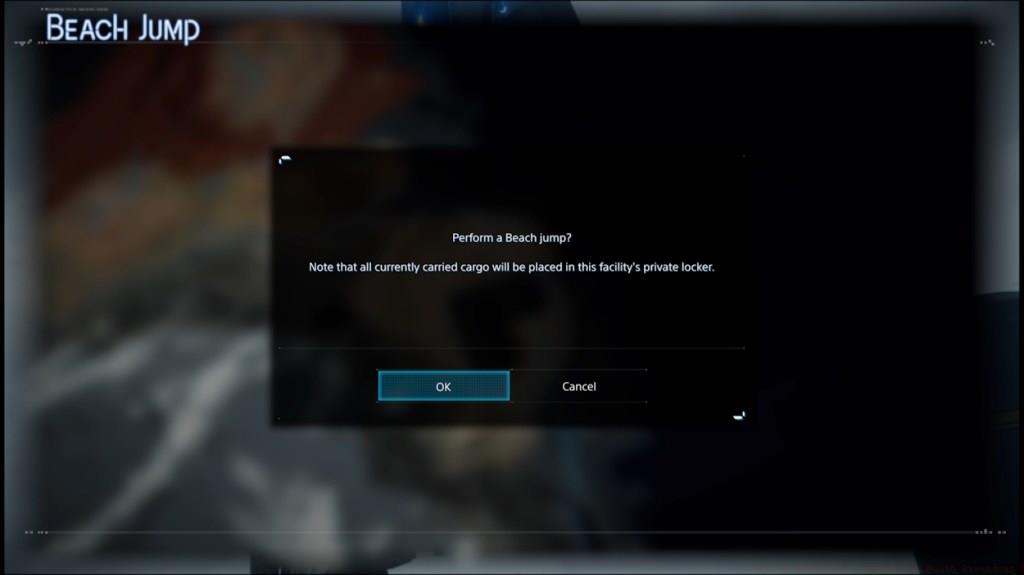
Cargo Management: Your transported goods automatically transfer to the destination facility’s private lockers, eliminating the risk of damage during transit. This automated logistics system represents one of transponders’ most valuable benefits for serious porters.

Experienced porters can maximize transponder effectiveness through sophisticated network design and resource allocation strategies. Building isolated transponders provides limited value compared to creating interconnected transportation hubs.
Network Optimization: Focus on creating triangular transponder formations that cover large geographic areas with minimal chiral bandwidth consumption. Each new connection should provide access to previously unreachable territories or significantly reduce travel time between high-traffic locations.
Common Construction Mistakes: Many players waste resources by placing transponders too close to existing infrastructure or in geologically unstable areas prone to timefall erosion.
Advanced Placement Techniques: Ideal transponder locations include mountain peaks for maximum signal range, river crossings to bypass natural barriers, and near MULE camps to facilitate quick escape routes.
Resource Management: Each transponder construction consumes substantial chiral crystals and advanced alloys. Prioritize locations that serve multiple strategic purposes to ensure optimal resource investment returns.
Time Efficiency Analysis: A well-planned transponder network can reduce average delivery times by 60-75% compared to traditional foot or vehicle transport methods.
Action Checklist
- Recruit Heartman to unlock transponder blueprint
- Upgrade to PCC Level 2 for construction capability
- Identify strategic high-elevation locations for maximum coverage
- Construct first transponder near resource-rich area
- Establish triangular network pattern for optimal connectivity
No reproduction without permission:Tsp Game Club » How to Build a Transponder in Death Stranding 2 Master Death Stranding 2's Transponder system for efficient fast travel and cargo management across the Chiral Network