Master Death Stranding 2 Episode 5 with advanced combat strategies, boss tactics, and progression secrets for Sam’s surreal journey.
Episode 5 Overview: A Descent into Chaos
Episode 5 of Death Stranding 2 marks a pivotal and disorienting shift in Sam’s journey, violently pulling him from the familiar burdens of the real world into a fragmented necropolis. This sequence is not just a narrative detour but a critical gameplay milestone designed to test your combat readiness and significantly boost your connection level with Drawbridge.
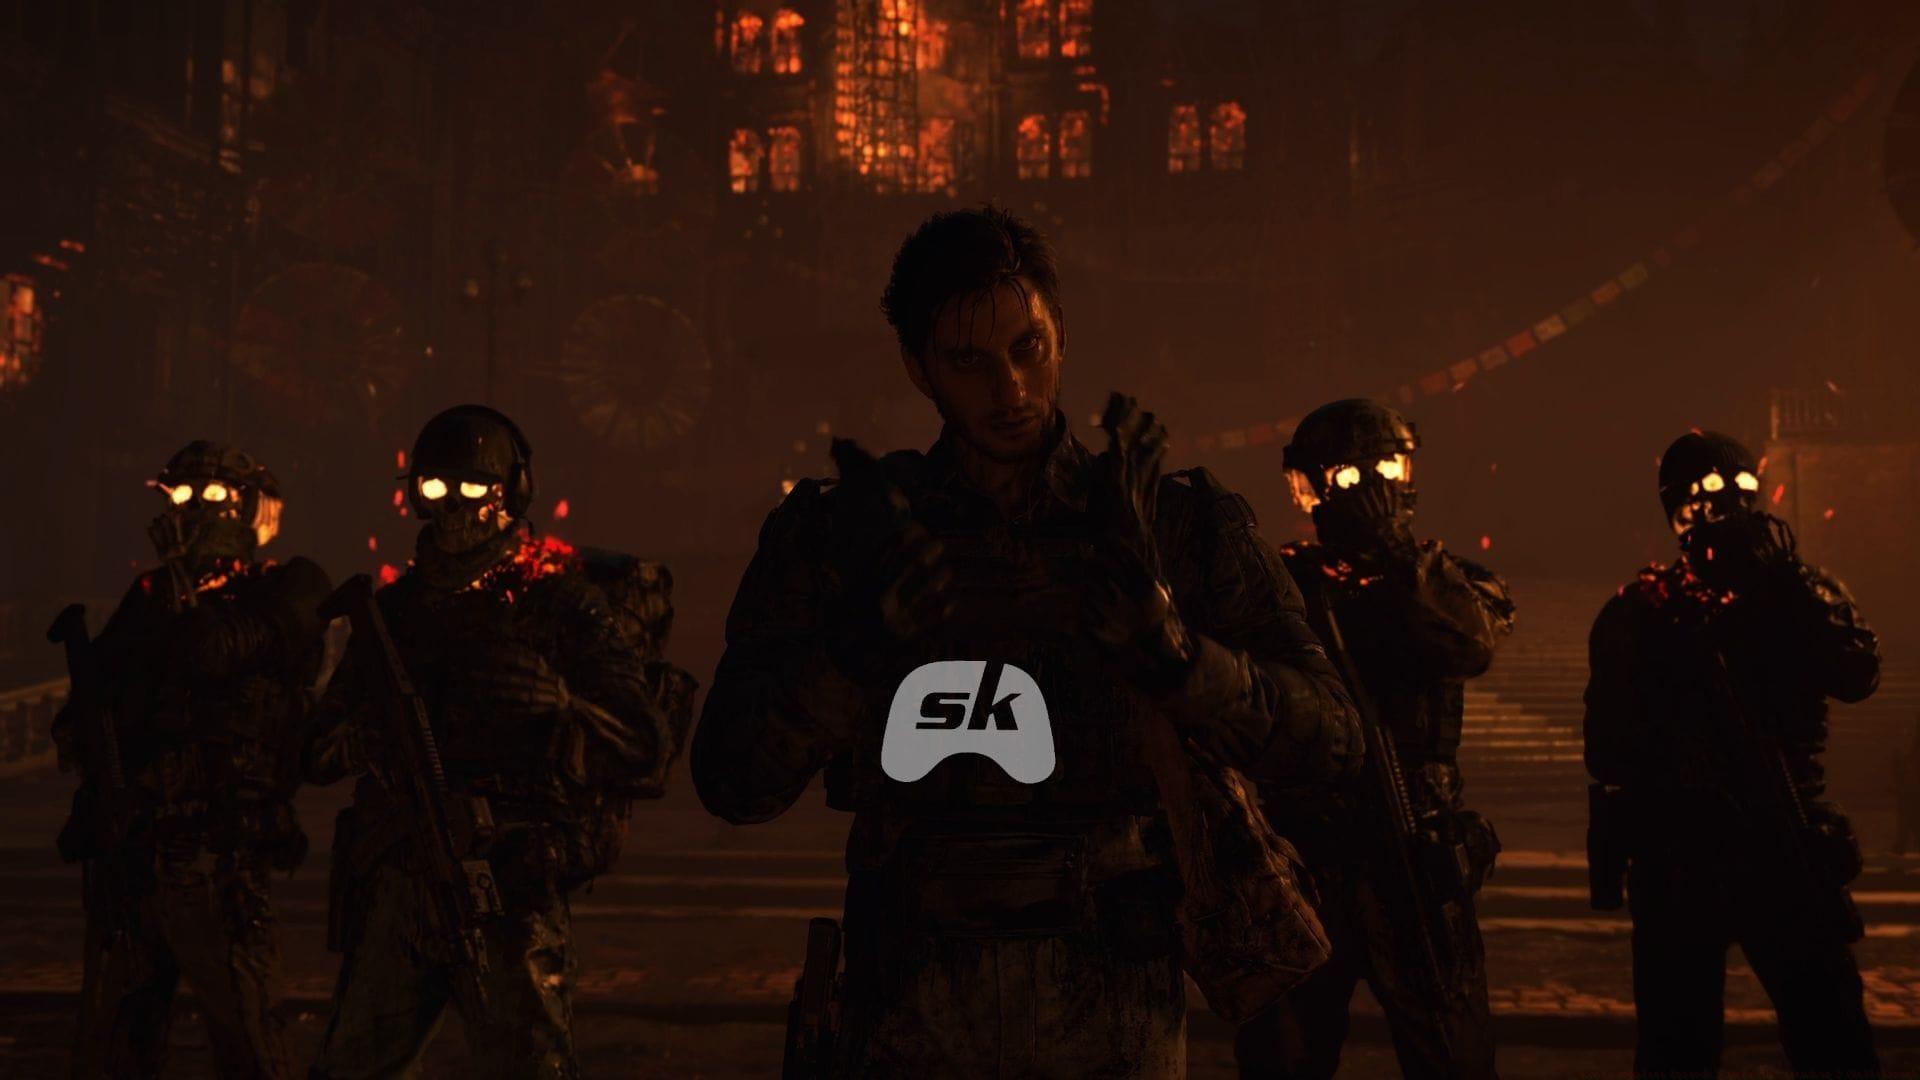
The environment is a haunting collage of shattered urban landscapes, where you’ll first encounter Neil leading a phantom motorcycle brigade. This initial meeting swiftly escalates from a curious sighting to a full-scale spectral conflict.
Also read: All Death Stranding 2 hot springs locations and where to find them
Combat Strategy: Surviving Neil’s Ghost Army
Upon regaining control, your immediate priority is securing any scattered cargo and optimizing your equipped gear for a prolonged firefight. As you advance along the decrepit road, waves of spectral infantry will assault from both flanks. While any firearm can be effective, Grenade Pistols found in the area offer exceptional crowd-control utility, capable of damaging multiple enemies with a single shot. A common mistake is to rush forward; instead, methodically clear each wave using the abundant environmental cover.
The path funnels you toward a prominent staircase, where the challenge intensifies with elevated snipers adding vertical threat. Use the objective marker for general direction, but rely on tactical movement between ruined cars and concrete pillars to avoid crossfire. On Hard or Very Hard difficulty, ammunition conservation becomes paramount—only engage confirmed targets and scavenge weapons from fallen foes.
Boss Battle: Defeating Neil Phase-by-Phase
Neil’s boss fight is a dynamic, multi-stage engagement that tests your adaptability. He employs teleportation, rapid dashes, and commands reinforcements. Your map is vital for anticipating his next appearance point, but the Odradek scanner is your true key to victory. Activate it frequently during lulls to pinpoint his cloaked location, as visual tracking alone is unreliable.
He follows a predictable pattern, vanishing after losing a portion of his health and rematerializing at one of three key locations: a central tower, a balcony on a building across the plaza, and finally, the rooftop structure overlooking the courtyard’s end. After each teleport, you must aggressively push through the remaining ghost soldiers to reach his new position. A critical error players make is focusing too much on the adds; Neil is the primary target, and the soldiers are a distraction.
His final defeat triggers a cryptic cutscene where he collapses, murmuring “Ne… Vana…” This ambiguous moment, speculated by Dollman to reference nirvana, deepens the game’s metaphysical mystery without providing concrete answers.
Post-Battle Mysteries & Progression Rewards
Just as the tension subsides, a powerful shockwave incapacitates Sam, revealing an unconscious, enigmatic woman nearby. Another surge knocks him out, returning him to the tangible world. The woman now resides sealed within a distinctive coffin-like pod, which Sam must transport to the DHV Magellan. While her identity remains concealed, securing her is clearly a primary objective for the burgeoning Drawbridge organization.
Completing Episode 5 is a substantial progression checkpoint. Your base level will increase, unlocking access to more advanced fabrication blueprints, logistical tools, and combat technology. This directly enhances your capability to manage the increasing complexities of the journey ahead. The episode concludes by introducing a new ally to the cause, setting the stage for the next chapter’s challenges.
Advanced Tips & Common Mistakes
Loadout Optimization: Before triggering this episode, equip weapons with high ammo capacity or replenishable options like the Non-Lethal Assault Rifle. Carry at least two types of Hematic Grenades for area denial.
Pitfalls to Avoid:
- Ignoring the Scanner: Not using the Odradek scanner between Neil’s phases will result in wasted time and unnecessary damage.
- Poor Resource Management: Expending all grenades on early waves leaves you vulnerable during the critical boss phases.
- Static Positioning: Remaining in one cover spot allows enemies, especially the snipers, to flank you.
Endgame Preparation: The tools and connection rank unlocked here, such as improved power skeletons or chiral network relays, are essential for tackling later, more demanding delivery contracts and hostile territory.
That concludes our guide for Episode 5 in Death Stranding 2. Check out more articles on the game below:
No reproduction without permission:Tsp Game Club » How to complete Episode 5 in Death Stranding 2 (Walkthrough) Master Death Stranding 2 Episode 5 with advanced combat strategies, boss tactics, and progression secrets for Sam's surreal journey.