Complete guide to mastering the challenging Into the Fray quest and securing exclusive Radio Renegade outfit rewards
Quest Overview and Strategic Preparation
The Into the Fray quest in Arc Raiders represents one of the most demanding assignments you’ll encounter early in your campaign. This high-stakes operation becomes available directly through Trader Shani and distinguishes itself through its requirement to eliminate a formidable ARC mechanized unit. The mission’s complexity stems from both the enemy’s substantial durability and the precision targeting required for efficient completion. While organized fireteams significantly reduce completion time, determined solo operators can achieve success through meticulous planning and adaptive combat tactics.
Strategic reading: How to acquire Power Cables in ARC Raiders
Advanced Leaper Location Strategies
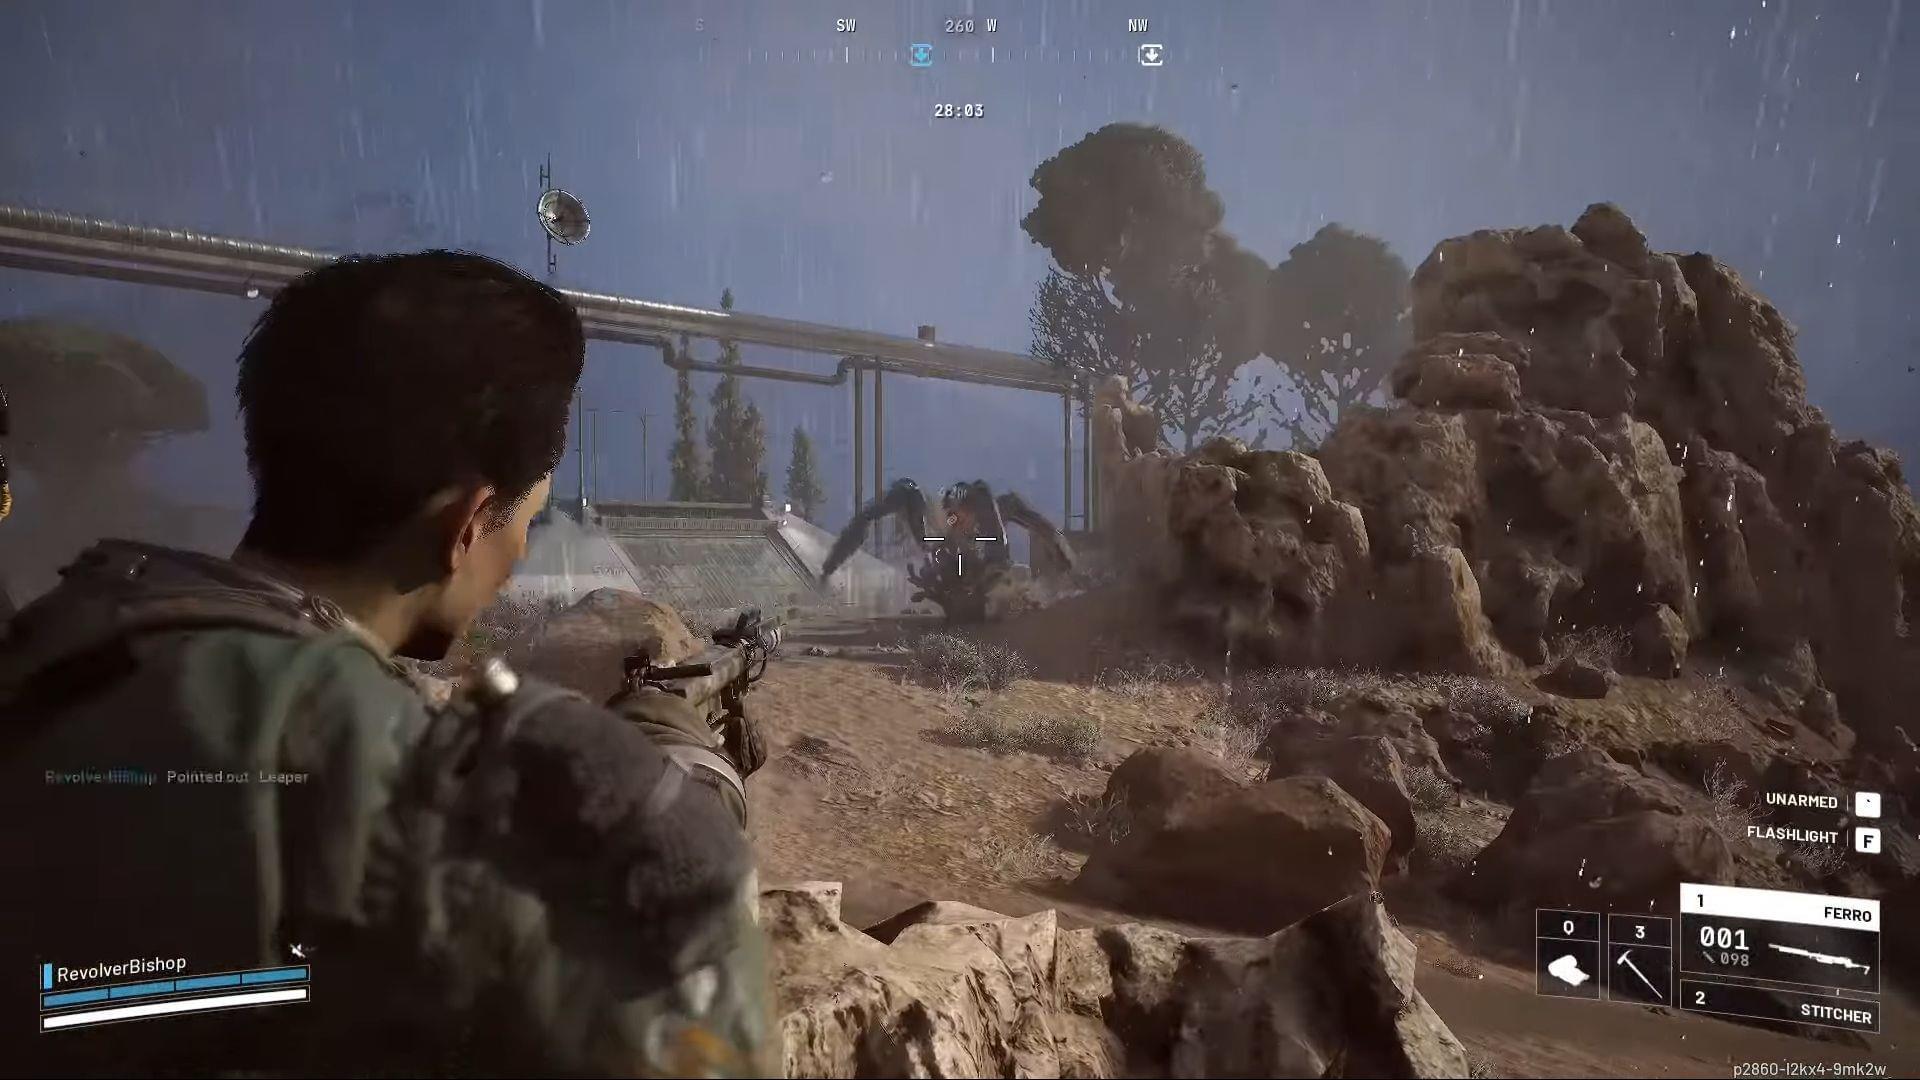
Your primary objective involves locating and neutralizing a Leaper unit, one of the game’s more aggressive mechanized threats. These adversaries typically patrol designated High Value Loot sectors and frequently appear adjacent to Extraction zones where player activity concentrates. A reliable hunting ground exists within the Dam Battlegrounds terrain near the Water Treatment Control landmark, though spawn rates fluctuate based on server population and recent player activity. For consistent results, systematically sweep multiple high-traffic areas while monitoring ARC patrol routes that might indicate nearby Leaper presence.
Pro tip: Leapers exhibit predictable patrol patterns between loot clusters. Position yourself at elevated vantage points to scout movement before engaging. Many experienced hunters recommend checking the industrial sector northwest of the main dam structure, where spawn rates typically increase during peak gameplay hours. If the primary location proves unfruitful, immediately transition to secondary zones like the abandoned research outpost or communications array to maintain hunting efficiency.
Combat Mechanics and Weak Point Exploitation
Upon encountering a Leaper, immediately focus sustained fire on its critical vulnerability points, specifically the articulated leg mechanisms. Systematically disabling these joint systems will progressively immobilize the mechanical adversary, creating extended windows for sustained damage application. Supplement your primary weapon with Wolfpack grenade clusters to erode armor integrity and apply area denial pressure. Maintain constant situational awareness to evade the unit’s aggressive lunge maneuvers targeting your position, utilizing environmental cover to break line of sight and reset engagement timing. Through coordinated application of high-caliber ammunition and explosive ordnance, you’ll gradually degrade the mechanized threat to destruction.
Combat analysis: Methods for locating Laboratory Reagents in ARC Raiders
Advanced tactical note: The Leaper’s attack pattern follows a predictable three-stage sequence. After two lunges, it typically pauses for 3-4 seconds to recalibrate targeting systems – this represents your prime damage window. Position explosive charges near its path during this recalibration phase to maximize burst damage potential. Equip weapons with armor-piercing modifications to accelerate joint destruction, and consider bringing an emergency mobility tool like the grapple hook for rapid disengagement when overwhelmed.
Loot Recovery and Secure Extraction Protocols
Following the Leaper’s destruction, meticulously search the debris field for your objective item among the scattered mechanical components. This retrieval process demands patience as the critical component blends with standard wreckage. Once you secure the Leaper Pulse Unit, prioritize immediate evacuation from the combat zone and safe return to Speranza headquarters. For absolute security, deposit the component in your Protected Inventory slot to guarantee item retention regardless of subsequent combat outcomes against ARC forces or hostile players.
Extraction strategy: Plan your exit route before engaging the Leaper. Identify multiple extraction points within reasonable distance and note any intervening hostile concentrations. Many successful operators complete the loot retrieval during the final 60 seconds before extraction, minimizing exposure time. If playing solo, consider using audio decoys or smoke grenades to obscure your movement toward extraction zones when carrying the valuable component.
Reward Acquisition and Mission Optimization
After successful return to base, deliver the recovered component to Trader Shani to formally conclude the operation. This transaction unlocks access to the exclusive mission rewards from the Into the Fray assignment in Arc Raiders.
Primary reward obtained upon mission completion:
This distinctive apparel set provides unique visual customization without statistical advantages, allowing your operator to stand out in the battlefield. For players seeking to optimize future runs, consider these advanced techniques: pre-position supply caches near anticipated engagement zones, coordinate with squadmates to simultaneously engage multiple Leapers for component farming, and master the quick-extract maneuver to reduce mission completion time by approximately 40%.
Remain connected to Sportskeeda for continuing tactical updates, advanced guides, and development news.
No reproduction without permission:Tsp Game Club » How to complete Into the Fray quest in Arc Raiders Complete guide to mastering the challenging Into the Fray quest and securing exclusive Radio Renegade outfit rewards