TL;DR
- Liberation Peak favors snipers with multiple elevated positions overlooking key objectives and choke points
- NATO teams should focus on central rock formation access while leveraging limited HQ cover
- Pax Armata enjoys superior sniper nests with comprehensive objective coverage and protection
- Advanced tactics include glare management, position rotation, and aggressive counter-sniping
- Always maintain situational awareness of combat zone boundaries and flanking routes
Positioned within Tajikistan’s rugged mountain ranges, Liberation Peak stands as one of the premier sniping environments in Battlefield 6, offering extensive vertical advantages with minimal concealment opportunities for opposing forces. Marksmanship specialists seeking tactical superiority on this demanding battlefield must identify the optimal sniper vantage points across Liberation Peak within BF6. Superior positions typically provide multi-objective oversight or control over constricted passages weaving through the map’s geological formations.
To maximize effectiveness as a precision shooter, operators should also examine optimal Recon configurations in Battlefield 6, enabling them to secure crucial advantages that prove decisive at extended engagement distances. Understanding the relationship between sniper positioning and effective Assignments completion can significantly enhance your progression rate.
Access our comprehensive interactive tactical map for detailed analysis of BF6‘s Liberation Peak terrain.
Examining the Ridge 13 layout, representing the most expansive iteration of Liberation Peak supporting Conquest, Escalation, and additional large-scale combat operations, reveals a substantial central rock formation. This geological feature naturally becomes contested territory for both factions, though significant portions of this rock structure extend beyond active combat boundaries.
This elevated position additionally commands sightlines over a restricted corridor containing critical Objective positions. Both opposing forces will deploy precision marksmen covering this passageway.
Remember that optical aiming through sniper rifle scopes will produce distinctive lens glare visible to enemy spotters.
Objective F positioning adjacent to a substantial elevation creates exceptional opportunities for snipers, particularly when hostile forces advance past the central map region.
For the NATO contingent initiating from the Northeast headquarters, available superior sniper positions remain limited due to reduced elevated terrain. However, they maintain enhanced accessibility to the central rock formation dominating the battlefield.
Visual documentation and tactical descriptions utilize Escalation objective designations throughout this segment. Objective identifiers vary from Conquest nomenclature employed for Pax Armata team analysis.
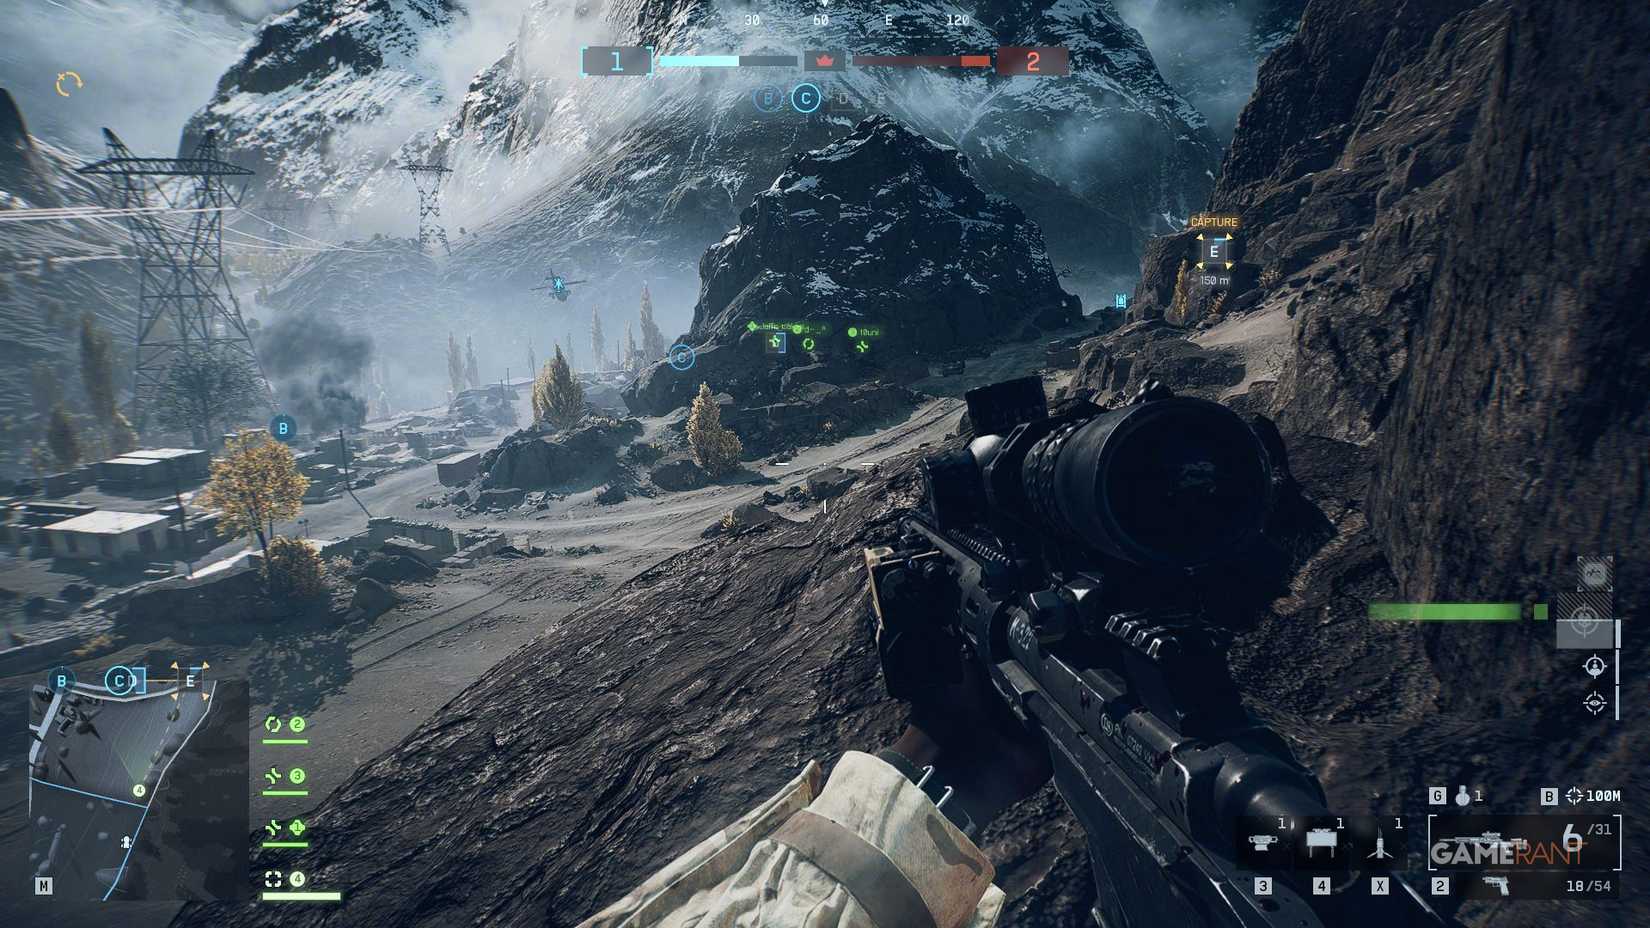
Red Roof HQ, Commanding B, C & E Sectors
Within the NATO operational headquarters perimeter, operators will identify a structure featuring distinctive crimson roofing. Scale the frontal barrier to access the lower roof section. Given the inclined roof architecture, marksmen can utilize this slope for protective covering.
From this elevated platform, precision shooters establish effective observation over Objectives B and C to the left flank. Simultaneously, to the right aspect, they can maintain surveillance on forces advancing from Objective E through the constricted passage.
Northeast Aspect of Central Rock Formation
Operators can access the northeastern sector of the rock structure, providing marksmen with superior visibility across Objective C.
Identify three fractured tree specimens and navigate between the leftward pair before ascending the rock formation. Eventually, personnel will receive combat boundary notifications. Continue progression and anticipate a descent opportunity onto a leveled platform.
This stabilized zone also exceeds operational boundaries, but proceed toward the perimeter edge, enabling precision engagement from this secured location. Employ the rightward rock face for intermittent cover despite ongoing boundary alerts.
Southern Aspect of Central Rock Formation
Marksmen can ascend the southwestern face of the substantial rock structure. This vantage delivers clear observation of Objective E and the remainder of the restricted corridor.
Should operators advance slightly further upward, they’ll additionally acquire excellent visibility of opposing sniper positions.
Southern Mountain Face, Adjacent to HQ Perimeter
When tactical circumstances deteriorate for the NATO contingent and they face defensive compression, a viable position exists immediately outside headquarters boundaries. Follow the indicated directional marker, and traverse the rocky terrain toward the minor ridge.
This location provides snipers with expansive observation over Objective B, sections of Objective C, the central geological formation, and the passageway to the right of this structure, where Objective E situates. From this standpoint, operators eliminate concerns about flanking maneuvers entirely, protected by their headquarters to the left and steep mountain topography to their right.
Operators deploying within the southeastern map sector as Pax Armata benefit from increased sniper position options, particularly during defensive contraction scenarios requiring perimeter security.
Visual references and descriptive content employ Conquest objective labeling in this section. Objective designations differ from Escalation terminology utilized for NATO team evaluation.
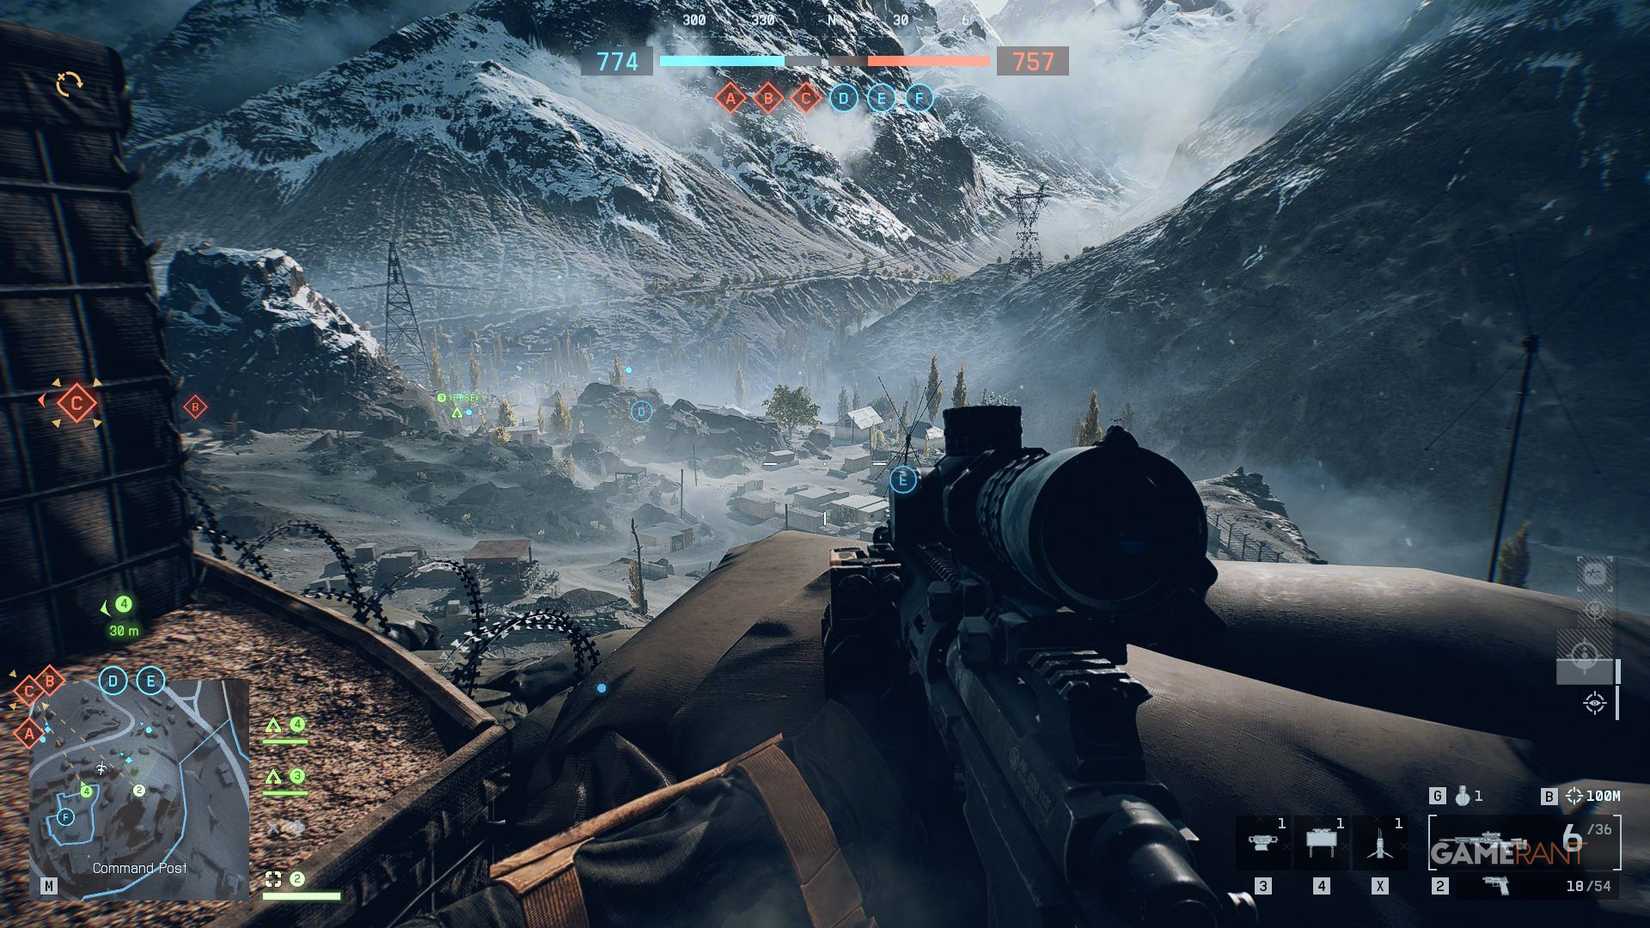
Sniper’s Nest Overlooking Objective F
A prepared sniper position situates immediately south of Objective F, potentially representing the optimal vantage across the entire engagement zone for precision specialists. This location enables marksmen to observe sections of Objective F, complete coverage of Objective E, flanking approaches to Objective D, the substantial central rock formation, and portions of the constricted passage containing Objective C.
The position also provides overhead protection safeguarding snipers from aviation-based threats.
The tactical insertion beacon for squad reinforcement would prove invaluable for locations of this nature, though regrettably it remains associated with the Assault specialization rather than the Recon category.
Sniper’s Nest Within Southern Headquarters
Should Pax Armata experience complete defensive compression necessitating protection of Objectives F and E, an additional prepared sniper position exists inside the Headquarters compound. While offering reduced elevation compared to the Objective F position, it provides enhanced protective covering and effective observation of Objective E.
Southwestern Aspect Opposite Central Rock Formation
To secure the constricted passage between the substantial rock formation, where Objective C positions, Pax Armata precision specialists can scale the leftward ridge. To reach the demonstrated tactical position, personnel must navigate through zones generating combat boundary return warnings.
This approach should yield quality observation of Objective B and any NATO elements advancing toward Objective C. Operators must maintain vigilance regarding right flank security, however, as hostile forces might traverse the alternate route encircling the large central rock structure.
Roof Structure Southwest of Objective D With Objective B Observation
A structural facility positions immediately southwest of Objective D, where marksmen can establish positions atop the roofing. This vantage provides effective surveillance of forces approaching from Objective B, in addition to any personnel accessing the substantial central rock formation.
This tactical location remains relatively unprotected, however, particularly vulnerable to aviation-based threats. Maintain limited duration occupation of this position.
Beyond fundamental position identification, mastering Liberation Peak demands sophisticated engagement methodologies. Seasoned snipers implement systematic glare management by limiting aimed exposure duration to 3-4 seconds maximum before repositioning. This technique significantly reduces detection probability while maintaining target acquisition capability.
Position Rotation Protocol: Avoid remaining stationary for extended periods. Establish 2-3 complementary positions within your sector and rotate every 2-3 eliminations to prevent pattern recognition by opposing forces.
Counter-Sniping Operations: When facing enemy marksmen, utilize the sun positioning to your advantage—keeping it at your back illuminates their optics while obscuring yours. The golden hours following dawn and preceding dusk provide optimal lighting conditions reducing scope glare visibility.
Combat Zone Boundary Exploitation: Many premium positions straddle operational boundaries. Master the timing of boundary exits—depart just before the countdown completes, then re-enter immediately to reset the timer while maintaining your tactical advantage.
Advanced Movement Techniques: When traversing between positions, utilize the ‘zig-zag sprint’ pattern: sprint for 2 seconds, change direction abruptly, repeat. This unpredictable movement pattern dramatically reduces susceptibility to counter-sniper fire.
For comprehensive strategic development beyond sniper positioning, consult our Complete Guide covering all Battlefield 6 gameplay systems and mechanics.
Weapon Selection Strategy: Your choice of precision rifle should complement your intended engagement range. For the extensive sightlines of Liberation Peak, prioritize high-velocity platforms with minimal bullet drop characteristics. Detailed analysis of optimal Weapons Unlock progression can significantly enhance your long-range effectiveness.
Class Synergy Optimization: While the Recon specialization focuses on precision engagement, understanding Class Guide interactions enables superior squad coordination and battlefield dominance.
Action Checklist
- Study the Ridge 13 layout to identify natural choke points and multi-objective sightlines
- Practice accessing the central rock formation from both spawn points
- Establish 2-3 rotation positions within your operational sector
- Master glare reduction techniques through timed exposure and position shifting
- Develop counter-sniping protocols including solar positioning and movement patterns
No reproduction without permission:Tsp Game Club » Best Sniping Spots for Liberation Peak in Battlefield 6 Master Liberation Peak's sniper positions with tactical insights, counter-sniping strategies, and advanced positioning techniques