TL;DR
- Silver Pieces fund essential upgrades like riding maps and Phantom Job shards
- Gold Pieces unlock high-tier rewards including relic upgrades and luxury mounts
- 8-player parties with balanced roles maximize farming efficiency
- Monster train meta yields 8,000-10,000 gold/hour with proper coordination
- Knowledge Level management prevents drop rate penalties

Mastering Enlightenment Silver Pieces and Enlightenment Gold Pieces in the Occult Crescent transforms from daunting to rewarding with the right approach. After countless hours testing FATE rotations, mob density patterns, and boss spawn mechanics, I’ve distilled the most efficient methods into actionable strategies. This comprehensive guide delivers battle-tested techniques, optimized party compositions, and insider tips that will dramatically boost your coin income. Ready to dominate the economy? Let’s begin your journey to riches.

What Makes Silver and Gold Pieces Special?
The Dawntrail expansion (Patch 7.25) introduced two exclusive zone-bound currencies:
| Coin Type | Primary Uses | Typical Sources | Rarity |
|---|---|---|---|
| Silver Pieces | Entry-level Phantom Job shards, riding maps, base Arcanaut gear, crafting materials | Skirmish FATEs, Critical Engagements, story quests, survey tasks | Common |
| Gold Pieces | High-tier Phantom Job unlocks, relic weapon upgrades, luxury mounts, exclusive minions | High-level mobs, large-scale CEs, world bosses, treasure coffers | Rare |
Why prioritize these currencies?
These coins completely replace traditional tomestones for all Occult Crescent rewards. Without sufficient reserves, you’ll miss out on crucial Phantom Job progression, relic weapon enhancement paths, and the game-changing riding map that cuts travel time by 50%. Essentially, these currencies control your access to power progression and quality-of-life improvements.
Struggling with FFXIV’s demanding FRU content and tired of endless wipe cycles? I understand that frustration—it’s incredibly draining. Our FFXIV FRU Boost service connects you with elite players who breeze through these challenges, securing valuable rewards and achievements while you skip the stress entirely!
Unlocking the Zone and Pre-Farm Setup

Entry Requirements
-
Complete the Dawntrail MSQ.
-
Achieve level 100 on any combat class.
-
Accept “Unfamiliar Territory” in Tuliyollal (X:17 Y:12) to access South Horn.
Gear Optimization
-
Zone item level sync caps at item-level 700.
-
Crafted gear or previous tomestone sets perform adequately.
-
Stock consumables; bonus HP and damage significantly improve chain pull survival.
Essential Phantom Job Buffs
Prioritize unlocking and leveling these three immediately:
| Phantom Job | Important Buff | Why It Matters |
|---|---|---|
| Knight | –10 % damage taken for party | Sustains massive pull trains |
| Bard | +10 % EXP gain | Accelerates Knowledge progression |
| Monk | Minor sprint enhancement | Minimizes transition downtime |
Activate each enhancement at Knowledge Crystals, then switch to your primary job for permanent advantages.
Mobility Enhancements
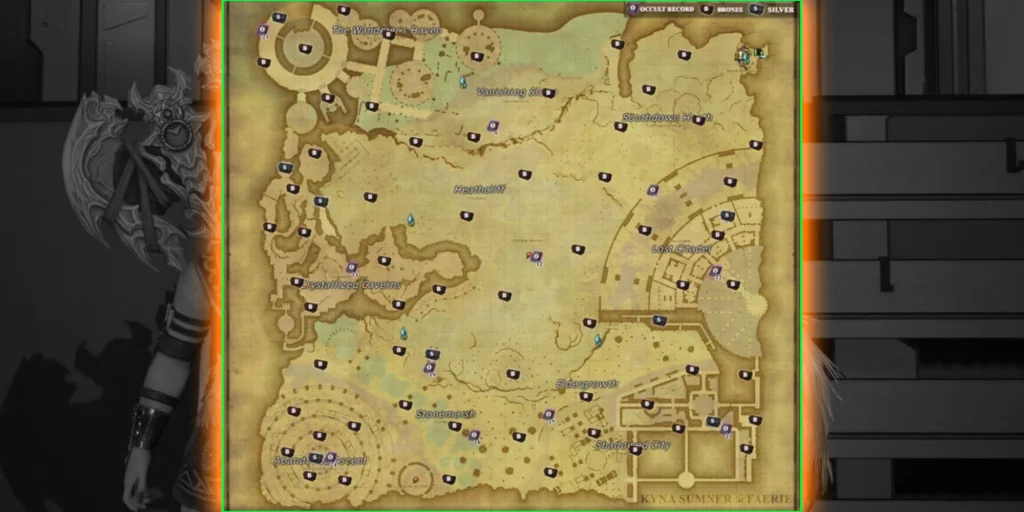
Invest 3 000 silver in the Riding Map immediately upon availability. Enhanced mount speed enables participation in every CE before lockout and potentially doubles event completion rates. Discover Aether Ride nodes during exploration to reduce travel time between farming locations.
Knowledge Level and Mob Scaling
Your Knowledge Level (KLv) increases progressively as you defeat enemies. Drop rates follow these fundamental principles:
-
Equal or higher-level enemies consistently yield both coin types.
-
Lower-level opponents stop dropping gold when KLv significantly exceeds their level.
-
Progressing to deeper zone sections maintains optimal income as you outlevel current areas.
Monitor enemy levels vigilantly; when combat becomes trivial, relocate to preserve efficiency.
Repeatedly failing in the Omega Protocol (TOP) raid and feeling stuck? That frustration is real—I’ve experienced it firsthand. Our FFXIV TOP Boost service pairs you with veteran raiders who master complex mechanics effortlessly, helping you obtain rare gear and achievements without the headache!
Step-by-Step Farming Loop
| Step | Action | Goal |
|---|---|---|
| 1 | Assemble or join an 8-player party | Amplify kill speed and distribute event credit |
| 2 | Select roles: tanks handle pulls, healers ensure survival, AoE DPS clear waves | Balanced composition withstands larger trains |
| 3 | Activate Knight/Bard/Monk bonuses, consume food, repair equipment | Maximum starting efficiency |
| 4 | Targeting silver? Patrol FATE/CE routes. Focusing gold? Navigate to high-level mob concentrations. | Align strategy with currency objectives |
| 5 | Execute continuous rotation: engage → eliminate → reposition | Eliminate downtime for maximum yield |
| 6 | Manage inventory before reaching the 9 999 limit | Maintain collection capacity |
| 7 | Rest every 90 minutes: stretch, hydrate, refocus | Prevent fatigue and maintain performance |
Strategic transitions—initially, subsequently, concurrently—maintain optimal rhythm. Master this sequence and watch your profits accelerate dramatically.
Fast Silver Coin Methods
Critical Engagement Rush
Each successful CE completion awards approximately 200 silver. Active instances generate CEs every 2-3 minutes. Coordinate with party chat channels for efficient rotations; immediately head to marked locations when alerts sound.
Skirmish FATE Chain
Skirmish events provide roughly 80 silver at gold rating completion. These appear in groups, resolve quickly, and respawn rapidly. Completing three consecutive skirmishes yields 240 silver while awaiting the next CE spawn.
Quest & Survey Turn-Ins
Side quests, lore discoveries, and excess Phantom shards convert to silver at the main camp. These passive contributions provide consistent supplemental income during active farming sessions.
Forked Tower Raid
Weekly completion of this 48-player raid delivers 800 silver in approximately 10 minutes. Organize with alliance members and treat this as a high-value weekly reset activity.
Silver Strategy Comparison
| Method | Silver / Hour (party) | Engagement Level | Notes |
|---|---|---|---|
| CE rush | 400-600 | High | Requires active population |
| Skirmish spam | 300-400 | Medium | Ideal between CEs |
| Forked Tower | 800 per clear | Low (weekly) | Weekly bonus income |
| Quest turn-ins | 50-100 | Low | Passive accumulation |
High-Yield Gold Coin Methods
Monster Train Meta
-
Location: Southwest South Horn (level 26-28 mob clusters)
-
Composition: 5-7 Warriors cycling Holmgang; 1-2 healers providing shields; all members equip Cannoneer.
-
Execution: Aggro six enemies → deploy Cannon barrage → advance to next group.
-
Returns: 8 000–10 000 gold/hour with flawless coordination.
Balanced AoE Squad
Two tanks, two healers, and four AoE-focused DPS achieve consistent 5 000 gold/hour. This approach involves smaller pulls but maintains steady progression with reduced risk.
Solo Kite Route
Self-sufficient classes (Warrior, Red Mage, Summoner) employ figure-eight kiting patterns against mid-level enemies. Anticipate 2 500-3 000 gold/hour without party support.
Event Windfalls
Certain world bosses provide substantial gold rewards alongside silver. Prioritize these encounters but consider them supplementary rather than primary income sources.
Gold Strategy Comparison
| Method | Gold / Hour | Difficulty | Party Need |
|---|---|---|---|
| Monster train | 8 000-10 000 | Very High | Full group required |
| Balanced AoE | 5 000-6 000 | High | 8-player optimal |
| Solo kite | 2 500-3 000 | Medium | Independent play |
| Event boss | 500-1 000 (variable) | Variable | Flexible participation |
Recommended Combat Jobs
| Role | Main Job | Why It Shines | Key Abilities |
|---|---|---|---|
| Tank | Warrior | Exceptional self-sustain, Holmgang chaining | Bloodwhetting, Inner Release |
| Paladin | Defensive barriers, party protection | Holy Sheltron, Passage of Arms | |
| Healer | Sage | Mobile shielding capabilities | Eukrasian Diagnosis, Phlegma |
| Scholar | AoE mitigation during pulls | Biolysis + Art of War | |
| Caster DPS | Red Mage | Instant raises, high mobility | Verholy burst, Vercure |
| Summoner | Pet tanking, continuous AoE | Outburst, Phoenix | |
| Melee DPS | Ninja | Burst damage, bonus loot | Bunshin, Aeolian Edge |
| Ranged DPS | Bard | Movement-friendly attacks, party buffs | Apex Arrow, Battle Voice |
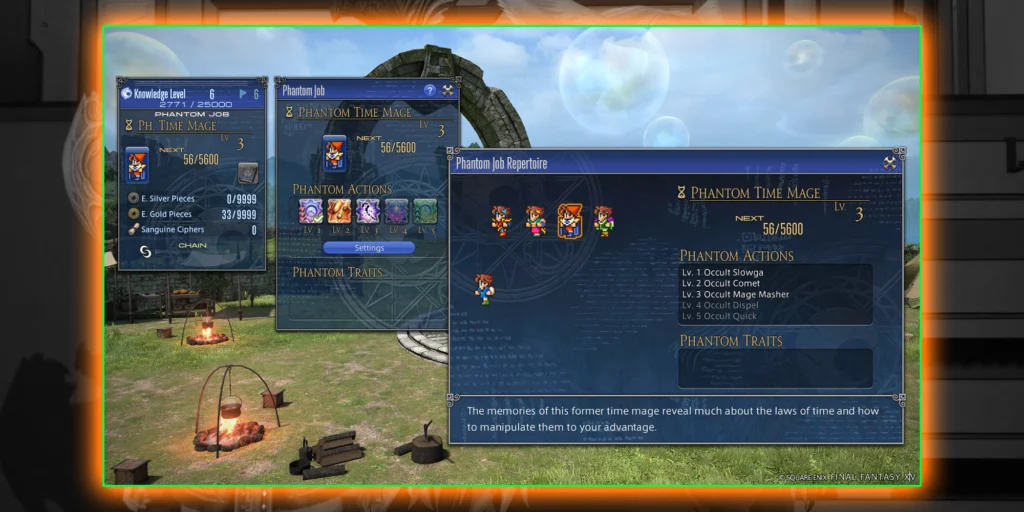
Top Phantom Jobs
| Phantom | Cost | Core Perk |
|---|---|---|
| Cannoneer | 1 000 silver | Devastating AoE, Weakness immunity |
| Knight | Introductory quest | –10 % damage reduction aura |
| Bard | Introductory quest | +10 % experience bonus |
| Thief | 1 600 gold | Potential drop enhancement, sprint |
| Time Mage | 1 000 silver | Area slow/stop for control |
| Chemist | 1 000 silver | Emergency healing potions |
Exhausted by the repetitive grind of leveling alternate jobs in FFXIV and eager to skip directly to endgame content? I understand that frustration—it can diminish the enjoyment significantly. Our FFXIV Alt Job Leveling Boost service partners you with experienced players who rapidly level your additional classes, enabling immediate access to exciting endgame activities without the tedious process!
Extra Tips From the Community
-
Join specialized Discords to locate monster-train groups or monitor CE spawn timers.
-
Switch instances during low-traffic periods when competition reduces tagging success.
-
Plan expenditures strategically. Track reward costs, establish milestones, and acknowledge incremental achievements.
-
Wield relic weapons during farming; multiple objectives align efficiently.
-
Schedule regular breaks. Pause hourly to maintain concentration and prevent exhaustion.
Quick Reference Cheat Sheets

Weekly To-Do
| Task | Reward |
|---|---|
| Forked Tower completion | 800 silver |
| Story quest submissions | 300-400 silver |
| Treasure Pot hunting | Potential rare materials + coins |
First Day Shopping List
| Item | Cost | Priority |
|---|---|---|
| Riding Map | 3 000 silver | ★★★★★ |
| Cannoneer access | 1 000 silver | ★★★★☆ |
| Initial Phantom Job fragment | 400 silver | ★★★☆☆ |
Coin Spending Targets
| Goal | Silver | Gold |
|---|---|---|
| Complete Arcanaut armor collection | 24 000 | – |
| Premium Phantom Job | – | 1 600 |
| Relic initial materials | 8 000 | 600 |
| Elite mount | 12 000 | 3 000 |

Conclusion
The Occult Crescent rewards methodical preparation and intelligent execution. Assemble optimal party compositions, pursue every CE for silver accumulation, and deploy cannon-enhanced train strategies for maximum gold returns. Rotate between different approaches to maintain engagement, monitor your Knowledge Level progression, and allocate coins toward defined objectives. Follow these reference guides, adapt techniques to match your playstyle, and soon you’ll showcase new Phantom Jobs, gleaming relic weapons, and perhaps exclusive mounts in Phantom Village. Rally your allies, initiate combat music, and transform today’s farming efforts into tomorrow’s achievements. Successful hunting awaits—join the next FATE convoy!
Action Checklist
- Complete Dawntrail MSQ and reach level 100
- Accept ‘Unfamiliar Territory’ quest in Tuliyollal
- Unlock Knight, Bard, and Monk Phantom Jobs for buffs
- Purchase Riding Map for 3,000 silver immediately
- Form balanced 8-player party with optimal roles
- Execute CE circuit for silver (400-600/hour)
- Run monster trains for gold (8,000-10,000/hour)
- Monitor Knowledge Level and relocate when needed
- Complete weekly Forked Tower for bonus silver
- Take 10-minute breaks every 90 minutes
No reproduction without permission:Tsp Game Club » FFXIV Occult Crescent Gold & Silver Farming Guide | Patch 7.25 Maximize your Enlightenment coin gains with proven farming strategies