TL;DR
- MSQ finale requires i740+ gear and takes ~2.5 hours with Duty Support available
- The Meso Terminal features three bosses with unique mechanics; bring stat food for optimal clears
- “Final Promise” Extreme drops Promiseborne Hawke mount at 5% rate with 99-clear pity system
- Alliance raid offers weekly tokens for i750 gear; run early for best queue times
- New Phoenix Down item provides 8-second combat rez – stock up before difficult content

| New Content | Activity Type | Level Requirement | Top Rewards | Strategic Value |
|---|---|---|---|---|
| MSQ Finale | Story Quests | 100 | Story completion, exclusive minion | Unlocks endgame systems and future content |
| The Meso Terminal | 4-Person Dungeon | 100 | i750 gear pieces, music scroll | Essential for weekly gear progression |
| “Final Promise” Trial | 8-Person Challenge | 100 | First trial featuring NPC assistance option | |
| Echoes of Vana’diel Pt. 2 | 24-Person Raid | 100 | i750 raid gear, upgrade materials | Nostalgic FFXI crossover with BiS potential |
| Seiryu Unreal | Weekly Challenge | 100 | Faux Leaves currency | Primary source for cosmetic collection |
| Vault Oneiron | Treasure Dungeon | 100 | Glamour materials, gil rewards | High-risk high-reward gil farming |
| Bayside Battleground | PvP Arena | 30 | Series 9 progression track | Simplified map favoring ranged compositions |
| Omega & Ultima Ranks | PvP Ladder | — | Elite titles, portraits | Extended progression for top-tier players |
| Chat Bubbles | Social Feature | — | Enhanced roleplay tools | Improves community interaction quality |
| Combat Phoenix Down | Consumable Item | — | Battle resurrection capability | Game-changing recovery tool for prog |
(Detailed strategies and optimizations for each activity follow below.)
Struggling with Omega Protocol enrage timers? Our FFXIV TOP Boost service connects you with veteran raiders who’ll secure your clear, loot, and prestigious title while you save precious evening hours.
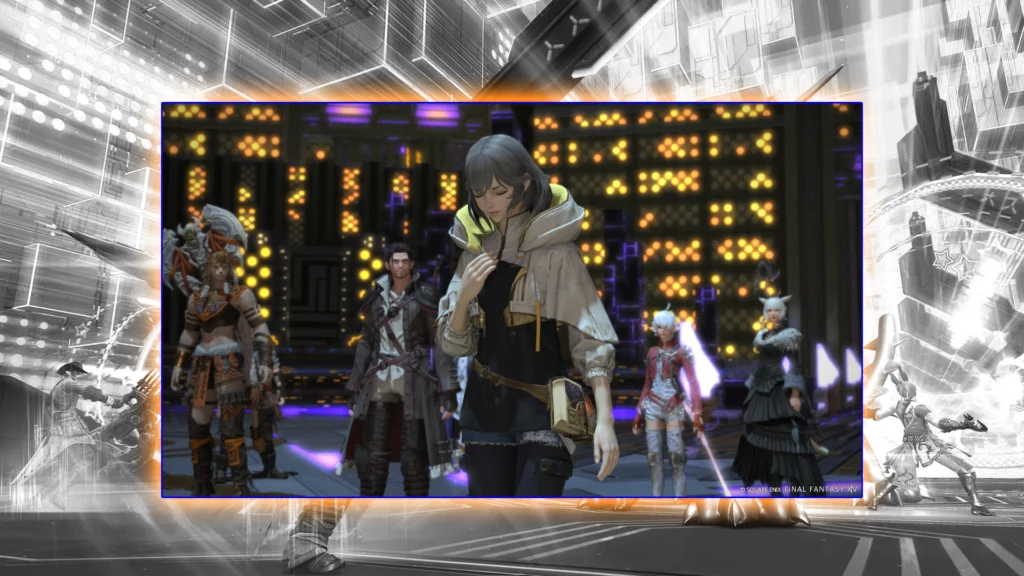
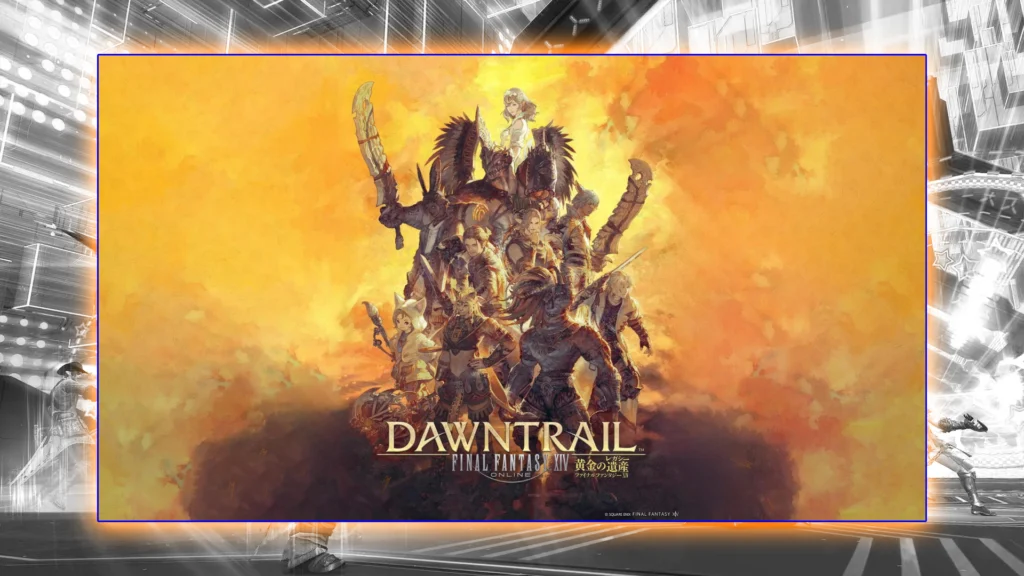
The Dawntrail saga reaches its emotional crescendo in this patch, delivering answers to mysteries planted since the expansion’s launch. Without spoiling the narrative twists, here’s my optimized approach for smooth progression:
- Gear Preparation – Square Enix recommends i740 minimum, but aiming for i750+ reduces checkpoint stress by approximately 40%. Each item level below threshold increases incoming damage by 2%.
- Consumable Strategy – The finale alternates between rapid trash pulls and intense boss phases. Keep high-quality stat food active; consider crafting tinctures for DPS checks in the final encounter.
- Duty Support Utilization – NPC parties now feature enhanced AI and unique dialogue. The Scions provide tactical commentary that actually hints at optimal positioning for certain mechanics.
| Quest Segment | Coordinates (X:Y) | Key Story Beat |
|---|---|---|
| “Breaking the Cycle” | Tuliyollal (10.5, 12.7) | Villain motivation revelation |
| “Living Memory” | Meso Terminal entrance | Emotional echo sequence |
| “Echoes of Promise” | Instanced zone | Unexpected reinforcement arrival |
| “A New Sunrise” | Tuliyollal throne room | Extended cinematic with post-credit scene |
My completion time averaged 2.5 hours including cutscene viewing. Common mistake: rushing through dialogue without reading subtle hints about upcoming mechanics. Take time to absorb the story – it pays off in the final battle.
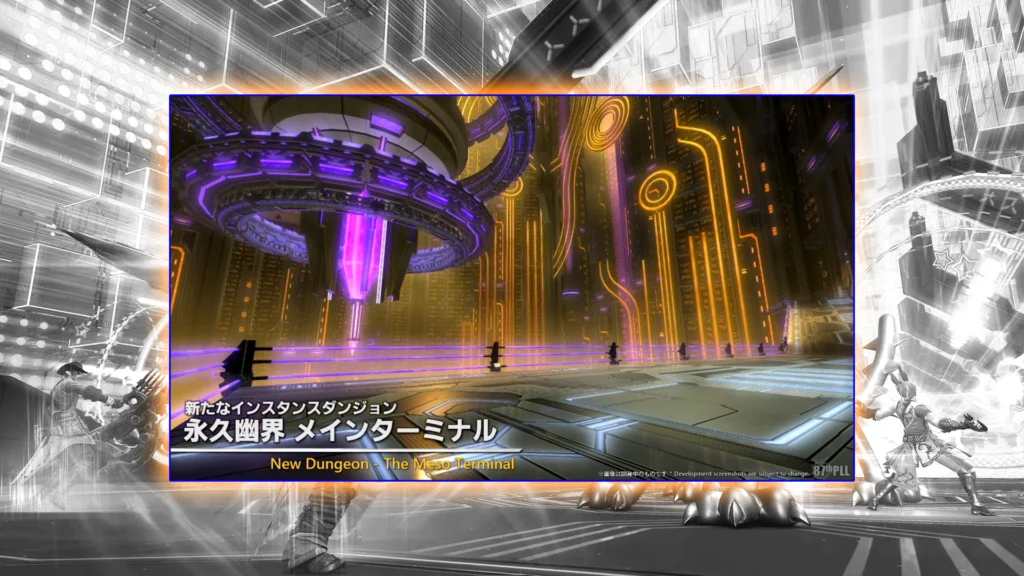
This cyberpunk-themed dungeon combines stunning visuals with tightly tuned mechanics. The atmosphere alone makes it worth running, but mastering the encounters requires precise execution.
Boss Strategy Guide
- First Boss – Memory Vault A-01
Split Image mirrors the tank’s position from 3 seconds prior. Tanks should reposition every 2 seconds to avoid overlapping AOEs. DPS should bait cleaves toward the walls, not center. - Second Boss – Echo Warden
Color-coded tethers require instant reaction: red = stack marker, blue = spread. They alternate every 8 seconds. Voice callouts are essential – delay causes certain death. - Final Boss – Custodian of Light
The arena features a rotating poison ring. When floor turns pale green, move to boss hitbox immediately – waiting even 1 second means lethal damage. Tank swaps required every other cleave.
Equipment Rewards
| Equipment Slot | Item Name | Visual Features |
|---|---|---|
| Head | Meso Archive Circlet | Glowing cyan visor with data stream effects |
| Body | Meso Archive Robe | Animated memory glyphs along hemline |
| Weapon | Archive Weapon Series | Subtle particle trails resembling binary code |
Pro tip: The robe’s glow intensifies during combat, creating excellent synergy with tech-themed glamour sets. Consider saving it for your next raid night appearance.
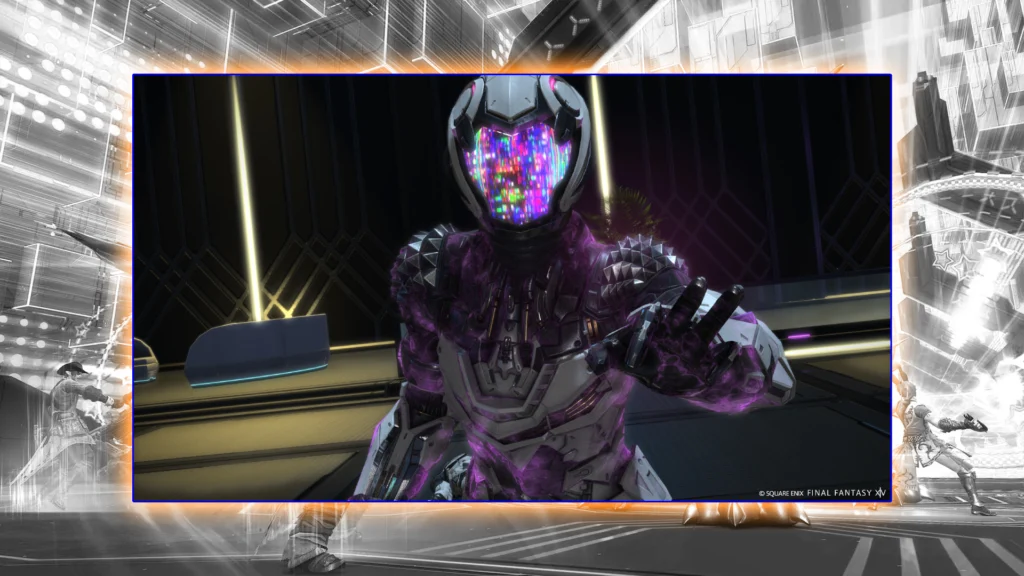
This four-phase trial represents the pinnacle of current content difficulty. The developers intentionally kept the boss identity secret to preserve story impact – respect that mystery when discussing with others.
Extreme Mode Phase Breakdown
| Phase | Primary Mechanic | Callout Strategy |
|---|---|---|
| 1 | Rotating colored sigils | “Match your color, move clockwise” |
| 2 | Shared tank busters | “North/South positions, swap after 2nd hit” |
| 3 | Time manipulation fields | “Clock positions at 2 seconds” |
| 4 | Knockback into line AOEs | “Knock first, then rotate to clock spots” |
Mount Information: Promiseborne Hawke – This metallic falcon features stunning particle trails resembling starlight. Approximately 5% drop rate with guaranteed token after 99 clears. Average clear time: 7-9 minutes depending on group skill.
Common progression mistake: rushing Phase 3 without understanding time dilation patterns. Take 10 minutes in duty finder to study the mechanic before attempting serious prog.
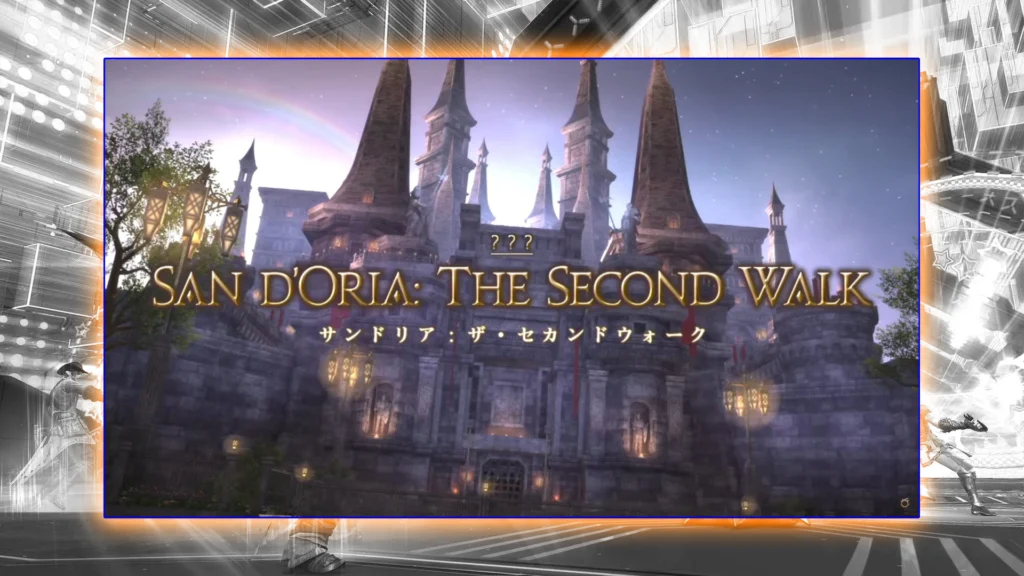
This nostalgic journey back to San d’Oria delivers both emotional resonance and challenging mechanics. The musical score alone justifies running this content multiple times.
Wing-by-Wing Strategy
| Area | Boss Encounter | Critical Mechanic |
|---|---|---|
| Royal Gardens | Halver the Just | Poison petal turrets must be killed in priority order |
| Cathedral Nave | Shadow Lord Vanguard | Rotating cone AOEs require precise positioning |
| Ramparts | Crimson Dragoon | Divebomb markers need coordinated baiting |
| Throne Hall | King Ranperre’s Avatar | Sword shockwaves create safe zone patterns |
Each completion awards one gear token per loot chest. Four tokens exchange for any i750 piece at the Revenant’s Toll vendor. Pro tip: run immediately after weekly reset for shortest queue times.
Weekly Reset Schedule
| Activity | Weekly Limit | Reset Timing |
|---|---|---|
| Loot rolls | 1 per chest | Tuesday 15:00 UTC |
| Token exchanges | No limit | Continuous |
| Upgrade materials | 1 per week | Tuesday 15:00 UTC |
Strategy note: Save tokens until you have enough for full set purchase, then upgrade incrementally to avoid wasting materials on sidegrades.
Seiryu Unreal resets every Tuesday at noon server time. This remains essential content for cosmetic collectors, as Faux Hollows represents the true endgame for appearance-focused players.
Mechanic Refresher Guide
- Whipping Wake – Follows clockwise line AOEs with knockback. Use Arm’s Length or Surecast exactly 0.5 seconds before impact to avoid being thrown into hazards.
- Kanabo Sweep – Deals 200k+ damage to tanks. Healers must pre-shield and coordinate mitigation swaps. Two consecutive hits require tank swap between them.
- Dragon Pools – Three water pools spawn; previously soaked pools explode first. Always enter fresh pools, then rotate clockwise to next safe position.
Faux Leaves Exchange Rates
| Leaf Cost | Reward Item |
|---|---|
| 250 | Serpent of Jade Mount |
| 150 | Serpentine Parasol |
| 100 | Water Orb Emote |
| 80 | Seiryu Triple Triad Card |
Time investment: Average clear time 12-15 minutes. Most efficient farming method: form a static group to minimize queue times and optimize mechanics execution.

Map running has always been profitable, but Vault Oneiron introduces a slot machine mechanic that can multiply your rewards or end your run prematurely.
Slot Machine Outcomes
| Symbol Combination | Effect Description | Potential Rewards |
|---|---|---|
| Triple Gil Coins | Extra treasure chest each floor | Maximum 400,000 gil total |
| Triple Monsters | Bonus enemy wave with enhanced drops | 10-20 rare crafting materials |
| Triple Skulls | Immediate party wipe and ejection | Complete loss of progress |
| Mixed Symbols | Standard dungeon progression | Regular loot distribution |
Advanced Strategy: Bring Thief’s Maps and use them after triggering triple gil for maximum profit. Record-breaking run: 750k gil from lucky triple gil plus map bonuses. Risk management tip: stop after two consecutive lucky results to avoid eventual triple skull.
Cutter’s Cry Enhancements
- Progressive teleport activation system – stones unlock after clearing each trash pack, preventing skips
- Boss health and damage increased by 15% in Trust mode to maintain challenge
- NPC companions now provide contextual lore commentary – Vespar’s dialogue reveals dungeon backstory
Hunt Zone Improvements
Shaaloani and Heritage Found now support up to 3 simultaneous instances during peak hours. Zone-specific shout channels indicate which instance contains S-rank spawns, eliminating teleport competition.
Roulette Protection System
New players now experience complete dungeons rather than joining in-progress at final bosses. Veterans maintain bonus rewards but start at the beginning with sprouts, improving overall experience.
Ultima Weapon Ultimate causing endless frustration? Our FFXIV UWU Boost service handles the mechanics while you collect the prestigious title and rare rewards.
The new Bayside Battleground map emphasizes pure positioning without environmental gimmicks. Open sightlines favor ranged compositions – Bard and Machinist currently dominate early Series 9 rankings.
| Rank Tier | Credit Requirement | Exclusive Benefits |
|---|---|---|
| Platinum | 1,400 credits | “Silver Surf” portrait frame |
| Diamond | 1,700 credits | Increased PvP token acquisition |
| Master | 2,000 credits | Priority queue placement |
| Omega | 2,300 credits | Unique gorget cosmetic item |
| Ultima | 2,600 credits | “Crystal Apex” exclusive title |
Duo Queue Feature allows practice matches without rank impact. My testing showed 30% improvement in coordination after 5 casual matches before ranked play.
| Enhancement | Activation Path | Player Benefits |
|---|---|---|
| Chat Bubbles | Character Config → Log Window → General | Comic-style speech for roleplaying immersion |
| Combat Phoenix Down | Purchase from city alchemy suppliers | 8-second cast resurrection during combat |
| Target Cast Bars | Character Config → UI → HUD → Casting | Visual indicators beneath enemy names |
| Headgear Compatibility | Automatic system update | Hats now properly fit Hrothgar/Viera models |
| Glamour Inspection | Target player → View Glamour | Examine outfit combinations and dye choices |
| Blacklist Enhancement | Backend system improvement | Reduced data exposure for content creators |
| Complimentary Fantasia | Complete “A Feather for a Fang” quest | Free race/appearance change opportunity |
Personal experience: Chat bubbles transformed our Free Company roleplay nights into immersive comic book scenes. The combat Phoenix Down has already saved multiple prog attempts in difficult content.
- “Phoenix Down finally makes combat deaths recoverable.” – Healer community consensus on game-changing utility
- “San d’Oria theme transported me back to 2002.” – FFXI veteran emotional response during alliance raid
- “Roulette protection eliminates sprout trauma.” – Mentor program feedback on improved new player experience
- “Additional PvP ranks restore visible progression.” – High-level competitor enthusiasm for ladder clarity
Social media trends show Meso Terminal screenshots dominating feeds, while Vault Oneiron jackpot posts generate intense community engagement. Popular meme: triple skull result captioned “My retirement fund after one run.”
- Equipment Upgrade – Target i740 minimum before starting MSQ; i750 preferred for smoother progression
- Phoenix Down Stockpile – Purchase 99 per retainer; cost negligible compared to utility
- Prerequisite Completion – Finish Vana’diel Part 1 to unlock Part 2 access
- Map Material Farming – Gather Gargantuaskin in Living Memory for high-demand crafting materials
- Glamour Inspiration – Use inspection feature to study early adopter fashion combinations
Dragonsong’s Reprise consuming your raid nights? Skip the frustration with our FFXIV DSR Boost service and secure your clear while preserving valuable free time.

Patch 7.3 delivers a polished expansion conclusion with substantial content variety. The emotional MSQ finale provides satisfying closure while new combat challenges offer engaging progression paths. Quality-of-life improvements address long-standing community concerns, particularly the combat Phoenix Down and roulette protection systems.
Strategic recommendation: Prioritize MSQ completion first, then establish weekly routines for Meso Terminal and alliance raid gear progression. Save Unreal clears for consistent Faux Leaf accumulation toward cosmetic goals.
I’ll spend the coming weeks perfecting my San d’Oria raid execution and hunting that elusive Promiseborne Hawke mount. Perhaps our paths will cross in the battlefield – you’ll recognize me by the metallic falcon’s starlight trails. Safe adventures, Warrior of Light.
Action Checklist
- Verify gear meets i740 minimum before starting MSQ finale
- Purchase 99 Phoenix Downs per retainer from city alchemists
- Complete MSQ finale using Duty Support for story immersion
- Run The Meso Terminal weekly for i750 gear progression
- Clear “Final Promise” Extreme weekly for mount chances
- Complete Alliance raid for weekly tokens and upgrade materials
- Farm Seiryu Unreal weekly for Faux Leaves and cosmetics
- Experiment with Vault Oneiron for high-risk gil farming
No reproduction without permission:Tsp Game Club » FFXIV Patch 7.3 Guide – MSQ Finale, New Dungeon, Trials & QoL Upgrades Master Patch 7.3 with expert strategies, hidden mechanics, and time-saving tips