TL;DR
- Pilgrim’s Traverse is a 100-floor Deep Dungeon in Il Mheg with generous checkpoints and full matchmaking support
- Build your Aetherpool early (+60-70 by mid-game) to avoid damage walls in later floors
- Save pomanders like Witching for emergencies and use Strength/Steel stacks for boss encounters
- The Enlightened title requires a full solo clear without party wipes – preparation is key
- Final Verse (Quantum) offers scalable difficulty up to 40 offerings for the ultimate challenge

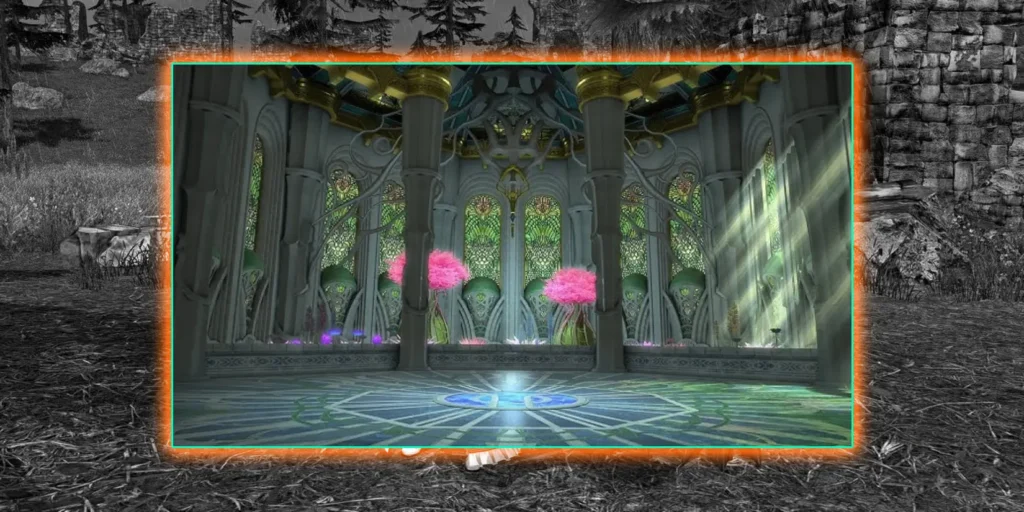
Have you ever gazed across Il Mheg’s ethereal landscapes and wondered what mysteries lie beneath? Pilgrim’s Traverse reveals those secrets through an intense 100-floor roguelite experience teeming with deadly traps, hidden treasures, and a climactic boss battle that tests even seasoned raiders. This comprehensive guide walks you through unlocking the dungeon, mastering its systems, optimizing your pomander usage, and claiming the ultimate rewards. We’ve packed this guide with quick-reference tables, actionable checklists, and proven strategies for both solo adventurers and coordinated parties.
Forget filler content—every paragraph delivers practical value. We maintain straightforward language, provide tested advice, and structure information for maximum clarity. By the conclusion, you’ll understand the dungeon’s flow, know exactly when to conserve or consume your pomanders, and be prepared for the optional Final Verse (Quantum) challenge that awaits the bold.

As the fourth installment in the Deep Dungeon series, Pilgrim’s Traverse emerges in the Dawntrail expansion (patch 7.35). This underground adventure unfolds beneath Il Mheg, weaving narrative threads around the Church of the First Light with assistance from your fae companion Feo Ul. The dungeon accommodates 1-4 players without role restrictions, and the entire 100-floor journey now supports matchmaking. Each level segment is called a stone, culminating in a boss encounter at stone 99 followed by a reward chamber at stone 100. Enhanced checkpoint mechanics significantly reduce the frustration of failed runs.
Essential Details
| Topic | Details |
|---|---|
| Theme | Il Mheg, fae‑touched ruins, Church of the First Light, Feo Ul’s aid |
| Length | 100 stones; boss at 99, reward at 100 |
| Party Size | 1–4 players; any jobs; no role requirements |
| Matchmaking | Yes—now covers the entire 1–100 climb |
| Checkpoints | Save every 10 floors, plus respawn starts at 51 and 71 |
| Run Timer | 60 minutes per 10‑floor set |
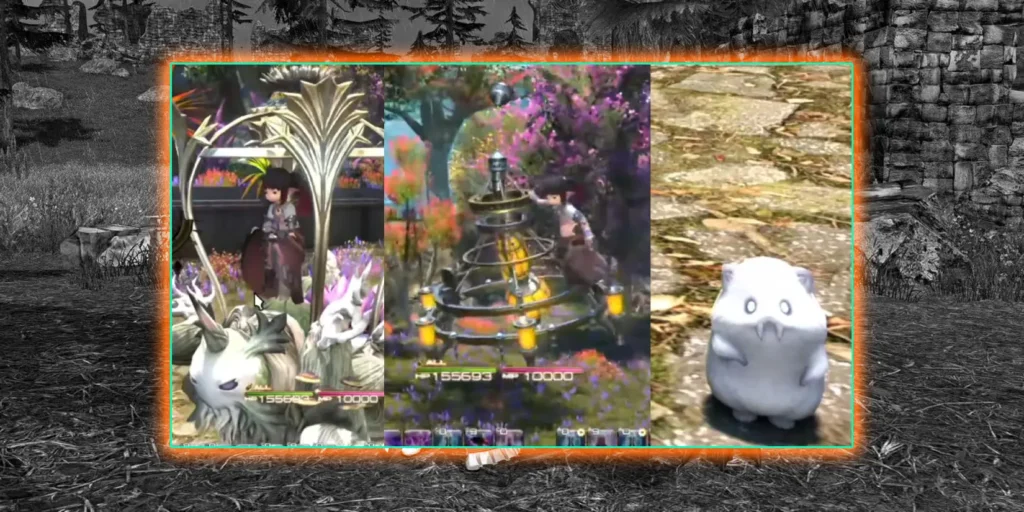
| Unique Twists | Votive Candelabras, Juniper Incense (summons Feo Ul) |
| Core Power | Aetherpool Arm/Armor (+1–+2 upgrades; caps at +99/+99) |
Struggling with FRU progression and endless raid nights? Our FFXIV FRU Boost service lets veteran players clear the content while you keep the rewards and titles. Book your session today!
Gaining access to Pilgrim’s Traverse requires minimal preparation but involves specific prerequisites. Complete the main story progression, meet the level requirement, and interact with key NPCs to begin your journey.
Prerequisites Checklist
| Requirement | What It Means | Where / Who |
|---|---|---|
| Main Scenario | Finish Endwalker (through 6.0 ending) | — |
| Job Level | Level 91+ on a Disciple of War or Magic | — |
| Deep Dungeon Intro | Clear Palace of the Dead floor 50 once | South Shroud (for PotD prep) |
| Unlock Quest | Accept “Pilgrimage of Light” | Bright‑eyed Child, The Crystarium (X:10.3, Y:10.7) |
| Entrance | Start the dive | Vanthau, Wolekdorf, Il Mheg (X:29.9, Y:6.0) |
| Save Files | Two dedicated save slots | Shown at the entrance UI |
Pro tip: Complete the Palace of the Dead requirement early to avoid last-minute rushing. Once you’ve finished the quest and spoken with Vanthau, create a new save file and you’re ready to begin your descent.
Each 10-floor segment functions as an independent expedition with a consistent pattern: enter, survey threats, eliminate required enemies, activate the exit pylon, and advance to the next section.
Progression Systems
You commence at level 91 on stone 1, gaining levels organically as you defeat enemies—typically reaching level 100 around stone 21 during your initial run. External job levels are irrelevant; each attempt resets this internal progression system.
Your equipment is replaced by Illumed Aetherpool Arm and Armor, which scale independently. Silver chests provide opportunities to increase both Arm and Armor by +1 (occasionally +2), with a maximum cap of +99/+99. Higher Aetherpool ratings significantly reduce encounter difficulty in later stages.
Leveling Progression
| Milestone | What to Expect | Tip |
|---|---|---|
| Stones 1–10 | Level 91+, light mobs, many silver chests | Farm silver safely; early traps hurt less |
| Stones 11–20 | Fast internal leveling | Keep opening silver; momentum matters |
| Stones 21–30 | You’re ~100 inside | Great stretch to farm +2 upgrades in groups |
| Stones 70–90 | Heavy hits begin | Enter with high Aetherpool; don’t rush |
| Stones 91–99 | Endgame mobs and the boss | Save best pomanders; play clean |
Navigation and Time Management
Floor layouts procedurally generate each attempt, with rooms connected by corridors and concealed traps throughout. Clear enemies until the message “The path to the next floor is open” appears, then activate the Pylon of Passage. You receive 60 minutes per 10-floor segment—ample time if you maintain efficient movement.
Boss Encounters and Progress Recovery
Anticipate boss battles at predetermined intervals, with a special confrontation on stone 99. Stone 100 serves as a treasure room concluding your run. While team wipes eject you from the instance, save points every 10 floors allow continuation. Additional starting points at floors 51 and 71 significantly mitigate the penalty for failed attempts.
Special Mechanics
- Votive Candelabras: Interacting with these applies a boon or bane to the subsequent floor. Beneficial effects can dramatically enhance your run, while detrimental ones require preparation.
- Juniper Incense: An uncommon silver chest item that summons Feo Ul for assistance on the current floor. Reserve this for critical situations.
Votive Effects and Countermeasures
| Votive Outcome | What Happens Next Floor | Smart Counter |
|---|---|---|
| Rapid Recast | Shorter ability cooldown feel | Press the advantage; pull faster but safe |
| Heavenly Blessing | Helpful healing/buff style vibe | Stack with Strength/Steel for bosses |
| Blind Faith | Hidden map | Use Pomander of Sight |
| Treacherous Ground | Extra traps | Use Pomander of Safety |
Environmental Hazards
Encounter classic Deep Dungeon threats including hidden landmines, luring circles, and Silence tiles. Floors may also feature enchantments such as Gloom or No Items.
Hazard Management Guide
| Hazard | Threat | Best Counter |
|---|---|---|
| Landmines | Burst damage | Sight to reveal; Safety to remove |
| Luring Traps | Spawns extra mobs | Witching as panic; line‑of‑sight pulls |
| Silence/Paralysis | Locks skills | Purification clears and shields |
| Gloom | Mobs hit harder, take less | Serenity to normalize |
| No Items | Pomanders/potions disabled | Serenity or skip fights, kite carefully |
Party Formation Options
You can either queue with random players or assemble a fixed group with friends. The complete 1-100 progression now supports matchmaking. Matched parties may require minimum Aetherpool levels for higher floors to ensure adequate preparation. Fixed groups and solo runs bypass these requirements.
Entry Mode Comparison
| Mode | Pros | Watchouts |
|---|---|---|
| Matched Party | Fast queue, complete 1–100 climb with pugs | Aetherpool minimums may gate higher floors |
| Fixed Party | Full control of pace and pomanders | No minimums; responsibility sits with you |
| Solo | Highest personal challenge | One mistake can end the file—slow and steady |
Frustrated by Arcadion progression consuming your raid nights? Our FFXIV Arcadion Boost service pairs you with experienced players who secure clears while preserving your loot, titles, and achievements. Reserve your spot today!
Pomanders fundamentally shape your dungeon experience. These crucial items primarily drop from bronze coffers and influence every strategic decision. You can carry up to three of each type, so utilize them proactively—never conclude a run with unused stacks.
Comprehensive Pomander Reference
Effect durations follow dungeon specifications. “Next floor” effects activate after using the pylon.
| Pomander | What It Does | Duration | Best Use |
|---|---|---|---|
| Strength | +30% damage and healing | ~8 min | Bosses, dangerous elites |
| Steel | −40% damage taken | ~8 min | Gloom floors, hard pulls, bosses |
| Sight | Reveals layout and traps | Instant | Navigate safely; plan routes |
| Safety | Removes traps on the floor | Instant | Treacherous Ground, kite without fear |
| Affluence | More chests on next floor | Next floor | Farm pomanders/Aetherpool/potions |
| Flight | Fewer enemies on next floor | Next floor | Skip risky mobs, save time |
| Alteration | One room of mobs becomes mimics or mandragoras | Next floor | Gamble for free kills or handle mimics with Purity |
| Purity | Cures Accursed Pox; blocks the next one | Instant | Open gold chests safely; handle mimics |
| Fortune | More coffer drops from enemies (this floor) | This floor | Farm when safe and stocked on time |
| Witching | Polymorph nearby mobs into weak critters | ~30 sec | Panic button for over‑pulls or luring traps |
| Serenity | Clears floor enchantments | Instant | Removes Gloom, No Items, etc. |
| Haste | Shorter GCD window | Timed | Pair with Strength to melt bosses |
| Purification | Clears binds/paralysis and shields against the next | Instant | Paralyze traps, stun‑heavy mobs |
| Intuition | Reveals Accursed Hoard presence/spot | Persists until hoard found | Treasure hunting while stable |
| Raising | First death auto‑raises | Until consumed | Keep it up in solo and early/mid floors; doesn’t appear 81–100 |
| Devotion (new) | Guarantees a Votive Candelabra next floor | Next floor | Force a boon/bane; prep counters for bad rolls |
Pro Tip: When at maximum capacity (3) for any pomander type and encounter another, immediately consume one to collect the new item. This habit prevents waste and maximizes your resource potential.
Optimize Your Pace
While time permits exploration, it’s not unlimited. Execute efficient pulls, progress systematically between rooms, and avoid opening every bronze chest on hazardous floors. When the pylon activates, evaluate whether additional treasure justifies the risk—on upper stones, the answer is often negative.
Early Aetherpool Development
Lower-floor silver chests present minimal risk. Open them consistently. Many groups repeatedly run stones 21-30 to efficiently farm +2 upgrades. Target +60–70 by mid-game and push higher before attempting the 90s.
Potion Management
Pilgrim’s Potions provide a 30-second regeneration effect with frequent reuse capability. Accumulate them throughout runs and acquire additional potions through Illumed Aetherpool Glass trades. Solo climbers should stock 100–200 before serious attempts. Maintain constant regeneration during difficult encounters and coordinate with your abilities. Remember that potions share cooldowns with offensive tinctures—plan your activation windows accordingly.
Enemy Knowledge and Adaptation
From the 30s onward, certain enemies become significantly more dangerous. Monitor cast bars, respect gaze mechanics, and maintain distance from patrols. When encounters appear risky, utilize Flight, Witching, or strategic line-of-sight pulls to bypass threats. Experience consistently triumphs over recklessness.
Solo Strategy: Floor-by-Floor Problem Solving
Immediately assess buff/debuff conditions upon entering each floor. If No Items activates, either use Serenity or selectively engage only safe enemies. Execute single-target pulls and maintain emergency pomanders. Regular breaks improve performance. A composed mindset outperforms anxious execution.
Raising Pomander Priority
When available, activate Raising immediately. This safeguard can prevent run-ending failures. Beyond floor 81, these pomanders cease dropping, so preserve remaining charges and exercise heightened caution.
Team Coordination
Communicate intentions clearly: “I’ll use Safety on this floor,” “Activating Strength for the boss,” “Witching ready if we trigger a lure.” This coordination prevents redundant usage and maximizes resource efficiency.
Situational Pomander Guide
| Situation | Use First | Backup |
|---|---|---|
| You triggered a luring trap | Witching | Steel, kite, or line‑of‑sight |
| Map is hidden or floor is trap‑heavy | Sight or Safety | Slow pulls and corners |
| Gloom or nasty floor debuffs | Serenity | Strength + Steel and careful pulls |
| Tight timer on a dangerous layout | Flight | Skip dead‑end rooms |
| Boss feels spiky | Steel + Strength | Add Haste if available |
| Chest farming stretch | Affluence + Fortune | Keep time in mind |
Pilgrim’s Traverse rewards both persistence and skill. You’ll earn experience, gil, and tomestones while pursuing rare treasures, prestigious titles, and an impressive mount.
Treasure Hoards and Light Sacks
Concealed hoards reside beneath floors, revealing themselves when Intuition is active. Excavation locations display on your minimap once the pomander detects them.
| Floor Range | Sack Type |
|---|---|
| Stones 1–30 | Sack of Silvered Light |
| Stones 31–70 | Sack of Gilded Light |
| Stones 71–100 | Sack of Platinum Light |
Deliver sacks to Tyr Marn in Il Mheg for appraisal. Anticipate cosmetics, materia, currency items, and exclusive collectibles. Some hoard rewards integrate with the dungeon’s weapon and accessory progression paths.
Milestone Rewards
Specific floors guarantee valuable rewards. Glass fuels potions; books unlock premium prizes.
| Clear Milestone | Reward |
|---|---|
| Floor 30 | Illumed Aetherpool Glass |
| Floor 50 | Illumed Aetherpool Glass |
| Floor 70 | Illumed Aetherpool Glass |
| Floor 100 | Illumed Invocation (book) |
Illumed Aetherpool Glass exchanges for Pilgrim’s Potions and other miscellaneous items. Illumed Invocation represents the book required for the endgame accessory collection.
Accessories, Mount, and Collection Progress
Eight books constitute the complete collection.
| Step | What You Do | Result |
|---|---|---|
| 1 | Clear floor 100 to earn Illumed Invocation | 1 book |
| 2 | Repeat until you hold 8 | Enough books for the set |
| 3 | Trade 8 to Ose Wyd in Il Mheg | Gain four First Light accessories |
| 4 | Wear the four and speak to Aenc Daen | Earn the Chandelier of First Light mount |
Subsequent clears accelerate significantly thanks to the floor 71 starting point. This checkpoint effectively halves the time required to collect all eight books.
Weapon Glamours
Throughout your runs, you’ll acquire items related to the dungeon’s weapon series. These weapons feature the distinctive First Light aesthetic and serve as coveted glamour targets for collectors. Hoards, weekly objectives, and associated currencies contribute to this progression path.
Weekly Challenge Log Integration
Pilgrim’s Traverse introduces new entries to the Challenge Log. Completing milestones such as floors 20, 30, 50, 70, and 100 during the weekly reset period grants Luminous Oil and Sacks of First Light. Convert these resources into valuable items at designated vendors. This provides additional rewards for activities you’re already pursuing.
Whether you prefer party progression or solo challenges, titles commemorate your journey through Pilgrim’s Traverse.
| Title | Requirement |
|---|---|
| Devoted Pilgrim | Clear floor 30 (any party) |
| Saint of Sorrows | Clear floor 100 (any party) |
| The First Shadow | Wear the four First Light accessories and speak to the special NPC (also awards a Chandelier of First Light furnishing) |
| The Enlightened | Clear floors 1–100 solo with no party wipe recorded |
| Grief’s Anointed | Defeat the boss in The Final Verse |
| The Mourner of Light | Clear The Final Verse (Quantum) at 40/40 offerings |
Few FFXIV challenges match the purity of a solo Deep Dungeon clear. The Enlightened title demonstrates your ability to maintain composure across all 100 stones.
Optimal Job Selection
Jobs featuring self-healing, crowd control, and consistent performance excel in this environment.
- Red Mage provides burst damage, Vercure healing, and emergency Dualcast Raise capability.
- Warrior offers exceptional survivability through Bloodwhetting and potent self-healing.
- Paladin and Gunbreaker navigate dangerous floors with robust defensive toolkits.
- Reaper maintains strong self-sustain while delivering substantial damage.
Select the job you’ve mastered thoroughly. Comfort with your toolkit outweighs theoretical optimizations in encounters lasting multiple hours.
Preparation Essentials
- Pomander strategy: Pre-determine which items you’ll expend on problematic pulls (typically Witching) and which you’ll reserve for bosses (Strength, Steel, Haste).
- Pilgrim’s Potions: Accumulate 100–200. Maintain continuous regeneration during potentially overwhelming encounters.
- Experience advantage: Complete at least one full party run to floor 100. Familiarity with upper-floor patterns reduces surprises during solo attempts.
Execution Strategy
- Immediate assessment of floor effects before proceeding.
- Strategic use of Sight or Safety on particularly hazardous floors.
- Line-of-sight techniques to split pulls at doorways.
- Serenity deployment for No Items or problematic enchantment combinations.
- Intuition activation only when you can afford the time investment.
Time Management
Target each boss encounter with at least 10 minutes remaining. If falling behind, you can reset a floor set by exiting and re-entering from the last save point, though this consumes valuable time. Maintaining steady progression and avoiding unnecessary combat proves more effective.
Mental Preparation
Expect elevated stress during the 90s. Take brief pauses in starting rooms if experiencing tension. Regulate your breathing, verify keybind positions, and refocus your attention. The final segment tests endurance more than raw damage output.
Solo Preparation Checklist
| Prep Item | Target | Notes |
|---|---|---|
| Pilgrim’s Potions | 100–200 | Regen always ready |
| Witching | 2–3 in reserve | Your panic button |
| Strength + Steel | 1–2 each for boss and hard floors | Stack with Haste when safe |
| Sight/Safety | 1+ each | Use more in upper floors |
| Serenity | 1–2 | Holds for Gloom/No Items |
| Raising | Active whenever possible | Vanishes from loot pool 81–100 |
Omega Protocol (TOP) consuming your raid evenings with repeated failures? Delegate to professionals using our FFXIV TOP Boost service—we handle mechanics and secure clears while you return to find titles and loot awaiting, rather than another marathon of attempts.
defeating the stone 99 boss unlocks a separate duty featuring the same encounter. This presents two paths: practice or extreme challenge—your choice determines the experience.
The Final Verse (Normal)
This mode allows you to rechallenge the floor 99 boss in a 1-4 player instance without repeating the full 98-floor climb. It provides an opportunity to master mechanics and patterns. Defeating this version awards Grief’s Anointed. Treat it as either a training ground or a quick victory celebration.
The Final Verse (Quantum)
Quantum mode enables your party to spend offerings to enhance the boss difficulty. Each offering increases the challenge intensity, creating a four-player “mini-ultimate” experience.
Quantum Configuration Overview
| Setting | Details |
|---|---|
| Party | Fixed party of 4 (no matchmaking at the peak) |
| Offerings | 15–40 total per pull; choose the number before entry |
| Types | 5 types that amplify specific damage/HP themes |
| Cap | Up to 8 per type (5 × 8 = 40) for max difficulty |
| Fight Length | ~10 minutes of tight mechanics |
| Failure | Wipes do not consume offerings |
| Reward | Sacks scale with difficulty; The Mourner of Light at 40/40 |
Offering Types and Effects
| Offering Type | What It Ramps | Max Slotted |
|---|---|---|
| HP | Boss max health | Up to 8 |
| Physical | Physical damage profile | Up to 8 |
| Fire | Fire profile | Up to 8 |
| Light | Light profile | Up to 8 |
| Darkness | Darkness profile | Up to 8 |
Every 5 offerings typically introduces new mechanics or intensifies existing checks. Groups often begin with lower difficulty settings, gradually increasing toward 40 as proficiency develops. Some dedicated teams immediately attempt 40/40 and endure the learning process.
Quantum Reward Structure
| Difficulty | Key Takeaway |
|---|---|
| Any clear | Sacks of First Light to the leader, scaled by offerings |
| 40/40 | Achievement plus the title The Mourner of Light |
Checkpoint System
| Save Point | Resume From |
|---|---|
| 10, 20, 30, 40, 50, 60, 70, 80, 90 | The last saved 10‑floor milestone |
| Special Starts | 51 and 71 |
Pylon and Timer Management
| Step | What You Check |
|---|---|
| Enter floor | Floor debuffs, traps plan (Sight/Safety), pull path |
| Mid‑floor | Kill count progress; time left |
| Exit | Pylon ready? Any safe chest left? Team status |
| Boss | Strength/Steel/Haste up; potions bound |
What’s the typical clear time?
Duration varies based on party efficiency and exploration choices, but the 71–100 segment significantly reduces repeat clear times after your initial success.
Can I use matchmaking for the entire climb?
Yes. Matchmaking now supports the complete 1-100 progression. However, higher floors may enforce Aetherpool minimum requirements to ensure party readiness.
Do Raising pomanders appear in the final floors?
No. These pomanders cease dropping beyond floor 81, making preservation of existing charges crucial.
Is the final boss exclusively on floor 99?
Correct. Stone 100 functions as a reward chamber that concludes your run.
Are Votive Candelabras always beneficial?
Not necessarily. While beneficial effects can significantly enhance your run, negative outcomes can create substantial challenges. Maintain Sight/Safety/Serenity to mitigate common drawbacks.

Pilgrim’s Traverse refines the Deep Dungeon formula with improved accessibility and enhanced challenge options. You benefit from forgiving checkpoint systems, complete matchmaking support for casual play, and sufficient difficulty to satisfy veteran players. The core gameplay loop remains engaging: scout, clear, activate, and advance—supported by strategic pomander usage, potion management, and thorough preparation.
Pursue hoards when conditions permit. Prioritize early Aetherpool development. Maintain Raising protection until its disappearance from the loot pool. For solo attempts, maintain composure between floors and focus on immediate challenges rather than distant anxieties. If you seek additional difficulty after conquering floor 100, the Final Verse (Quantum) offers scalable intensity from “challenging” to “extreme.”
Enter the illuminated depths beneath Il Mheg and craft your legend stone by stone. When the church falls silent and the stone 99 boss collapses, you’ll recognize that victory stems not from luck, but from methodical execution, intelligent resource management, and unwavering determination. This is how you earn your books, claim your mount, collect your titles—and, if you dare, achieve The Enlightened.
Action Checklist
- Complete Endwalker MSQ and reach level 91+
- Clear Palace of the Dead floor 50 once
- Accept ‘Pilgrimage of Light’ quest from Bright-eyed Child
- Farm Aetherpool to +60-70 before attempting floors 71+
- Stock 100-200 Pilgrim’s Potions for solo attempts
- Learn boss patterns through practice runs
- Complete full 1-100 clear for Saint of Sorrows title
- Attempt solo clear for The Enlightened title
No reproduction without permission:Tsp Game Club » FFXIV Pilgrim’s Traverse Guide: Deep Dungeon 1–100 Master Pilgrim's Traverse with expert strategies for solo and party runs