Complete guide to unlocking The Crater achievement in Elden Ring Nightreign with expert strategies and time-saving tips
Understanding The Crater Achievement Requirements
The Crater achievement represents one of several Shifting Earth events that emerge after conquering your initial major boss encounter in Elden Ring Nightreign. These dynamic world events manifest across the landscape with distinctive names including Crater, Mountaintop, Shrouded City, and Rotted Woods, each presenting unique environmental challenges and reward structures.
Access to the crater zone remains restricted until you’ve successfully defeated your first Nightlord adversary. Following this milestone, the event activates as a Shifting Earth occurrence within the Limveld region. You’ll recognize its activation by the appearance of an enormous depression marked on your map’s north-central quadrant at the beginning of each match cycle.
Optimal Preparation Strategies
An alternative approach involves joining another player’s game session where the event is currently active, even if it hasn’t spawned in your own world instance. However, resist the temptation to immediately venture forth—strategic timing suggests waiting until Day Two commences, as premature entry often results in insufficient time for completion. Additionally, ensure your character reaches approximately Level 7 through 10 before attempting this challenge. Level 9 proves particularly effective with well-upgraded equipment, though lower levels may necessitate multiple attempts to succeed.
Pro Tip: Beyond character level, your weapon upgrade level significantly impacts success probability. Aim for +4 to +6 weapon enhancements to ensure adequate damage output against the challenging enemies you’ll encounter. Stock up on preserving boluses and healing items, as the environmental hazards and combat encounters will test your resource management skills.
Team composition plays a crucial role in The Crater’s demanding encounters. While the original guide mentions Iron Eye and The Executor as viable options, consider incorporating characters with area-of-effect capabilities or crowd control abilities. Duchess provides excellent support healing, while Raider offers strong single-target damage—choose based on your preferred playstyle and team synergy requirements.
Navigating The Crater Event Step-by-Step
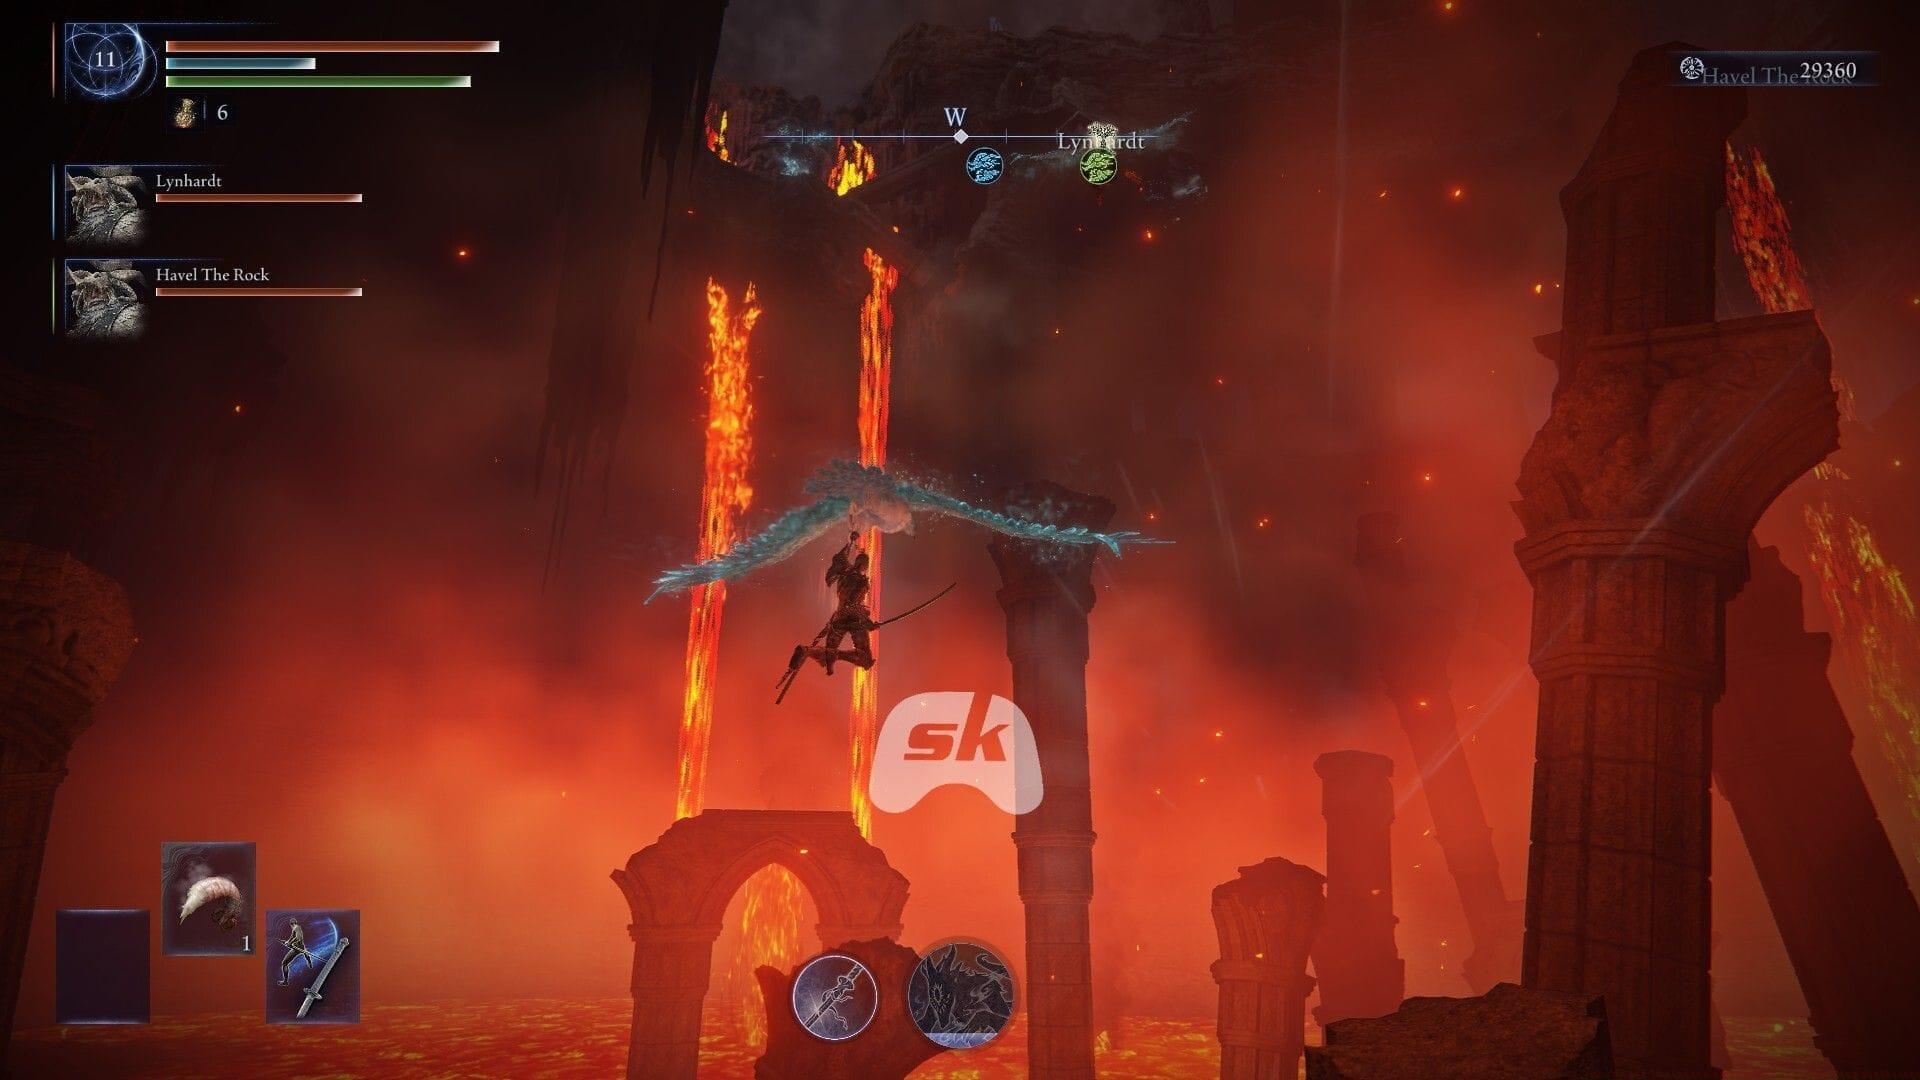
Upon crossing the event threshold, an immediate timer initiates—a violent storm begins accumulating strength, and prolonged delays result in blocked passageways that can trap you permanently. Once committed to the event, maintaining forward momentum becomes absolutely essential for success.
Identify the two inclined stone pillars functioning as natural ramps—this constitutes your primary entrance point. Descend the ramp into the initial corridor where you’ll discover an opening suitable for dropping through. Execute this descent to arrive adjacent to a Site of Grace. Activate this checkpoint immediately and utilize accumulated Runes for any necessary level enhancements, as this represents your final secure resting point for the foreseeable duration.
From this juncture forward, prioritize evading non-essential enemy engagements whenever feasible, since the encroaching storm progresses relentlessly. That being acknowledged, certain combat scenarios cannot be circumvented through evasion alone.
Recommended reading: What is Shifting Earth in Elden Ring Nightreign?
Immediately following the initial corridor, you’ll encounter two Fire Prelates obstructing a critical doorway. These formidable opponents demand serious combat commitment—dispatch them efficiently and secure the reward totem they guard. Upon their defeat, a previously locked door unlocks, granting access to the subsequent area. Proceed through this opening and promptly turn rightward, where additional enemies await. Unless supremely confident in your combat capabilities, bypass these foes through strategic movement—the temporal constraints continue accumulating.
The subsequent corridor introduces Battle Chariots alongside several hand-like creatures (commonly called Fingercreepers). Once again, prioritize rapid traversal over engagement. Upon reaching this path’s termination point, the terrain becomes fractured—you’ll observe ledges suitable for controlled descent. This marks the actual crater formation.
Execute careful descents using the tombstones protruding from the crater walls as improvised platforms. Avoid hasty jumping maneuvers to prevent fatal plunges. Once you achieve the floor level, retreat becomes impossible.
Navigation Tip: The platforming section requires precise timing rather than speed. Wait for the ideal moment when the tombstones align for safe jumping. Many players fail here by rushing—patience truly proves virtuous in this treacherous descent.
Boss Battle: Magma Wyrm Tactics
After reaching the expansive open area at the crater’s base, advance toward the coffin encircled by lit braziers. This action triggers the confrontation against the formidable Magma Wyrm, where employing Bleed or Frostbite damage types delivers optimal results for rapid health depletion. Effective team configurations incorporate Iron Eye and The Executor, though Duchess or Raider represent excellent alternative selections.
Advanced Strategy: The Magma Wyrm possesses specific attack patterns that can be exploited. During its lava-spewing phase, position yourself behind the creature to avoid damage while dealing continuous strikes. When it prepares for its charge attack, dodging to the sides rather than backward provides better positioning for counter-attacks. Coordinate with teammates to maintain aggro distribution—having one player distract while others attack from behind significantly improves survival odds.
Environmental awareness proves crucial during this encounter. The braziers surrounding the coffin can provide temporary cover, but staying too close risks getting trapped during the Wyrm’s area-denial attacks. Maintain medium distance to ensure maneuverability while remaining in effective attack range.
Reward Collection and Escape
Following the Magma Wyrm’s defeat, interact with the golden-hued object positioned near the ornate coffin. This interaction permits upgrading one inventory weapon to Legendary quality tier. Completing this enhancement unlocks The Crater achievement within Elden Ring Nightreign.
Weapon Selection Advice: Carefully consider which weapon to upgrade to Legendary status. Prioritize weapons with scaling that matches your build or those with unique weapon arts that complement your playstyle. Remember that this represents a significant power spike—choose wisely based on your long-term character development plans.
Immediately upon securing your rewards, initiate evacuation procedures. Utilize the Spectral Hawk perched near the azure-colored tree for rapid extraction. Excessive delays allow the storm to envelop the area completely, resulting in certain demise.
This comprehensive guide concludes our exploration of The Crater achievement within Elden Ring Nightreign’s challenging landscape.
Further exploration: Elden Ring Nightreign review: A brilliant evolution of The Lands Between
Common Pitfall: Many players underestimate the escape timing after defeating the Magma Wyrm. The storm accelerates during the final phase—don’t spend time celebrating your victory. Immediately locate the Spectral Hawk and interact with it without delay to ensure successful extraction.
No reproduction without permission:Tsp Game Club » How to get The Crater achievement in Elden Ring Nightreign Complete guide to unlocking The Crater achievement in Elden Ring Nightreign with expert strategies and time-saving tips