TL;DR
- Banana control dictates round tempo – master early utility exchanges
- A-site splits require perfect timing between Short and Apps pushes
- CT utility conservation wins late-round retake scenarios
- Sound intelligence and positioning create unbeatable defensive setups
- Economic discipline enables consistent round-winning firepower
Inferno represents the pinnacle of tactical Counter-Strike gameplay, demanding exceptional team coordination and strategic foresight. This legendary map challenges players with intricate choke points, vertical complexity, and utility-dependent engagements that separate elite teams from average performers. Whether you’re refining fundamental skills or preparing for competitive matches, this comprehensive breakdown delivers actionable strategies for immediate performance improvement.
Introduction to Inferno in CS2

What Makes Inferno Unique?
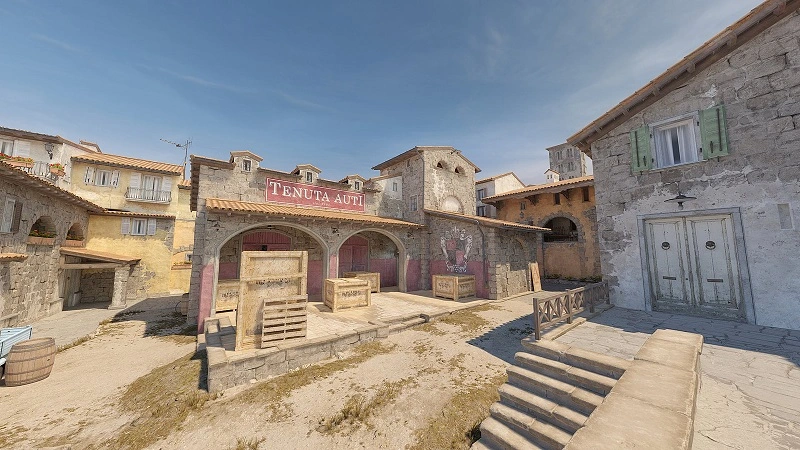
Inferno’s design philosophy centers around controlled aggression and information warfare. The map’s tight corridors and multi-level structures create natural crossfire opportunities that punish uncoordinated pushes. Close-quarter combat zones make shotguns and SMGs strategically viable alongside traditional rifle loadouts, particularly in eco-round scenarios where close-range engagements favor budget weapons.
Utility mastery becomes non-negotiable – players who cannot execute precise smokes, molotovs, and flashes will find themselves systematically eliminated from key areas. Banana exemplifies this dynamic, where early control battles determine mid-round options and late-game possibilities.
The map’s architecture encourages calculated mid-round adjustments rather than brute force rushes. Teams demonstrating superior Inferno performance consistently exhibit three core attributes: synchronized movement patterns, clear information sharing protocols, and rehearsed utility combinations that create temporary numerical advantages.
Historical Significance of Inferno in Counter-Strike Series
Inferno’s competitive legacy spans multiple Counter-Strike generations, first appearing in CS 1.1 before evolving through Source, CS:GO, and now CS2 with visual enhancements while preserving strategic integrity. This battlefield has hosted legendary clashes like Fnatic versus Luminosity in 2016 and Astralis’s era of dominance built upon flawless Inferno tactical systems.
Visual upgrades across iterations have maintained contemporary aesthetics while the map’s soul remains strategically balanced and punishing for tactical errors. Its enduring presence in competitive circuits establishes Inferno as the ultimate proving ground for team cohesion and strategic execution.
Overview of Inferno Map Layout

Terrorist Side (T-side) Key Areas
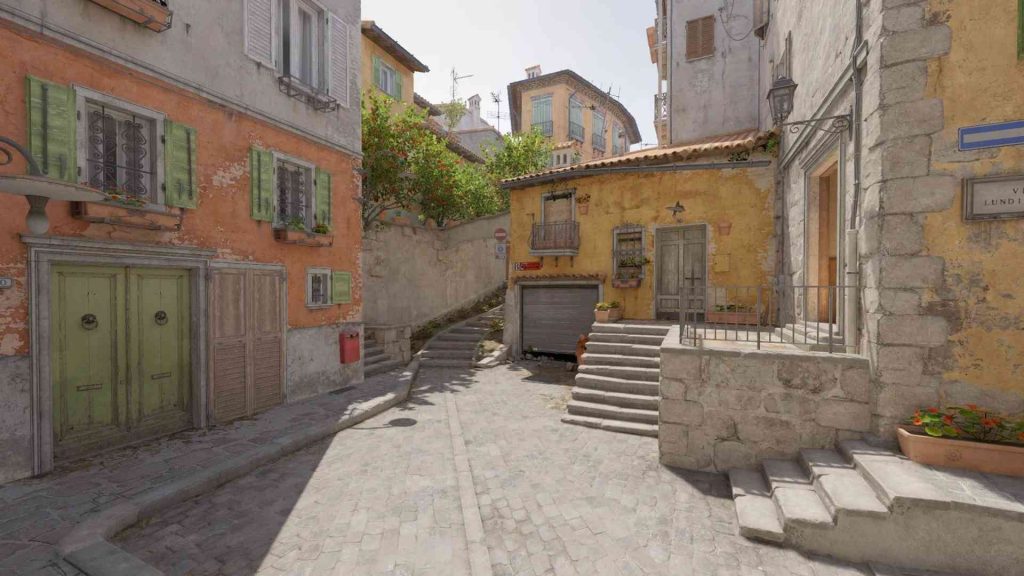
Terrorist operatives deploy from the southern spawn zone with two primary assault corridors: T Ramp and Banana targeting B site, and Mid and Second Mid approaching A bombsite. Each pathway contains tactical sub-zones enabling staged pushes and area denial strategies:
- T Ramp: Initial staging area for Banana reconnaissance and control establishment.
- Second Mid: Transition zone accessing Apartments, Boiler, and Short positions.
- Alt Mid: Alternative routing option creating deceptive map presence and apartment pressure.
- Apps (Apartments): Provides potential A site penetration via Balcony or Short entry points.
- Banana: Direct B site access corridor frequently contested through early-round utility exchanges.
- Mid: Branching point dividing into Short and Long corridors, both essential for coordinated A site assaults.
Comprehending these tactical zones represents the foundational step toward T-side Inferno mastery. Strategic dominance over Banana or Mid control zones creates tactical flexibility and execution opportunities.
Counter-Terrorist Side (CT-side) Key Areas
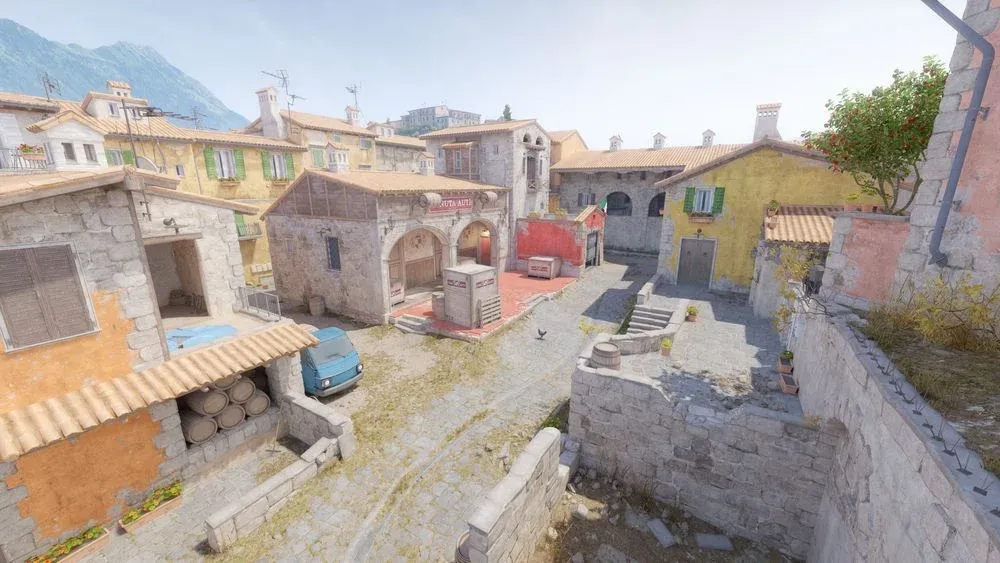

Counter-Terrorists spawn with proximity to both bomb sites, emphasizing defensive positioning strategies and map control denial tactics. Critical defensive positions include:
- CT Spawn: Central hub facilitating inter-site rotation and support deployment.
- Arch and Library: Essential for Long A control and rapid inter-site repositioning.
- Pit and Graveyard: A-site defensive strongholds providing cover and crossfire opportunities.
- Construction and Coffins: B-site defensive positions utilizing cover mechanics.
- Banana Control: Arguably the most crucial early-round CT strategic element.
Elite CT players demonstrate spatial control without positional overextension. Particularly on Inferno, inefficient utility deployment or reckless aggression frequently results in round losses. Instead, CTs depend on precisely timed utility and intelligent crossfire setups to maintain dominance over critical choke points like Banana and Mid corridors.
Success on Inferno’s Terrorist side begins with mastering the default setup approach. This strategic foundation involves distributing your team across key map areas to establish early control while forcing Counter-Terrorists to reveal their positions and expend valuable utility. A well-executed default creates psychological pressure, making CTs hesitant and reactive rather than proactive.
The core objective isn’t immediate site penetration but rather information acquisition and resource depletion. By methodically challenging multiple areas, you force defenders to commit resources prematurely, leaving them vulnerable for later executes.
Default Setup and Map Control
On Inferno, a strong T-side often begins with a structured default setup. This tactical distribution positions players to contest critical zones while gathering intelligence about CT formations.
- 1-2 players Banana to contest or take control.
- 2-3 players in Mid/Alt Mid to pressure A and control Apartments.
- 1 player watching T ramp or Second Mid for flank detection.
The strategic aim here is not to rush into a site, but rather to methodically collect information and compel CTs to disclose their defensive arrangements. The Banana contingent should employ utility strategically — deploying smokes to counter CT’s deep Banana coverage, applying molotovs to car or sandbags positions, and utilizing flashbangs to dislodge defenders from Banana control points.
Concurrently, establishing Mid dominance enables access to Apps and Short corridors, facilitating coordinated A-site split attacks. When CTs over-rotate or exhaust their utility reserves, this signals your opportunity for rapid site execution or well-calibrated deception plays.
Implementing a default configuration grants your team map presence — the defensive side cannot confidently predict your assault vector, compelling them into conservative, frequently inferior defensive configurations.
Executing an A-Site Take
An A-site assault on Inferno can be executed through multiple approaches: rapid rushes, delayed splits, or premeditated plays incorporating smokes and molotovs. The most consistently effective methodology typically involves a Short and Long split, converging from Mid and Apps sectors simultaneously.
For optimal execution:
- Smoke Arch and Library to obstruct visual coverage from Long positions.
- Molotov Pit and Graveyard to displace entrenched defenders.
- Flash over Balcony to support the player advancing from Apartments.
- Deploy one or two players through Short, synchronizing with the Apps offensive push.
Precision in timing and spatial coordination is paramount. Should team members arrive asynchronously or utility deployment be mistimed, you risk being eliminated systematically. Ideally, you aim to overwhelm A with 3+ players attacking from multiple vectors simultaneously, forcing CTs into disadvantageous engagements or tactical withdrawals.
Following bomb placement, secure Pit, Short, and Site dominance. These positions provide crossfire opportunities and enable superior management of CT retake pathways.
Common Mistake Alert: Many teams fail to coordinate their Short and Apps pushes within the critical 2-3 second window, allowing defenders to address threats sequentially rather than simultaneously.
Executing a B-Site Take
B-site presents notorious challenges when CTs retain utility — particularly molotovs and smokes. Consequently, early Banana control becomes essential. Once you’ve compelled CT withdrawals or successfully baited out defensive smokes, you can prepare for a coordinated B execute.
A standardized B assault typically employs:
- CT smoke to obstruct rotation pathways.
- Coffins smoke to eliminate visual contact with site defenders.
- New Box molly to eliminate common anchor positions.
- Flashes over wall to disorient site defenders.
Deploying three players for entry with two providing flash support and trade coverage represents the optimal approach. Post-plant, maintain Construction and Banana oversight for defensive angles. Remain vigilant against flanking maneuvers from T ramp or CT attempts to retake from Banana approaches.
Periodically, faking B followed by transitioning to A via CT spawn can secure round victories — particularly when defenders overcommit rotations.
Advanced Tip: The most successful B executes often involve utility sequencing where smokes, molotovs, and flashbangs are deployed in precise chronological order to maximize disorientation and minimize defensive response time.
Late-Round Rotations and Fakes
A critical competency on Inferno involves determining when to rotate or commit to deceptive plays. If you’ve established Banana dominance but haven’t advanced into B, a convincingly executed fake incorporating utility can induce rotations from A. Subsequently, rapidly transition to the alternative site with numerical superiority.
Strategically sophisticated teams:
- Utilize one player to deploy deceptive utility while remaining teammates rotate.
- Utilize silent movement between sites to avoid providing auditory intelligence.
- Monitor for information-gathering pushes from CTs attempting to verify your tactical disposition.
A precisely timed deception can secure round victory before combat initiation.
Sound Strategy Development: Mastery of auditory cues separates intermediate from advanced players. The 5-7 second window after throwing a smoke but before rotating often determines fake credibility.
Pro-Level Insight: Top competitive teams frequently employ partial commits where 2-3 players demonstrate aggression while others prepare for rapid site transitions.
Understanding CT rotation patterns enables you to manipulate defender movements, creating vulnerabilities in their defensive structure that can be exploited for round wins.
Inferno’s tactical depth revolves around precise smoke deployment that can single-handedly dictate round outcomes. These vision-blocking tools create temporary safe zones and disrupt enemy positioning, making them indispensable for both attacking and defending teams.
B Site Execution Smokes
The CT Spawn Smoke serves as a critical barrier during B site attacks, preventing defenders from spotting your team’s movement from rotation paths. Proper placement cuts off multiple angles simultaneously, allowing your squad to establish site control methodically.
Coffins Smoke eliminates the B site defender’s ability to watch Banana approaches or New Box positions. This smoke creates a temporary blind spot that enables safe entry into the bombsite.
The strategic Library and Arch Smokes form the foundation of A site split attacks, isolating defenders and forcing them into unfavorable engagement scenarios.
A Site Split Smokes
When executing an A site take, the Moto Smoke effectively blocks Library sightlines from Short or Site positions, limiting defender reaction time.
Long Smoke specifically counters AWPers holding angles from Pit or Library positions, providing essential cover for your advancing teammates.
Mid Control Denial Smokes
Counter-Terrorists can utilize the Mid Smoke to delay T-side mid control attempts or conceal teammate boosts from unexpected angles.
Dedicated practice sessions in offline servers or workshop maps build the muscle memory needed for consistent smoke placement. Proper timing becomes crucial—deploy too early and the smoke dissipates before your push, too late and you enter directly into enemy crosshairs.
Team coordination transforms individual smoke throws into game-winning strategies. During a coordinated B hit, one player throws the CT smoke, another covers Coffins, while a third deploys molotovs on New Box. This level of synchronized utility deployment can secure round victories without requiring a single shot fired.
Molotovs on Inferno fulfill two primary combat functions: enemy displacement from positions and push delay tactics. These fire-based tools force opponents out of defensive spots or prevent aggressive pushes through key choke points.
Banana Control Molotovs
The Car/Logs Molotov effectively counters early CT aggression in Banana, clearing the critical early-game control zone.
New Box Molotov burns out common anchor positions on B site, removing safe defensive spots for the enemy team.
During A site executions, the Pit or Graveyard Molotov dislodges defenders during coordinated attacks.
The versatile Boiler Molotov clears the corner in Apartments before initiating Mid control pushes.
Site Clearance Molotovs
Sandbags Molotov deters or punishes CT attempts at Banana control, limiting their map presence.
Aggression Prevention Molotovs
Well-timed HE grenades at Banana or Mid can significantly reduce enemy health pools. A deep Banana HE combination frequently softens Terrorist players for easier M4 elimination shots.
Flashbang deployment remains significantly underutilized in lower competitive ranks. Players should master pop-flash techniques for specific scenarios:
- Mid peek from CT positions.
- Banana entry for Terrorist pushes.
- Aps pop flash for Short advancement.
- Construction retake flash.
Flashbangs represent your most reliable tactical allies on Inferno. They’re simple to align, difficult for enemies to avoid, and instantly alter combat tempo. Several high-impact flash setups deliver consistent results:
Entry Flash Coordination
The Wall flash for Banana bounces over the roof structure, creating perfect conditions for T-side Banana advancement.
The Arch/Library pop flash enables Mid control acquisition or wrap-around maneuvers to A site positions.
Retake Flash Support
Aps pop flashes blind any defenders holding Balcony or Pit angles during executes.
Map Control Flash Chains
Strategic CT retake flash from Coffins facilitates B site reclamation during post-plant scenarios.
Coordinate flash deployment with teammates using the buddy system approach. One player initiates the flash bounce, while their teammate immediately swings to capitalize on the temporary blindness.
This coordinated methodology generates exceptionally effective map control while minimizing individual risk exposure during tactical advancements.
Superior utility usage separates elite Inferno teams from average competitors. The difference often manifests in coordinated deployment that overwhelms defensive setups through precise timing and complementary coverage.
Synchronized B Executes
During coordinated B site attacks, teams should assign specific utility roles: one player handles CT smoke, another covers Coffins smoke, while a third deploys the New Box molotov. This level of teamwork frequently secures round victories without requiring direct firefights.
Coordinated A Splits
For A site advancements, teams must master the art of utility conservation. Avoid expending all tactical resources during the initial round phase—maintain at least one smoke for late-round defensive scenarios or retake situations.
Utility Conservation Strategies
Strategic utility management frequently determines round outcomes well after the timer reaches 00:40 remaining.
Mastering these coordinated approaches transforms individual skill into team dominance on one of Counter-Strike’s most strategically demanding maps. For comprehensive strategic development, consult our Complete Guide to advanced tactical gameplay.
Proper equipment selection complements utility effectiveness. Review our Weapons Unlock guide to optimize your loadout selections.
Mastering audio manipulation on Inferno can create significant tactical advantages that many players overlook. The map’s tight corridors and multiple elevation changes amplify sound cues, making them both a vulnerability and an opportunity for strategic deception.
Audio Masking Techniques
- Teammate footsteps to mask movement and conceal repositioning efforts.
Likewise, employ walking to conceal your pushes or generate fake rotation sounds to bait CT movements. Executing a smoke grenade followed by deliberate footsteps can convincingly simulate a site commitment, prompting unnecessary rotations that open alternative bombsites for uncontested plants.
Sound = Info = Power.
Advanced players often combine multiple audio elements simultaneously. For example, throwing a flashbang while teammates walk creates layered sound that obscures individual movements and intentions.
Inferno’s compact layout demands communication that is not just clear but strategically optimized. Poor comms can turn coordinated executes into chaotic individual duels that favor defenders.
Inferno is a tight map, so comms have to be fast, specific, and consistent. Here’s how to sharpen your callouts and maintain team coherence under pressure:
- Always use location + number + action: “Two Boiler pushing Short.”
- Keep it brief during fights; go into detail only after the play.
- Learn and use universal callouts like Arch, Pit, Coffins, Balcony, etc.
- Don’t overcall or panic — calm comms save rounds.
The better your team’s comms, the less confusion and more coordination you’ll experience.
Selfless play wins games. That means flashing in your entry, mollying common angles, and smoking off rotate spots — even if you’re not the one entering.
Support tactics require anticipating teammate needs and positioning:
- Throw anti-AWP flashes for teammates peeking Mid or Long.
- Molotov common holds like New Box or Pit before the push.
- Drop utility to teammates if they’re executing critical site takes.
Play around your team’s timing and always ask what they need before a big push.
Post-plant rounds are won with information sharing and coordinated team positioning rather than individual heroics.
As Ts during post-plant scenarios:
- Communicate where you’re holding from to establish crossfire opportunities.
- Let others know if you’re playing for bomb sound to coordinate defuse denial timing.
- Share info if you’re low HP or have utility remaining for coordinated defense.
As CTs during retake situations:
- Retake together, don’t isolate yourself from team support.
- Flash for teammates before they swing on contested angles.
- Call if you’re defusing or tapping to coordinate covering fire and angle control.
Most importantly, don’t panic — a cool, coordinated retake often wins against rushed individual pushes.
Inferno stands as one of Counter-Strike’s most strategically demanding battlegrounds, requiring players to master tight chokepoint navigation, precision utility deployment, and seamless team synchronization. This iconic map challenges participants to think several steps ahead, transforming what appears to be simple corridor combat into complex positional warfare where every smoke and flashbang carries game-changing potential.
Map Layout Fundamentals
The map’s distinctive hourglass configuration creates natural bottlenecks that reward tactical patience over aggressive rushing. The narrow pathways of Banana and Apartments force engagements at close quarters, making weapon selection and positioning equally important as raw aiming skill.


What distinguishes Inferno from other competitive maps is its emphasis on utility-based area denial. Teams that fail to coordinate their smokes, molotovs, and flashbangs will find themselves systematically dismantled by opponents who understand the map’s tactical rhythm.
Historical Context and Evolution
Since its debut in Counter-Strike 1.1, Inferno has undergone multiple visual and structural refinements while maintaining its core strategic identity. The map has hosted legendary professional matches that demonstrate its balanced yet punishing nature when executed improperly.
A Site Navigation Mastery
Mastering A site requires understanding its multi-level defensive architecture. The elevated Balcony position overlooking Pit creates natural crossfire opportunities that disciplined teams exploit ruthlessly.
- Pit: Sunken defensive position requiring utility clearance before safe entry
- Graveyard: Adjacent to Pit, often used for delayed defensive plays
- Balcony: High-ground vantage point controlling multiple entry routes
- Default Plant: Strategic planting location maximizing post-plant angle control
- Truck Side (Short): Direct Mid-to-A access point vulnerable to Arch-side attacks
- Long: Extended approach route favoring AWPers and long-range engagements
- Mini Pit: Compact defensive niche requiring specific molotov lineups for effective clearance
Professional teams consistently demonstrate that precise callout usage transforms chaotic site takes into methodical clearance operations.
B Site Defense Systems
B site’s apparent simplicity belies its technical complexity. The limited entry options force attackers to execute with near-perfect utility synchronization to overcome entrenched CT positions.
- Coffins: Curved protective wall enabling unconventional defensive angles
- First Oranges / Second Oranges: Stacked crate formations creating layered defensive depth
- New Box (Dark): Deep corner position requiring coordinated utility for effective neutralization
- Construction: Connector zone enabling rapid B-to-A rotations when properly controlled
- Boost Corner: Early-round control position vulnerable to pre-emptive utility attacks
- Emo / Back Site: Rear defensive corner frequently utilized during execute defense scenarios
Default Control Protocols
Successful T-side rounds typically originate from structured default formations that methodically gather intelligence while depleting CT utility reserves.
- 1-2 players establishing Banana presence through calculated utility exchanges
- 2-3 players controlling Mid and Apartments to pressure multiple CT positions simultaneously
- 1 player providing flank protection and rotation flexibility
The strategic objective shifts from immediate site penetration to systematic map control acquisition, forcing defenders into reactive postures.
Advanced teams utilize default phases to identify CT positioning patterns and utility usage tendencies that inform subsequent execute timing decisions.
A Site Take Mechanics
Coordinated A site assaults demand precise timing between multiple entry vectors. The most devastating executes combine Short and Long approaches with Apartments pressure, creating overwhelming defensive challenges.
- Smoke Arch and Library to isolate Long control from site defense operations
- Molotov Pit and Graveyard to eliminate common anchor positions
- Flash over Balcony to disrupt defensive sightlines and create entry opportunities
- Coordinate player movements from Short and Apps to ensure simultaneous pressure application
Post-plant positioning should prioritize crossfire setups that maximize trade potential while minimizing defensive exposure.
Standard Setup Formations
CT defensive structures typically employ 2-3 splits between bomb sites, with flexibility based on early-round Banana control developments.
- Banana control utilizing early molotovs and defensive smokes
- A apps presence maintained through Pit positioning and Boiler awareness
- Mid control denial through calculated peeks and utility deployment
Resource conservation emerges as the critical differentiator between competent and elite CT sides. Preserving at least one smoke for late-round defensive scenarios frequently determines round outcomes.


A Site Holding Strategies
Layered defensive configurations prove most effective for A site protection. These typically involve:
- 1 player in Pit providing initial contact and delay capability
- 1 on Site maintaining bomb plant denial and crossfire support
- 1 playing Arch or Library enabling rapid rotation support while maintaining defensive integrity.
Critical Smoke Lineups
Inferno’s tactical identity revolves around smoke grenade mastery. Teams lacking consistent smoke lineups will find themselves systematically dismantled by opponents who understand the map’s utility-based rhythm.
- CT Spawn Smoke (B Site) – Critical for B executions to obstruct CT rotation sightlines
- Coffins Smoke – Eliminates B site defender visibility from Banana approach routes
- Library and Arch Smokes (A Site) – Fundamental for successful A site splits from Short control positions
- Moto Smoke (A Site) – Blocks Library defensive oversight of Short entry pathways
- Long Smoke – Denies AWPers defensive control from Pit and Library vantage points
- Mid Smoke (CT Side) – Delays T-side Mid control acquisition and conceals defensive boost positions
Professional teams demonstrate that smoke timing frequently determines execute success more than raw aiming proficiency.
Strategic Molotov Applications
Molotovs serve dual strategic purposes: area denial and defensive position displacement.
- Car/Logs Molotov (Banana) – Clears early CT aggression and establishes T-side Banana presence
- New Box Molotov (B Site) – Eliminates common anchor positions during site execute scenarios
- Pit or Graveyard Molotov (A Site) – Dislodges entrenched defenders during coordinated A site assaults
- Boiler Molotov – Clears Apartments corner positions before Mid control pushes
- Sandbags Molotov – Deters or punishes CT-side Banana control attempts
Angle Selection Hierarchy
Strategic positioning on Inferno involves understanding both conventional and unconventional angle advantages. Elite players consistently identify positions that offer both defensive coverage and offensive opportunity.
Common angles requiring mastery include:
- Pit to Short cross – Fundamental defensive-offensive transition point
Advanced positioning involves selecting angles that provide multiple engagement options while minimizing exposure to common pre-fire locations.
Wallbang Avoidance Techniques
Multiple positions on Inferno remain vulnerable to wall penetration and spam damage. Critical awareness zones include:
- Sandbags Banana – Frequently targeted with wallbang attempts and molotov clearance
- Pit corner – Spammable from Short and Balcony positions
- Boiler/Second Mid wall – Often pre-fired by experienced players anticipating common holds
Positioning discipline involves constant movement between defensive setups to avoid predictability. Teams that establish consistent defensive patterns will find themselves systematically countered by observant opponents.
Sound Intelligence Utilization
Audio cues provide critical intelligence for both offensive execution and defensive response. Professional players demonstrate exceptional sound awareness through:
- Banana push sounds from both T and CT perspectives
Strategic sound manipulation involves using environmental audio to mask movement, fake rotations, and create tactical deception opportunities.
Efficient Callout Systems
Inferno’s compact design demands communication precision and clarity. Effective callout protocols follow standardized formats:
- Always use location + number + action protocols: “Two Boiler pushing Short”
- Maintain brevity during active engagements, reserving detailed analysis for post-round assessment periods.
Professional teams demonstrate that concise, accurate communication frequently determines round outcomes more than individual mechanical skill.
Support Utility Coordination
Selfless utility deployment distinguishes elite teams from average performers. Supporting teammates involves:
- Throw anti-AWP flashes to create peeking advantages for teammates engaging Mid or Long control positions.
Strategic support extends beyond simple flashbang assistance to include coordinated molotov deployment and smoke coverage for strategic repositioning.
Retake Communication Protocols
Post-plant scenarios demand specialized communication protocols focused on retake coordination and information sharing.
Training Tool Integration
Dedicated practice tools provide accelerated skill development pathways. Essential training resources include:
- Yprac Inferno Guide – Comprehensive utility practice for smokes, flashes, and molotovs
- Aim Botz or Recoil Master – Foundational aiming mechanics refinement
- Grenade practice servers – Enable precision lineup mastery through repetition and refinement
Offline server practice with unlimited utility availability represents one of the most efficient methods for developing competitive advantages.
Demo Review Methodologies
Systematic demo analysis transforms passive viewing into active learning. Professional match observation should focus on:
- Identify positioning errors and timing mistakes in personal gameplay sessions
Studying elite teams like NaVi, Vitality, or G2 provides strategic frameworks that can be adapted to individual team styles and skill levels.
Muscle Memory Development
Inferno mastery demands intuitive understanding of spatial relationships and timing dynamics. This specialized knowledge develops through:
- Internalize rotation timing between bomb sites
Advanced players develop instinctive awareness of critical map knowledge elements including:
- Mastering common angle clearance patterns without excessive exposure to defensive crossfires
This specialized tactical awareness emerges through dedicated repetition, critical self-analysis, and continuous improvement focus.
Action Checklist
- Master 3 essential smoke lineups: CT spawn (B), Coffins (B), and Library/Arch (A)
- Practice Banana control utility exchanges with teammate coordination
- Implement crossfire positioning on both A and B sites
- Develop economic discipline through round-by-round buy analysis
- Establish default setup with players distributed across Banana, Mid, and flank watch positions
- Practice coordinated A-split timing between Short and Apps pushes
- Master Banana control utility sequences including smokes and molotovs
- Develop sound cue recognition for rotation timing decisions
- Implement fake strategies with utility deception and silent rotations
- Practice all 5 essential smoke lineups in offline server until achieving 95% consistency
- Coordinate with teammates for synchronized utility deployment during executes
- Master 3 key molotov lineups for Banana and site control
- Develop flashbang coordination using buddy system approach
- Analyze pro demos to understand utility timing and team coordination
- Practice audio masking by coordinating teammate footsteps during repositioning and site transitions
- Implement structured callout system using location+number+action format
- Develop utility support routines for entry players and site executes
- Establish post-plant communication protocols for crossfire coordination
- Practice essential smoke lineups for CT Spawn, Coffins, Library/Arch, and Mid positions
- Review professional match demos focusing on utility timing and rotation decisions
- Develop Banana control strategies with coordinated utility deployment
- Master A site split executes with synchronized Short/Long/Apps coordination
- Implement structured communication protocols for retake scenarios and post-plant situations
- Mastering common angle clearance patterns without excessive exposure to defensive crossfires
- Internalize rotation timing between bomb sites
- Yprac Inferno Guide – Comprehensive utility practice for smokes, flashes, and molotovs
- Throw anti-AWP flashes to create peeking advantages for teammates engaging Mid or Long control positions.
- Sandbags Banana – Frequently targeted with wallbang attempts and molotov clearance
No reproduction without permission:Tsp Game Club » Inferno Guide: Callouts, Tips, and Strategies
