TL;DR
- Standard CT setup uses 1 outside, 2 A site, 2 B site positioning for balanced defense
- Effective T-side defaults focus on gradual map control through outside/secret presence and ramp pressure
- Aggressive CT plays like outside pressure pushes and fake rotates can disrupt T strategies when timed correctly
- Outside control is crucial – coordinate smokes, molotovs and crossfires to deny T options
- Master multi-level crosshair placement for vertical angles and sound-based rotations
When defending as Counter-Terrorists on Nuke, your primary objective is establishing map dominance while avoiding overextension risks. A well-balanced defensive formation typically distributes players across key areas:
- One player controlling Outside/Yard (mini position) utilizes early smokes and vision control to challenge secret access or outside advances.
- Two defenders securing A site with one positioned in heaven or rafters for high-ground advantage, while the other covers hut/squeaky/floor entry points.
- Two operators holding B site typically station one in control room and another near double doors or vent exits.
This tactical distribution provides operational flexibility. When Terrorists assault A site, you maintain defensive presence from elevated heaven positions and hut coverage. If Ts target B, control room defenders can stall advances while vent drops receive support from rotated teammates or existing B site personnel.
During numerous rounds, the Outside or mini defender will deploy early smoke grenades or molotov cocktails, potentially delaying enemy pushes before retreating to reinforce A site or execute rotations as needed. The strategic concept involves contesting territory early in the round, while never committing too aggressively distant from your assigned bombsite.
The cornerstone of standard CT formations revolves around maintaining information superiority. Counter-Terrorists must consistently track or suspect whether Terrorists have established control over secret passages, ramp areas, or yard territory. Utilize irregular peek timing, tactical utility deployment, and crossfire positioning to ensure no enemy movements catch your team unprepared.
While the standard defensive arrangement provides solid coverage, coordinated CT squads can gain significant advantages through calculated aggression—particularly on Nuke’s complex layout. These proactive CT maneuvers can destabilize Terrorist game plans:
- Outside pressure assault: Two CT operators advance deep into yard/secret territory during round initiation to challenge and potentially eliminate Ts attempting to secure outside control. This high-risk approach, when executed with precise timing (such as early round phases before Ts establish utility setups), can neutralize Terrorist strategies before they develop momentum.
- Ramp or lower aggressive peeks: A B site defender can push slightly forward or peek lower ramp sections. The tactical goal involves intercepting Ts advancing toward site or securing early eliminations through trades. However, this tactic carries substantial danger—Ts frequently concentrate utility in these areas, requiring flashbang support or smoke screen coverage.
- Proactive heaven dominance: Rather than passively maintaining heaven control, some CTs push ladder room access or establish forward anchor positions in rafters or behind cover. This can yield early picks but also exposes defenders if Ts deploy potent smoke/flash combinations.
- Deceptive rotation maneuvers or isolated engagements: Deploy one or two CTs deep into enemy territory to simulate rotation activities. If Ts misinterpret these signals as genuine rotations, they might overcommit to the opposite bombsite, creating vulnerability opportunities.
Aggressive tactics on Nuke require selective implementation. Once Terrorists establish map control or deploy utility, overextending typically becomes suicidal for CT operators.
Outside territory (yard/secret access) represents the strategic epicenter for numerous Nuke engagements. Controlling this area provides Ts with multiple tactical options; losing outside control often results in being confined to limited movement options. Here’s how CTs can intelligently manage this critical space:
- Smoke and Molotov Synchronization
Early smoke deployments including “Red to Secret,” “Window to Secret,” “Lower Yard” patterns remain fundamental staples. Molotov cocktails effectively obstruct secret advancement routes or prevent Ts from progressing through yard access points. - Spawn or mid peeks with optimal timing
A CT operator might peek yard or secret during round commencement to apply pressure or force Ts to conserve utility. However, these peek maneuvers must be timed precisely to avoid being caught in enemy utility or easily traded. - Crossfire configurations with multiple sightlines
One defender monitors secret doorway, while another observes yard territory from mini or hut positions. When Ts attempt advances, you want overlapping fields of fire, ensuring Ts cannot blind your teammates without exposing themselves to return fire. - Rotation support execution
If Ts commit to outside-driven B split attacks, the CT outside operator should prepare to retreat or establish crossfire positions, while the A/Upper team provides support from heaven, vents, or ladder room. The strategic objective involves delaying enemy progress and securing eliminations, not necessarily winning the outside engagement completely. - Utility deployment for information denial
Smoke grenades or flashbangs that obstruct Ts visibility into interior areas or mask your defensive formations can dramatically alter round outcomes. One strategically positioned smoke can compel Ts to guess your positions and postpone their assault timing.
As Terrorist operatives, your initial objective centers on establishing territorial control and probing CT defensive arrangements, rather than fully committing without intelligence. An effective default T-side strategy typically incorporates:
- Outside/Secret tactical presence
Deploy one or two Ts to secure control over outside yard and secret access. Utilize smoke screens and flash grenades to gradually advance forward and deny CT visual intelligence. - Ramp pressure application
One or two Ts apply pressure through ramp access to compel B site CTs to respond. This prevents CTs from freely maintaining aggressive defensive positions. - CT rotation pathway monitoring
Maintaining presence in lobby, main, or hut areas to track CT rotation patterns (such as peeking ramp, monitoring squeaky) proves essential. Even without immediate pushes, simply demonstrating presence forces CTs to allocate attention. - Mid territory control
Some Ts peek from ramp into vents or from vents into B to determine whether CTs are guarding vent access points. This intelligence gathering can reveal B site access opportunities.
The “default” approach embodies slow, methodical territory control, systematically gathering intelligence, and exhausting CT defensive alternatives before committing to site execution.
Crosshair positioning on Nuke transcends conventional horizontal alignment—you must consistently account for vertical elevation variations. Essential techniques include:
- Pre-aiming standard head-level positioning at elevated angles (rafters, heaven, vent drop zones). Avoid aiming too low relative to expected enemy elevations.
- When ascending ladders or ramp sections, adjust crosshair elevation early during movement.
- Employ horizontal crosshair tracking (lateral sliding movements) to monitor multi-level entry positions (such as simultaneous vent drops while teammates push ramp access).
- Following utility deployment or forcing angles open, reposition crosshair alignment to locations where enemies will emerge, not where they currently position.
Certain defensive and offensive positions deliver disproportionate tactical influence:
- Heaven (CT defensive): Provides overwatch capability for A site, facilitates rotation support, enables ramp or crossfire visibility.
- Rafters (T or CT tactical): Offers elevation advantage for peeking down into bombsite areas or executing stealthy observation peeks.
- Vents (T offensive): From secret to B access or drop to B—maintaining vent control provides surprise attack potential.
- Silo / Floor (T post-plant): Provides effective cover, angles to block rotation paths, and secure crossfire opportunities.
Avoid remaining in static positions for extended durations; both Ts and CTs will pre-nade or pre-flash these common positions. Maintain readiness to reposition or execute rotations based on enemy movements.
Nuke represents more than just another battleground in CS2—it’s a sophisticated three-dimensional chessboard that separates tactical masters from average players. The map’s defining characteristic is its vertical stacking of bomb sites, creating combat scenarios where traditional horizontal positioning strategies become obsolete. Unlike linear maps like Dust2, Nuke demands constant awareness of threats from above and below simultaneously.
Every engagement point features overlapping angles that challenge conventional crosshair placement. You’ll encounter opponents dropping through ventilation systems, flanking from heaven positions, or emerging from secret tunnels. It’s common to secure one bombsite, detect footsteps overhead, then get eliminated from beneath seconds later. This multi-layered complexity necessitates superior team communication, precise timing comprehension, and exhaustive knowledge of every callout and rotation possibility.
Additionally, Nuke structurally favors the CT side significantly. Most competitive matches witness CT squads accumulating 9-10 rounds before side switching. For T sides, this transforms into an examination of patience and accuracy. The inherent imbalance makes Nuke exceptionally punishing for unorganized teams but profoundly rewarding for strategically prepared units.
Mastering Nuke transcends mechanical aiming skill—it’s about cerebral dominance. Becoming a strategic expert on this map requires intimate familiarity with every concealed position and tactical pathway, which this comprehensive guide delivers.
What Makes Nuke Unique in CS2 Competitive Play
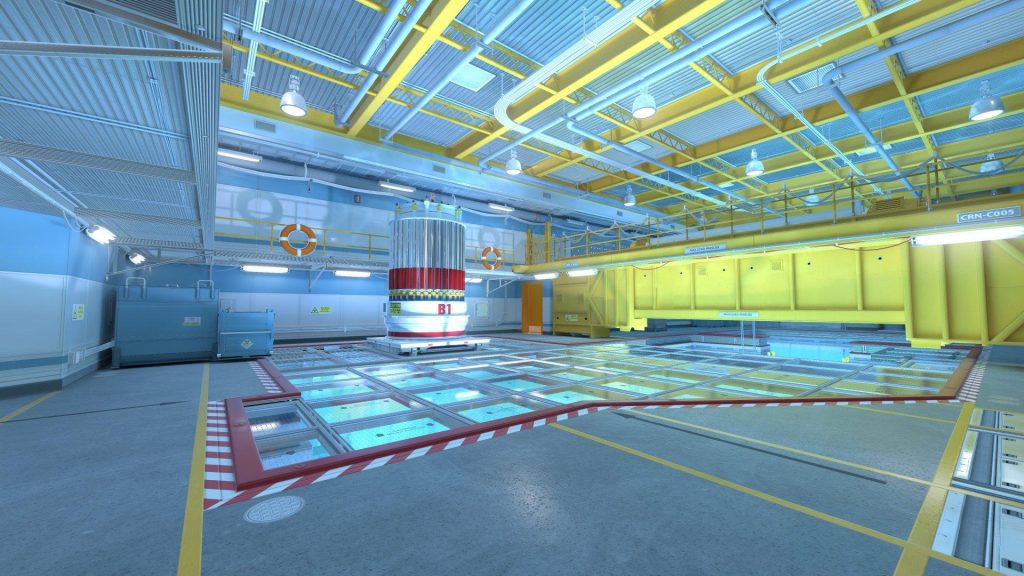

Nuke maintains solitary distinction within CS2’s competitive map pool for several compelling reasons. Primarily, it’s the exclusive map where A and B bomb sites stack vertically rather than distributing horizontally. This architectural decision fundamentally alters rotation patterns, defensive positioning, and offensive execution strategies. Ventilation shafts, ladder systems, and ramp pathways become mission-critical components, where rapid elevation transitions determine round outcomes.
Secondly, Nuke emphasizes auditory intelligence gathering. Descending through vents, activating squeaky door mechanisms, traversing radio room or secret tunnels—all generate detectable sound signatures. Elite competitors manipulate these acoustic elements to execute deceptive maneuvers, mislead opponents, or bait rotational movements. Nuke transcends being merely a shooting gallery—it’s a tactician’s ultimate proving ground.
Furthermore, the exterior sector—expansive, unobstructed, and strategically pivotal—functions as the map’s central nervous system. Dominating outside equates to controlling match tempo. When Terrorists infiltrate secret undetected, they can overwhelm B site from lower elevations. When Counter-Terrorists command outside with skilled AWPers or precisely positioned smokes, they completely suffocate T side advancement opportunities.
Combine these elements with constricted chokeholds like hut entrance, squeaky access, and ramp approach, and you’ve created an environment where minor errors prove catastrophic. Nuke rewards structural discipline over individual heroics. Teams excelling on Nuke comprehend timing synchronization, utility deployment efficiency, and paramount—effective communication protocols.
Overview of Upper and Lower Sites
Let’s establish foundational understanding. Nuke contains two bomb disposal zones: A (upper level) and B (lower level). However, contrasting with conventional map design where sites position adjacently, on Nuke these objectives stack vertically. Literally. The A bombsite positions directly above B site, interconnected through dual primary routes: the ventilation network and an extensive subterranean passage from secret tunnel.
A Site (Upper):
- Positioned immediately above B.
- Accessible through squeaky door mechanism, hut entrance (from lobby area), heaven elevation, and ventilation access points.
- Essential defensive locations incorporate heaven platform, rafter beams, floor area behind silo structures, and mini passage.
B Site (Lower):
- More challenging accessibility for Terrorists.
- Typically approached via ventilation systems or the extended route from secret/exterior.
- Critical defensive positions encompass double door entry, control room, dark corner positions, and single door access.
Rotational movements between the dual sites achieve lightning velocity when executing CT strategies. You descend through ventilation from A to reach B, or conversely through secret and ladder room compartments. This vertical adaptability explains why Counter-Terrorists favor Nuke—it enables rapid site reinforcement while minimizing exposure risks.
Key Verticality and Multi-Level Design Elements
What genuinely differentiates Nuke from alternative CS2 maps is its vertical architecture. While other arenas feature stairwells and potentially elevated zones, Nuke resembles a five-story structure with intersecting fields of fire. Let’s analyze why this matters:
- Crosshair Placement Complexity:
On Nuke, you’re not simply monitoring sightlines at standard elevation. You’re surveying ascending ladders, descending ramps, traversing catwalk systems, and occasionally through floor perforations. - Acoustic Ambiguity:
Is that footfall overhead? Beneath? Adjacent? Competitors frequently second-guess auditory perception on Nuke because sound propagation behaves erratically between floor levels. Skilled players capitalize on this through simulated descent sounds or walking rather than sprinting. - Rotational Complexity:
CTs can execute rapid rotations via ventilation or heaven pathways, but these routes carry inherent vulnerability. If a T detects ventilation descent audio, that operative’s location becomes compromised. Similarly, heaven rotational movements expose CTs to lobby area assaults. - Angle Coverage Dynamics:
The overlapping elevations mean you frequently observe opponents before they detect you—particularly from heaven to site or rafter positions. This transforms angle holding and peeking into intensely timing-dependent activities.
Without comprehending this stratified configuration, you’ll discover yourself eliminated by adversaries you didn’t realize possessed visual contact.
Outside Smokes (Red to Secret, Wall of Smokes)
The exterior region functions as the decisive engagement zone, where properly executed smoke deployments dictate round rhythm. Here are fundamental smoke techniques:
- Red to Secret: Prevents CT visual acquisition from exterior into secret passageway.
- Windows to Secret / Lower Yard: Obstructs CT’s capacity to observe from mini or window positions.
- Wall-of-smoke techniques: Employing multiple smoke grenades in barrier configurations to obstruct wide visibility—this proves exceptionally beneficial when advancing exterior or transitioning between outside and yard sectors.
Deployment timing proves critical—if you initiate smoke coverage prematurely, CTs might penetrate through. If delayed excessively, CTs already maintain visual control.
Site Entry Flashes and Molly Spots
When penetrating A or B bomb sites, tactical equipment becomes your primary instrument. Recommended deployment methodologies:
- Flashes
- Pop-flash projectiles directed toward heaven or rufter/rafter positions so defenders cannot pre-aim effectively.
- Rear-echelon flashes targeting CTs maintaining deep site positioning.
- Flash deployments over hut structures or through squeaky access to disorient defenders.
- Molotovs / HE grenades
- Dislodge opponents from rafter positions, silo areas, or behind container obstacles.
- Prevent ascent maneuvers onto silo or elevated firing positions.
- HE grenade deployments into confined spaces (behind containers, shadowed corners) can degrade health or compel repositioning.
Utility to Deny CT Info or Rotations
You can interrupt CT rotational movements or hinder their intelligence gathering capabilities. Several tactical approaches:
- Molotov placements within ventilation shafts or ladder room compartments, precluding CTs from safely utilizing those pathways.
- Smoke deployments blocking rotational doorways or intersection paths.
- Flash deployment across primary routes during rotational timing windows to disorient defenders transitioning between bomb sites.
- Deferred smoke usage: delay deployment until CTs initiate rotation, then activate smokes to obstruct their trajectory or visibility, compelling uncomfortable movement or timing decisions.
How to Master Multi-Level Angles
Crosshair positioning on Nuke concerns less about alignment with flooring—you must perpetually consider vertical dimensions. Strategic recommendations:
- Pre-aim conventional head elevation at high-angle positions (rafters, heaven, ventilation descent points). Avoid aiming excessively low.
- When ascending ladder systems or ramp inclines, adjust crosshair elevation prematurely.
- Utilize horizontal crosshair placement (lateral sliding) to monitor multi-level access points (e.g., operative vent descending while another advances ramp).
- Following utility deployment or forcing angles accessible, reposition crosshair toward locations where adversaries will emerge, not where they currently position.
High-Impact CT and T Positions
Certain tactical positions provide disproportionate battlefield influence:
- Heaven (CT): Overwatches A site, facilitates rotational support, provides visibility toward ramp sectors or crossfire opportunities.
- Rafters (T or CT): Provides elevation advantage to survey downward into site or execute stealthy peeking maneuvers.
- Vents (T): From secret tunnel to B site or descent into B—maintaining ventilation control translates into surprise attack potential.
- Silo / Floor (T post-plant): Excellent cover, angles to obstruct rotations, and secure crossfire potential.
Avoid remaining in stationary positions for extended durations; Ts and CTs will pre-nade or pre-flash those locations. Maintain readiness to alternate or rotate positions.
Buying Smart on CT and T Sides
Nuke proves merciless—suboptimal purchasing decisions can forfeit rounds. Here’s economic management methodology:
CT Side:
- Initial rounds: emphasize tactical equipment (smokes, molotovs) above firearms. Partial purchase if necessary.
- Intermediate rounds: comprehensive purchase including utility becomes standard—never economize on smoke deployment because exterior dominance remains essential.
- During economic constraints: acquire UMPs, CZs, or SMGs but retain single smoke or molotov. That individual utility item can delay T advancement.
T Side:
- You require utility, but your firearms need reinforcement. During economic rounds, concentrate on affordable smokes, HE grenades.
- Forced rounds: prioritize weaponry above armor if executing aggressive maneuvers with utility assistance.
- When Ts maintain favorable economy, transport multiple smoke and flash devices—even sacrificing rifle acquisition if it enables more reliable site execution.
- Avoid exclusively stockpiling weapons; allocate resources toward utility to incapacitate CT defensive structures.
Secret Control Like a Pro
Secret tunnel constitutes the principal conduit connecting Outside to B bombsite. When Ts establish Secret dominance, they unlock accessibility to the most vulnerable CT defense position. However, maintaining or contesting Secret control demands more than basic navigation. Here’s professional execution methodology:
For CTs:
- Early Molotovs and Smokes: Professional CTs frequently deploy molotovs across Secret staircases or activate exterior smokes to obstruct Ts from establishing clear advancement routes. This delays the assault or compels Ts to expend utility resources inefficiently.
- AWP Angles from Garage: Numerous elite AWPers maintain pixel-perfect angles from Garage overlooking Secret crossing points. It’s a demanding shot but highly rewarding—intercepting Ts during their transition into hazardous zones.
- Secret Stack: Periodically, CTs position rifler personnel within Secret utilizing SMG or M4 weaponry, holding passive angles. If Ts advance recklessly, it generates uncontested eliminations or dual frag opportunities.
For Ts:
- Wall of Smokes: The “wall of smokes” represents standard strategic approach. Ts launch 3-4 smoke grenades to obscure Garage, Red, and Secret pathways—completely eliminating visibility from Mini and Heaven positions.
- One-Way Smokes: Certain professionals deploy smoke at Secret entrance maintaining minimal aperture, permitting visibility of CTs penetrating while remaining undetected.
- Split Pushes: Combine advancement from Secret with simultaneous pressure from Ramp or Ventilation sectors. This partitions CT attention and elevates your probability of successful B-site capture.
Securing Secret control without suffering personnel losses represents a skill distinguishing competent teams from exceptional units. You require precise utility coordination, perfect timing synchronization, and comprehensive map awareness to achieve consistent execution.
Vents and Heaven Rotations Timing
The authentic potency of Nuke resides within velocity and adaptability of rotational capabilities—when properly timed. Professional competitors master ventilation descent and heaven transition maneuvers without revealing intelligence. Here’s their execution methodology:
CT Rotations:
- Silent Drop to B from Vents: If you crouch-descend and employ correct angles, you can silently rotate to B. This proves essential when reinforcing B without alerting Terrorist forces.
- Heaven to A via Ladder Room: This rotational pattern enables rapid A site reinforcement while avoiding exposure from Lobby or Mini sectors.
- Fake Rotates: CTs will sporadically simulate rotational audio (ventilation descent or heaven ladder sound) to decoy Ts into excessive commitment or rushed site assaults.
T Side Tricks:
- Fast Vent Dive: Certain Ts launch immediate door molotov followed by ventilation dive maneuver. This frequently surprises CT defenders—particularly when executed during round initiation phases.
- Late Vent Split: While the round progresses deliberately, a T covertly infiltrates ventilation while teammates secure Heaven or Ramp control. This concluding round compression overpowers even veteran defensive units.
Timing synchronization here proves paramount. Misjudge your rotation by single seconds, and you encounter stacked defensive formations. But time it perfectly, and you surprise your opposition during vulnerable moments.
Nuke transforms CS2 into a three-dimensional chess match where vertical strategy overcomes raw mechanical skill. This nuclear facility’s layered architecture creates a playground for tactical minds who understand that positioning trumps pure aim in most engagements.
Every engagement point features multiple elevation levels, creating situations where you might hear footsteps above while being eliminated from below. The map’s complexity stems from overlapping sightlines across five distinct vertical layers, making it fundamentally different from traditional linear maps like Dust2 or Mirage.


Nuke stands alone in the competitive map pool as the only environment where bomb sites stack vertically rather than spreading horizontally. This architectural decision fundamentally alters rotation patterns, defensive positioning, and attack timing considerations.
The auditory dimension introduces another strategic layer—vent drops, squeaky door openings, and secret tunnel movements all generate distinct sound signatures that skilled players leverage for deception, rotation baiting, and information gathering.
Outside area functions as the map’s central nervous system. Controlling these open spaces enables Terrorists to execute undetected secret pushes that collapse B site from unexpected angles. Conversely, CTs who dominate outside with well-placed AWPs and smokes can completely suffocate T-side options.
Tight choke points including hut, squeaky, and ramp transform minor positioning errors into round-ending mistakes. Nuke systematically rewards structured team play while punishing individualistic approaches.
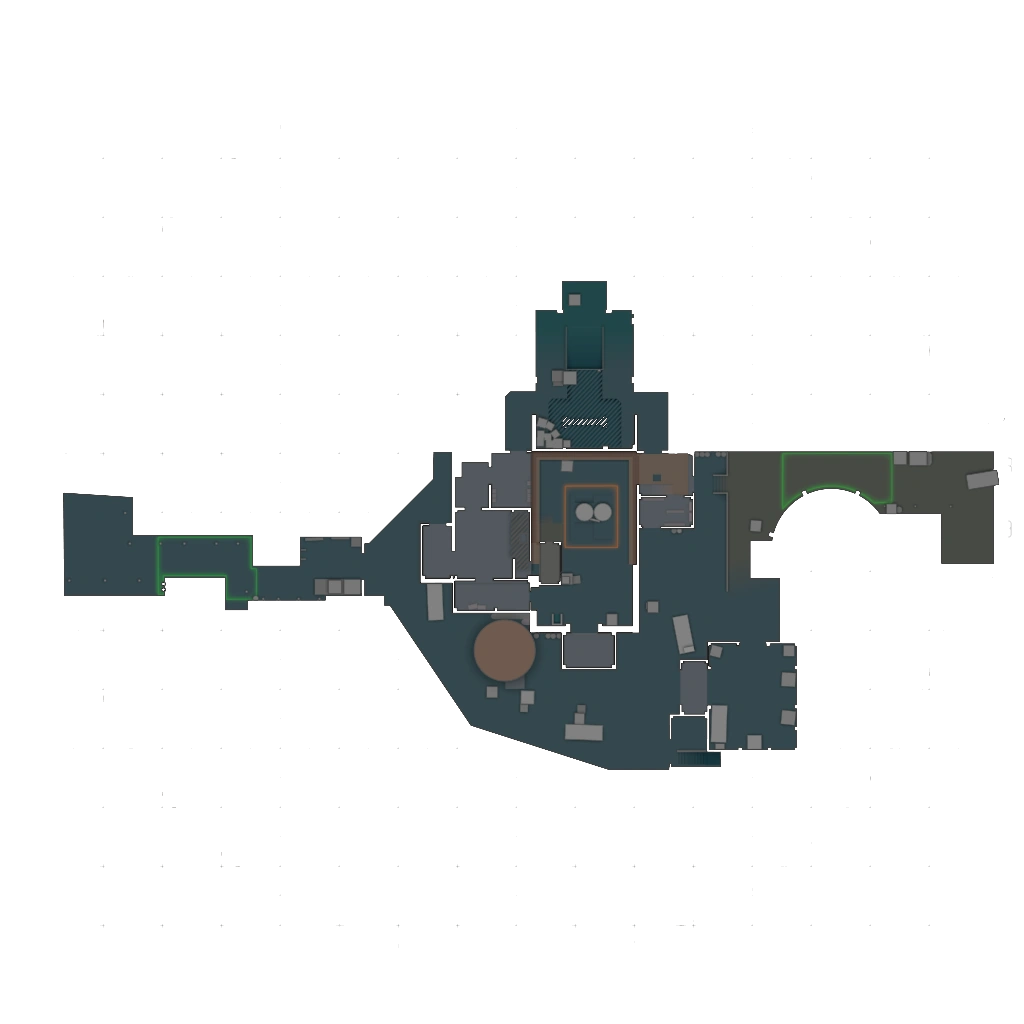

Overview of Upper and Lower Sites
Understanding Nuke’s basic architecture is non-negotiable. The map contains two primary bomb sites: A (upper level) positioned directly above B (lower level). These vertically stacked objectives connect through two critical pathways: the vent network and the underground secret route.
A Site (Upper):
- Located directly above B site with direct visual oversight
- Accessible through multiple entry points including squeaky door, hut from lobby, heaven access, and vent connections
- Defensive strongholds encompass heaven, rafters, floor positions behind silos, and mini access
B Site (Lower):
- Presents greater access challenges for Terrorists
- Typically entered through vent systems or the extended secret/outside path
- Key defensive locations include double door positions, control room, dark corners, and single door access
Rotation movement between sites achieves lightning speed for CT defenders. Dropping through vents from A to B or utilizing secret and ladder room pathways enables rapid site reinforcement with minimal exposure risk.
Key Verticality and Multi-Level Design Elements
Nuke’s defining characteristic remains its unprecedented vertical complexity. While other competitive maps incorporate staircases and limited elevated platforms, Nuke functions as a multi-story structure with intersecting fields of fire. Critical considerations include:
- Crosshair Placement Complexity:
Standard horizontal aiming becomes insufficient when you must simultaneously monitor ladder ascents, ramp descents, catwalk traversals, and occasionally floor penetration sightlines. - Sound Interpretation Challenges:
Footstep audio cues become ambiguous—originating from above, below, or adjacent positions. Experienced players capitalize on this ambiguity through fake-dropping maneuvers or strategic walking instead of running. - Rotation Timing Precision:
CT rotations through vents or heaven achieve speed but introduce vulnerability. Terrorist detection of vent droppage compromises rotational security, while heaven movements expose defenders to lobby assault pressure. - Sightline Overlap Advantages:
The layered architecture frequently enables visual acquisition of opponents before reciprocal detection occurs—particularly from heaven overlooking sites or rafter positions.
Failure to comprehend this multi-tiered layout guarantees elimination by enemies positioned in unexpected vertical locations.
Standard CT Setup
Defensive positioning prioritizes map control establishment without positional overextension. A strategically balanced formation typically deploys:
- Single defender controlling Outside/Yard (mini designation) utilizing smoke deployment and visual denial to contest secret passage or external assaults.
- Two operators securing A site perimeter with complementary positioning—typically heaven or rafter overwatch combined with hut/squeaky/floor surveillance.
- Dual personnel guarding B site, commonly positioning one in control room with the other covering double door access or vent approach routes.
This tactical distribution provides operational flexibility. Terrorist A site pressure encounters established presence from both heaven and hut positions. B site assaults encounter stalling resistance from control room defenders while vent droppage meets B site personnel or rotational assistance.
Frequent round scenarios involve the Outside or mini operative deploying early-round smoke or molotov coverage, potentially delaying enemy advancement before tactical withdrawal to reinforce A site or execute rotations as situation demands.
The foundational principle in standard setup execution involves maintaining information superiority. Counter-Terrorist units must consistently maintain awareness or establish reasonable suspicion regarding Terrorist control over secret, ramp, or yard territories. Employ irregular peek timing, utility deployment, and crossfire establishment to eliminate surprise engagements.
Aggressive CT Plays
While standard formations provide reliable defense, coordinated CT squads benefit from calculated aggression—particularly on Nuke’s dynamic battlefield. Strategic offensive maneuvers include:
- External pressure application: Two CTs advance aggressively into yard/secret territory during early round phases to contest and potentially eliminate Terrorists attempting external control establishment.
- Ramp or lower territorial challenges: B site defenders can press forward or execute lower ramp reconnaissance. Objective involves intercepting Terrorists during site approach or securing early elimination trades. This high-risk approach demands flash support coordination or smoke concealment deployment.
- Proactive heaven control assumption: Rather than passive heaven positioning, certain defenders advance into ladder room or establish forward rafter or cover positions.
- Deceptive rotation simulation or isolation engagement creation: Deploy one or two CTs deep into enemy territory to simulate rotational movement. Successful deception prompts Terrorist commitment to opposite site, creating vulnerability exposure.
Aggressive tactical implementation on Nuke requires selective application timing. Once Terrorists establish map dominance or utility superiority, overextension frequently becomes tactically suicidal.
How to Control Outside Efficiently
External territory (yard/secret designation) functions as primary engagement zone for numerous Nuke rounds. Control establishment provides Terrorists with strategic options; territorial loss typically results in containment scenarios. Strategic external management approaches include:
- Smoke and Molotov Synchronization
Early deployment of established smoke patterns including “Red to Secret,” “Window to Secret,” “Lower Yard” coverage. Molotov deployment can obstruct secret advancement corridors or deny Terrorist movement through yard door access points. - Spawn or mid territorial reconnaissance at optimal timing
Counter-Terrorist operatives may execute yard or secret observation during round commencement to apply pressure or force Terrorist utility conservation. - Crossfire establishment with multi-angle coverage
One defender monitors secret door access while another surveils yard territory from mini or hut positions. - Rotation support implementation with tactical precision
When Terrorists commit to external-driven B site division, the external CT operative should maintain readiness for tactical withdrawal or crossfire participation. - Utility deployment for information denial
Smoke or flash deployment that obstructs Terrorist visual acquisition of interior positions or defender nest locations can dramatically alter engagement outcomes.
Default T-Side Control
As Terrorist operative, primary objective involves territorial control establishment and defensive probing rather than blind full commitment. Effective default T-side strategy typically incorporates:
- External/Secret presence maintenance
Deploy one or two Terrorists to secure outside yard and secret control. Utilize smoke deployment and flash coordination to incrementally advance while denying Counter-Terrorist visual intelligence. - Ramp pressure application
One or two Terrorists apply ramp territorial pressure to force B site defensive response activation. - Counter-Terrorist rotation pathway connection
Maintain positional presence in lobby, main, or hut areas to monitor CT rotational movement patterns. - Mid territorial control establishment
Select Terrorists execute reconnaissance from ramp into vents or vent systems into B to determine vent defensive coverage.
The “default” strategy emphasizes methodical, controlled territorial advancement, intelligence gathering, and defensive option exhaustion before tactical commitment.
How to Execute A Site
A site penetration presents significant challenges due to vertical angle complexity, heaven control superiority, and hut defensive strength. Reliable assault methodology includes:
- External pressure & secret utilization as deceptive or genuine threat
When Counter-Terrorists heavily commit to B site defense, strong external pressure or secret advancement can dilute A site defensive coverage. - Smoke deployment for hut, squeaky, heaven, rafter coverage
Critical smoke placements include blocking CT visual lines from heaven to site, hut entry denial, and rafter visual obstruction. - Utility concentration in site entry zones
Employ molotov deployment on rafter positions, force CT displacement from box or silo cover, and combine flash deployment from multiple vectors to disable defenders. - Tradable angle establishment & crossfire creation
Following site penetration, Terrorists should establish crossfire positions: one operative secures mini or floor control while another monitors hut or squeaky access. - Post-plant positional deployment
After bomb deployment, position one Terrorist in silo or floor coverage, another in heaven or rafter positions if feasible, with remaining personnel controlling mini or hut territories.
The strategic key involves simultaneous collapse of all utility-intensive zones, overwhelming residual A site defense, and subsequent post-plant position consolidation.
How to Execute B Site via Ramp or Secret
B site presents inherent penetration difficulty, but secret/vent pathways provide tactical alternatives. Strategic approach methodology:
Via Ramp (Lower Pathway):
- Utilize early smoke deployment to cover double door access, control room sightlines, and vent exit coverage zones.
- Deploy multiple personnel through ramp advancement while others proceed through secret/vent routes to compress B site defenders.
- One or two Terrorists can establish ambush positions at vent droppage into B, intercepting CTs during retake attempts or rotational movements.
Via Secret + Vent Drop (Upper to Lower):
- Terrorists establish secret control and advance into ladder room or secure vent proximity.
- Execute vent droppage into B site. Employ utility coordination to secure vent droppage zones, preventing CT pre-aim positioning or flash countermeasures.
- Simultaneously deploy Terrorists through ramp to execute dual-vector B site assault.
Utility deployment requires precise synchronization. Effective flash coverage over double door and control room areas proves essential. Molotov deployment assists in denying CT defensive positions in confined corners or box coverage.
Following bomb deployment, maintain interior site control (dark zone, double door, forward positions), and position operative in vent drop pathway or secret territory to delay rotational counterattacks.
Best Smokes, Flashes, and Nades on Nuke
Outside Smokes (Red to Secret, Wall of Smokes)
External territory represents critical engagement zone where strategic smoke deployment controls round tempo regulation. Classic smoke deployments include:
- Red to Secret coverage: Blocks CT visual intelligence from external into secret pathway access.
- Windows to Secret / Lower Yard obstruction: Obscures Counter-Terrorist reconnaissance capability from mini or window positions.
- Wall-of-smoke tactical implementation: Employment of multiple smoke deployments in barrier formation to obstruct extensive visual coverage—particularly valuable during external advancement or yard transition phases.
Deployment timing proves critical—premature smoke activation enables CT penetration following dissipation, while delayed deployment allows CT visual establishment.
- Flash deployment strategies
- Pop-flash deployment toward heaven or ruft/rafter positions to prevent defender pre-aim capability.
- Rear-echelon flash deployment for deep site defensive coverage.
- Flash deployment over hut structures or through squeaky access to disable defenders.
- Molotov / HE grenade deployment
- Dislodge defenders from rafter positions, silo coverage, or box concealment.
- Jump denial onto silo structures or elevated angle access.
- HE grenade deployment into confined spaces (box coverage, dark corner positions) can inflict health degradation or movement disruption.
- Molotov placement within vent systems or ladder room access, preventing CT safe utilization of these pathways.
- Smoke deployment to obstruct rotational door access or cross pathway blockage.
- Flash deployment over primary pathways during rotation timing to disable defenders during inter-site movement.
- Delayed smoke activation: maintain deployment readiness until CT rotational initiation, then execute smoke deployment to block pathway access or visual acquisition.
- Initial rounds: prioritize utility acquisition (smokes, molotovs) over weapon superiority. Partial purchase execution if necessary.
- Intermediate rounds: complete purchase with utility standard—never compromise smoke deployment because external control proves vital.
- During economic constraints: acquire UMPs, CZs, or SMGs while maintaining single smoke or molotov reserve. This singular utility deployment can stall Terrorist advancement pressure.
T Side Economic Considerations:
- Utility requirement exists, but weapon systems demand backup support. During economic round conservation, concentrate on economical smoke deployment, HE grenade acquisition.
- Force round execution: prioritize weapon systems over armor protection when executing aggressive utility-supported assaults.
- During favorable Terrorist economic conditions, transport multiple smoke and flash deployments—potentially prioritizing over rifle acquisition if ensuring site execution reliability.
- Avoid exclusive weapon accumulation; invest in utility deployment to cripple CT defensive structures.
When to Force or Eco Based on Round Win Probability
- Following CT side victory sequences: If Counter-Terrorists secure 4–5 consecutive rounds, T side frequently must execute force or partial purchase strategies.
- CT side economic decisions: if experiencing sequential round losses and unable to afford complete purchases, execute partial purchases to maintain competitive capability.
- Deceptive or surprise force implementation when opponents anticipate economic conservation—tactical alteration and rush execution with utility deployment to intercept CT unpreparedness.
Positioning and Crosshair Placement
How to Master Multi-Level Angles
Crosshair positioning on Nuke demands vertical consideration beyond standard floor-level alignment. Strategic recommendations:
- Pre-aim common head elevation at elevated angles (rafter positions, heaven access, vent droppage zones). Avoid excessive low aiming.
- During ladder ascension or ramp advancement, adjust crosshair elevation early during movement.
- Employ horizontal crosshair positioning (lateral sliding movement) to track multi-level entry points.
- Following utility deployment or angle forced opening, reposition crosshair to anticipated enemy emergence locations.
High-Impact CT and T Positions
Specific positions provide disproportionate tactical influence:
- Heaven (CT defensive): Overlooks A site territory, facilitates rotational assistance, enables ramp observation or crossfire establishment.
- Rafter positions (T or CT utilization): Provides elevation advantage for downward site observation or covert reconnaissance execution.
- Vent systems (T offensive): From secret to B site or droppage to B—vent control maintenance enables surprise assault potential.
- Silo / Floor coverage (T post-plant): Provides effective cover, rotational blocking angles, and secure crossfire capability establishment.
Avoid prolonged static position maintenance; Terrorists and Counter-Terrorists will execute pre-nade deployment or pre-flash countermeasures against these locations.
Action Checklist
- Practice vertical crosshair placement focusing on heaven, rafters, and vent drop angles
- Master 3 critical outside smokes: Red to Secret, Windows to Secret, and Wall-of-Smoke formations
- Develop team communication protocols for multi-level callouts
- Implement economic decision-making frameworks based on round win probability
- Study professional match demos focusing on rotation timing and utility usage
- Practice all essential callouts with team members until instant recognition achieved
- Master 3 critical smoke lineups for outside control and site entry
- Develop muscle memory for vertical crosshair placement through workshop map training
- Establish communication protocols for multi-level sound interpretation
Site Entry Flashes and Molly Spots
During A or B site penetration, utility deployment functions as primary tactical instrument. Recommended application methodologies:
Utility to Deny CT Info or Rotations
Counter-Terrorist rotation disruption or information denial achievement possible through strategic utility employment. Tactical methodologies include:
Nuke Economy Management Tips
Buying Smart on CT and T Sides
Nuke’s unforgiving nature transforms economic mismanagement into round-costing errors. Strategic economic oversight approaches:
CT Side Economic Strategy:
No reproduction without permission:Tsp Game Club » Nuke Guide: Callouts, Tips, and Strategies
