TL;DR
- Master 6 essential smoke lineups for complete mid and site control
- Learn proper timing coordination to make utility effective rather than wasted
- Practice defensive setups to delay pushes and control rotations
- Coordinate team utility combos for unstoppable executes
- HE grenades become round-winning tools when timed with sound cues and enemy movements
Welcome to the definitive guide for mastering utility deployment on Mirage in Counter-Strike 2 (CS2). If you’re determined to gain a tactical advantage on one of competitive gaming’s most revered battlegrounds, this comprehensive playbook delivers everything needed. From scientifically precise smokes that eliminate sightlines to strategically timed flash arrangements that disorient opponents just long enough for clutch victories — we cover all essential techniques. This extends beyond basic instruction; it’s a systematic deconstruction of how to command Mirage with professional expertise.
Let’s immediately immerse ourselves in the realm of smoke grenades, Molotov cocktails, explosive devices, and flash disorientation tools — all customized specifically for Mirage’s unique architecture.
Introduction to Mirage – The Competitive Staple
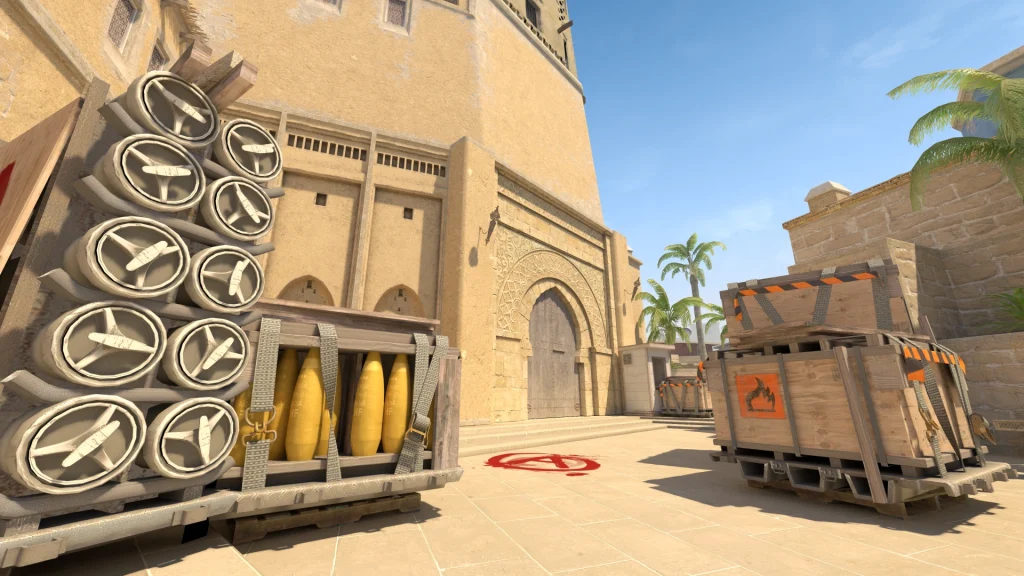

Why Mirage Stands Out
Mirage represents the premier selection for numerous Counter-Strike 2 (CS2) competitors. It achieves equilibrium between extended visual corridors, confined passageways, and multiple pathways for tactical grenade employment. Contrasting with maps featuring more artificial complexity, Mirage demonstrates elegant simplicity in layout while offering profound strategic depth. This distinctive combination establishes its popularity across professional and recreational player bases alike.
But what genuinely distinguishes Mirage as exceptional? Primarily, the mid territory dominance dynamic. It stands among the limited battlegrounds where securing central control can determine the complete tempo of engagement. When Terrorists achieve mid command, they can seamlessly transition toward A or B objectives, sever reinforcement routes, or even simulate bombsite assaults. For Counter-Terrorists, preventing mid access translates to constricting Terrorist strategic alternatives. This entire framework constructs a tactical environment where grenades transition from optional to fundamentally indispensable.
Additionally, every segment of Mirage — ranging from Palace structures to Catwalk pathways — can be transformed into utility ambush zones. With properly executed smoke screens and flash disorientation, you can systematically dismantle defensive formations or postpone advances sufficiently for reinforcement arrival.
Importance of Utility on Mirage
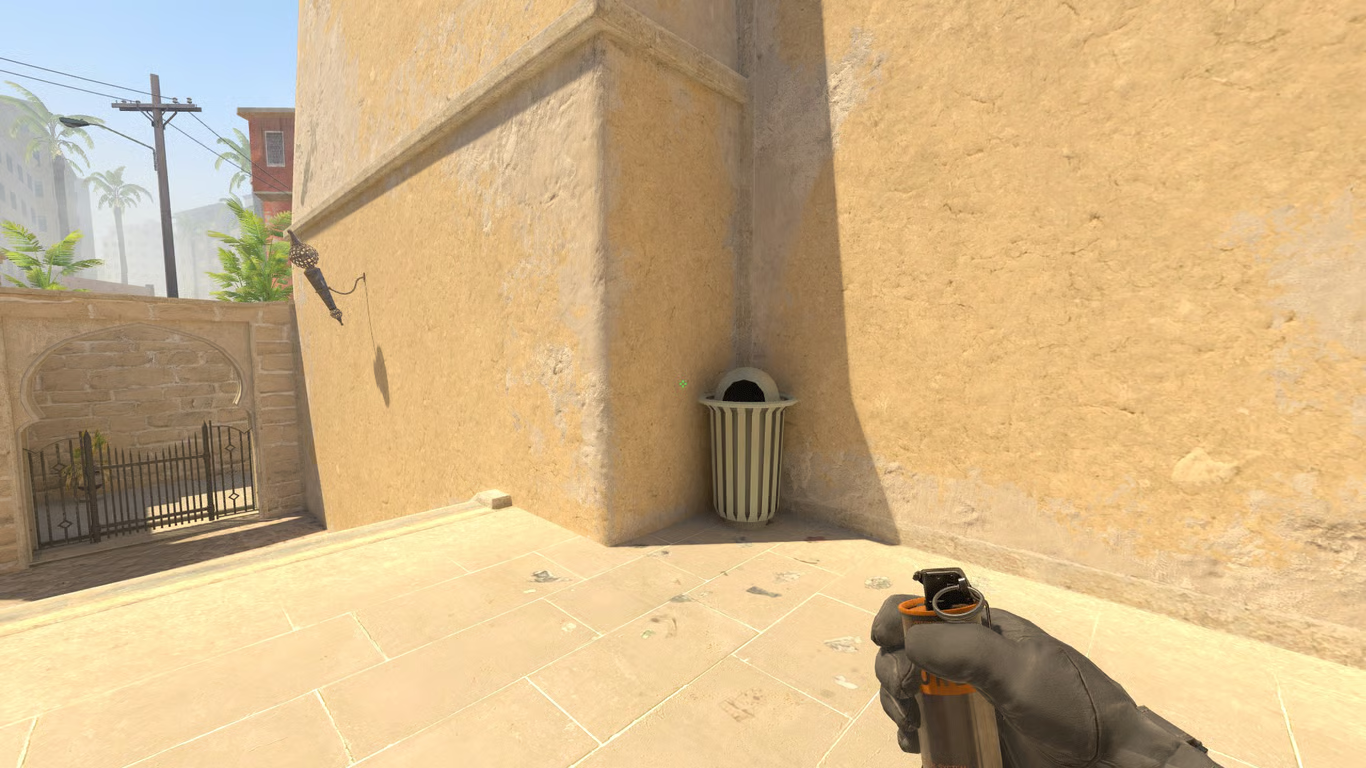

Now, let’s address reality directly. Firearm proficiency alone cannot sustain performance on Mirage. What distinguishes competent participants from exceptional performers is their application of tactical equipment. You might possess impeccable targeting skills, but if incapable of obscuring Connector passageways or coordinating entry flashes onto B bombsite, you’ll forfeit most engagements before combat initiates.
Smoke deployments block critical sightlines including Window positions, Connector access, or CT spawn visibility. Flash devices facilitate territory acquisition without detection exposure. Molotov incendiaries eliminate concealed positions beneath Balcony structures or Van coverage. High-explosive grenades weaken concentrated defensive arrangements or compel adversaries from protective positions.
Therefore, if aspiring to advance through competitive tiers or simply cease functioning as team liability, mastering Mirage utility becomes absolutely non-negotiable. Let’s commence with foundational elements.
Types of Utility: Smokes, Flashes, Molotovs, and HE Grenades
Within Counter-Strike 2 (CS2), each equipment category serves distinct tactical purposes, and comprehending these functions proves crucial for effective Mirage implementation:
- Smoke Grenades: Employed for vision obstruction — fundamentally necessary for eliminating sniper sightlines or preventing information gathering. Consider: Window coverage, CT spawn denial, and Jungle area smokes.
- Flashbangs: Momentarily impair vision for opponents facing their detonation direction. Ideal for aggressive advancement or scanning contested zones.
- Molotovs (or Incendiaries for CTs): Inflict zone-specific damage and inhibit enemy progression through specific locations. Excellent for evacuating frequently utilized concealment spots.
- HE Grenades: Deliver explosive impact damage and can be launched into bottleneck areas or beyond smoke screens to surprise opponents.
Perfecting timing selection and positioning for each classification will provide substantial advantage, particularly on environments like Mirage where equipment conflicts frequently determine bombsite command acquisition.
Timing and Coordination with Teammates
Even the most perfectly positioned smoke deployment worldwide proves useless if launched prematurely or belatedly. Chronological precision represents everything. Smokes should materialize immediately preceding team advancement, not half-minute early. Flash detonations must occur precisely when allies approach corners, not subsequent to fatal headshots.
Synchronize with your squad members:
- Announce when executing CT smoke deployment or Ramp flash coordination.
- Request Molotov application beneath Balcony during A bombsite assaults.
- Coordinate Market smoke timing during B pushes to intercept rotation patterns.
Verbal coordination transforms your equipment into orchestrated devastation. Otherwise, you’re simply discarding $300 currency units into atmospheric nothingness.
Top Mid Smoke
Securing central territory constitutes the foundation of any Mirage Terrorist strategy, and the Top Mid Smoke represents the access point. This deployment eliminates Window visibility and permits secure transition toward underpass systems or Connector pathways.
How to throw it:
- Position your operator within T-Spawn proximity to refuse container.
- Align with particular window structural elements or architectural pixels (verify using lineup verification servers or workshop modifications).
- Implement jump-throw binding mechanisms for replicable consistency.
This smoke placement reaches Top Mid periphery, concealing Counter-terrorist Window positions from observing your progression. When combined with Window Smoke deployment, this evolves into lethal combination for central territory acquisition.
Why it matters:
Absent this smoke screen, any sniper specialist positioned within Window will annihilate your squad’s forward momentum. Single elimination can sufficiently obstruct complete mid command. Never omit this — establish as instinctive behavior.
Window Smoke
The established standard. Among the most critically important smokes on Mirage — unquestionably. The Window Smoke prevents Counter-terrorist sniper specialists from utilizing optimal visual locations and assists Terrorists in establishing early-round central control.
Where to throw from:
- Position at T-spawn rear barrel alignment.
- Target slightly elevated above specific antenna structures or building corners.
- Employ jump-throw binding for pinpoint accuracy.
When correctly positioned, the smoke entirely obscures Window perspective. CT operators might attempt short position elevation to observe beyond obstruction, but they’ll necessitate exposure commitment.
Mistakes to avoid:
- Excessive propulsion causing interior Connector landing.
- Insufficient propulsion resulting in edge impact failure to block Window visibility.
Practice this technique until encoded into neuromuscular memory systems.
One-Way Smokes on Mirage
One-way smoke deployments represent stealth-oriented, tactical instruments that provide visual acquisition while your opponents remain visually impaired. Mastering even singular examples of these techniques can secure combat victories before initiation.
Popular one-way smokes:
- A Ramp (CT side): A smoke positioned immediately leftward of wooden scaffold structures enables Ramp observation while maintaining concealment.
- Connector (T side): A deeply placed smoke launched during mid lurking permits observation of foot movement from Jungle areas.
- B Apps Window (CT side): Deploying smoke along ledge surfaces allows Apartments direction viewing with minimal exposure risk.
Why it works: You generate visual superiority — observing hostile forces before their detection capability. It’s analogous to possessing legitimate wall penetration awareness.
Caution: These smoke placements depend critically on exact positioning accuracy. If incorrectly placed, they become ineffective or potentially detrimental — revealing tactical positioning.
Practice is essential. Utilize workshop modifications to perfect techniques and ensure execution capability under pressure conditions.
Pop Flashing Mid or A Ramp
A pop flash represents a flashbang device that detonates instantly following visual appearance, providing opponents zero reaction time for evasion. These represent match-altering elements on Mirage environments.
Pop Flash for Mid:
- From T-Spawn or Top Mid positions, ricochet flash deployment adjacent to Window structures or underpass systems.
- It should explode precisely when teammates examine mid from container positions.
Pop Flash for A Ramp:
- From Palace or deep Ramp locations, bounce flash mechanisms off wall surfaces or scaffold frameworks.
- Perfect for confronting aggressive Counter-terrorist Ramp defenders from Stairwell or Jungle positions.
Benefits:
- Disorients hostile forces before defensive reaction.
- Avoids blinding allied operators with proper timing execution.
- Generates chaotic situations enabling victory in confrontations typically lost.
Advanced play: Pop flash self-entry into A Ramp during individual advancement, or decoy using fake flash then approach without flash protection.
Mid Control with Smokes and Molotovs
As Counter-terrorist operatives, commanding central territory resembles controlling Mirage’s circulatory system. If Terrorists secure Mid uncontested, you’re compelled toward passive A and B site defense. This explains why equipment utilization within central areas represents tactical priority.
Smokes to use:
- Top Mid Smoke: Obstructs Terrorist rapid control acquisition.
- Window Smoke (from CT side): Can be employed early for self-obscuration and re-engagement with teammate support.
- Connector Molotov: Halts Mid division assaults or advancement attempts.
Molotovs:
- Molotov deployment within Underpass areas prevents concealed attackers attempting B site division strategies.
- Ladder Room Molotov assists preventing rapid Connector or short position gameplay.
Best practice:
- Designate one participant (typically Mid anchoring specialist) for early equipment employment.
- Rotate secondary CT operative when necessary to assist Mid contestation.
- Combine smoke delay tactics with flash coordination to regain command if compromised.
Practicing Lineups in Offline Servers
Before accessing ranked competitive matches and initiating grenade deployment, you require precise lineup acquisition — and superior methodology involves utilizing offline server environments.
How to set up:
- Launch Counter-Strike 2 (CS2) utilizing console directive:
map de_mirage. - Activate cheat systems:
sv_cheats 1. - Employ
sv_infinite_ammo 1to eliminate equipment depletion concerns. - Use
bind KEY “sv_rethrow_last_grenade”for identical grenade repetitive testing.
Why practice here?
- Zero pressure from allied or hostile operators.
- You can perfect jump-throw mechanics, rapid lineup systems, and even develop customized techniques.
- Test projectile physics characteristics and smoke landing positions across different map sectors.
Bonus tip: Enable noclip functionality for aerial navigation and precise grenade impact location observation. This assists adjustment of propulsion elevation or positioning when discrepancies occur.
Incorporate into daily preparation routines. Even brief ten-minute daily smoke mastery sessions can significantly elevate gameplay performance.
Using Jump-Throw Binds
Certain elite Mirage smokes — including the Window smoke — demand absolute precision and chronological accuracy. This explains the jump-throw binding implementation necessity.
What it is:
- A jump-throw binding mechanism permits simultaneous jumping and grenade propulsion via singular button activation, eliminating inconsistency factors.
How to set it up:
- Add this configuration to your Counter-Strike 2 (CS2) setup or console interface:
alias "+jumpthrow" "+jump;-attack"alias "-jumpthrow" "-jump"bind alt "+jumpthrow"
Why it matters:
- Eliminates timing inaccuracies.
- Guarantees replication consistency for extended-distance or confined-window smoke deployments.
- Enhances operational efficiency and reduces dependence on random chance factors.
Practice tip: Employ this binding exclusively during training sessions until becoming instinctive behavior.
While often overlooked in favor of flashier utility, HE grenades deliver exceptional value during post-plant situations when you understand enemy rotation patterns and common retake routes. Their explosive potential extends beyond raw damage to include psychological impact and area denial capabilities that can secure round victories.
Timing-Based Defensive Execution:
- Footstep-reactive deployment: Time your HE throws to detonate exactly when CT footsteps reach choke points like Ramp, Palace, or Market Door.
- Damage confirmation follow-ups: When teammates report enemy damage indicators, immediately capitalize with targeted grenade placements to eliminate weakened opponents.
- Corner clearance protocols: Force defenders out of standard plant zone hiding spots or confined spaces such as Under Balcony and Van positions.
Psychological Warfare Elements: The auditory and visual disturbance from HE detonations frequently causes hesitation in enemy pushes, creating additional time advantages or setting up favorable peeking opportunities.
- Add this configuration to your Counter-Strike 2 (CS2) setup or console interface:
- A Ramp defensive advantage (CT perspective): Positioning smoke slightly left of the wooden scaffold structure enables Ramp observation while maintaining concealment.
- Connector infiltration technique (T side): Deploying a deeply placed smoke while positioning mid allows visibility of foot traffic approaching from Jungle territory.
- B Apartments window control (CT positioning): Placing smoke precisely on the window ledge facilitates Apartments surveillance with drastically reduced exposure.
- Initiate from T-Spawn or Top Mid positioning, bouncing flashes strategically against walls adjacent to Window or underpass areas.
- Perfect synchronization ensures explosion precisely as teammates initiate peeks from box cover positions.
- Execute from Palace or deep Ramp positioning, utilizing wall or scaffolding surfaces for flash deflection.
- Ideal for confronting aggressive CT players holding Ramp sightlines from Stairs or Jungle defensive setups.
- Disorients opposition before defensive reactions can execute properly.
- Prevents teammate vision impairment when timing coordination is executed correctly.
- Generates chaotic situations that enable winning duels that would typically result in elimination.
- Smoke Grenades: Deployed to obstruct visual lines — fundamentally essential for neutralizing sniper positions or denying enemy intelligence gathering. Consider: Window, CT spawn, and Jungle smoke placements.
- Flashbangs: Temporarily disorient opponents within their visual field. Ideal for aggressive advances or peeking contested zones.
- Molotovs (or Incendiaries for CTs): Inflict area-of-effect damage and prevent enemy advancement through specific areas. Excellent for eliminating opponents from common hiding locations.
- HE Grenades: Deliver explosive impact damage and can be deployed into choke points or behind existing smokes to surprise enemies.
- Announce when you’re deploying CT smoke or flashing Ramp.
- Request Molotov coverage on Under Balcony during A site executions.
- Synchronize Market smoke deployment on B with short area advances to catch rotating defenders unprepared.
- Position your operative in T-Spawn vicinity near the refuse container.
- Align with specific architectural elements or pixel-perfect reference points (verify using lineup servers or workshop maps).
- Implement jump-throw binding for consistency.
- Position behind the T-spawn barrel structure.
- Target slightly above specific antenna arrays or building corner references.
- Utilize jump-throw binding for precision execution.
- Overthrowing resulting in Connector area placement.
- Underthrowing causing edge impact failure to obstruct Window visibility.
- Advance toward “Top Mid” container structures.
- Target above wall corner sections or window frame elements (consult your preferred lineup methodology).
- Execute standard left-click deployment.
- During mid-to-A split executions.
- Following mid control establishment and Cat or Short area advances.
- To bait Counter-Terrorists into peeking from Jungle or Ticket positions.
- Initialize CS2 using console command:
map de_mirage. - Activate cheat commands:
sv_cheats 1. - Implement
sv_infinite_ammo 1to maintain unlimited grenade availability. - Configure
bind KEY “sv_rethrow_last_grenade”to repeatedly test identical grenade deployments. - Zero pressure from teammates or opposition forces.
- You can refine jump-throw executions, rapid lineup deployments, and even develop personalized tactical placements.
- Test projectile physics and smoke deployment patterns across different map sectors.
- A jump-throw binding enables simultaneous jumping and grenade deployment through single-button activation, eliminating execution inconsistency.
Advanced Coordination Mechanics: Synchronize HE usage with auditory intelligence and teammate callouts. Haphazard throwing squanders valuable resources, while calculated deployment transforms them into match-deciding assets.
Pro Tip: In 1v2 or 1v3 post-plant scenarios, prioritize HE usage on the most likely retake path rather than spreading damage across multiple angles.
One-way smoke setups represent sophisticated tactical instruments that grant you visual superiority while leaving adversaries completely blinded. Perfecting just one or two of these specialized deployments can secure eliminations before engagements formally initiate.
Strategic One-Way Locations:
Operational Mechanics: These specialized smokes generate asymmetrical visual superiority—observing enemies before they detect your presence. Essentially providing legitimate wallhack capabilities within game mechanics.
Critical Implementation Notes: These advanced smoke variations depend entirely on millimeter-perfect positioning accuracy. Even minor placement errors render them completely ineffective or potentially reveal your tactical position to opponents.
Practice Imperative: Dedicated training using community workshop maps is mandatory to refine these techniques and ensure reliable execution during high-pressure competitive situations.
Common Pitfall: Many players underestimate the precision requirements, attempting these smokes without sufficient repetition, resulting in wasted utility and compromised defensive positions.
Pop flash mechanics involve flashbang detonation occurring immediately upon becoming visible to opponents, eliminating any reaction window. These become pivotal round-altering tools on Mirage’s tactical landscape.
Mid Control Flash Variations:
A Ramp Aggressive Entry Setups:
Tactical Advantages:
Advanced Application: Self-pop-flash into A Ramp during solo push maneuvers, or employ decoy flash tactics followed by unannounced peeks.
Execution Timing: The critical success factor involves ensuring the flashbang’s visibility and detonation phases occur nearly simultaneously.
Welcome to the definitive guide for mastering utility usage on Mirage in Counter-Strike 2 (CS2). This comprehensive resource delivers expert-level smoke grenades, flash setups, and Molotov placements that will transform your gameplay on this iconic competitive battleground. From precision smoke lineups that block critical sightlines to explosive grenade combinations that secure round wins, this guide provides the tactical edge needed to dominate Mirage matches.
Let’s explore the strategic deployment of smoke grenades, Molotovs, HE explosives, and flashbangs — all specifically designed for Mirage’s unique layout.
Introduction to Mirage – The Competitive Staple


Why Mirage Stands Out
Mirage consistently ranks as the preferred competitive map for CS2 enthusiasts due to its balanced combination of extended sightlines, confined passageways, and multiple strategic utility deployment opportunities. Unlike maps with gimmicky mechanics, Mirage features straightforward design principles with profound strategic depth in execution. This accessibility combined with competitive complexity makes it popular across professional and casual player bases.
What truly distinguishes Mirage within the competitive landscape? Primarily, the mid control dynamic represents one of the few maps where securing mid can determine the entire round tempo. When Terrorists establish mid control, they gain flexibility to pivot between A and B sites, intercept rotation paths, or execute fake attacks. For Counter-Terrorists, denying mid access effectively restricts Terrorist tactical options. These elements combine to create a strategic environment where utility deployment transitions from optional to absolutely essential.
Additionally, every strategic position on Mirage — from Palace to Catwalk — can be converted into utility-based tactical advantages. With properly executed smoke screens and flashbang sequences, you can systematically dismantle enemy defensive formations or delay offensive pushes sufficiently for reinforcement arrival.
Importance of Utility on Mirage


Let’s address the reality of competitive Mirage gameplay. Firearm proficiency alone cannot guarantee success on this map. The distinguishing factor between competent players and exceptional performers lies in their utility deployment methodology. You might possess exceptional aiming skills, but without the ability to smoke Connector or flash B site entry, you’ll likely lose most rounds before direct engagements even commence.
Smoke grenades obstruct critical angles including Window, Connector, and CT spawn. Flashbangs enable territory acquisition without visual detection. Molotov cocktails eliminate enemies from concealed positions like Under Balcony or Van. High-explosive grenades weaken stacked defensive positions or force opponents from protective cover.
Therefore, if your goal involves rank advancement or simply avoiding being a liability for your team, achieving proficiency in Mirage utility usage becomes non-negotiable. Let’s begin with the foundational principles.
Understanding the Basics of Smokes and Grenades
Types of Utility: Smokes, Flashes, Molotovs, and HE Grenades
Within CS2’s tactical framework, each utility category serves distinct purposes, and comprehending their strategic applications becomes crucial for effective Mirage deployment:
Achieving mastery regarding when and where to deploy each utility category provides substantial competitive advantages, particularly on Mirage where utility engagements frequently determine which team establishes site control.
Timing and Coordination with Teammates
Even the most perfectly placed smoke grenade proves ineffective if deployed prematurely or belatedly. Chronological precision remains paramount. Smoke screens should materialize immediately preceding team advances, not ten seconds earlier. Flashbangs must detonate precisely when teammates peek corners, not after they’ve already been eliminated.
Coordinate utility deployment with squad members:
Effective communication transforms individual utility deployment into coordinated tactical symphonies. Without coordination, you’re essentially discarding $300 worth of equipment with zero tactical benefit.
Essential Smoke Lineups for Mirage
Top Mid Smoke
Establishing mid control represents the tactical foundation for any Terrorist-side Mirage strategy, and the Top Mid Smoke serves as the gateway to that objective. This smoke obstructs visual access from Window and enables safe transition to underpass or Connector areas.
How to throw it:
This smoke placement lands precisely at Top Mid perimeter, obscuring Counter-Terrorist Window positions from observing your advance. When combined with a Window Smoke, this combination becomes exceptionally effective for mid control acquisition.
Why it matters:
Without this smoke deployment, any AWPer positioned in Window can devastate your team’s tactical momentum. A single elimination might sufficiently stall your entire mid control strategy. Never omit this smoke — integrate it into your tactical muscle memory.
Window Smoke
The definitive smoke placement. One of the most crucial tactical smokes on Mirage — unequivocally essential. The Window Smoke denies Counter-Terrorist AWPer operators prime visual positioning and assists Terrorists in establishing early round mid control.
Where to throw from:
When properly executed, the smoke completely blocks Window visual access. CTs might attempt short area boosts to observe over the smoke, but they’ll need to expose their positions.
Mistakes to avoid:
Practice this deployment until it becomes ingrained in your tactical response patterns.
Connector Smoke
Planning to execute A site splits from mid? You’ll require Connector smoke coverage to prevent flanking maneuvers or elimination during short or jungle area advances.
From T-Spawn (or Mid):
When to use it:
Once Connector receives smoke coverage, your transition path from mid to A becomes significantly safer — particularly when combined with Stairs Smoke and Jungle Smoke.
Mirage Grenade Training Techniques
Practicing Lineups in Offline Servers
Before entering ranked competitive matches and initiating grenade deployment sequences, you must perfect your lineup executions — and the optimal methodology involves utilizing offline server environments.
How to set up:
Why practice here?
Expert technique: Activate noclip functionality to navigate freely and visually confirm grenade landing positions. This enables precise adjustment of deployment trajectories or positioning when discrepancies occur.
Incorporate this training methodology into your daily warm-up routine. Even dedicating ten minutes daily to smoke grenade mastery can dramatically enhance your competitive performance capabilities.
Using Jump-Throw Binds
Several of the most effective Mirage smoke deployments — including the Window smoke — demand absolute precision and timing accuracy. This represents the scenario where jump-throw binding becomes strategically essential.
What it is:
How to configure it:
- Add these commands to your CS2 configuration file or console interface:
alias "+jumpthrow" "+jump;-attack"alias "-jumpthrow" "-jump"bind alt "+jumpthrow"
Why it matters:
- Eliminates timing-based execution errors.
- Guarantees consistency for extended-distance or precision window smoke deployments.
- Enhances operational efficiency and reduces reliance on random chance factors.
Training recommendation: Employ this binding exclusively during practice sessions until it becomes instinctive operational procedure.
Watching Professional Matches for Strategic Inspiration
Have you ever contemplated how elite CS2 competitors consistently dominate Mirage gameplay? The fundamental principle: they’ve achieved mastery in utility deployment methodologies. And you can acquire substantial knowledge simply through observation.
Where to observe:
- ESL, BLAST, and IEM professional tournament matches.
- First-person perspective recordings from professional players including s1mple, NiKo, or ropz.
- YouTube analytical breakdowns of specific utility configurations on Mirage.
What to analyze:
- Their methodology for smoking Mid and establishing control.
- Their tactical application of Molotov cocktails in post-plant tactical scenarios.
- Chronological precision — observe how utility deployment synchronizes with movement patterns and team positioning strategies.
Study and implement: Apply acquired knowledge to reproduce professional-level tactical executions within your competitive matches. Eventually, you’ll begin anticipating round developments — and that represents the genuine competitive advancement threshold.
Mistakes to Avoid with Mirage Utility
Overthrowing or Underthrowing
Nothing demonstrates “inexperienced gameplay” more conspicuously than failed smoke deployments. This might appear as a minor execution error, but it can literally determine round outcomes.
Common causes:
- Failure to implement jump-throw binding configurations.
- Inaccurate positioning alignment (deviating by mere single-pixel measurements).
- Rushing lineup execution without verifying landmark references.
Corrective measures:
- Utilize offline practice server environments.
- Review unsuccessful smoke deployments within match recordings.
- Continue adjustment procedures until achieving perfect deployment consistently.
Strategic importance: A poorly executed Window smoke provides Counter-Terrorists mid control. A failed CT smoke deployment on A enables AWPer operators to maintain uncontested positioning. Never permit substandard execution to compromise your team’s strategic framework.
Welcome to the definitive guide for mastering utility deployment on Mirage in Counter-Strike 2 (CS2). This comprehensive playbook delivers advanced smoke formations and grenade tactics that transform your strategic approach to this iconic competitive battleground. From precision vision-blocking smokes to tactical flash configurations that create round-winning opportunities — we provide the complete arsenal. This transcends basic instruction; it’s your blueprint for professional-level Mirage command.
Let’s immediately explore the complete spectrum of smoke grenades, Molotovs, HE explosives, and flashbangs — all customized specifically for Mirage’s unique architecture.


Why Mirage Stands Out
Mirage represents the gold standard for competitive CS2 engagements. It achieves perfect equilibrium between extended sightlines, confined passageways, and multiple strategic utility application points. Unlike maps relying on gimmicks, Mirage features straightforward design paired with profound execution complexity. This duality establishes its popularity across professional and casual player bases.
What truly distinguishes Mirage’s design philosophy? Primarily, the mid control dynamic operates as a round-defining mechanism. Among competitive maps, few demonstrate where securing mid control determines the complete tempo of engagement. When Terrorists establish mid dominance, they gain flexible pivot capabilities toward A or B sites, can sever rotation paths, or execute convincing site fake-outs. For Counter-Terrorists, denying mid access effectively chokes Terrorist tactical options. These elements combine to create a strategic environment where utility deployment becomes mandatory — not optional.
Additionally, every strategic position on Mirage — from Palace to Catwalk — converts into utility ambush zones. With properly executed smoke screens and flash combinations, you can systematically dismantle defensive formations or delay offensive pushes sufficiently for reinforcement arrival.
Importance of Utility on Mirage


Now, addressing practical reality: isolated gunplay proficiency cannot sustain Mirage performance. What distinguishes competent players from exceptional performers revolves around utility application mastery. You might possess impeccable aim mechanics, but failure to smoke Connector properly or flash B site entry points guarantees round losses before firing exchanges commence.
Smoke deployments obstruct critical sightlines including Window, Connector, or CT spawn. Flashbangs facilitate territory acquisition without visual detection. Molotovs eliminate defenders from tight corners such as Under Balcony or Van positions. High-explosive grenades weaken stacked defensive positions or compel opponents from protective cover.
Therefore, if your objectives include competitive rank advancement or eliminating team liability status, achieving Mirage utility expertise becomes non-negotiable. Let’s commence with foundational principles.
Types of Utility: Smokes, Flashes, Molotovs, and HE Grenades
Within CS2’s tactical ecosystem, each utility category serves distinct operational purposes, and comprehensive understanding proves crucial for effective Mirage deployment:
- Smoke Grenades: Deployed for vision obstruction — essential for neutralizing sniper positions or denying intelligence gathering. Consider: Window, CT spawn, and Jungle smoke placements.
- Flashbangs: Create temporary visual impairment for enemies within their directional view. Ideal for aggressive advancement or peeking contested territory.
- Molotovs (or Incendiaries for CTs): Inflict area-denial damage and prevent enemy progression through specific locations. Excellent for eliminating opponents from common defensive positions.
- HE Grenades: Deliver explosive impact damage and can be deployed into choke points or behind smoke screens for unexpected enemy engagement.
Mastering situational awareness for each utility type delivers substantial competitive advantage, particularly on Mirage where utility engagements frequently determine site control outcomes.
Timing and Coordination with Teammates
Even the most strategically perfect smoke deployment proves worthless with improper timing execution. Temporal precision governs all utility effectiveness. Smoke screens should achieve full deployment immediately before team advancement, not ten seconds prematurely. Flash detonations must occur precisely as teammates peek corners, not following their elimination.
Coordinate utility deployment with squad members:
- Communicate clearly when deploying CT smoke or flashing Ramp entry.
- Request Molotov deployment on Under Balcony during A site execution.
- Synchronize Market smoke deployment on B with short position advancement to intercept rotation patterns.
Effective team communication transforms your utility into orchestrated devastation. Otherwise, you’re simply discarding $300 worth of equipment without strategic return.
Top Mid Smoke
Establishing mid control forms the tactical foundation for any Mirage Terrorist-side strategy, and the Top Mid Smoke establishes access to that control. This smoke deployment eliminates vision from Window position and enables safe transition to underpass or Connector access.
How to throw it:
- Position your operative in T-Spawn proximity to trash container.
- Align positioning with specific window structural elements or architectural pixels (verify through lineup servers or workshop maps).
- Implement jump-throw binding for execution consistency.
This smoke placement lands precisely at Top Mid perimeter, obscuring Counter-Terrorist Window positions from observing your advancement. When combined with Window Smoke deployment, this combination becomes lethal for mid control acquisition.
Why it matters:
Absence of this smoke deployment enables any Window-positioned AWPer to demolish your team’s strategic momentum. Single elimination can sufficiently stall complete mid control. Never bypass this deployment — integrate into tactical instinct.
Window Smoke
The quintessential deployment. Among the most strategically critical smokes on Mirage — definitive statement. The Window Smoke denies Counter-Terrorist AWPer prime visual positioning and facilitates Terrorist mid control establishment during round initiation.
Where to throw from:
- Assume position at T-spawn behind barrel structure.
- Target alignment slightly above specific antenna components or building corners.
- Employ jump-throw binding for precision execution.
When deployment executes correctly, the smoke completely obscures Window visibility. Counter-Terrorists might attempt short position boosting to observe above deployment, but require positional exposure.
Mistakes to avoid:
- Overthrowing deployment causing landing inside Connector.
- Underthrowing deployment resulting in edge bouncing failure to obstruct Window.
Practice this deployment until achieving muscle memory integration.
Connector Smoke
Objective: Execute A site split from mid control? Requirement: smoke deployment obstructing Connector to prevent flanking maneuvers or elimination during short or jungle advancement.
From T-Spawn (or Mid):
- Advance toward “Top Mid” container structures.
- Target alignment above wall corners or window framework (reference preferred lineup configuration).
- Utilize standard left-click deployment mechanism.
When to use it:
- During mid-to-A split executions.
- Following mid control establishment and Cat or Short position advancement.
- Tactical baiting for Counter-Terrorist peeking from Jungle or Ticket positions.
Once Connector receives smoke coverage, your mid-to-A transition path becomes significantly safer — particularly when synchronized with Stairs Smoke and Jungle Smoke deployments.
One-Way Smokes on Mirage
One-way smoke deployments represent sophisticated tactical instruments that provide visual advantage while maintaining enemy blindness. Mastering even limited selection of these deployments can secure engagement victories before combat initiation.
Popular one-way smokes:
- A Ramp (CT side): Smoke deployment positioned immediately leftward of wooden scaffolding enables Ramp peeking while maintaining concealment.
- Connector (T side): Deep smoke deployment executed during mid lurking enables visual detection of Jungle approach movements.
- B Apps Window (CT side): Smoke deployment on ledge structure enables Apartments peeking with minimal exposure risk.
Why it works: You establish visual superiority — observing enemy movement before their visual acquisition. Comparable to legitimate wallhack functionality.
Caution: These smoke deployments depend critically on exact placement precision. Misplacement renders deployments useless or worse — reveals your tactical position.
Practice is essential. Utilize workshop maps for refinement and ensure pressure situation execution capability.
Pop Flashing Mid or A Ramp
Pop flash deployment represents flashbang detonation occurring immediately following visual appearance, denying opponent reaction time. These represent game-altering deployments on Mirage.
Pop Flash for Mid:
- From T-Spawn or Top Mid positions, bounce flash deployment off wall surfaces near Window or underpass access.
- Detonation should occur precisely as teammate peeks mid from container positions.
Pop Flash for A Ramp:
- From Palace or deep Ramp positions, bounce flash deployment off wall structures or scaffolding.
- Perfect for peeking aggressive Counter-Terrorists holding Ramp from Stairs or Jungle positions.
Benefits:
- Disorients enemy combatants before reaction capability.
- Prevents teammate blinding with proper timing execution.
- Generates tactical chaos enabling victory in typically lost engagements.
Advanced play: Pop flash self-deployment into A Ramp during solo advancement, or tactical baiting with fake flash followed by dry peeking.
B Apartments Entry Flash
B site advancement without flash deployment constitutes tactical gambling. You’re charging into potential AWPer positions, SMG campers, or riflers pre-aiming Apartments entries. Therefore, achieving perfect entry flash deployment proves critically important.
How to do it:
- From rear wall positioning in B Apartments, target alignment above doorway structures or roof corner elements.
- Bounce flash deployment achieving detonation within site center, blinding Van, Bench, and Short position defenders.
Team variation: Coordinate teammate deployment from Mid or Underpass positions during Apps advancement.
Solo variation: Deploy flash, execute brief delay, then execute wide swing maneuver.
Result: Defending combatants experience blindness and panic reactions — while you achieve site penetration.
Bonus Tip: Chain flash deployment with Van smoke or Molotov deployment to enhance advancement unstoppability.
Mid Control with Smokes and Molotovs
As Counter-Terrorist operative, controlling Mid establishes tactical command over Mirage’s strategic heartbeat. If Terrorists achieve uncontested Mid control, you face forced passive positioning on A and B sites. Therefore, utility deployment priority focuses on Mid territory.
Smokes to use:
- Top Mid Smoke: Obstructs Terrorist fast control acquisition.
- Window Smoke (from CT side): Can deploy early for self-blocking and re-aggressive maneuvers with teammate coordination.
- Connector Molotov: Halts Mid split executions or advancement pushes.
Molotovs:
- Molotov deployment on Underpass denies lurker split attempts toward B site.
- Ladder Room Molotov assists preventing fast Connector or Short gameplay.
Best practice:
- Designate single operative (typically Mid anchor) for early utility deployment.
- Rotate secondary Counter-Terrorist if necessary for Mid contestation support.
- Combine smoke delay tactics with flash deployments for control reacquisition if lost.
A Ramp and Palace Control
A site demonstrates vulnerability to coordinated execute patterns, particularly with effective smoke deployments. Therefore, Counter-Terrorists require Ramp and Palace control establishment during round initiation.
Defensive utility setups:
- Molotov A Ramp: Denies early aggressive maneuvers and compels Terrorists to delay or utilize smoke deployments.
- Flash A Ramp push: Flash deployment followed by peeking Counter-Terrorist can disrupt Terrorist stacking formations.
- Palace HE grenade: Upon detecting multiple Palace movement patterns, HE deployment can inflict substantial damage.
One-way tricks:
- Position smoke deployment immediately external to Palace for one-way peeking capability.
- Implement deep Ramp smoke deployment for vision obstruction and information gathering advancement.
Rotation awareness: Following A site smoke deployments, avoid over-rotation execution. Deploy utility for planting delay and await teammate reinforcement.
Practicing Lineups in Offline Servers
Before transitioning into ranked competitive matches and initiating grenade deployment sequences, you require lineup execution precision — and superior methodology involves offline server utilization.
How to set up:
- Launch CS2 platform with console command execution:
map de_mirage. - Activate cheat functionality:
sv_cheats 1. - Implement
sv_infinite_ammo 1for unlimited grenade availability. - Utilize
bind KEY “sv_rethrow_last_grenade”for identical grenade testing repetition.
Why practice here?
- Zero pressure environment from teammates or opponents.
- You can refine jump-throw mechanics, rapid lineup execution, and even develop customized deployments.
- Test bounce physics mechanics and smoke landing patterns across different map sectors.
Bonus tip: Activate noclip functionality for aerial navigation and precise grenade landing observation. This facilitates throw height or positioning adjustment if discrepancies occur.
Integrate into daily warm-up routines. Even ten minutes daily mastering smoke deployments can significantly elevate gameplay performance.
Using Jump-Throw Binds
Certain optimal Mirage smoke deployments — including Window smoke — demand perfect precision and timing execution. That’s where the jump-throw bind implementation proves valuable.
What it is:
- A jump-throw binding enables simultaneous jumping and grenade deployment with single button activation, eliminating execution inconsistency.
How to set it up:
- Add this configuration to your CS2 setup or console interface:
alias "+jumpthrow" "+jump;-attack"alias "-jumpthrow" "-jump"bind alt "+jumpthrow"
Why it matters:
- Eliminates timing execution errors.
- Guarantees consistency for extended-distance or confined-window smoke deployments.
- Enhances operational efficiency and reduces reliance on random chance.
Practice tip: Implement this binding exclusively during training sessions for instinctive integration.
Watching Pro Matches for Inspiration
Have you contemplated how elite CS2 competitors consistently dominate Mirage engagements? Simple explanation: they’ve achieved utility deployment mastery. And you can acquire substantial knowledge through observational analysis.
Where to watch:
- ESL, BLAST, and IEM professional competitions.
- POV demonstration recordings from players including s1mple, NiKo, or ropz.
- YouTube analytical breakdowns of specific utility configurations on Mirage.
What to look for:
- Observation methodology for Mid smoking and control acquisition.
- Their Molotov deployment strategies in post-plant tactical situations.
- Timing execution — notice utility synchronization with movement patterns and team positioning.
Study and replicate: Apply acquired knowledge to reconstruct professional-level tactical executions within your competitive matches. Eventually, you’ll initiate round outcome prediction capabilities — and that represents genuine skill elevation.
Action Checklist
- Practice Top Mid and Window smoke lineups for 15 minutes daily using offline servers
- Master jump-throw binding for consistent long-distance deployments
- Coordinate with teammates on utility timing before matches
- Study pro player demos to identify advanced utility combinations
- Practice HE grenade timing against common retake routes using sound cue triggers
- Master three essential one-way smoke placements in offline servers
- Coordinate pop flash sequences with teammates during executes
- Implement coordinated utility combinations in competitive matches
- Configure jump-throw bind in CS2 console using provided alias commands
- Practice essential smoke lineups daily in offline servers
- Study professional match demos focusing on utility timing and coordination
- Coordinate utility deployment with teammates using clear communication protocols
- Practice all 8 essential smoke lineups in offline servers for 15 minutes daily
- Master jump-throw bind execution for Window and CT smokes
- Coordinate utility timing with at least two teammates in practice matches
- Study professional player utility deployment patterns from tournament recordings
- Implement defensive utility setups for CT side across 10 competitive matches
No reproduction without permission:Tsp Game Club » Mastering Mirage Smokes and Grenade Lineups in CS2
