TL;DR
- Map knowledge transforms raw aim into strategic dominance in CS2
- Master Dust II first for fundamental skills, then progress to strategic maps like Mirage
- Understanding choke points and timing is more crucial than memorizing every angle
- Effective communication through proper callouts can win more rounds than perfect aim
- Practice in specific game modes accelerates learning curve dramatically
The Strategic Advantage of Map Awareness
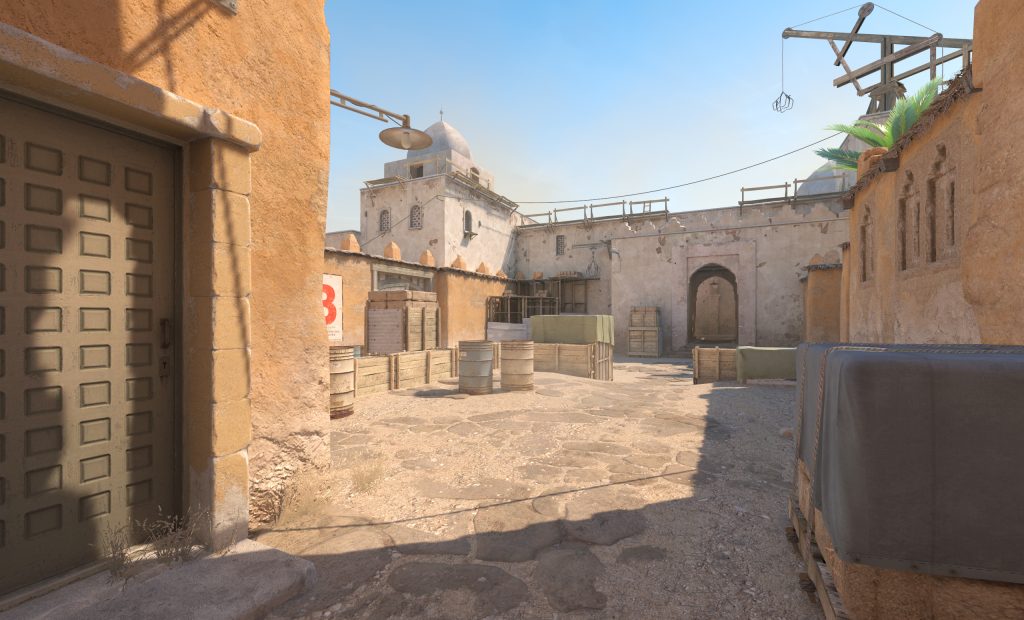

While pinpoint accuracy and lightning reflexes are impressive in Counter-Strike 2, they’re essentially useless without comprehensive map understanding. Imagine having the world’s fastest sports car but no knowledge of the roads – you’ll crash before reaching your destination. Developing spatial awareness early separates competent players from those stuck in lower ranks.
Advanced map knowledge enables you to predict opponent movements, coordinate team strategies, and dictate the pace of engagement. Think of it as chess mastery: you must comprehend the entire battlefield to outmaneuver your competition. In CS2, your map comprehension serves as the strategic foundation for every decision.
How Different Maps Shape Gameplay Dynamics
Each CS2 arena features distinct architectural characteristics that fundamentally influence round progression. Some environments, such as Dust II, prioritize open sightlines and straightforward engagements that test pure aiming proficiency. Contrastingly, maps like Nuke incorporate multi-level structures and vertical elements that challenge your three-dimensional awareness and execution timing.
Strategic approaches must adapt to each map’s unique properties. A perfectly executed flashbang in Inferno might prove completely ineffective on Mirage due to differing spatial configurations. Bomb site defensibility varies dramatically between locations, requiring tailored coordination for successful execution.
Layout Simplicity and Navigational Ease
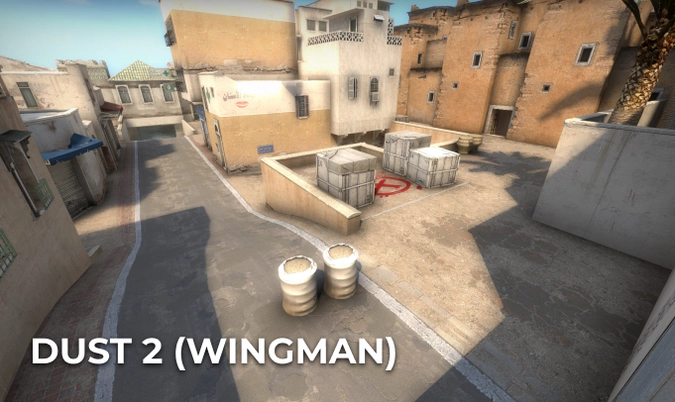
Ideal learning environments feature clean, symmetrical designs that minimize navigation confusion. You shouldn’t require constant minimap consultation to determine your position or intended destination. Maps such as Dust II and Mirage succeed in this regard because their central corridors clearly demarcate territory, and transitions between objectives remain relatively straightforward.
During initial learning phases, a map should effectively teach core competencies – angle control techniques, site defense protocols, and rotation timing based on auditory cues and positional callouts. Complex arenas with excessive vertical elements, constricted passageways, or perplexing routing patterns typically hinder rather than facilitate skill development.
Defined Choke Points and Clear Bombsites
Quality beginner maps establish clear conflict zones – areas where offensive and defensive forces typically converge. Dust II’s “Long A”, Mirage’s “Mid”, and Inferno’s “Banana” represent textbook examples. These designated areas evolve into consistent engagement zones that instruct players in smoke deployment, flash utilization, and corner combat tactics.
Transparent bombsite visibility remains equally critical. If novice participants enter an objective area and cannot immediately identify planting locations or defensive positions, that indicates problematic design. Effective learning maps provide instinctive bombsite configurations where both Counter-Terrorists and Terrorists rapidly comprehend their tactical responsibilities.
Intuitive Callouts for Effective Communication
Positional terminology forms the essential language of CS2 coordination. When teammates announce “One pushing Short A!” you must instantly recognize the referenced location. Maps featuring well-established, logically-derived callouts make team communication easily accessible. Dust II’s legendary designations like “Catwalk,” “Long,” “Tunnels,” and “B” have become so ubiquitous they’ve integrated into gaming vernacular.
For optimal beginner accessibility, a map should facilitate rather than complicate information exchange. During skill acquisition, prioritize arenas where callouts prove memorable and easily referenceable.
1. Dust II – The Timeless Training Ground
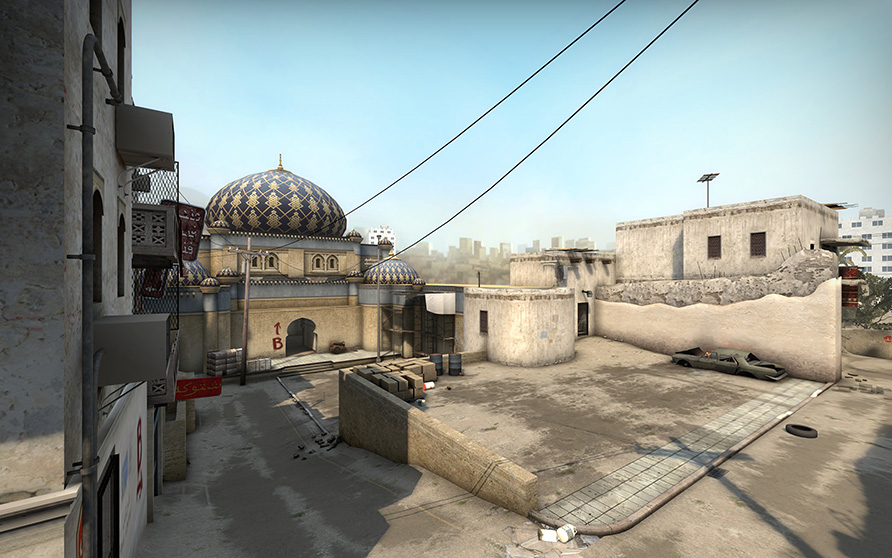

Overview of Dust II Layout
Dust II represents the definitive Counter-Strike experience – so culturally significant it has maintained relevance across decades without substantial modifications. It incorporates balanced architectural planning that’s easily comprehensible. Two primary objectives (A and B), interconnected through Central Corridor and Long A, with underground passages linking Terrorist deployment to B. The accessibility of Dust II establishes it as the foundational arena every emerging competitor should dominate.
The environment’s principal regions encompass:
- Tunnels leading to B Site
- Catwalk (Short A) progressing toward A Site
- Long A for direct A Site penetration
- Mid for tactical repositioning or offensive maneuvers
From educational perspective, every pathway serves distinct purpose, enabling you to commence learning specialized combat roles – point entry specialist, sniper specialist, defensive anchor – exclusively within this single location.
Why It’s Exceptional for Novice Players
Dust II’s primary advantage for learning lies in its transparent structural design. Minimal vertical complexity exists, transitions occur rapidly, and confrontations typically represent pure aiming contests. You needn’t memorize intricate callouts or firing angles. Instead, concentrate on acquiring fundamental abilities including:
- Optimal crosshair positioning
- Angle holding and peeking techniques
- Basic smoke and flash deployment
- Utilizing auditory signals to anticipate adversary movements
Dust II additionally provides margin for developmental errors. The arena features expansive sightlines, so if you advance too aggressively, you’ll learn promptly without suffering immediate consequences each instance. Furthermore, due to its pervasive popularity, you’ll consistently discover matches, rendering it perfect for concentrated practice.
Essential Spots and Callouts to Learn
To initiate your Dust II journey, prioritize these critical areas:
- Tunnels – Master corner inspection and B site defense protocols.
- Mid Doors – Pivotal position for both factions. Practice pre-aiming this critical firing line.
- Catwalk – Expedited A Site approach. Acquire fundamental smoke and flashbang techniques.
- Long A – Excellent for extended-range engagements. Learn long-distance flash deployment and territorial control tactics.
- A Site & B Site – Comprehend optimal planting positions and defensive/retake formations.
Quick professional insight: Practice elementary smoke deployment from Central Corridor to Counter-Terrorist deployment or flash utilization for Long A advances. Minor utility comprehension on Dust II yields significant tactical dividends.
Optimal Game Modes for Skill Development
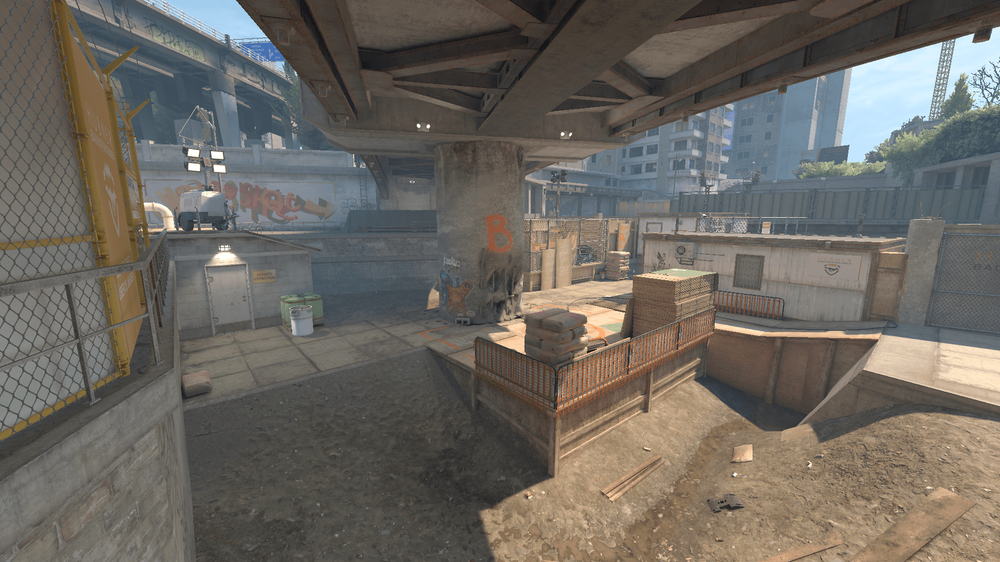

When pursuing CS2 map proficiency, the optimal approach rarely involves immediate competitive immersion. Various gameplay formats cultivate distinct capabilities. Here’s systematic analysis of each modality’s training benefits:
- Deathmatch – Ideal for angle familiarization and aiming enhancement. Concentrate on maintaining strategic positions from each arena like Mirage’s Window or Dust II’s Long A.
- Casual – Reduced pressure compared to ranked matches. Employ this environment for exploration and experimental routing, utility application, and callout mastery.
- Competitive – This represents the genuine testing ground. Only participate in competitive matches on maps where you feel approximately 60–70% comfortable.
- Wingman – Superior for close-quarters combat and partial map comprehension. You can focus on limited sectors with concentrated engagements.
- Custom Server with Bots – Optimal for independent investigation. Navigate the environment, practice explosive deployment, and learn transition patterns without distractions.
Each format offers unique advantages. If you remain uncertain about layout fundamentals, allocate additional time in bot training or casual environments until establishing confidence.
Essential Workshop Tools and Training Maps
CS2’s community workshop contains exceptional player-developed resources that facilitate more intelligent practice methodologies. Several indispensable tools include:
- YPrac Maps – These represent specialized training environments customized for individual CS2 arenas. You can practice smoke deployment, flash utilization, and site defense protocols.
- Aim Botz – While not map-specific, this proves perfect for crosshair placement improvement before match participation.
- Training Maps with Callouts – These superimpose nomenclature across various map sectors, enabling faster visual-to-callout correlation.
Combine these resources with instructional video content and you’ll observe accelerated improvement compared to exclusive solo queue participation.
Solo vs. Team Practice Strategies
Learning maps collaboratively with teammates provides extraordinary value. Here’s the strategic rationale:
- Callout Practice – You can rehearse real-time communication and comprehend team response dynamics.
- Strategy Testing – Attempt coordinated objective assaults or defensive holds without random teammates disrupting tactical planning.
- Map Exploration Together – You’ll retain information more effectively when learning collectively – they might demonstrate pathways or positioning strategies you’d overlook independently.
However, individual practice maintains value – it compels independent problem-solving and awareness sharpening. Ideally, integrate both methodologies. Participate with teammates when available, but consistently engage in solo queue participation or training map sessions to reinforce acquired knowledge.
Rotation and Communication Errors
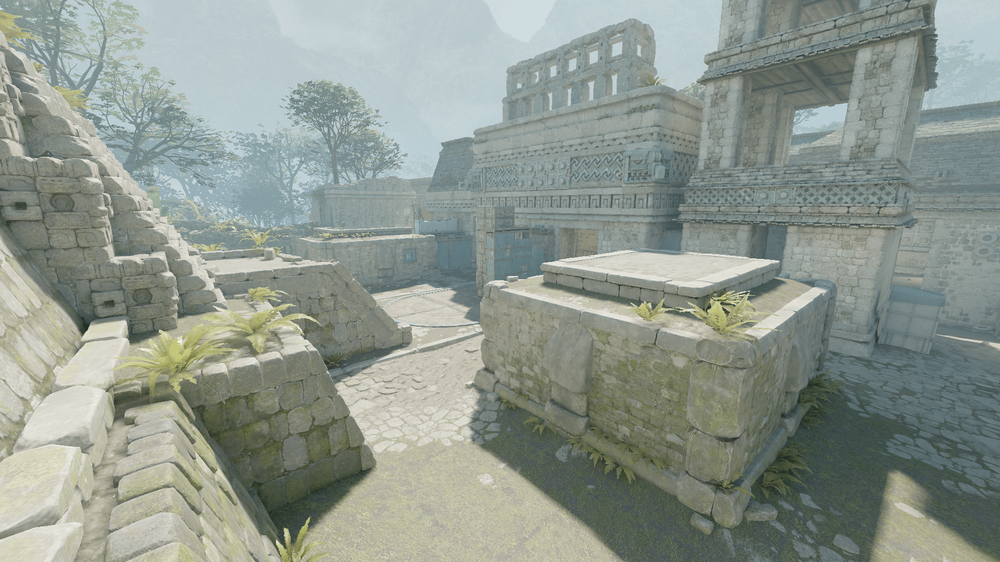

Among the most prevalent novice miscalculations involves excessive rotation. This occurs when you react impulsively to auditory cues or combat sounds and abandon your assigned position prematurely. Rather than maintaining disciplined stance and securing your sector, you transition – only to leave your objective completely vulnerable.
Here’s strategic avoidance methodology:
- Await Confirmation – Refrain from movement unless teammates verify the assault’s authenticity.
- Communicate Before Departure – Consistently inform your squad, “Executing rotation,” ensuring someone assumes defensive responsibility for your vacated position.
- Trust Tactical Planning – If you’re anchoring B objective, maintain position until rotation becomes absolutely essential.
Additionally, communication deficiency destroys coordination effectiveness. If you suffer elimination but remain silent, your team lacks necessary adjustment information. Vocalize promptly – even concise communication like “One Banana, minimal health” provides critical intelligence.
Utility Misuse and Timing Mistakes
Novices frequently squander explosive devices or deploy them at inappropriate moments. Representative instances include:
- Deploying Smoke Without Strategic Purpose – Don’t utilize simply because it’s available. Employ to obstruct visibility, delay offensive pressure, or support allied maneuvers.
- Blinding Teammates – Always announce flash deployments (“Executing flash!”) and practice deployment angles that avoid team disorientation.
- Premature Molotov Deployment – Reserve incendiary devices for critical passageways when anticipating adversary advances, not randomly during initial phases.
Strategic utility application secures round victories. Observe professional competitors or instructional content to acquire fundamental positioning strategies and their tactical logic.
Sound Awareness and Positioning Blunders
Auditory information represents EVERYTHING in CS2. Audible movement near opponents reveals positional intelligence. Unnecessary weapon discharge similarly alerts adversaries. Timing precision additionally matters – rushing excessively early or delayed can disrupt synchronized assault coordination.
Novice tactical recommendations:
- Utilize Walking Unless Executing Rush – Shift-walking maintains acoustic stealth.
- Monitor Enemy Footstep Patterns – If detecting movement, avoid aggressive peeking maneuvers.
- Eliminate Predictable Timing Patterns – Vary your peeking intervals or advance timing to increase opponent prediction difficulty.
Approach CS2 as chess competition blended with concealment tactics – every sound and movement provides crucial intelligence.
Leveraging Replay Analysis
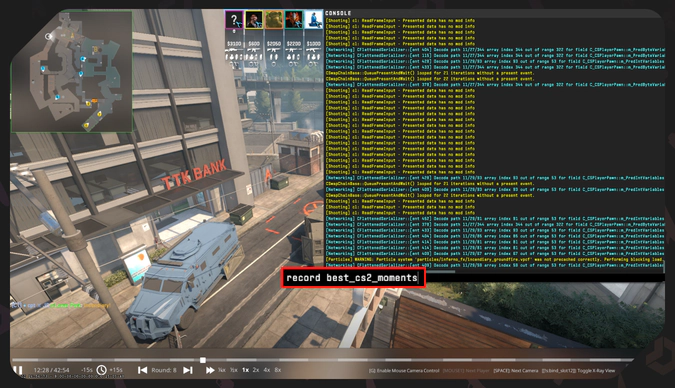

CS2 incorporates sophisticated replay functionality that novices rarely utilize – but absolutely should. Reviewing personal match recordings represents one of the most rapid improvement methodologies available.
Critical analysis focal points:
- Positioning Deficiencies – Did you unnecessarily expose your position?
- Aiming Inaccuracies – Were you targeting thoracic region or cranial area?
Additionally, observe elimination sources. If repeated fatalities originate from identical positions, you’ve identified developmental requirements.
Pro Player Tactics to Emulate
Professional CS2 competitors operate on identical arenas as you – they simply employ them more effectively. Observing their objective approach methodologies, defensive positioning, and utility deployment proves immensely valuable.
To maximize professional observation benefits:
- Select Specific Arena you’re mastering (e.g., Mirage)
- Observe 2–3 professional matches on that specific location
- Document Observations regarding their movement patterns, utility utilization, and strategic differentiation.
You’ll experience astonishment regarding how much you can replicate – particularly straightforward positioning strategies and angle maintenance with superior discipline.
Setting Achievable Map-Specific Goals
Skill enhancement occurs most rapidly when pursued intentionally. Rather than simply repetitive participation, establish targeted objectives.
Exemplary targets:
- Master 3 smoke deployment strategies for A objective on Mirage
- Maintain B site defense for 3 consecutive rounds without elimination
- Execute proper transitions between A and B based on teammate communication
Minor victories accumulate into substantial improvements. Approach CS2 map domination similarly to athletic training regimen – consistent, concentrated repetitions prove more valuable than random effort allocation.
Why Map Awareness Matters in CS2
In Counter-Strike 2 (CS2), having exceptional aim is only part of the equation. You might possess perfect crosshair placement and lightning reflexes, but without understanding where you’re positioned and anticipating enemy movements, you’re essentially playing blindfolded. This makes map awareness arguably the most crucial skill to develop from day one. For newcomers, grasping map layouts – identifying choke points, predicting opponent positions, and learning safe navigation paths – will significantly elevate your victory rate.
Comprehensive map knowledge enables you to predict enemy rotations, formulate strategic approaches, communicate efficiently with teammates, and even dictate the match’s tempo. Think of it as high-stakes chess: you must comprehend the board to make intelligent moves. In CS2, the battleground becomes your chessboard, and lacking this understanding means you’ll consistently trail your adversaries.
How Maps Dictate Strategy and Game Flow
Every CS2 map features a distinctive design that determines round progression. Some arenas, like Dust II, present open, straightforward environments that favor pure aim duels. Others, such as Nuke, incorporate complex multi-level structures and vertical elements that test your spatial perception and timing precision. For those starting out, appreciating each map’s subtleties distinguishes confident site assaults from getting eliminated while moving through common angles.
Tactical approaches must adapt to each map’s characteristics. A perfectly executed flashbang on Inferno could prove completely ineffective on Mirage. Bomb sites might be easily defensible on one map while becoming nearly impossible to hold on another without coordinated teamwork. Mastering one map thoroughly establishes a solid foundation before expanding your repertoire.


Dust II Layout Essentials
Dust II represents the iconic Counter-Strike battleground – so legendary it has required minimal revisions across decades. It showcases a balanced, symmetrical design that’s intuitive to comprehend. Two bomb sites (A and B), connected via Mid and Long A pathways, with tunnels linking T-side spawn to B area. This straightforward architecture establishes Dust II as the primary map every novice should conquer.
The arena’s primary zones encompass:
- Tunnels providing B Site access
- Catwalk (Short A) leading toward A Site
- Long A for direct A Site approach
- Mid facilitating rotations or aggressive maneuvers
From an educational standpoint, every route serves distinct purposes, allowing you to begin learning role specialization – entry fragger, AWPer, site anchor – exclusively on this single map.
Why Beginners Thrive on Dust II
What renders Dust II ideal for newcomers is its uncomplicated structure. Minimal vertical complexity, rapid rotations, and typically clean aim confrontations characterize this battleground. You won’t need to memorize complicated callouts or angles. Instead, concentrate on developing core competencies like:
- Precise crosshair positioning
- Angle holding and peeking techniques
- Executing basic smoke and flash deployments
- Utilizing audio cues to forecast enemy movements
Dust II additionally provides room for error. The map’s open nature means if you overextend, you’ll learn rapidly without facing immediate punishment each time. Furthermore, its extreme popularity ensures consistent match availability, making it perfect for dedicated practice sessions.
Essential Positions and Communication Points
To initiate your Dust II journey, prioritize these critical areas:
- Tunnels – Master corner checking and B site defense from these locations.
- Mid Doors – A pivotal intersection for both CTs and Ts. Practice pre-aiming this crucial angle.
- Catwalk – Abbreviated route to A Site. Learn fundamental smoke and flashbang placements.
- Long A – Excellent for long-distance engagements. Learn to deploy extended-range flashes and contest control.
- A Site & B Site – Understand planting positions and defensive/retake locations.
Quick professional insight: Practice elementary smoke placements for CT spawn from Mid or flash deployments for Long A assaults. Minor utility knowledge on Dust II yields substantial returns.

Mirage’s Defining Characteristics
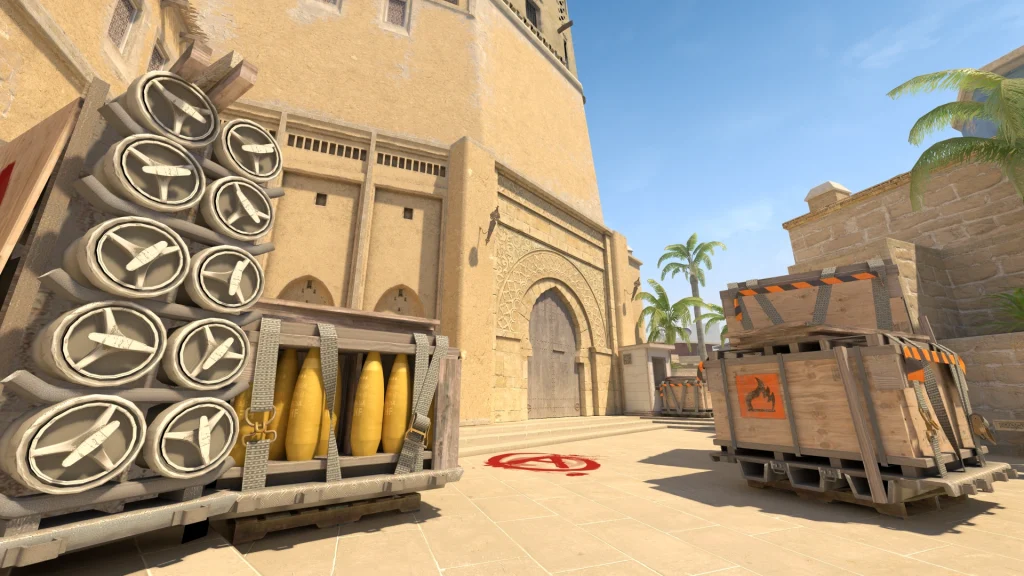
Mirage stands as another community beloved – and deservedly so. It achieves perfect harmony between accessibility and strategic development potential. Featuring its expansive Mid section, multiple approach paths to each bomb site, and clearly delineated control zones, Mirage educates players on interpreting game flow and managing tempo.
Significant locations on Mirage include:
- A Site incorporating Tetris, Palace, and Jungle areas
- Mid providing connectors to both A and B sites
- B Site reached through Apartments
- Underpass enabling stealthy maneuvers
How Beginners Can Dominate on Mirage
Mirage emphasizes territory control beyond most beginner-friendly arenas. The Mid territory represents a crucial contention point, and mastering smoke deployments to obstruct visibility (Window, Connector, Top Mid) will substantially increase your winning potential.
As a novice, concentrate on developing these abilities:
- Domination Mid – This constitutes Mirage’s core. Controlling Mid equates to controlling rotations.
Additionally, practice maintaining angles as CT from positions like Ticket Booth, Market, and Catwalk. These defensive locations prove forgiving while teaching proper crosshair maintenance.
Critical Beginner Errors to Evade on Mirage
- Neglecting Mid – Excessive newcomers charge A or B without attempting Mid control. Don’t bypass this essential component.
- Utility Neglect – If you’re not deploying Window smokes or Mid flashes, your approach requires adjustment.
- Tunneling Through Singular Routes – Attempt diversifying your tactical approaches. Avoid exclusively utilizing Ramp on A. Incorporate Palace, Mid, and Underpass alternatives.

Understanding Constricted Pathways and Control Points
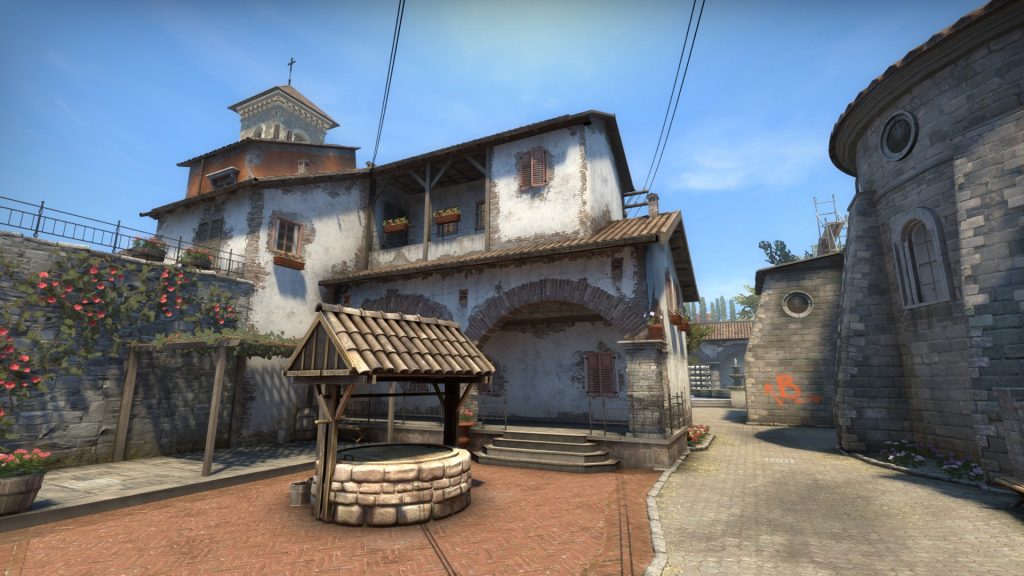
Inferno represents a classic CS arena that highlights tight passageways and choke point domination. Contrasting with expansive layouts, Inferno compels you to consider positioning and timing meticulously. The primary control areas you’ll need to command include:
- Banana — the curved corridor connecting T spawn and B site
- Mid / Apartments — the route toward A via apartments
- Alt Mid / Library — occasionally utilized for rotations
- CT Spawn — essential for retakes and rotational movements
These narrow passageways mean that managing utility (smokes, flashes, molotovs) proves absolutely critical. Additionally, timing grows increasingly important: advancing too early or late can forfeit lane or site control.
As a beginner, one of your initial objectives on Inferno involves becoming comfortable navigating Banana and Apartments — these represent high-traffic routes where numerous confrontations occur.
Banana, Apartments, and Additional Critical Zones
- Banana
Banana essentially functions as a miniature map within itself. Numerous rounds witness combat here. Smoke and molotov deployments routinely serve to obstruct visibility or eliminate defenders. As T-side, pushing Banana frequently results in B site domination or forcing CTs from B positions. As CT, maintaining Banana early with utility represents standard procedure. - Apartments / Mid to A
For T-side, advancing through Apartments provides direct A site access. Learning proper corner clearing techniques in Apartments, how to deploy flashbangs over walls, and how to move silently prove important. On CT side, holding from Balcony, Pit, or short A provides leverage to challenge site assaults. - Library / Alt Mid
While less commonly employed, this pathway can surprise opponents. It proves valuable for rotating or splitting A site advances when properly executed. - CT / Spawn and Rotational Strategies
Comprehending how CTs rotate from CT spawn to sites, and how T-side can delay or manipulate those rotations, remains fundamental. For example, an effective Banana feint can occupy CTs, granting your squad time to push A via Apartments.
Fundamental Smoke and Flash Deployment Approaches
Here are several elementary utility concepts for Inferno that beginners can commence utilizing:
- Banana Smoke & Molotov
A smoke placement at Banana’s apex can obstruct CT visibility. A molotov in corners prevents passive defensive positions (e.g., “Dark” or “Car”). - Mid to A Smokes
You can deploy smoke at Mid / Library to block CT sightlines when advancing A. Additionally, smoke between Apartments and Balcony assists in angle reduction. - Flashbangs Over Apartments / Over the Wall
Utilize pop flashes into A site from Apartments to blind defenders on site or in Pit. Practice tossing them sufficiently elevated to flash above obstacles. - B Site Execution Smokes
A smoke at CT / Coffins proves useful. Also smoke deployments for Market Window / New Box help protect entry points.
As you gain confidence, you’ll expand your utility arsenal. However, beginning simply on Inferno helps you internalize utility’s substantial influence in constrained maps.


Optimal Game Modes for Map Knowledge Development
If you’re striving to excel at CS2 maps, the optimal approach doesn’t necessarily involve immediately entering competitive matches. Various game modes facilitate building different competencies. Here’s an analysis of how to leverage each:
- Deathmatch – Ideal for mastering angles and enhancing aiming precision. Concentrate on maintaining strategic positions from each map like Mirage’s Window or Dust II’s Long A.
- Casual – Reduced pressure compared to competitive. Employ this mode to investigate maps and experiment with pathways, utility deployments, and communication points.
- Competitive – This environment genuinely tests your abilities. Only participate in competitive matches on maps where you feel 60-70% confident.
- Wingman – Excellent for close-quarters engagements and learning specific map sections. You can focus on fewer areas with concentrated confrontations.
- Custom Server with Bots – Best for individual exploration. Navigate the environment, practice grenade tosses, and learn rotational patterns without interruptions.
Each modality offers distinct advantages. If you remain uncertain about layout, dedicate additional time to bot matches or casual sessions until establishing confidence.
Essential Training Tools and Workshop Resources
CS2’s workshop contains numerous exceptional community-developed resources to help you practice more intelligently. Some indispensable options include:
- YPrac Maps – These represent specialized training arenas customized for individual CS2 maps. You can practice smoke placements, flash deployments, and site defense strategies.
- Aim Botz – While not map-specific, this proves perfect for improving crosshair positioning before engaging in matches.
- Training Maps with Callouts – These overlay identification labels on diverse map regions so you can associate visual areas with communication points more rapidly.
- Recoil Master – Assists in practicing weapon management combined with angle peeking on particular maps.
Combine these resources with YouTube instructional content and you’ll commence observing improvements more swiftly than simply solo queuing continuously.
Collaborative Learning vs. Individual Practice Sessions
Learning maps alongside friends can provide tremendous value. Here’s why:
- Callout Practice – You can rehearse real-time communication and comprehend how your team responds.
- Strategy Experimentation – Attempt coordinated site assaults or defensive positions without random squad members disrupting plans.
- Map Investigation Together – You’ll retain information better when learning collectively – companions might demonstrate routes or setups you’d overlook alone.
However, solitary practice isn’t worthless – it compels you to troubleshoot and sharpen awareness. Ideally, blend both methodologies. Play with friends when possible, but dedicate time to solo queues or training maps consistently to reinforce acquired knowledge.


Why Map Intelligence Wins Games
In Counter-Strike 2 (CS2), exceptional mechanical skill alone cannot guarantee victory. You might possess perfect crosshair alignment and rapid reaction times, but without comprehensive terrain understanding, you’re essentially navigating through fog. That’s precisely why developing advanced map awareness stands as the most critical early-game competency. For newcomers, grasping a map’s complete architecture—identifying critical pressure points, predicting opponent positioning, and executing safe movement patterns—will significantly elevate your success metrics.
Terrain mastery enables you to forecast enemy movements, develop tactical approaches, coordinate efficiently with teammates, and even dictate match tempo. Imagine playing high-level chess without board comprehension: in CS2, the environment serves as your strategic canvas, and insufficient knowledge ensures you remain perpetually reactive.
How Layout Shapes Every Match
Each CS2 battlefield presents distinctive structural characteristics that determine round progression dynamics. Certain environments like Dust II feature expansive sightlines and linear pathways, promoting pure aiming contests. Alternative layouts such as Nuke incorporate multi-level complexity and vertical dimensions to challenge your spatial cognition and timing precision. For those starting out, comprehending each map’s unique intricacies separates confident site assaults from predictable elimination in common firing lanes.
Tactical approaches transform based on the active terrain. A perfectly executed flash grenade on Inferno could prove completely ineffective on Mirage. Bomb site defensibility might appear straightforward on one map while becoming nearly untenable on another without proper team synchronization. Mastering individual maps sequentially establishes robust fundamentals before expanding your repertoire.

Layout Simplicity Principles
Maps suitable for newcomers typically demonstrate clean, symmetrical designs. You shouldn’t require constant minimap consultation to determine positioning or navigation routes. Environments like Dust II and Mirage perform exceptionally here because their central corridors distinctly partition the terrain, and transitions between objectives remain relatively direct.
During initial learning phases, a map should instruct core competencies — proper angle domination, site defense protocols, and rotation decisions based on auditory cues and positional reporting. Complex layouts featuring excessive vertical elements, constricted passageways, or confusing pathways tend to discourage beginners rather than facilitate skill development.
Strategic Choke Point Management
Effective learning environments clearly delineate their strategic bottlenecks — these represent zones where offensive and defensive formations typically engage. Dust II’s “Long A”, Mirage’s “Mid”, and Inferno’s “Banana” serve as ideal illustrations. These regions evolve into regular combat arenas and educate players about smoke deployment, flash utilization, and combat techniques around corners.
Clear bombsite visibility remains paramount. If a novice enters an objective area and cannot immediately identify planting locations or defensive positions, that creates significant obstacles. Beginner-appropriate maps provide intuitive bombsite configurations where both Counter-Terrorists and Terrorists comprehend their responsibilities rapidly.
Communication Flow Optimization
Positional callouts constitute CS2’s communication language. If you’re participating in team play and someone announces, “One advancing Short A!” you must recognize that location immediately. Maps featuring well-established, logical communication systems make team coordination simple to acquire. Dust II’s legendary callouts including “Catwalk,” “Long,” “Tunnels,” and “B” have become so ubiquitous they’ve integrated into gaming vernacular.
For optimal learning experiences, prioritize environments where callouts prove easy to memorize and reference.
1. Dust II – The Timeless Classic


Overview of Dust II Layout
Dust II represents the definitive Counter-Strike experience — so culturally significant that it has maintained relevance across multiple gaming generations. It showcases balanced architectural design that facilitates rapid comprehension. Dual objective zones (A and B), interconnected through Central Corridor and Long A, with underground passages linking Terrorist spawn to B. The accessibility of Dust II establishes it as the primary environment every emerging competitor should conquer.
The terrain’s primary regions encompass:
- Tunnels providing access to B Site
- Catwalk (Short A) directing toward A Site
- Long A enabling direct A Site approach
- Mid facilitating transitions or offensive maneuvers
From educational perspectives, every pathway serves distinct purposes, and you can initiate tactical role development — point entry, sniper specialist, defensive anchor — exclusively within this single environment.
Why It’s Great for Beginners
What renders Dust II ideal for novices involves its transparent structural philosophy. Minimal vertical complexity exists, transitions occur rapidly, and engagements typically represent pure aiming contests. You needn’t memorize intricate callout systems or firing angles. Instead, concentrate on acquiring foundational abilities including:
- Crosshair positioning protocols
- Angle maintenance and peeking techniques
- Basic smoke deployment and flash utilization
- Employing auditory indicators to anticipate opponent movement
Dust II additionally provides forgiveness for errors. The environment features expansive sightlines, so if you overcommit, you’ll learn rapidly without experiencing immediate punishment consistently. Furthermore, because it maintains such widespread popularity, you’ll consistently discover matches, rendering it perfect for intensive practice sessions.
Essential Spots and Callouts to Learn
To initiate Dust II proficiency, prioritize these critical zones:
- Tunnels – Master corner verification and B site defense from this location.
- Mid Doors – A pivotal location for both factions. Practice predictive aiming techniques.
- Catwalk – Abbreviated route to A Site. Acquire fundamental smoke and flash deployment skills.
- Long A – Excellent for extended-range combat. Learn long-distance flash throws and control contests.
- A Site & B Site – Comprehend planting locations and defensive/retake positioning.
One immediate recommendation: Practice elementary smoke deployment from Central Corridor toward Counter-Terrorist spawn or flash utilization for Long A advances. Minor utility knowledge acquisitions on Dust II generate substantial returns.


Game Mode Selection Strategy
When pursuing CS2 terrain proficiency, optimal approaches frequently involve strategic game mode selection rather than immediate competitive engagement. Different modes cultivate distinct skill sets. Here’s systematic utilization guidance:
- Deathmatch – Ideal for angle familiarization and aiming improvement. Concentrate on maintaining critical positions from each environment such as Mirage’s Window or Dust II’s Long A.
- Casual – Reduced pressure compared to competitive modes. Employ this for exploration and tactical experimentation with routes, utility, and communication systems.
- Competitive – This represents where capabilities undergo genuine assessment. Only participate competitively on environments where you experience 60–70% comfort levels.
- Wingman – Excellent for close-quarters engagements and focused area learning. You can target limited zones with concentrated interactions.
- Custom Server with Bots – Optimal for independent exploration. Navigate freely, practice grenade techniques, and learn transition patterns without external distractions.
Each modality presents unique advantages. If you continue experiencing layout uncertainty, dedicate additional time to bot environments or casual modes until confidence develops.
Workshop Tools Integration
CS2’s community workshop contains exceptional player-created resources to facilitate smarter practice methodologies. Some essential inclusions involve:
- YPrac Maps – These represent training environments customized for individual CS2 maps. You can practice smoke deployment, flash utilization, and site defense protocols.
- Aim Botz – While not environment-specific, this proves perfect for crosshair positioning enhancement before match participation.
- Training Maps with Callouts – These overlay identification markers across various terrain zones so you can associate visual areas with communication systems more rapidly.
- Recoil Master – Assists weapon control practice combined with angle peeking on specific environments.
Combine these instruments with instructional video content and you’ll observe accelerated improvement compared to exclusive solo matchmaking.
Team vs Solo Training Benefits
Learning environments alongside teammates can generate extraordinary value. Here’s the reasoning:
- Callout Practice – You can exercise real-time communication systems and understand team response patterns.
- Strategy Testing – Experiment with coordinated objective assaults or defensive holds without random teammates disrupting strategic planning.
However, independent practice retains significance — it compels problem-solving development and awareness refinement. Ideally, blend both methodologies. Participate with friends when possible, but consistently engage in solo matchmaking or training environments to reinforce acquired knowledge.


Using Replays and Demo Reviews
CS2 incorporates sophisticated replay functionality that newcomers seldom utilize — but absolutely should. Observing personal gameplay recordings represents one of the fastest progression acceleration methods available.
Critical analysis focuses include:
- Positioning errors – Did you unnecessarily expose positioning?
- Aim mistakes – Were you targeting thoracic level or cephalic alignment?
- Utility usage – Did your smoke deployments provide tactical advantages? Were flash implementations effective?
Additionally, monitor locations where opponents eliminated you. If recurring incidents originate from identical positions, you’ve identified improvement opportunities.
Pro Player Observation Methods
Professional CS2 competitors operate within identical environments as you — they simply optimize utilization more effectively. Observing their objective approach methodologies, defensive positioning, and utility deployment techniques provides immense strategic value.
To maximize observational learning benefits:
- Select an environment you’re currently studying (e.g., Mirage)
- Observe 2–3 professional matches within that environment
- Document observations regarding movement patterns, utility applications, and differential tactical approaches
You’ll experience surprising replication capabilities — particularly straightforward lineups and angle maintenance with superior discipline.
Goal Setting System
Progression occurs most rapidly when intentional. Rather than exclusively playing repetitively, establish targeted objectives.
Illustrative examples:
- Acquire 3 smoke deployment patterns for A objective on Mirage
- Maintain B site defense for 3 consecutive rounds without elimination
- Execute transitions between A and B correctly based on teammate communication systems.
Minor achievements accumulate into significant advancements. Approach CS2 terrain mastery similarly to athletic conditioning — consistent, focused repetitions consistently outperform random effort distribution.
Action Checklist
- Practice Dust II for 30 minutes daily to build fundamental aiming and movement skills
- Learn 3 essential smoke lineups for your chosen map
- Watch professional match replays focusing on specific map strategies
- Play 3 casual matches focusing exclusively on callout communication
- Review your own match demos to identify positioning and timing errors
- Master Dust II’s core angles: Tunnels, Mid Doors, Catwalk, and Long A positions
- Practice 3 basic smoke lineups on Mirage for Window, Connector, and CT positions
- Learn Inferno’s Banana control with smoke and molotov combinations
- Watch 2 professional match demos focusing on your current map
- Review your own match replays to identify positioning and utility usage errors
- Begin with Dust II exclusively for 10-15 hours to build fundamental mechanics
- Practice 3 basic smoke lineups and 2 flash deployments for your chosen map
- Watch 2 professional matches on your target map and document 3 tactical observations
- Record and analyze 3 personal matches to identify recurring positioning errors
- Set measurable weekly goals (e.g., improve K/D ratio by 0.2, reduce rotation mistakes by 50%)
No reproduction without permission:Tsp Game Club » Beginner-Friendly CS2 Maps to Learn First
