Master the Death Knight encounter with wave management, stagger tactics, and advanced Scholar strategies in Elden Ring Nightreign
Understanding the Death Knight Encounter Structure
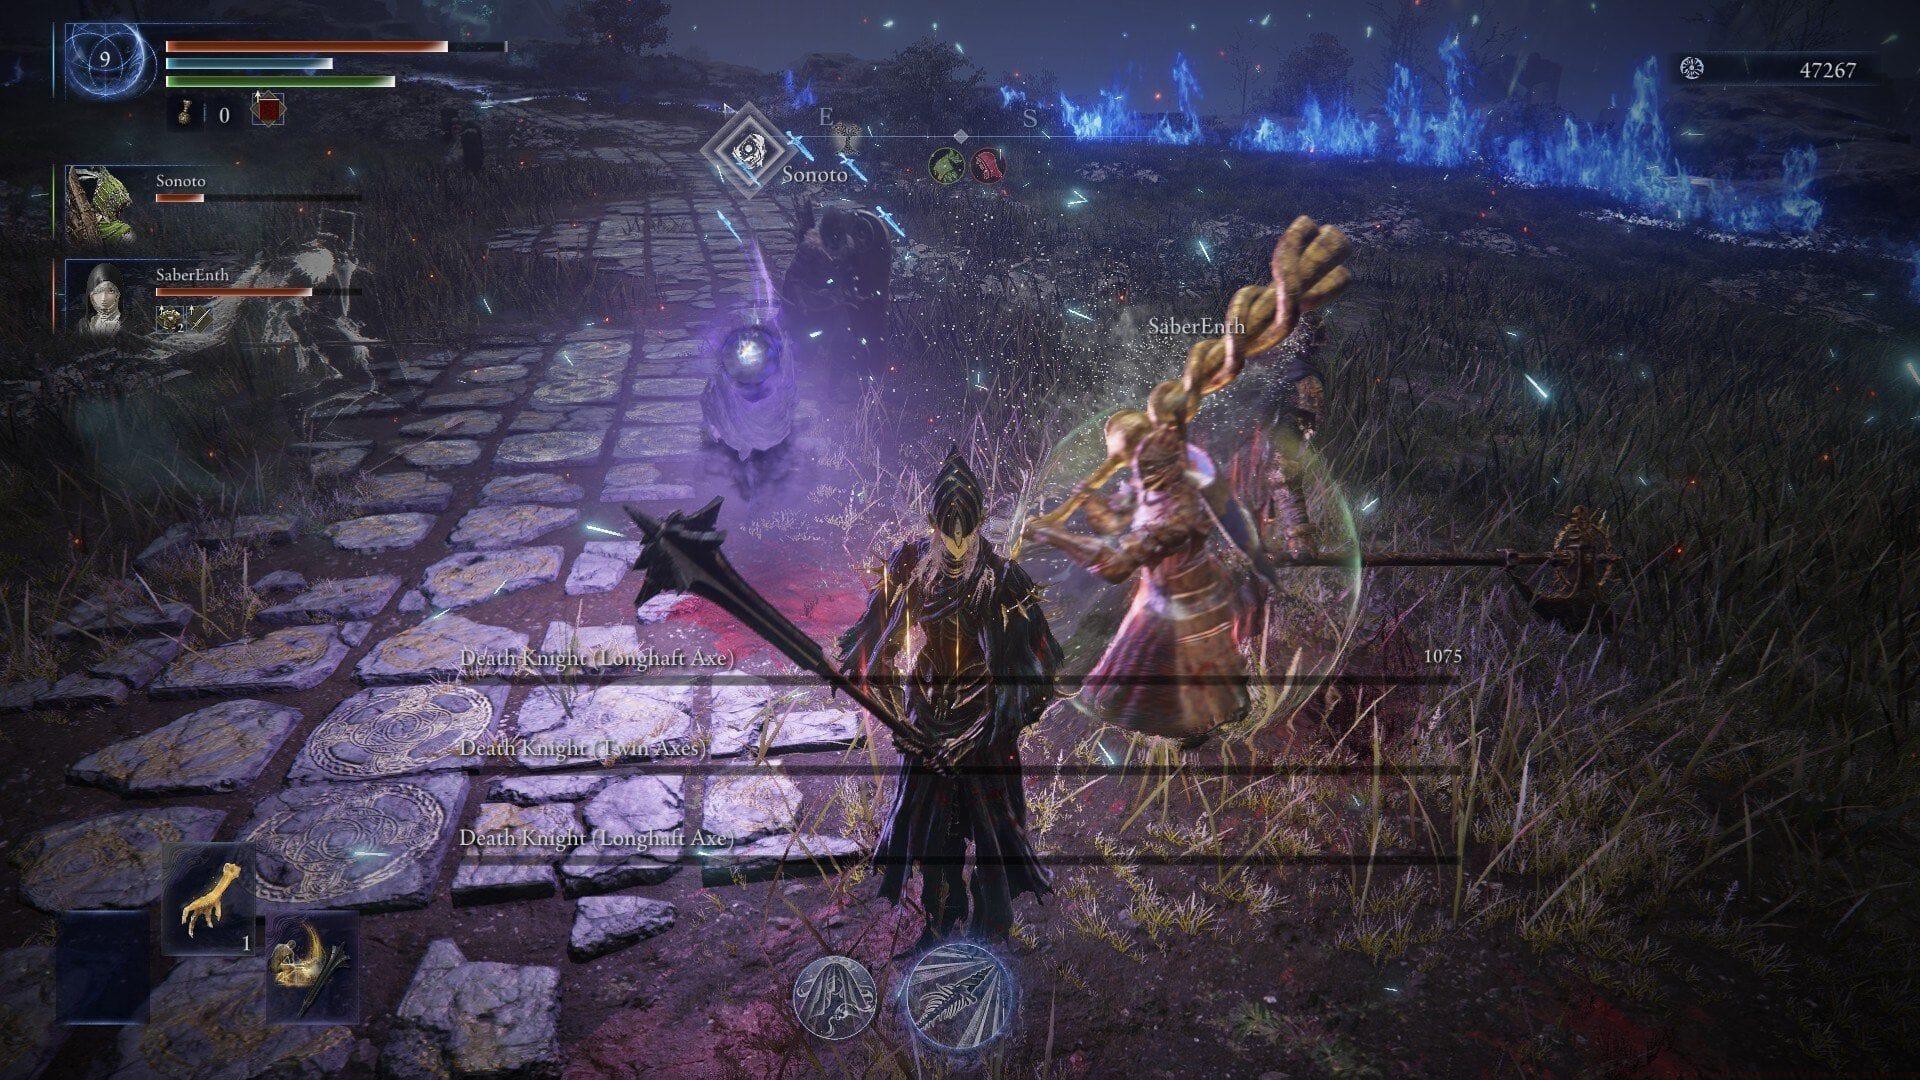
Death Knights in Elden Ring Nightreign serve as a brutal skill check introduced in The Forsaken Hollows expansion. This multi-phase encounter prioritizes survival instincts over pure damage output, testing your ability to manage escalating threats rather than simply out-DPS a single target. You’ll first encounter them during the Dreglord expedition’s Night One segment, where the real challenge lies in maintaining composure amid overwhelming numbers and relentless pressure tactics.
- Initial phase: A defensive wave of standard shielded knights that test your crowd control abilities
- Mid-phase escalation: A solitary Death Knight enters to gauge your one-on-one combat proficiency
- Final climax: All three Death Knights converge simultaneously, creating a chaotic endgame scenario
For players seeking a balanced challenge, Level 7 provides the optimal power level for this encounter, though veterans can attempt it as early as Level 5 for heightened intensity. The level recommendation primarily affects your survivability against their combined assault rather than your damage potential. Under-leveled attempts become exercises in perfect execution where single mistakes often prove fatal.
Combat Mechanics and Attack Patterns
The true threat of Death Knights emerges from their synergistic ability combinations rather than individual moves. These elite enemies employ a sophisticated pressure system that summons additional allies to rapidly congest the battlefield, while simultaneously mixing fast melee chains with precision ranged spear throws. This layered offense forces you to contend with multiple threat vectors across different ranges, making positioning and situational awareness more critical than reaction speed alone.
Fortunately, the Death Knights’ most devastating attacks feature clear sparks of lightning before they commit to their animations. This generous telegraphing system provides approximately 1.5 seconds of reaction time for their heavy strikes. Dodging sideways when you see lightning cue up proves most effective, as many of their attacks track poorly against lateral movement. Capitalize on their recovery animations for safe counterattacks, but avoid panic-rolling when multiple adversaries target you simultaneously.
Advanced players should note that different lightning colors may indicate attack variations – bright white sparks often precede sweeping area attacks while blue-tinged lightning typically signals targeted thrusts. Learning these subtle visual distinctions allows for more precise dodging and better resource management throughout the extended engagement.
Advanced Combat Strategies
During the initial waves, prioritize eliminating summoned minions before focusing on the primary Death Knights. This add-clearing strategy significantly reduces crossfire from spear throws and creates essential breathing room when the main targets initiate their combos. Many players fail by tunnel-visioning on the knights while accumulating damage from overlooked supporting units.
For Scholar class enthusiasts, this encounter showcases one of your most powerful synergies. The Scholar’s Ultimate Art, Communion, creates damage-sharing links between nearby enemies. When you damage one connected foe, all linked targets suffer proportional damage. Deploying this ability during the three-Knight phase effectively triples your damage output, preventing the battle from becoming a protracted war of attrition. If teammates chain their ultimates with yours, the coordinated assault can conclude the encounter before your ultimate even completes.
Despite their imposing appearance, Death Knights possess surprisingly vulnerable stagger mechanics. Heavy weapons and aerial jump attacks rapidly accumulate posture damage, creating frequent interruption opportunities. This approach proves particularly effective when one knight overextends from the group. Successfully staggering a single opponent temporarily reduces the overall pressure, allowing you to focus on remaining threats or recover resources.
Weapon selection dramatically impacts stagger potential – greatswords and colossal weapons require 3-4 clean hits to trigger a stagger, while dual-wielding lighter weapons may need 6-8 consecutive strikes. Time your heaviest attacks during their attack recovery frames for maximum safety and efficiency.
Common Mistakes and Optimization Tips
Many players undermine their success through predictable errors. The most common fatal mistake involves over-committing to attack chains when multiple knights are active. Unlike solo encounters, this battle punishes greed severely – landing two extra hits often results in taking three incoming attacks from other knights. Advanced players should adopt a ‘hit-and-disengage’ rhythm, especially during the final phase.
Positioning errors represent another frequent failure point. The arena features several pillars and terrain variations that can provide temporary cover from spear throws or break enemy line-of-sight. Utilizing these environmental elements strategically can create precious seconds for healing or ability cooldowns.
For optimization-focused players, consider these advanced tactics: Bait the knights into using their easily-dodged lightning attacks to create safe damage windows, use throwing knives or spells to pull individual knights from the group during the final phase, and time your heavy attacks to coincide with when knights finish their summoning animations for guaranteed critical strikes.
If you found this Death Knight guide helpful, explore these additional Elden Ring Nightreign resources:
- How to complete Scholar’s Remembrance in Elden Ring Nightreign
- All bosses in Elden Ring Nightreign
- Best PC Optimization Guide for Elden Ring Nightreign
No reproduction without permission:Tsp Game Club » How to defeat Death Knights in Elden Ring Nightreign Master the Death Knight encounter with wave management, stagger tactics, and advanced Scholar strategies in Elden Ring Nightreign